
Thermalright Hyper Vision 360 ARGB AIO CPU Liquid Cooler
Thermalright Hyper Vision 360 ARGB AIO CPU Liquid Cooler Instruction Manual
Model: Hyper Vision 360 ARGB AIO CPU Liquid Cooler
Brand: Thermalright
1. Product Overview
The Thermalright Hyper Vision 360 ARGB AIO CPU Liquid Cooler is an advanced all-in-one liquid cooling solution designed for high-performance computing systems. It features a magnetic fixed 3.95-inch LCD display screen, efficient PWM fans, and broad compatibility with various AMD and Intel CPU sockets.

Figure 1: Thermalright Hyper Vision 360 ARGB AIO CPU Liquid Cooler with radiator, fans, and pump/LCD block.
Key Features:
- Magnetic Fixed and Customizable LCD Display: Equipped with a 3.95-inch LCD screen (480x480 pixel resolution) for real-time statistics, custom images, and animated GIFs.
- New Design Pump: Optimized pump design with a strong nine-pole rotor motor and new fluid impeller, achieving up to 6400 RPM with low noise (under 27 dB(A)). Pre-applied thermal paste for efficient heat transfer.
- Freely Switch Cooling Modes: Features SS2 buckle body system for easy switching between family styles and water cooling.
- Liquid Leak Proof: Incorporates patented anti-leak technology with a pressure relief device in the radiator to prevent leaks caused by high temperatures.
- Broad Compatibility: Supports Intel LGA115X/1200/1700/1851/2011/2066 and AMD AM4/AM5 motherboard sockets.
2. What's in the Box
Verify that all components are present before beginning installation:
- Hyper Vision 360 water cooler (pre-assembled with fans and pump/LCD block)
- Mounting parts (various brackets, screws, and standoffs for Intel and AMD platforms)

Figure 2: Contents of the Thermalright Hyper Vision 360 ARGB AIO CPU Liquid Cooler package, showing the cooler unit and various mounting accessories for different CPU sockets.
3. Specifications
| Component | Specification |
|---|---|
| Pump Dimensions | L78.65 mm x W80.7 mm x H68 mm |
| Radiator Dimensions | L403mm x W120 mm x H27 mm |
| Pump Rated Speed | 6400 RPM±10% (MAX) |
| Pump ARGB Connector | 3 PIN 5V |
| Pump Power Connector | 4 PIN PWM |
| Radiator Material | Aluminum |
| Fan Model | TL—K12 |
| Fan Dimension | L120 mm x W120 mm x H25 mm |
| Fan Rated Speed | 2150 RPM±10% (MAX) |
| Fan Noise Level | 27 dBA (MAX) |
| Fan Air Flow | 69 CFM (MAX) |
| Fan Air Pressure | 2.87 mm H2O (MAX) |
| Fan Connector | 4 PIN PWM |
| Fan ARGB Connector | 3 PIN 5V |
| Fan Bearing Type | S-FDB V2 Bearing |
| Supported Sockets | Intel LGA115X/1200/1700/1851/2011/2066, AMD AM4/AM5 |
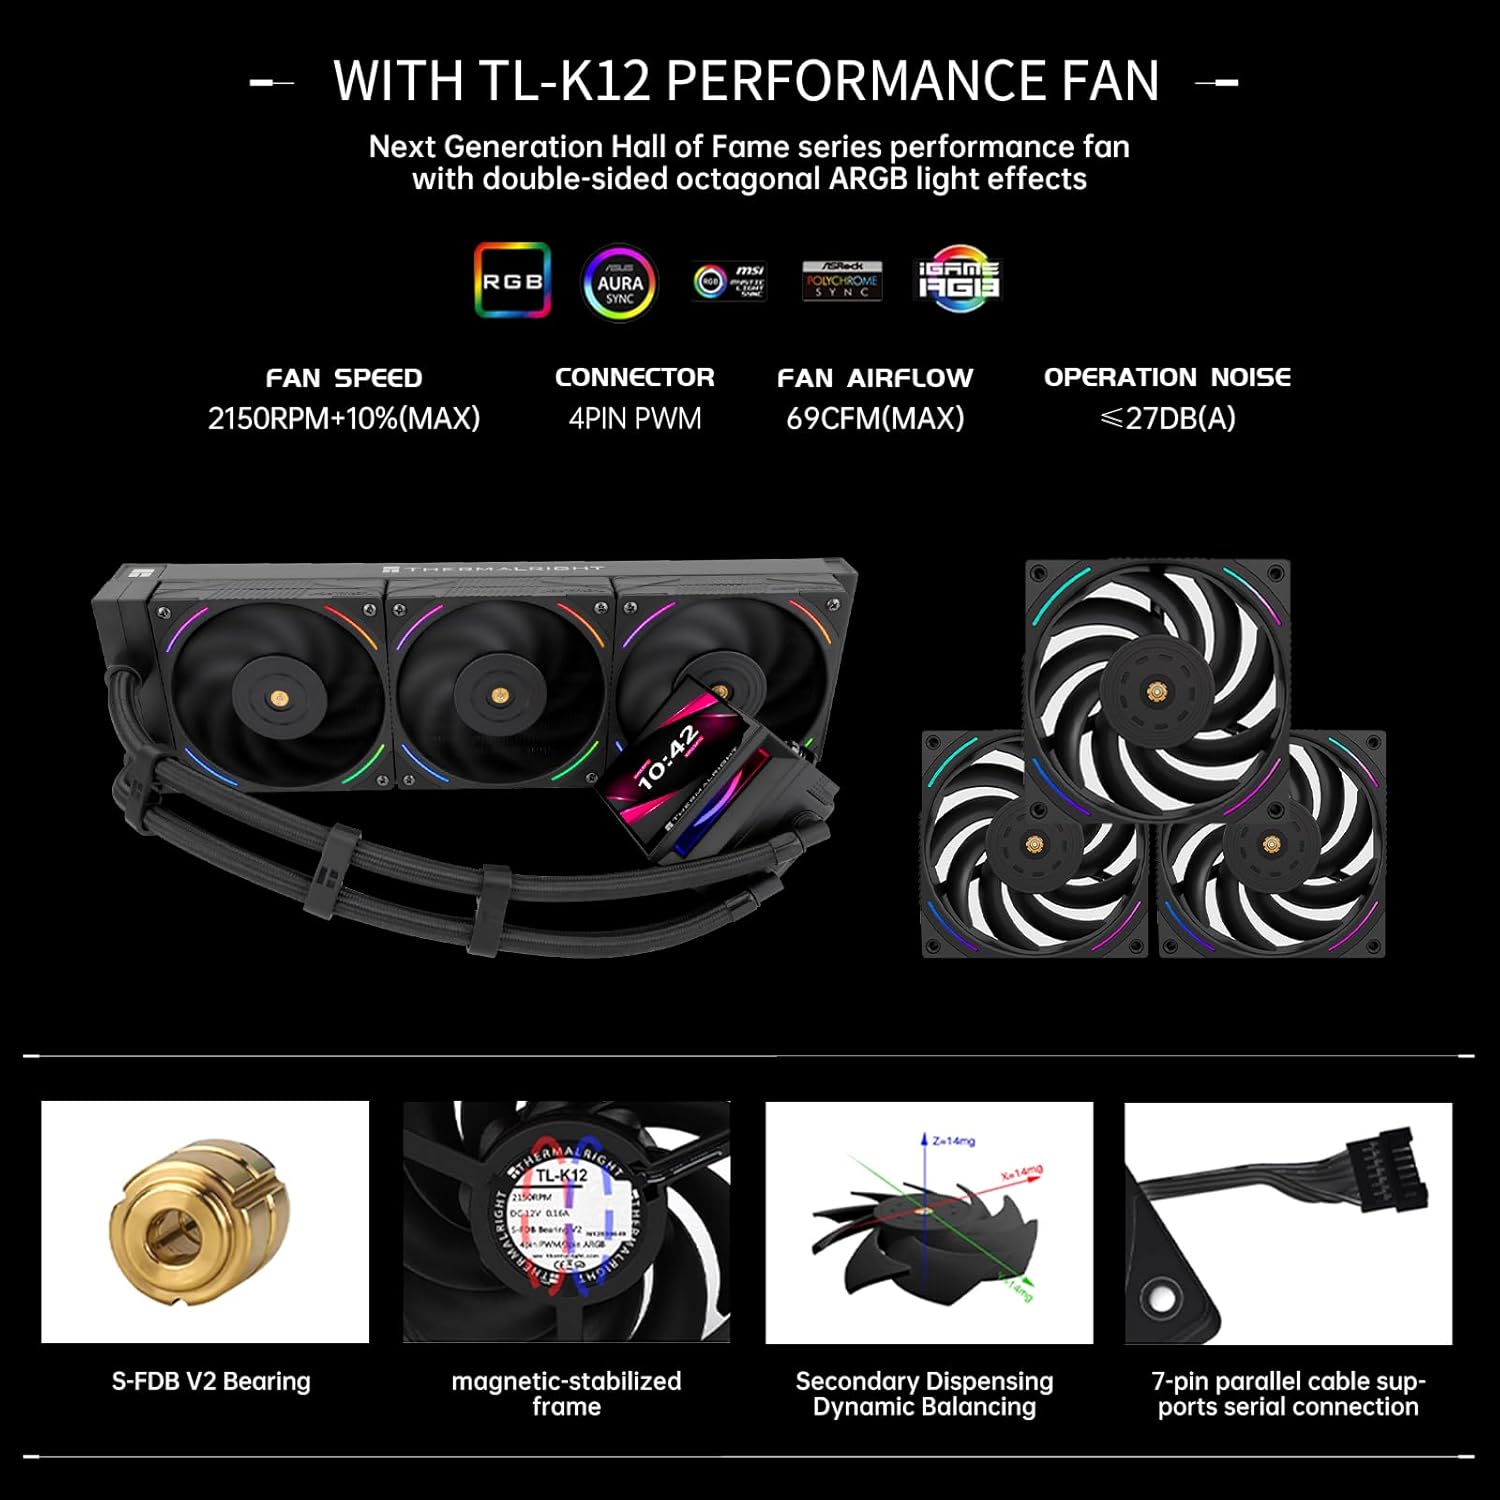
Figure 3: Detailed specifications for the TL-K12 performance fans included with the cooler.
4. Installation Guide
Follow these steps carefully to install your Thermalright Hyper Vision 360 ARGB AIO CPU Liquid Cooler. Ensure your system is powered off and unplugged before beginning installation.
4.1. AMD AM4/AM5 Motherboard Installation
- Remove the original AMD motherboard plastic bracket. Keep the original bracket and screws in a safe place.
- Install the four red plastic bushings into the motherboard's mounting holes.
- Install both AMD brackets, threading the AMD screws through the bracket holes.
- Tighten the four AMD platform screws to secure the bracket in place.
Video 1: Detailed installation steps for AMD AM4/AM5 motherboards. This video demonstrates the process of removing the stock bracket, installing the new standoffs, and securing the AMD mounting brackets.
4.2. Intel LGA1700/1851 Motherboard Installation
- Adjust the backplate studs: pull out the backplate studs from 115X to 1700 hole spacing.
- Place the Intel backplane after mounting the adjustment holes from the back of the motherboard.
- From the front of the motherboard, thread the four blue plastic posts through the backplane screws.
- Install the Radiator Bracket: Place the Intel Platform Metal Bracket on the Blue Plastic Sleeve Post. (Inside 115X, Outside 2066, Center 1700 Backplate Screws Through Holes in Bracket 1700).
- Use four Intel metal nuts to hold the bracket in place. Lock the four metal nuts to ensure that the Intel metal bracket is in place.
4.3. Common Steps for All Platforms
- Apply the right amount of thermal paste to the CPU.
- Remove the Heat Sink Protection Film from the cold head.
- Coldhead Installation: Remove the cold head screen before installing the cold head.
- Water-cooled head on CPU: Align the cold head bracket spring nuts with the bracket mounting screws on both sides.
- Torque both side nuts to ensure proper mounting pressure.
- Connect the cold head pump four-pin PWM connector to the CPU_OPT or PUMP_FAN fan socket on the motherboard. The motherboard will control the pump speed.
- The fan powered light 2-in-1 cable is pre-connected. Connect the fan 2-in-1 cable PWM connector to the CPU_FAN fan socket on the motherboard. The motherboard will control the fan speed.
- Serialized three-pin ARGB connector for synchronized light effects: Female Input with Hole, Male Output with Pin. Connect the fan cable's three-pin ARGB connector to the motherboard's three-pin +5VARGB socket. The motherboard will control the light effects.
- Mounting the cold head screen to the cold head.
- Cold head screen cable: connect the Type-C end of the data cable to the cold head connector.
- Connect the other end of the cable to the USB 9-pin socket on the motherboard.
- Connecting the SATA power cable.
5. Operating Instructions (TRCC Software)
The Thermalright Hyper Vision 360 ARGB AIO CPU Liquid Cooler features a customizable LCD display controlled by the TRCC software. Follow these steps to set up and customize your display.
- Confirm waterblock LCD and motherboard connection. Connect the USB cable to the motherboard's 9-pin USB header.
- Connect the USB cable Type-C to the waterblock LCD Type-C header.
- Download TRCC software from thermalright.com/support/download/. Select the English Version of TRCC screen control software to download.
- Unzip the downloaded file and start the TRCC setup.
- Double-click the TRCC shortcut to start the TRCC software.
- To choose a default theme, click a theme in the local theme section. The LCD screen updates in real-time.
- To access online theme customization, click the online theme icon, then click a theme template.
- Click the Online Gallery icon and select a background photo. You may choose from a wide selection of backgrounds.
- To save a new theme, first name the new theme by typing the theme's name in "Save As" and click the save button to save the new theme.
- Click the Local Theme icon; the new saved theme will be shown in the theme selection.
- For theme customization demonstration: Click the custom icon.
- Turn on custom text title display. Type in custom text content. Custom text color can be changed by clicking the square color icon. Custom text font can be changed by clicking the TT icon.
- To change any screen item display location, drag it with the mouse in the screen preview.
- Turn on Date Time display. Change time display format by clicking 24H/12H. Switch time or weekday display on/off by clicking the button on the right of the time or weekday icon. Change date display format by clicking the date format icon. Switch date display on/off by clicking the button on the right of the date icon.
- System info display customization: Turn on system info display. System info display format can be switched between cycle or list. Change system info cycle interval time. Switch system info M module on/off by clicking the button on the right of the M button. To change M1-M6 display info reading point, click the M1-M6 button. Scroll and click the left box to select new display info, then click the button on the upper right to confirm selection.
- Switching temp unit: click to select temp unit.
- Use local static picture as background picture: Click Load PNG, supports JPG, JPEG, BMP, PNG format. Picture can be edited in the screen preview window. Click the right down button to confirm editing.
- Use local GIF or video as theme background: Click Load Video, supports GIF, MP4, AVI, MOV, MKV. Video can be cut by dragging cut in and cut out. Click the play button to preview the cut video. Low FPS or High FPS can be toggled. Adjust video/GIF display position. Confirm editing; the software will start rendering. The theme will be updated and play after rendering.
- To stream screen content to LCD: Turn on streaming function. Showing screen streaming outline. Adjust screen streaming content by dragging the outline. Streaming content size can be adjusted by clicking + or - or typing in pixel numbers.
Video 2: Demonstration of the Thermalright TRCC software for controlling and customizing the LCD screen display, including theme selection, background customization, and system information display settings.
6. Maintenance
- Dust Cleaning: Periodically clean the radiator fins and fan blades with compressed air to ensure optimal airflow and cooling performance.
- Cable Management: Ensure all cables are properly routed and secured to prevent interference with fan blades or other components.
- Thermal Paste: While the cooler comes with pre-applied thermal paste, if you ever need to remount the cold plate, ensure to clean off old thermal paste and apply a new layer for best performance.
7. Troubleshooting
- No Power/Fans Not Spinning: Double-check all power connections, especially the 4-pin PWM connector for the pump and fans, and the SATA power cable for the LCD. Ensure they are securely seated.
- LCD Screen Not Displaying: Verify the Type-C USB cable connection to both the cold head and the motherboard's USB 9-pin header. Ensure the TRCC software is installed and running.
- High CPU Temperatures: Confirm that the cold plate is making proper contact with the CPU. Re-check mounting pressure and thermal paste application. Ensure fans are spinning correctly and radiator fins are not obstructed by dust.
- ARGB Lighting Issues: Check the 3-pin +5VARGB connection to the motherboard. Ensure your motherboard's RGB software is correctly configured and compatible with the cooler's ARGB.
- Pump Noise: Some pump noise is normal, but excessive noise might indicate air bubbles. Gently tilt your PC case to help dislodge any trapped air bubbles. Ensure the pump is running at an appropriate speed via motherboard settings.
8. Warranty and Support
The Thermalright Hyper Vision 360 ARGB AIO CPU Liquid Cooler comes with a Five years warranty. For any issues or support inquiries, please contact Thermalright customer service or visit their official website for detailed support resources and FAQs.
Official Website: www.thermalright.com
Related documentsHyper Vision 360 ARGB AIO CPU Liquid Cooler


Ask a question about this manual
Ask about setup, troubleshooting, compatibility, parts, safety, or missing instructions. Manuals+ will review the question and use this page’s manual context to help answer it.