1. Introduction
Thank you for choosing the Aigostar 2300W 11-Element Oil-Filled Radiator. This manual provides essential information for the safe and efficient operation of your new heater. Please read it thoroughly before first use and keep it for future reference.
This oil-filled radiator is designed to provide silent and uniform heating for your living spaces, featuring 3 operating modes, an adjustable thermostat, a 24-hour timer, and comprehensive safety protections.
2. Important Safety Instructions
WARNING: To reduce the risk of fire, electric shock, or injury, observe the following:
- Read all instructions before using this heater.
- Do not use this heater in bathrooms, laundry areas, or similar indoor locations where water may be present.
- Always plug heaters directly into a wall outlet/receptacle. Never use with an extension cord or relocatable power tap (outlet/power strip).
- This heater is hot when in use. To avoid burns, do not let bare skin touch hot surfaces.
- Extreme caution is necessary when any heater is used by or near children or invalids and whenever the heater is left operating unattended.
- Always unplug heater when not in use.
- Do not operate any heater with a damaged cord or plug or after the heater malfunctions, has been dropped or damaged in any manner.
- Do not run cord under carpeting. Do not cover cord with throw rugs, runners, or similar coverings. Arrange cord away from traffic area and where it will not be tripped over.
- To disconnect heater, turn controls to OFF, then remove plug from outlet.
- Do not insert or allow foreign objects to enter any ventilation or exhaust opening as this may cause an electric shock or fire, or damage the heater.
- To prevent a possible fire, do not block air intakes or exhaust in any manner. Do not use on soft surfaces, like a bed, where openings may become blocked.
- A heater has hot and arcing or sparking parts inside. Do not use it in areas where gasoline, paint, or flammable liquids are used or stored.
- Use this heater only as described in this manual. Any other use not recommended by the manufacturer may cause fire, electric shock, or injury to persons.
- This heater includes an overheat protection system and a tip-over switch for enhanced safety. If the heater overheats or tips over, it will automatically shut off.
- Keep children away from the heater and activate the child lock function if available.

Image: Multiple safety features including overheat protection, anti-freeze function, and tip-over protection are integrated into the radiator design.
3. Package Contents
Please check the package for the following items:
- Aigostar 11-Element Oil-Filled Radiator
- Remote Control
- Wheel Assembly (if not pre-assembled)
- User Manual (this document)
4. Product Overview
Familiarize yourself with the components of your Aigostar oil-filled radiator.

Image: The Aigostar oil-filled radiator, showing its main body, integrated control panel, and accompanying remote control.
- Heating Elements: 11 U-shaped fins for efficient heat distribution.
- Control Panel: Integrated LED touch screen for settings adjustment.
- Remote Control: For convenient operation from a distance.
- Wheels: Swivel casters for easy mobility.
- Handle: Integrated handle for transport.
- Power Cord Storage: Convenient storage for the power cord.

Image: Details of the radiator's portability features, including smooth swivel wheels, a convenient transport handle, and integrated power cord storage.

Image: Illustration highlighting the 11 heating elements and 2300W power, emphasizing uniform heat distribution across a room.

Image: A visual explanation of the U-shaped heating fins, detailing how they contribute to a 39.5% larger heat dissipation area and 92.3% increased heating efficiency.
5. Setup
5.1 Attaching the Wheels
If the wheels are not pre-assembled, follow these steps:
- Carefully turn the radiator upside down on a soft, flat surface to avoid scratching.
- Locate the wheel mounting brackets at the bottom of the radiator.
- Insert the wheel axles into the designated holes on the brackets.
- Secure the wheels using the provided fasteners (if any). Ensure they are firmly attached.
- Return the radiator to an upright position.
5.2 Placement
- Place the radiator on a firm, level surface.
- Ensure there is adequate clearance (at least 3 feet or 90 cm) from walls, furniture, curtains, and other flammable materials.
- Do not place the heater directly below a power outlet.
- Avoid placing the heater in high-traffic areas where it could be easily tripped over.
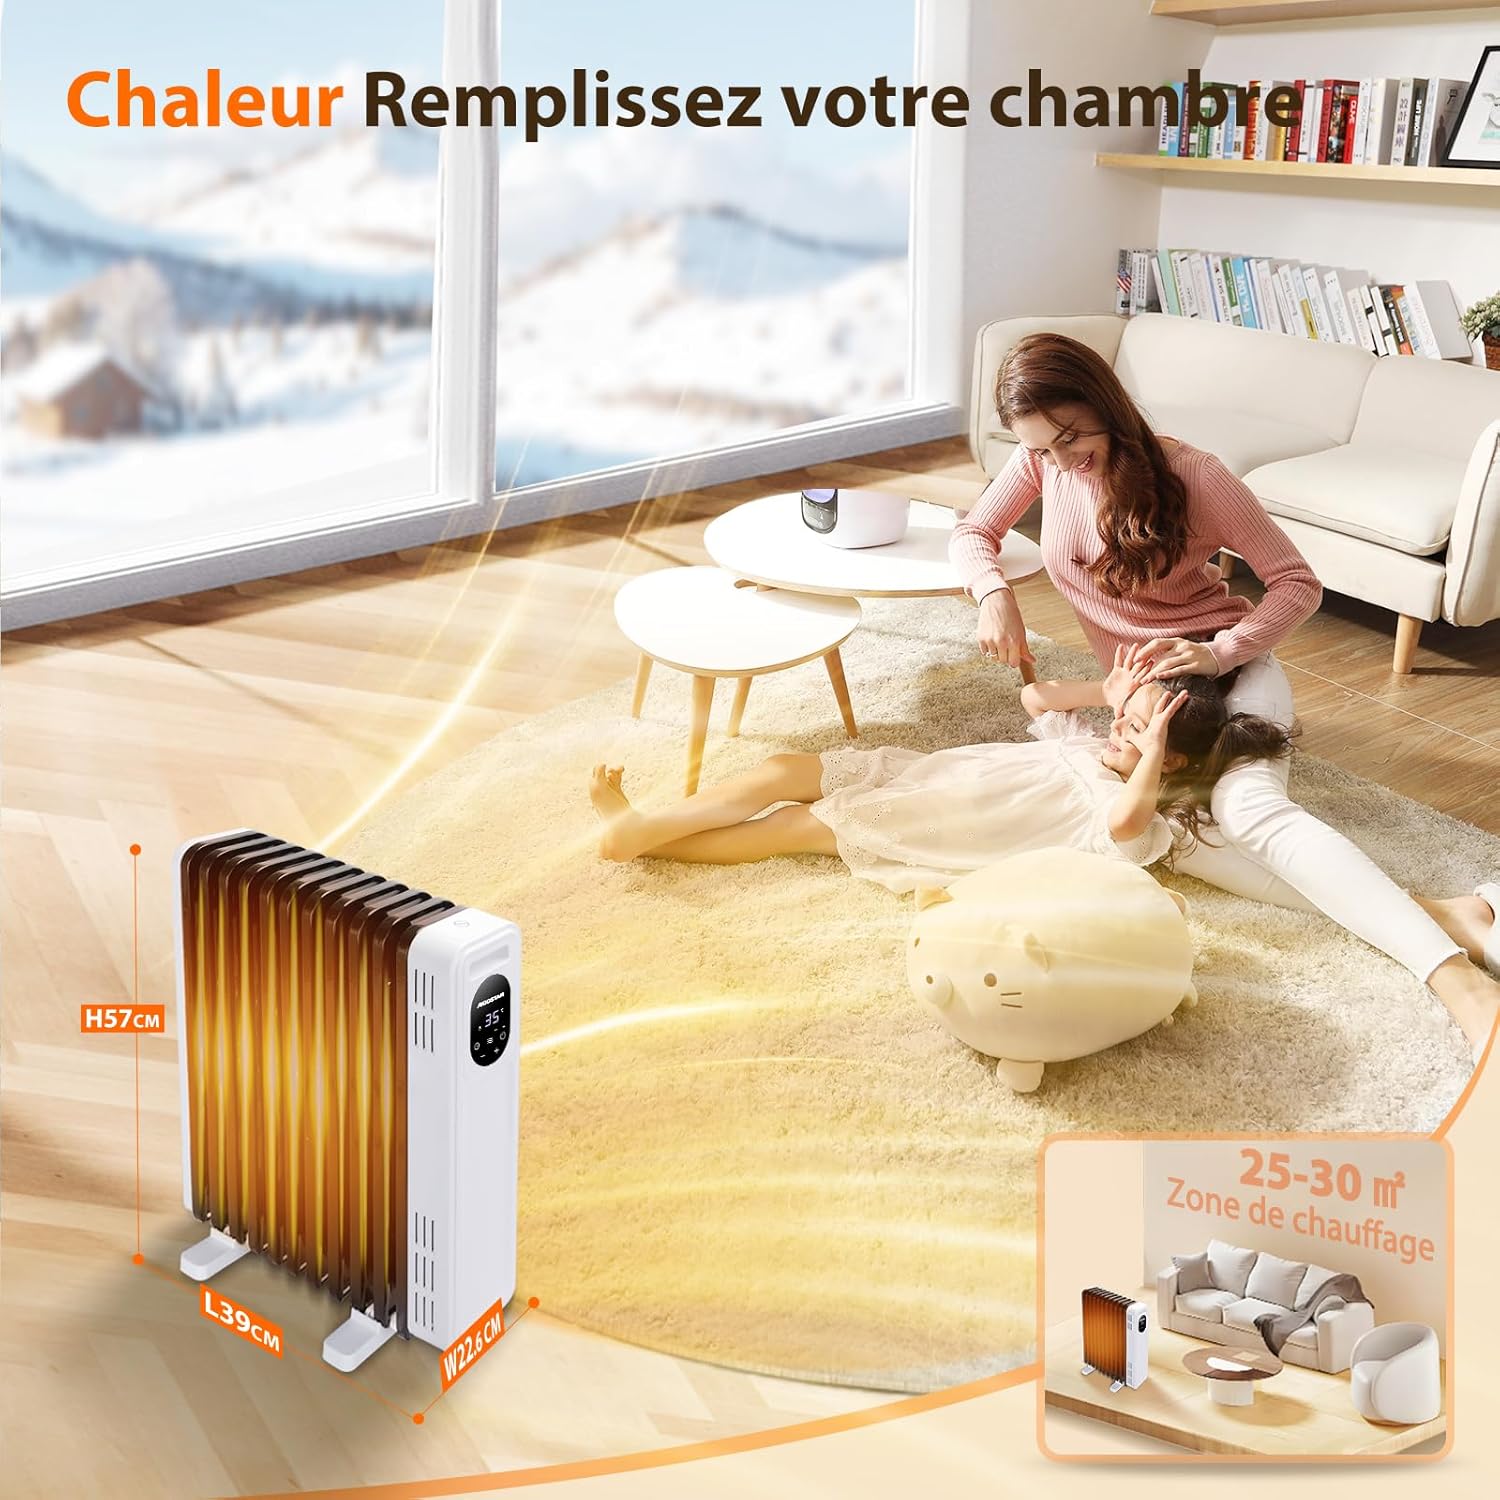
Image: The radiator positioned in a room, illustrating its compact dimensions (Height 57cm, Length 39cm, Width 22.6cm) and its effective heating area of 25-30 square meters.
6. Operating Instructions
6.1 Control Panel and Remote Control
The radiator can be operated using the integrated LED touch screen or the provided remote control.

Image: A close-up of the LED touch screen and remote control, clearly labeling buttons for temperature adjustment, time setting, power on/off, mode selection, and timer activation.
- ON/OFF Button: Powers the unit on or off.
- Mode Button: Cycles through heating modes (2300W, 1000W, ECO).
- Temperature/Time Adjustment (+/-): Increases or decreases the desired temperature or timer duration.
- Timer Button: Activates and sets the 24-hour timer.
- Display Brightness: Adjusts the brightness of the LED screen (refer to specific instructions for this function, usually a long press or combination).
6.2 Powering On/Off
- Plug the power cord into a suitable electrical outlet.
- Press the ON/OFF button on the control panel or remote control to turn the heater on.
- Press the ON/OFF button again to turn the heater off.
6.3 Selecting Heating Modes
The radiator offers three heating modes:
- 2300W Mode: Maximum heating power for rapid warming.
- 1000W Mode: Lower heating power for moderate warmth or smaller spaces.
- ECO Mode: Energy-saving mode. The heater automatically adjusts its power output to maintain the set temperature, optimizing energy consumption.
Press the Mode button repeatedly to cycle through the available modes.

Image: The radiator demonstrating its three operational modes: Low, High, and ECO. The ECO mode is highlighted with a graph showing how it intelligently adjusts heating to save energy while maintaining comfort.
6.4 Setting the Thermostat
You can set the desired room temperature between 5°C and 35°C.
- With the heater on, use the + or - buttons to adjust the target temperature.
- The display will show the set temperature, then revert to the current room temperature after a few seconds.
- The heater will cycle on and off to maintain the set temperature.
6.5 Using the 24-Hour Timer
The timer allows you to program the heater to turn on or off automatically after a set period (up to 24 hours).
- Press the Timer button.
- Use the + or - buttons to set the desired number of hours (1-24).
- The timer will start counting down. The heater will turn off (if it was on) or turn on (if it was off) once the set time has elapsed.
6.6 Child Lock Function
To prevent accidental changes to settings, activate the child lock:
- Refer to the specific instructions in your product manual for activating and deactivating the child lock, as this often involves a combination of button presses or a long press on a specific button.
7. Maintenance
7.1 Cleaning
- Always unplug the heater and allow it to cool completely before cleaning.
- Wipe the exterior surfaces with a soft, damp cloth. Do not use abrasive cleaners or solvents.
- Ensure no water enters the interior of the heater.
- Do not immerse the heater in water.
7.2 Storage
- When not in use, store the heater in a cool, dry place.
- Wrap the power cord neatly around the integrated storage area.
- It is recommended to store the heater in its original packaging to protect it from dust and damage.
8. Troubleshooting
| Problem | Possible Cause | Solution |
|---|---|---|
| Heater does not turn on. |
|
|
| Heater is on but not heating. |
|
|
| Heater makes unusual noises. |
|
|
| Remote control not working. |
|
|
9. Specifications
| Brand | Aigostar |
| Model Number | FRFBM1_BID_211937 |
| Power | 2300 Watts |
| Voltage | 230 Volts (AC) |
| Number of Elements | 11 |
| Number of Speeds/Modes | 3 (2300W, 1000W, ECO) |
| Adjustable Thermostat | Yes (5°C to 35°C) |
| Timer | 24-hour |
| Safety Features | Overheat Protection, Tip-over Protection, Child Lock |
| ASIN | B0DNHYXJM2 |
10. Warranty and Support
For warranty information and customer support, please refer to the documentation included with your purchase or visit the official Aigostar website. Keep your proof of purchase for any warranty claims.
If you encounter any issues not covered in this manual, please contact Aigostar customer service for assistance.
Aigostar Official Website: www.aigostar.com