1. Introduction
Thank you for choosing the Gutinteen Heated Cat House, Model AIR93-IN-HP. This weatherproof and insulated outdoor shelter is designed to provide a safe, warm, and comfortable environment for feral or outdoor cats, especially during colder seasons. Featuring a UL-tested heating mat, robust construction, and safety escape doors, this 2-room cat house ensures your feline friends are protected from the elements.
This manual provides detailed instructions for assembly, operation, maintenance, and troubleshooting to ensure optimal performance and longevity of your cat house.
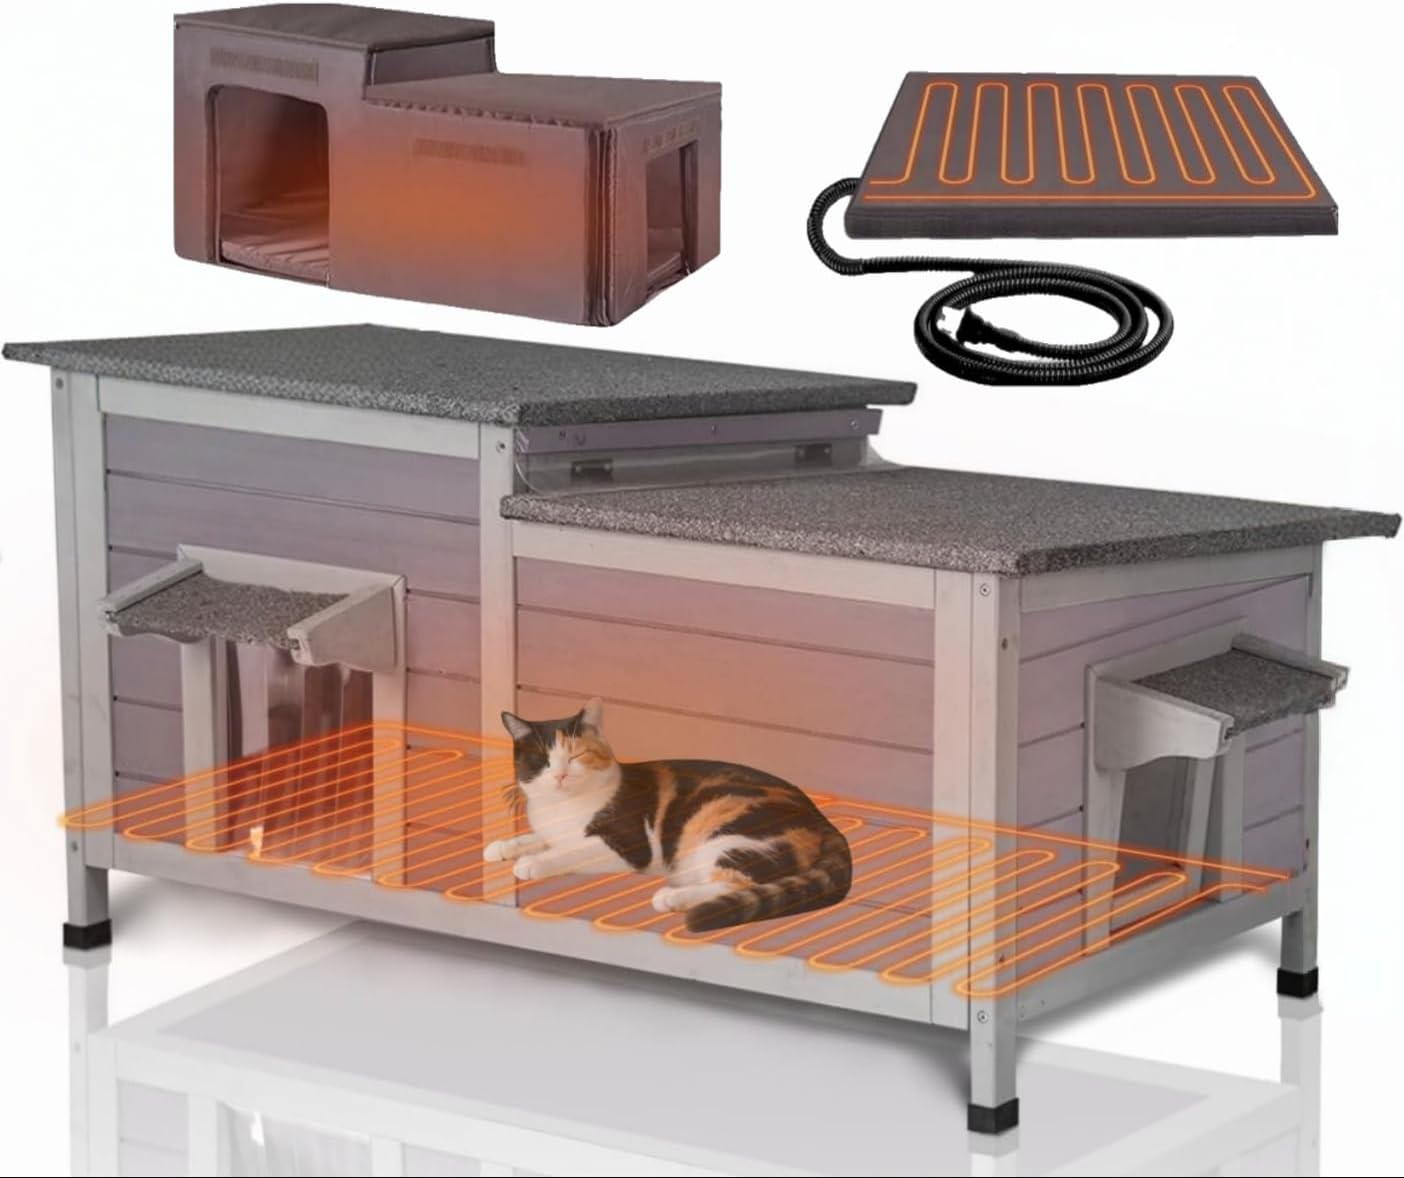
Figure 1: Overview of the Gutinteen Heated Cat House with integrated heating.
2. Important Safety Information
Please read all safety instructions carefully before assembly and use. Failure to follow these instructions may result in injury or damage to the product.
- Ensure the heating mat is always used with the provided insulated liner.
- Only use the heating mat with a properly grounded electrical outlet.
- Do not immerse the heating mat or its cord in water.
- Regularly inspect the power cord for any signs of damage. Discontinue use if the cord is frayed or damaged.
- Keep the power cord away from areas where pets can chew on it. The product features a chew-resistant cord, but constant chewing can still cause damage.
- Do not cover the heating mat with additional blankets or materials that could impede heat dissipation, as this may lead to overheating.
- Ensure the cat house is placed on a stable, level surface.
- Keep children away from the cat house and electrical components.
- This product is intended for animal use only.

Figure 2: Chew-resistant power cord design for enhanced safety.
3. Package Contents
Before beginning assembly, please verify that all components are present and undamaged. If any parts are missing or damaged, please contact customer support.
- Wooden Cat House Panels (various sizes for walls, roof, floor)
- Asphalt Roof Panels
- Heated Mat (UL-tested)
- Insulated Liner (with 0.78" sponge and fabric cover)
- Plastic Foot Pads
- PVC Door Curtains
- Assembly Hardware (screws, bolts, etc.)
- Instruction Manual


Figure 3: Key components including the insulated liner and heating pad structure.
4. Setup and Assembly
Assembly typically requires basic hand tools (e.g., screwdriver). Follow the numbered steps in the included assembly guide for detailed instructions. The following provides a general overview:
- Unpack Components: Carefully remove all parts from the packaging and lay them out on a clean, flat surface.
- Assemble Base: Connect the side and front/back panels to form the base structure of the cat house. Ensure all connections are secure.
- Install Floor Panels: Place the floor panels into the assembled base.
- Attach Legs and Foot Pads: Secure the raised legs to the bottom of the cat house and attach the plastic foot pads to prevent moisture absorption.
- Install Interior Divider (for 2-room model): If applicable, install the divider to create two separate rooms.
- Attach Roof Panels: Secure the asphalt roof panels to the top of the structure. Ensure they are properly aligned for weather protection.
- Insert Insulated Liner: Place the insulated liner into each room of the cat house.
- Position Heating Mat: Place the UL-tested heating mat inside one or both rooms, ensuring it rests flat within the insulated liner.
- Install PVC Curtains: Attach the PVC curtains to the entrance and escape doors.
- Final Check: Verify all screws are tightened and the structure is stable.

Figure 4: Dimensions and capacity of the 2-room cat house.
5. Operating Instructions
5.1 Placement
The Gutinteen Heated Cat House is suitable for both outdoor and indoor use. For outdoor placement, choose a sheltered location to further protect it from extreme weather. Ensure it is placed on a level surface.

Figure 5: Examples of outdoor and indoor placement for the cat house.
5.2 Using the Heating Mat
Once the cat house is assembled and the insulated liner and heating mat are in place:
- Ensure the heating mat is fully inserted into the insulated liner and lies flat.
- Plug the power cord into a standard, grounded electrical outlet.
- The heating mat will begin to warm up, providing continuous warmth for your cat. There is no on/off switch; the mat is designed to maintain a safe, consistent temperature.
- Monitor your cat's comfort. If the temperature is too high or too low, ensure the mat is correctly positioned and the house is adequately insulated.

Figure 6: Cat enjoying the warmth of the heated cat house in cold weather.
5.3 Escape Doors
The 2-room model features secure escape doors in each room. These doors are designed to allow cats to quickly exit the shelter from multiple points, enhancing their safety in case of perceived threats or emergencies.

Figure 7: Illustration of the cat house's safe escape door feature.
6. Maintenance and Cleaning
6.1 Cleaning the Insulated Liner
The insulated liner is machine-washable for easy cleaning:
- Unplug the heating mat from the power outlet.
- Carefully remove the heating mat from inside the insulated liner.
- Remove the inner sponge from the liner cover.
- Machine wash the fabric cover on a gentle cycle with cold water.
- Air dry completely before reassembling. Do not tumble dry.
- Once dry, reinsert the sponge and heating mat into the liner cover.
6.2 Cleaning the Cat House Structure
The wooden structure and asphalt roof can be cleaned with a damp cloth and mild, pet-safe detergent. Avoid harsh chemicals. Ensure the house is completely dry before allowing pets back inside, especially if the heating mat is in use.
The cat house features removable floors and large opening roofs for easier access during cleaning.

Figure 8: Cat house with open roof for convenient cleaning.
7. Troubleshooting
| Problem | Possible Cause | Solution |
|---|---|---|
| Heating mat not warming up. | Not plugged in; power outlet malfunction; damaged cord/mat. | Ensure mat is securely plugged into a working outlet. Check for tripped circuit breakers. Inspect cord for damage; if damaged, discontinue use and contact support. |
| Cat house feels too cold. | Extreme ambient temperature; insufficient insulation; mat not functioning optimally. | Ensure the insulated liner is correctly installed. Place the cat house in a more sheltered location. Verify the heating mat is working (see above). |
| Cat house feels too warm. | Over-insulation; mat malfunction. | Ensure no additional materials are covering the heating mat. If the mat feels excessively hot to the touch, unplug it and contact support. |
| Water inside the cat house. | Improper roof installation; extreme weather; damaged roof. | Check roof panel alignment and ensure all screws are tight. Verify the asphalt roof is intact. Consider moving to a more sheltered location during heavy rain/snow. |
8. Product Specifications
- Model: AIR93-IN-HP (2-Rooms)
- Brand: GUTINNEEN
- Dimensions (L x W x H): 39.1 x 18.5 x 19.1 inches
- Material: Fir Wood, Asphalt Roof, Waterproof Oxford Cloth (liner)
- Insulation: 0.78" Thicker Sponge and Fabric Cover (6-sided)
- Heating Mat: UL-tested, continuous warmth
- Safety Features: Chew-resistant cord, escape doors
- Cleaning: Machine-washable liner, removable roof/floor for structure cleaning
- Intended Use: Outdoor/Indoor for cats, rabbits, and small/medium animals

Figure 9: Product dimensions and key service information.
9. Warranty and Customer Support
Gutinteen offers a 30-Day Easy Returns policy for this product. Please refer to the retailer's return policy for specific details and procedures.
For any questions, concerns, or assistance with your Gutinteen Heated Cat House, please contact our customer support team. You can typically find contact information on the product packaging or the retailer's website where you purchased the item.
When contacting support, please have your model number (AIR93-IN-HP) and purchase information readily available.
10. Product Videos
No official product videos from the seller were found for this item in the provided data.