1. Product Overview
The Zerodis Robotic Vacuum Cleaner and Mop is designed to provide efficient and automated cleaning for various floor types, including hard floors. It features powerful 4KPa suction, a mopping function, and intelligent navigation with visual map tracking. Control the device conveniently via a dedicated mobile application or voice commands through smart speakers. The robot is equipped with an auto-recharge function, ensuring it returns to its charging base when the battery is low.
Key Features:
- Robot Vacuum and Mop: Combines vacuuming and mopping for comprehensive floor cleaning.
- APP and Voice Control: Manage cleaning schedules and settings via a mobile application or voice commands.
- Visual Map Tracking: Utilizes visual mapping for efficient navigation and coverage.
- 4KPa Suction Power: Effectively removes debris, dust, and pet hair.
- 100ml Water Tank: Allows mopping of up to 150m² on a single refill.
- Auto Recharge: Automatically returns to the charging station when battery is low.
- Multi-Language Support: Supports 10 languages for user interface.
2. Package Contents
Carefully unpack the box and ensure all items listed below are present and in good condition. If any items are missing or damaged, please contact customer support.
- 1 x Robot Vacuum Cleaner
- 1 x Charging Base
- 1 x Brush (Cleaning Tool)
- 1 x Mop (Cleaning Cloth)
- 1 x Adapter (US Plug)
- 1 x User Manual (This Document)
- 1 x Water Bottle
- 1 x Water Bottle Cap
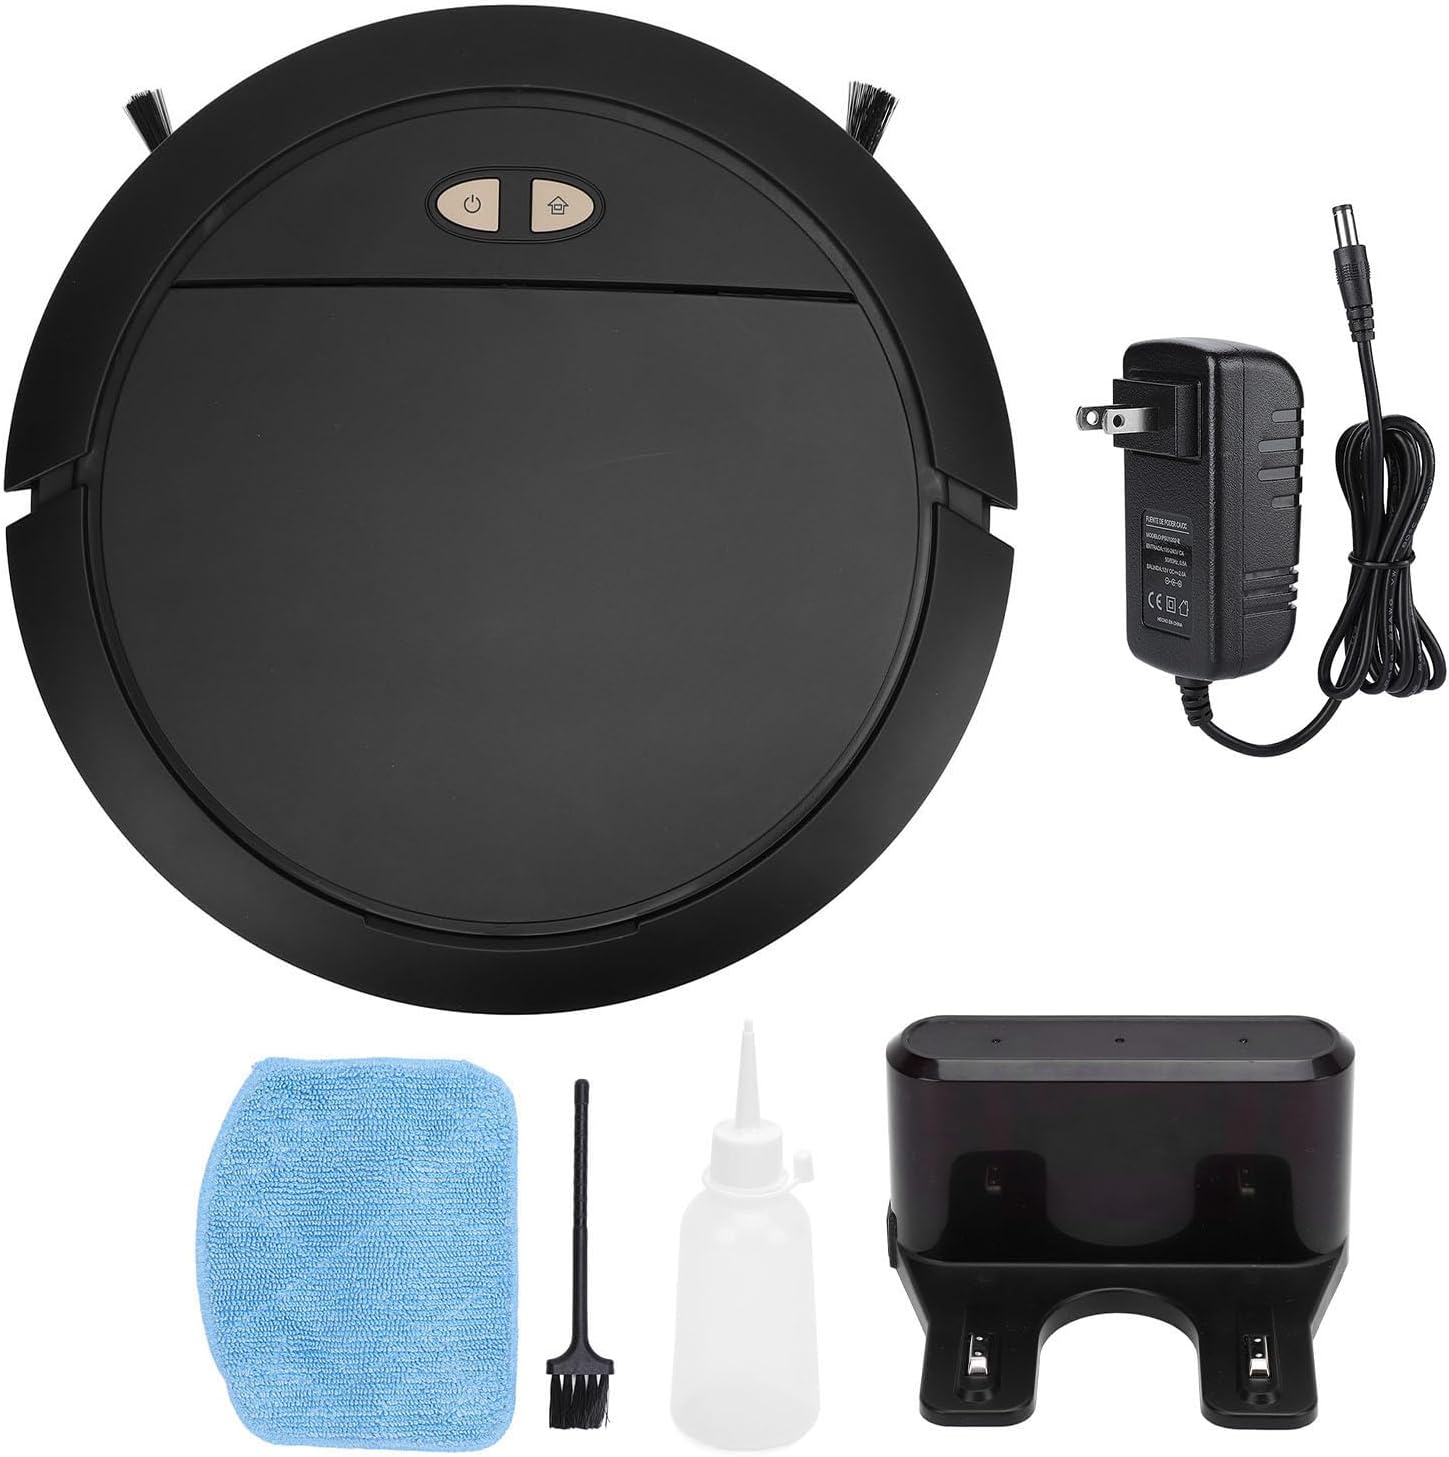
Image: All components included in the Zerodis Robotic Vacuum Cleaner and Mop package.
3. Product Components
Top View

Image: Top view of the robot vacuum, highlighting the control buttons.
- Power Button: Press to start or pause cleaning.
- Home Button: Press to send the robot back to the charging base.
- Dust Bin Cover: Lifts to access the dust bin.
Control Buttons Close-up

Image: Detailed view of the power and home buttons.
Underside View

Image: Underside of the robot, showing cleaning mechanisms.
- Side Brushes: Collect debris from edges and corners.
- Main Brush: Sweeps and agitates dirt for vacuuming.
- Driving Wheels: Allow the robot to move across various surfaces.
- Charging Contacts: Connect with the charging base for power.
- Sensors: Detect obstacles and drops.
4. Safety Instructions
Please read all safety instructions carefully before using the appliance and keep this manual for future reference. Failure to follow these instructions may result in electric shock, fire, or serious injury.
- This appliance is for indoor use only. Do not use outdoors or on wet surfaces.
- Do not allow children to operate the robot. Supervise children and pets when the robot is operating.
- Ensure the charging base is placed on a level surface against a wall, with adequate clear space around it.
- Do not handle the charging base or robot with wet hands.
- Keep hair, loose clothing, fingers, and all parts of the body away from openings and moving parts.
- Do not pick up anything that is burning or smoking, such as cigarettes, matches, or hot ashes.
- Do not use without the dust bin and filters in place.
- Do not use to pick up large debris, hard or sharp objects, or liquids.
- Only use the original adapter and charging base provided by the manufacturer.
- If the power cord is damaged, it must be replaced by the manufacturer or a qualified service agent to avoid hazards.
- Remove any loose cables, small objects, or fragile items from the floor before cleaning to prevent entanglement or damage.
5. Setup
5.1 Unpacking and Placement
- Remove the robot and all accessories from the packaging.
- Choose a suitable location for the charging base. It should be against a wall, on a hard, level surface, with at least 0.5 meters (1.6 feet) of clear space on either side and 1.5 meters (5 feet) in front.
- Plug the adapter into the charging base and then into a power outlet. Ensure the indicator light on the charging base illuminates.
5.2 Initial Charging
- Place the robot onto the charging base, ensuring the charging contacts on the robot align with those on the base.
- The robot will begin charging. For first-time use, charge the robot for 4-5 hours until fully charged. The indicator light on the robot will change to indicate a full charge (refer to the robot's LED indicator guide for specific patterns).
5.3 App Download and Connection
- Scan the QR code in this manual or on the product packaging to download the Zerodis companion app from your smartphone's app store.
- Open the app and follow the on-screen instructions to create an account and add your device.
- Ensure your phone is connected to a 2.4GHz Wi-Fi network during the pairing process.
5.4 Attaching Side Brushes
- Turn the robot upside down.
- Align the side brushes with the corresponding posts on the underside of the robot and press them down until they click into place.

Image: Front view of the robot with side brushes installed.
6. Operating Instructions
6.1 Starting a Cleaning Cycle
- Manual Start: Press the Power button on the robot once. The robot will begin cleaning in its default mode.
- App Start: Open the Zerodis app, select your robot, and tap the 'Start Cleaning' button.
- Voice Control: Use compatible smart speakers (e.g., Amazon Alexa, Google Assistant) with commands like "Start cleaning with [Robot Name]".
6.2 Pausing and Resuming
- Press the Power button on the robot or the 'Pause' button in the app to pause a cleaning cycle.
- Press the Power button again or the 'Resume' button in the app to continue cleaning.
6.3 Sending Robot to Charging Base
- Press the Home button on the robot or the 'Recharge' button in the app. The robot will navigate back to its charging base.
- The robot will automatically return to the charging base when its battery level drops below 20%.
6.4 Using the Mopping Function
- Open the water tank cover and fill the 100ml water tank with clean water using the provided water bottle. Close the cap securely.
- Attach the mop cloth to the designated area on the underside of the robot.
- Start a cleaning cycle. The robot will automatically dispense water and mop the floor.
- Note: Do not use the mopping function on carpets. Remove the mop cloth and empty the water tank after each use.
6.5 Adjusting Suction Power
You can adjust the suction power via the mobile app to suit different cleaning needs. Available suction levels are 1KPa, 2KPa, 3KPa, and 4KPa.
7. Maintenance
Regular maintenance ensures optimal performance and extends the lifespan of your Zerodis Robotic Vacuum Cleaner. Always turn off the robot and disconnect it from the charging base before performing any maintenance.
7.1 Emptying the Dust Box (After Each Use)
- Press the dust bin cover to open it.
- Remove the dust box from the robot.
- Open the dust box and empty its contents into a trash bin.
7.2 Cleaning the Filter (Weekly)
- Remove the filter from the dust box.
- Tap the filter gently over a trash bin to remove dust.
- Note: The filter is not washable. Replace the filter every 3-6 months, or as needed.
7.3 Cleaning the Main Brush (Weekly)
- Turn the robot upside down.
- Remove the main brush cover and then lift out the main brush.
- Use the provided cleaning tool to remove hair and debris tangled around the brush.
- Reinstall the main brush and its cover.
7.4 Cleaning the Side Brushes (Monthly)
- Gently pull the side brushes off their posts.
- Remove any hair or debris. If brushes are bent or damaged, replace them.
- Reattach the side brushes, ensuring they click into place.
7.5 Cleaning Sensors and Charging Contacts (Monthly)
- Use a clean, dry cloth to gently wipe the cliff sensors (located on the underside), wall sensors (on the front bumper), and the charging contacts on both the robot and the charging base.
8. Troubleshooting
If you encounter issues with your robot vacuum, please refer to the following common problems and solutions before contacting customer support.
| Problem | Possible Cause | Solution |
|---|---|---|
| Robot does not turn on. | Low battery; Power button not pressed correctly. | Place robot on charging base for 4-5 hours. Press and hold the power button for 3 seconds. |
| Robot does not charge. | Charging contacts are dirty; Charging base not powered. | Clean charging contacts on both robot and base. Ensure charging base is plugged in and powered. |
| Robot gets stuck frequently. | Obstacles on floor; Sensors are dirty. | Clear loose cables, rugs, and small objects. Clean all sensors. |
| Poor cleaning performance. | Dust bin full; Brushes tangled; Filter clogged. | Empty dust bin. Clean main and side brushes. Clean or replace filter. |
| App connection issues. | Incorrect Wi-Fi password; Not on 2.4GHz network; Robot too far from router. | Verify Wi-Fi password. Ensure phone and robot are on a 2.4GHz network. Move robot closer to router. Restart robot and router. |
9. Specifications
| Specification | Value |
|---|---|
| Item Type | Robot Vacuum Cleaner |
| Material | ABS |
| Weight | Approx. 2900g / 6.38 lbs |
| Suction Power | 1K, 2K, 3K, 4KPa (Adjustable) |
| Motor Power | 26W |
| Built-in Battery | 6000mAh Lithium Polymer Battery |
| Battery Life | 40-100 Minutes (depending on suction mode) |
| Working Noise | Less than 70db |
| Built-in Water Tank Capacity | 100ml |
| Dust Box Capacity | 335ml |
| Charging Time | 4-5 Hours |
| Product Dimensions | 16.92 x 13.77 x 5.11 inches |
| Item Model Number | Zerodisua0b7nqzie-12 |
10. Warranty and Support
For warranty information, please refer to the documentation provided at the time of purchase or visit the official Zerodis website. If you require technical support or have questions not covered in this manual, please contact Zerodis customer service through their official channels.
Online Support: Visit the Zerodis Store on Amazon