1. Introduction
This manual provides essential instructions for the installation, operation, and maintenance of your LINEDEPOT H2 Gaming PC Case. Please read this manual thoroughly before beginning assembly to ensure proper setup and optimal performance. Retain this manual for future reference.
2. Product Features
- Full-View Dual Tempered Glass: Two ultra-clear tempered glass panels offer a panoramic view of internal components.
- Pre-Installed PWM ARGB Fans: Equipped with 6 pre-installed PWM ARGB fans for efficient cooling and customizable lighting.
- High-Speed I/O Panel: Features 1 Type-C port, 2 USB 2.0 ports, HD Audio jack, Reset button, and Power button.
- Optimized Airflow Design: Engineered for effective heat dissipation with strategic ventilation.
- Broad Hardware Compatibility: Supports GPUs up to 420mm, CPU coolers up to 165mm, 360mm liquid radiators, and ATX power supplies up to 170mm.
- Tool-Free Installation: Designed for simplified assembly of components.
3. Package Contents
Verify that all components are present before proceeding with installation. If any items are missing or damaged, please contact customer support.
- LINEDEPOT H2 PC Case (with pre-installed 6 PWM ARGB fans)
- Accessory Box (containing screws, cable ties, and other small parts)
- User Manual (this document)
4. Specifications
| Feature | Detail |
|---|---|
| Model Name | H2 |
| Case Type | Mid Tower |
| Motherboard Compatibility | Extended ATX, ATX, Micro-ATX, Mini-ITX |
| GPU Length (Max) | 420mm (16.54 inches) |
| CPU Cooler Height (Max) | 165mm |
| PSU Length (Max) | 170mm |
| Pre-installed Fans | 6 x PWM ARGB Fans |
| Front I/O Ports | 1 x Type-C, 2 x USB 2.0, HD Audio, Reset, Power |
| Cooling Method | Air, Water |
| Item Weight | 7.35 kg (16.17 lbs) |
| Package Dimensions | 21.7 x 19.6 x 11 inches |
Note: Specifications are subject to change without prior notice.
5. Setup Guide: Component Installation
Follow these steps for installing your PC components into the LINEDEPOT H2 case. Ensure your system is powered off and unplugged before beginning any installation.
5.1. Removing Side Panels
The LINEDEPOT H2 features tool-free tempered glass side panels. To remove them:
- Locate the rear of the case.
- Unscrew the captive thumbscrews securing the tempered glass panels.
- Carefully slide the glass panel backward and lift it away from the chassis. Place it on a soft, flat surface to prevent damage.
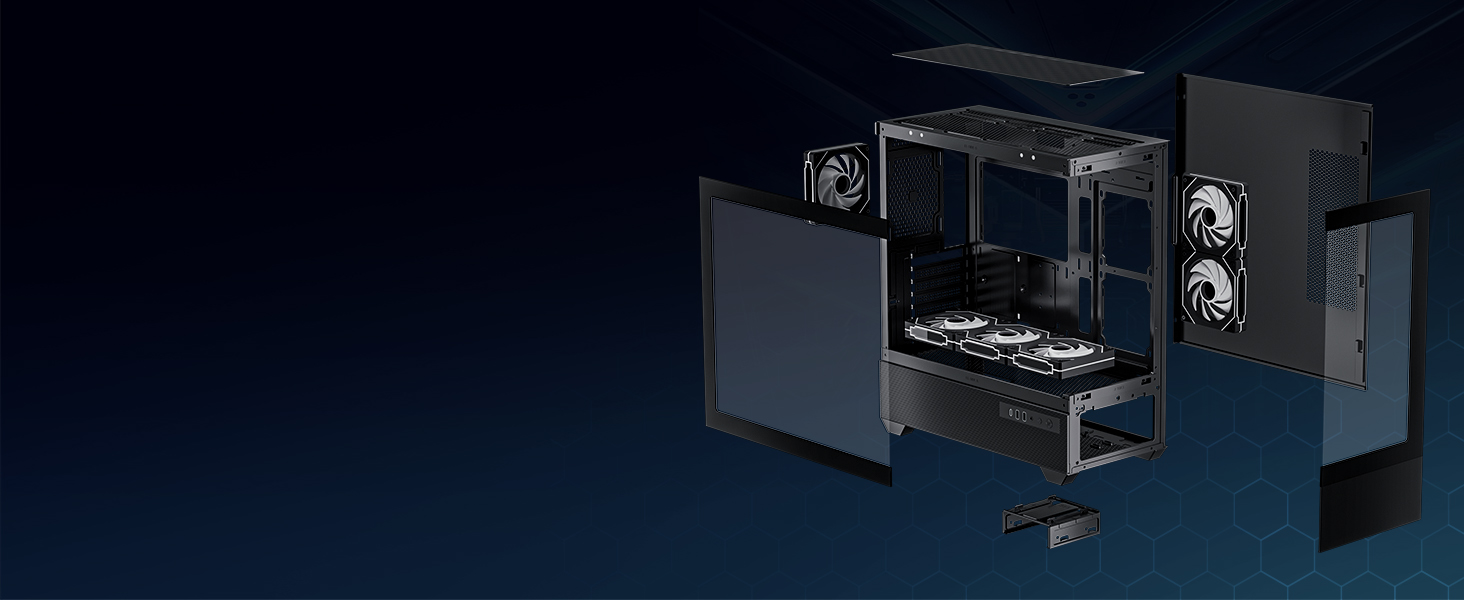
Image: Exploded view of the LINEDEPOT H2 case, illustrating the removable tempered glass panels and internal structure for easy access during component installation.
5.2. Motherboard Installation
- Install the I/O shield (if not pre-attached to your motherboard) into the rear opening of the case.
- Align your motherboard with the standoffs inside the case. Ensure the screw holes on the motherboard match the standoffs.
- Secure the motherboard using the provided screws from the accessory box.
5.3. Power Supply Unit (PSU) Installation
- The PSU mounts at the bottom of the case. Slide the PSU into its designated compartment from the rear.
- Secure the PSU with screws from the accessory box.
5.4. Storage Drive Installation (HDD/SSD)
The case supports multiple storage drives. Refer to the internal layout diagram for specific mounting locations.

Image: Internal layout of the LINEDEPOT H2 case, detailing maximum dimensions for GPU, CPU cooler, PSU, and locations for SSD/HDD drives.
- Locate the 2.5" SSD mounts or 3.5" HDD bays.
- Secure your SSDs or HDDs using the appropriate screws.
5.5. Graphics Card (GPU) Installation
- Remove the necessary PCIe slot covers from the rear of the case.
- Insert your GPU into the primary PCIe slot on your motherboard until it clicks into place.
- Secure the GPU to the case with screws.
5.6. Cable Management
Utilize the cable routing cutouts and tie-down points behind the motherboard tray to manage cables. This improves airflow and aesthetics.
6. Operating Instructions
6.1. Front I/O Panel Usage
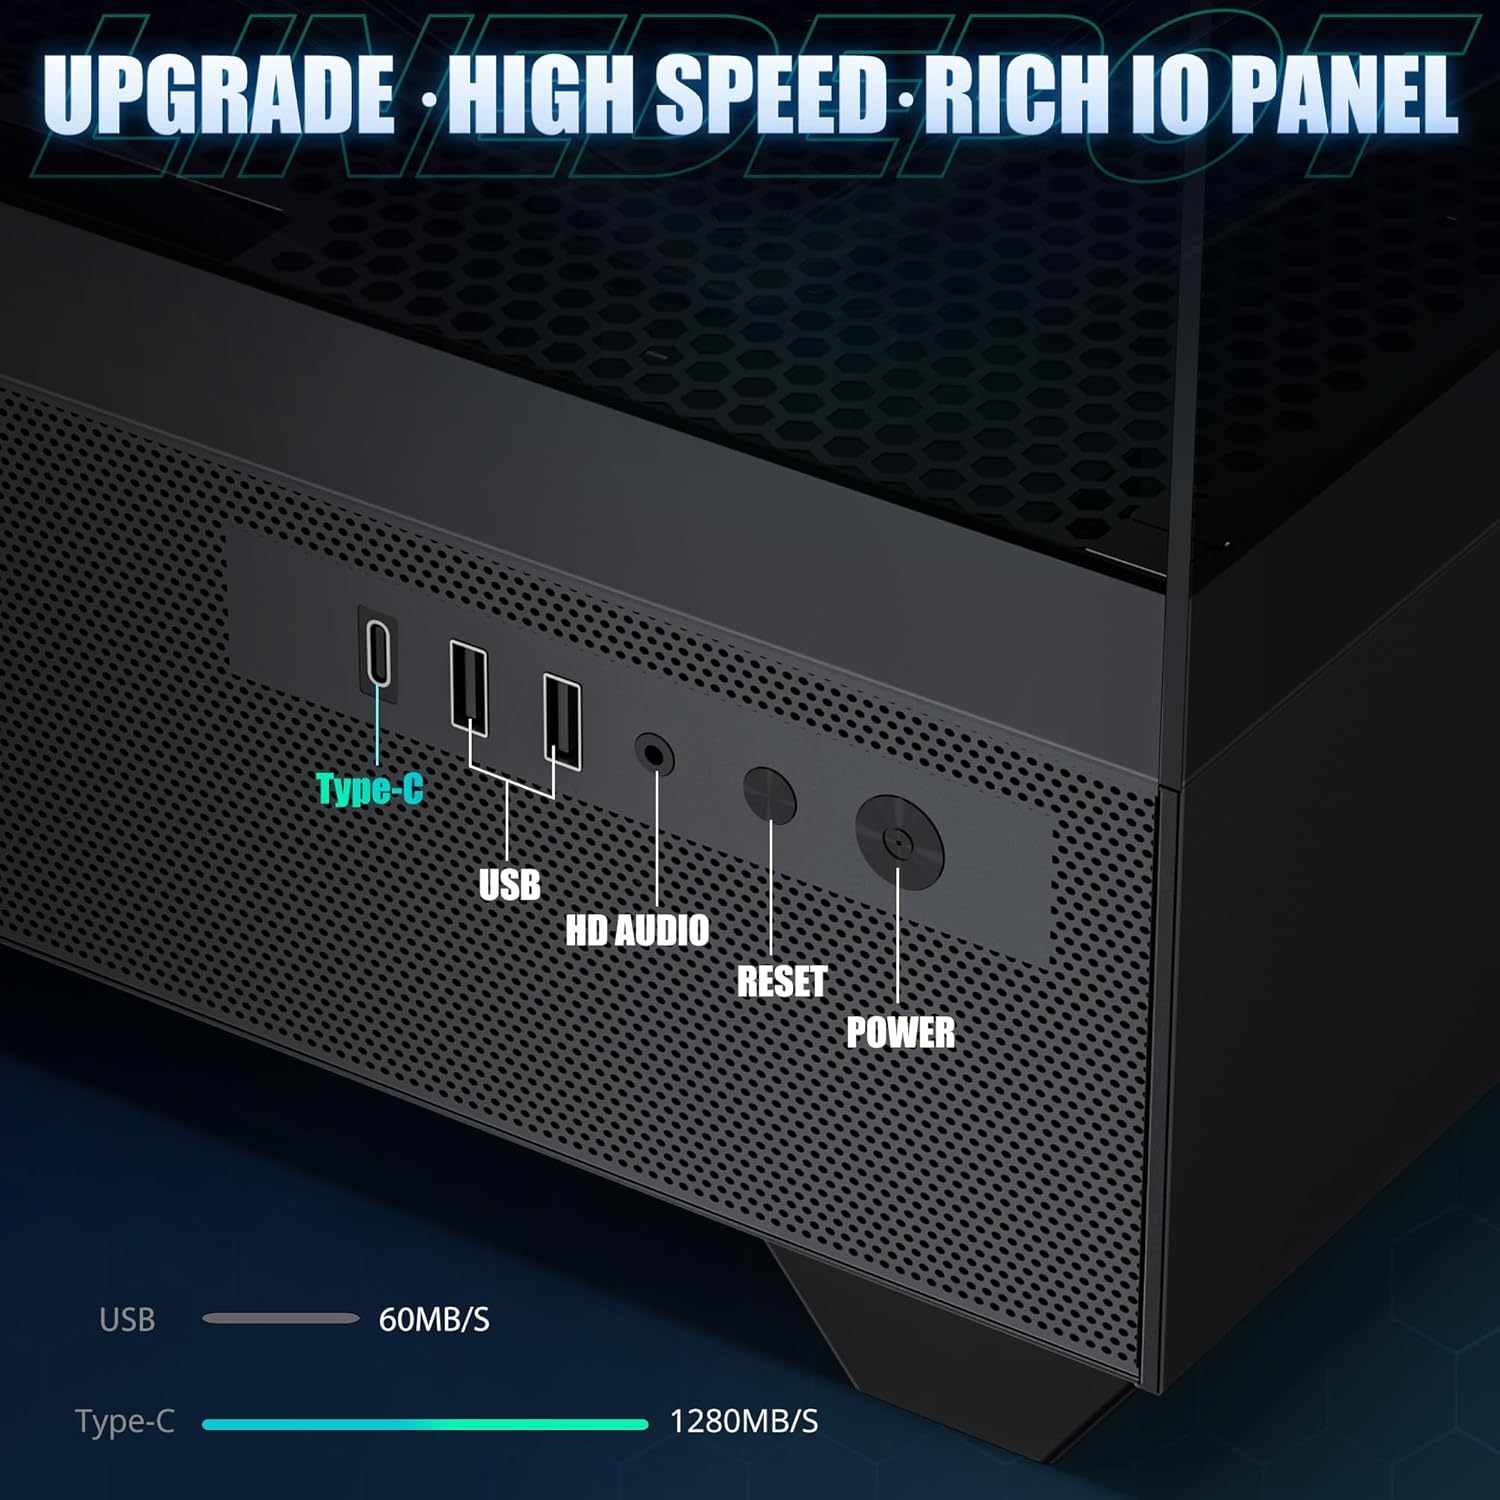
Image: Detailed view of the front I/O panel, highlighting the Type-C port, USB ports, HD Audio jack, Reset button, and Power button.
- Power Button: Press to turn the system on or off.
- Reset Button: Press to restart the system.
- USB 2.0 Ports: Connect USB 2.0 compatible devices.
- Type-C Port: Connect USB Type-C compatible devices for high-speed data transfer.
- HD Audio Jack: Connect headphones or microphones.
6.2. ARGB Fan Control
The pre-installed PWM ARGB fans can be controlled via your motherboard's ARGB software (if compatible) or a dedicated fan controller (if included or purchased separately). Ensure the ARGB and PWM cables from the fans are correctly connected to your motherboard or controller.

Image: Comparison illustrating the features of PWM ARGB fans, including speed adjustment, rich light modes, and motherboard light synchronization.
For detailed instructions on fan lighting and speed control, refer to your motherboard's manual or the fan controller's documentation.
7. Maintenance
Regular maintenance helps ensure the longevity and optimal performance of your PC case and components.
- Dust Cleaning: Periodically clean dust filters and internal components using compressed air or a soft brush. Ensure the system is powered off and unplugged before cleaning.
- Tempered Glass Care: Clean tempered glass panels with a soft, lint-free cloth and a non-abrasive glass cleaner. Avoid harsh chemicals.
- Fan Cleaning: Gently clean fan blades to remove dust buildup, which can impede airflow and increase noise.
8. Troubleshooting
If you encounter issues with your PC build, consider the following common troubleshooting steps:
- System Not Powering On:
- Check all power connections, including the PSU to the wall, PSU to motherboard (24-pin and CPU 8-pin), and front panel power switch header to the motherboard.
- Ensure the PSU switch is in the 'ON' position.
- Verify the front panel power switch cable is correctly connected to the motherboard's F_PANEL header.
- Fans Not Spinning/ARGB Not Lighting Up:
- Confirm fan PWM and ARGB cables are securely connected to the motherboard headers or fan controller.
- Check your motherboard's BIOS/UEFI settings or ARGB software for fan control and lighting configurations.
- No Display Output:
- Ensure your monitor cable is connected to the graphics card (GPU) output, not the motherboard's integrated graphics port (unless using integrated graphics).
- Reseat the graphics card in its PCIe slot.
- Check all power cables to the graphics card.
For further assistance, please contact LINEDEPOT customer support.
9. Warranty and Support
LINEDEPOT products are manufactured to high-quality standards. For warranty information and customer support, please refer to the warranty card included with your purchase or visit the official LINEDEPOT website. Please have your product model (H2) and purchase details ready when contacting support.


