Introduction
This user manual provides essential information for the installation, operation, and maintenance of the Pulluty Washer Suspension Rod Kit. This kit is designed to replace worn or broken suspension rods in compatible washing machines, helping to restore balance and minimize vibration during operation. Please read this manual thoroughly before proceeding with installation.
Product Overview and Components
The Pulluty Washer Suspension Rod Kit (Part Number W11130362) is engineered to provide stable support for your washing machine's tub. Each kit contains the necessary components for a complete replacement.

Figure 1: Overview of the Washer Suspension Rod Kit, showing four suspension rods, suspension balls, and bushings.
Kit Contents:
- 4 x Suspension Rods
- 5 x Suspension Balls
- 5 x Bushings
The kit is packaged with dimensions of approximately 27.17 x 3.54 x 1.77 inches.

Figure 2: Detailed dimensions of the suspension rod and associated components, including the rod length of 23.2 inches and spring assembly height of 5.1 inches.
Product Features:
The suspension rods are constructed from stainless steel, providing resistance to water and rust, ensuring long-term durability. The design incorporates high elasticity and toughness materials to maintain stability and durability, crucial for minimizing vibration during the washing cycle.
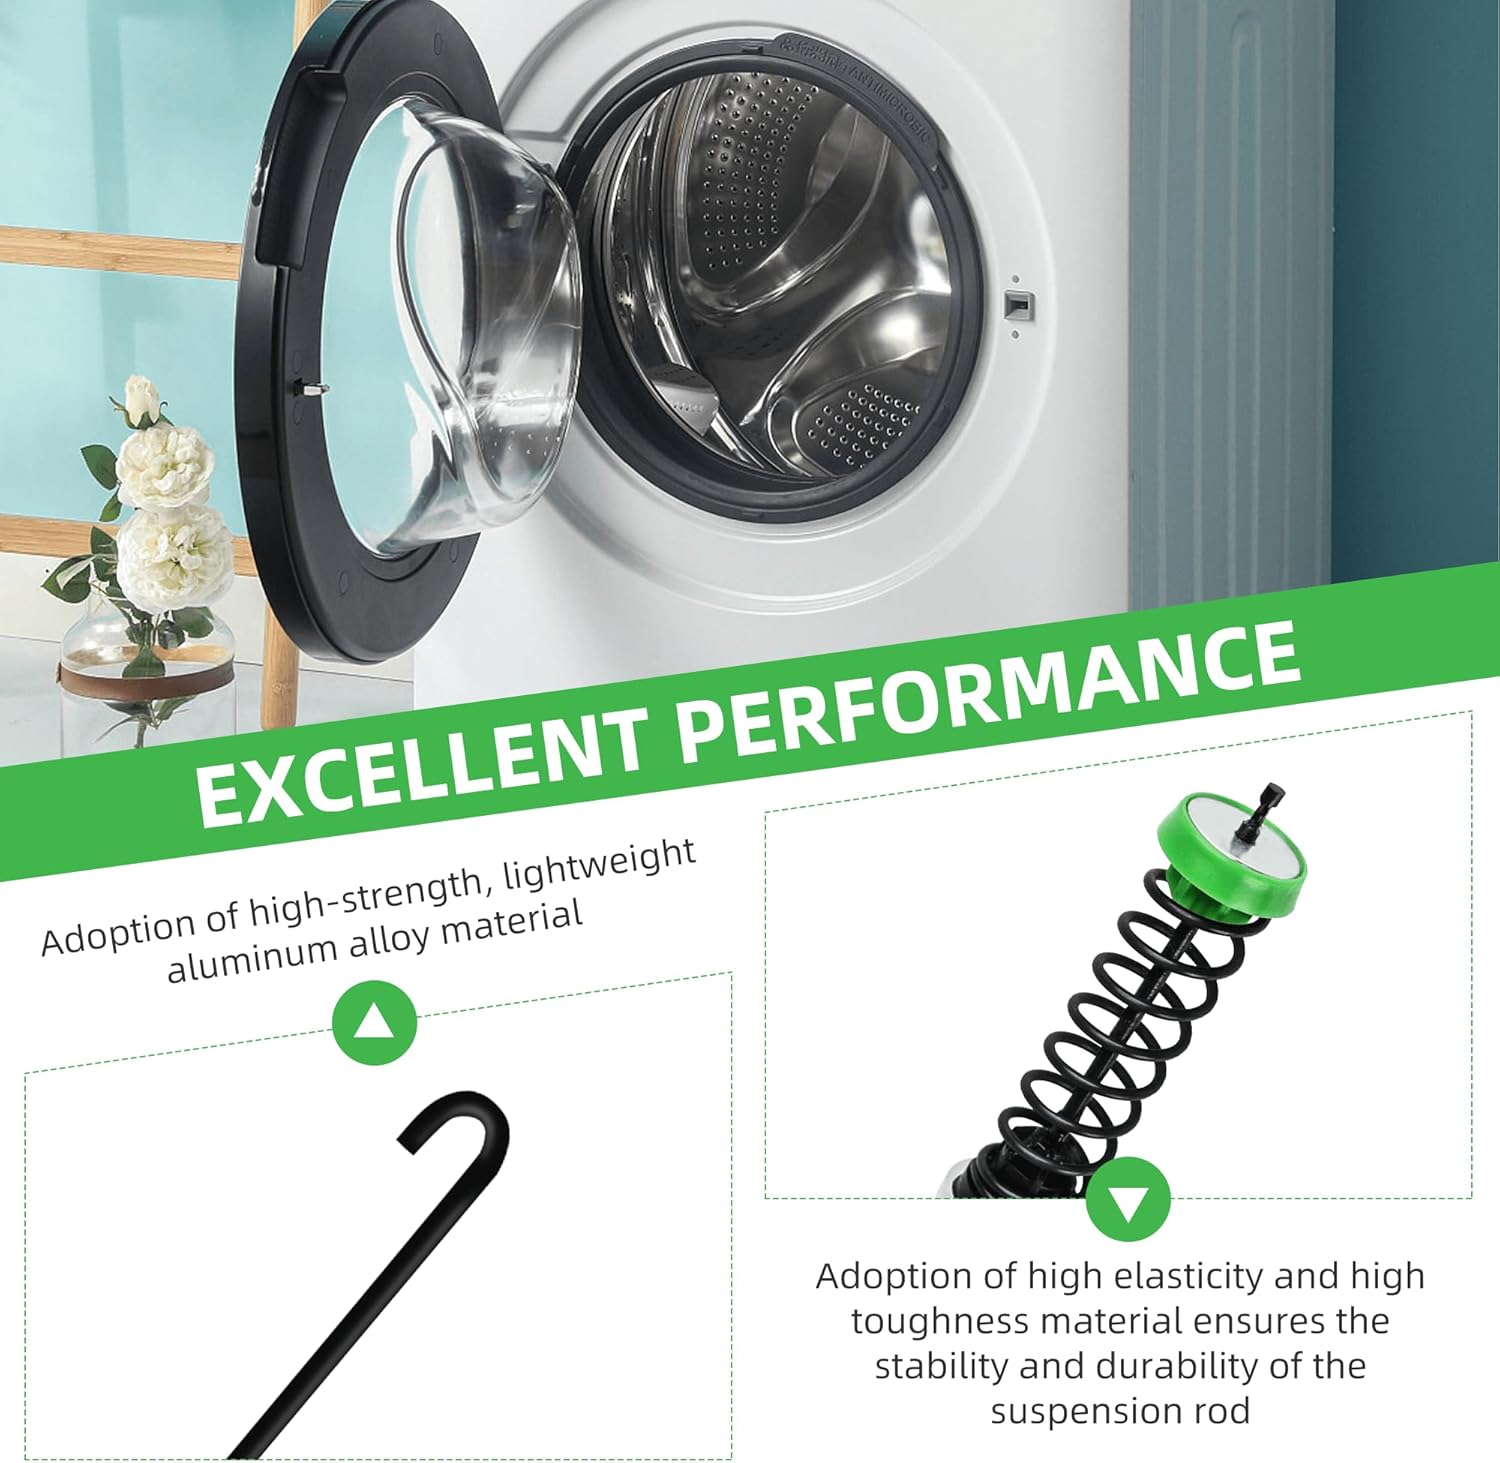
Figure 3: Illustration of the suspension rod's material properties, emphasizing the high-strength, lightweight aluminum alloy for the rod and high elasticity/toughness for the dampening components.
Compatibility
This W11130362 Washer Suspension Rod Kit is compatible with a wide range of washing machines from Whirlpool, Maytag, and Kenmore. Below is a list of common compatible models. If your model is not listed, please refer to your appliance's service manual or contact the manufacturer to confirm compatibility with part number W11130362.

Figure 4: A comprehensive list of compatible washing machine models across various brands, including Whirlpool, Maytag, Kenmore, and Crosley.
Partial List of Compatible Models:
- Whirlpool: MVWC565FW0, 8TWTW5010PW0, 8TWTW5010PW1, 8TWTW6000JW0, 8TWTW6000JW1, MVW4505MW0, MVWX655DW0, WTW5000DW0, WTW5000DW1, WTW5000DW2, WTW5000DW3, WTW5005KW0, WTW5010LW0, WTW5010LW1, WTW5015LW0, WTW5015LW1
- Maytag: 7MMVWC565FW0, MVWC565FW0, 7MMVWC565FW1, MVWC565FW1, 7MMVWX655EW0, 7MMVWX655EW1, MVW4505MW0, MVW4505MW1, MVW4505MW2, MVW5035MW0, MVW5035MW1, MVW5035MW2, MVW5430MW0, MVWC555DW0, MVWC555DW1, MVWC565FW1
- Kenmore: 11022352511, 11022352510, 11025132410, 11025132411
- Crosley: CAW42114GW1, CAW42114GW0, CAW42114GW2, CAW45125LW0
Installation Instructions (Setup)
Replacing washing machine suspension rods typically requires basic tools and careful attention. Always ensure the washing machine is unplugged from the power outlet and the water supply is turned off before beginning any repair work.
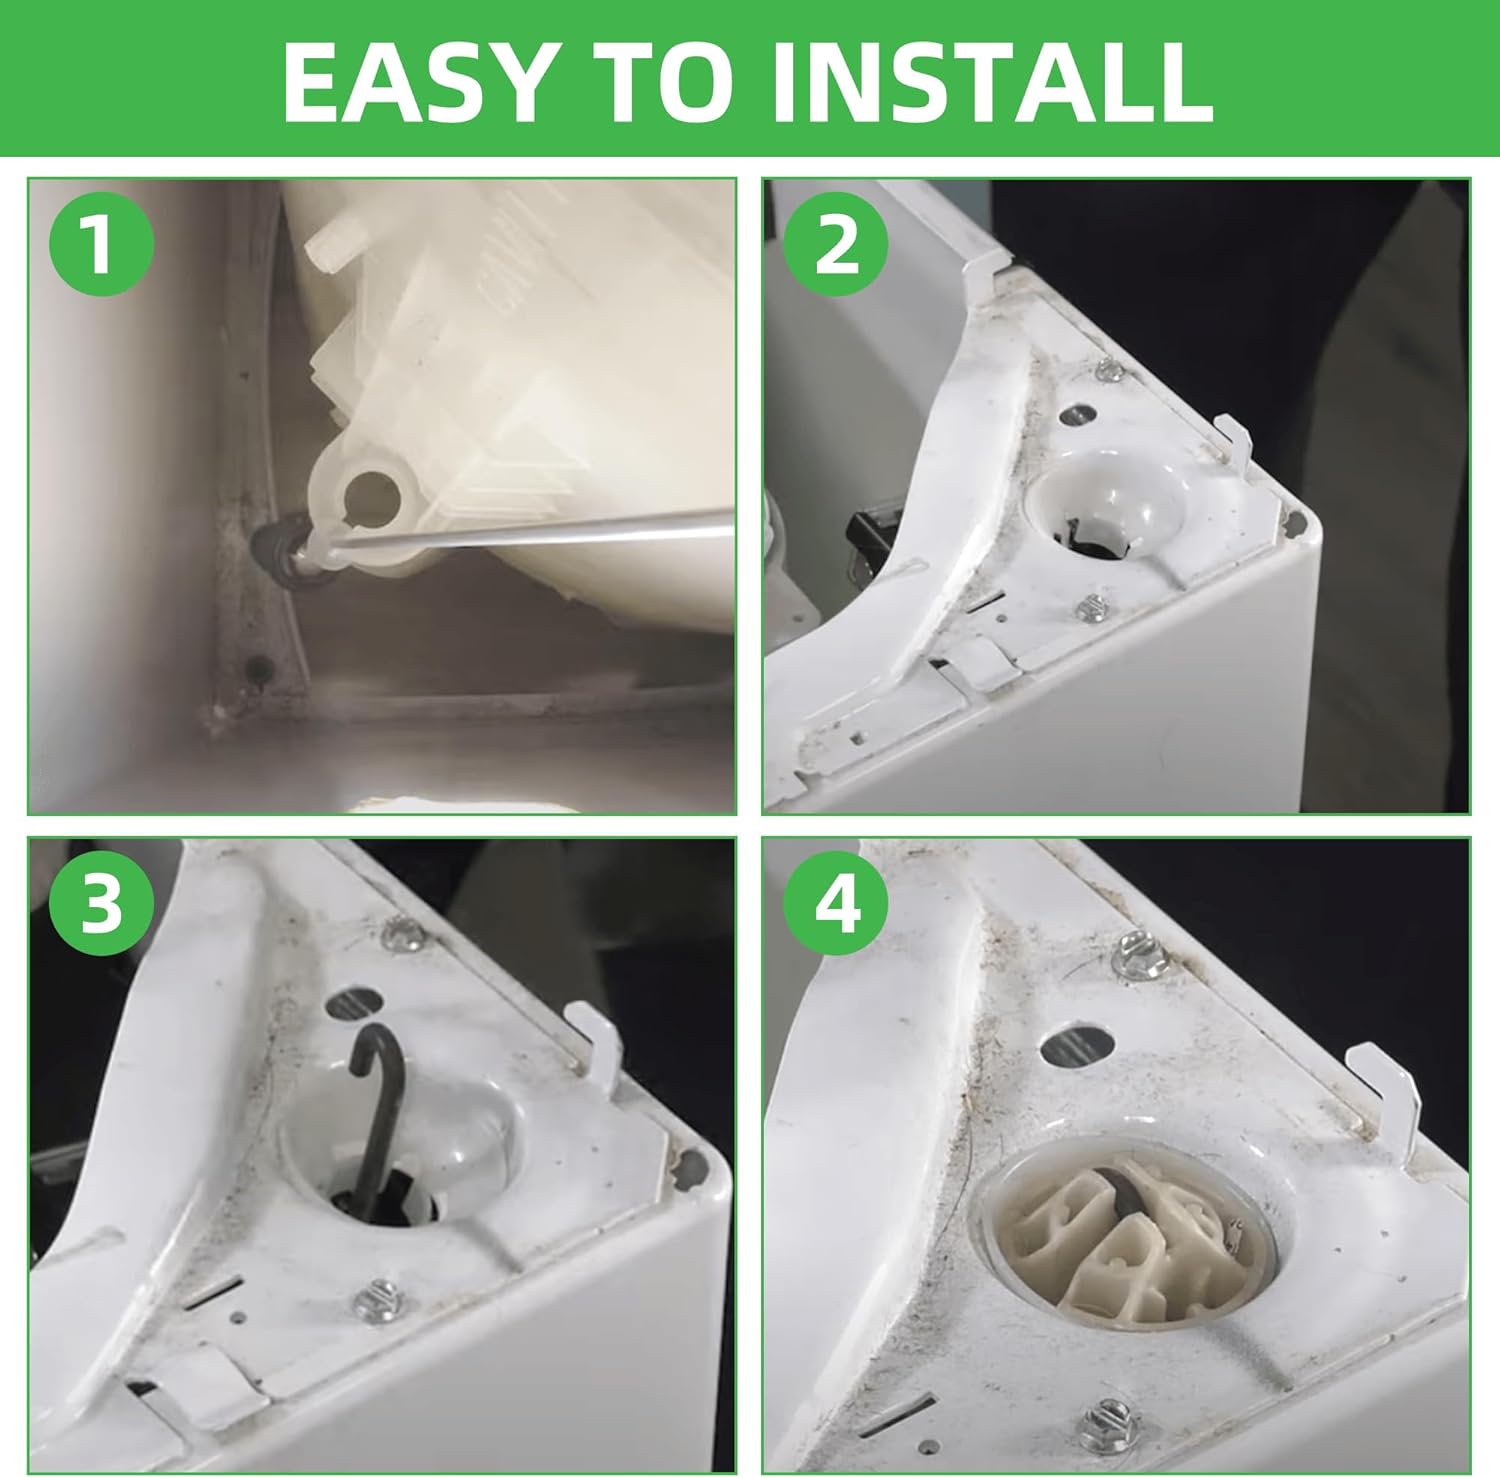
Figure 5: Step-by-step visual guide demonstrating the installation process of the washer suspension rods.
Step-by-Step Guide:
- Preparation: Disconnect the washing machine from the power supply and turn off the water inlet valves. Move the washer away from the wall to access the rear.
- Accessing Rods: Depending on your washer model, you may need to remove the top panel or the entire outer casing to gain access to the suspension rods. Refer to your washer's specific service manual for detailed access instructions.
- Removing Old Rods: Carefully lift the washer tub slightly to relieve tension on the rods. Unhook the old suspension rods from their mounting points on the tub and the washer frame. Note the orientation of the old rods and their components (springs, bushings, balls) for correct reassembly.
- Installing New Rods: Attach the new suspension rods, ensuring the bushings and suspension balls are correctly placed. The green cap of the rod should typically face upwards, connecting to the washer tub. The lower end hooks into the washer frame. Ensure all four rods are securely installed and the tub is evenly suspended.
- Reassembly and Testing: Reattach any panels removed. Reconnect the power and water supply. Run a small, empty load cycle to check for proper balance and reduced vibration.
Note: If you are unsure about any step, it is recommended to consult a qualified appliance technician.
Operating Principles
The suspension rod kit functions by supporting the washing machine's inner tub, allowing it to move freely and absorb vibrations during the spin cycle. When the rods are in good condition, they ensure the tub remains balanced, preventing excessive shaking and noise. Proper installation of this kit will restore the washer's ability to handle unbalanced loads more effectively and reduce overall machine stress.
Maintenance
While the suspension rods are designed for durability, regular maintenance of your washing machine can prolong their lifespan and the overall efficiency of the appliance:
- Load Balancing: Always distribute laundry evenly inside the washer tub to prevent excessive imbalance during the spin cycle, which can put undue stress on the suspension system.
- Avoid Overloading: Do not exceed the recommended load capacity of your washing machine. Overloading can strain the suspension rods and lead to premature wear.
- Regular Inspection: Periodically inspect the suspension rods for signs of wear, such as bending, corrosion, or damaged bushings. Address any issues promptly to prevent further damage.
Troubleshooting
If your washing machine exhibits symptoms of imbalance or excessive vibration after installing new suspension rods, consider the following troubleshooting steps:
- Excessive Vibration or Shaking:
- Check Installation: Ensure all four suspension rods are correctly installed and securely hooked into both the tub and the frame. Verify that the bushings and suspension balls are properly seated.
- Leveling: Confirm that the washing machine itself is level. Adjust the leveling feet if necessary.
- Load Distribution: Ensure laundry is evenly distributed in the tub. An unbalanced load is a common cause of vibration.
- Damaged Components: Although new, inspect the new rods for any manufacturing defects or damage that might have occurred during shipping or installation.
- Loud Noises During Spin Cycle:
- This could indicate that the tub is hitting the sides of the washer due to improper suspension. Re-check rod installation and ensure the tub is centered.
If problems persist after troubleshooting, it may indicate an issue beyond the suspension rods, or professional assistance may be required.
Specifications
| Attribute | Detail |
|---|---|
| Manufacturer | Pulluty |
| Part Number | W11130362 |
| Item Weight | 1.55 pounds |
| Package Dimensions | 27 x 3.8 x 2.1 inches |
| Country of Origin | China |
| Item Model Number | MVWX655DW1 MVWX655DW2 |
| Included Components | 4 x suspension rods, 5 x suspension balls, 5 x bushings |
| Batteries Required? | No |
| Date First Available | November 15, 2024 |
Warranty and Support
Pulluty provides a 360-day warranty or money-back service for this Washer Suspension Rod Kit. This warranty covers defects in materials and workmanship under normal use. For warranty claims or technical support, please contact Pulluty customer service through the retailer where the product was purchased or refer to the contact information provided with your product packaging.
