
1. Introduction
Thank you for choosing the Westinghouse Retro Series 1.25-Liter Coffee Maker. This manual provides essential information for the safe and efficient operation, maintenance, and troubleshooting of your appliance. Please read all instructions carefully before first use and retain this manual for future reference.
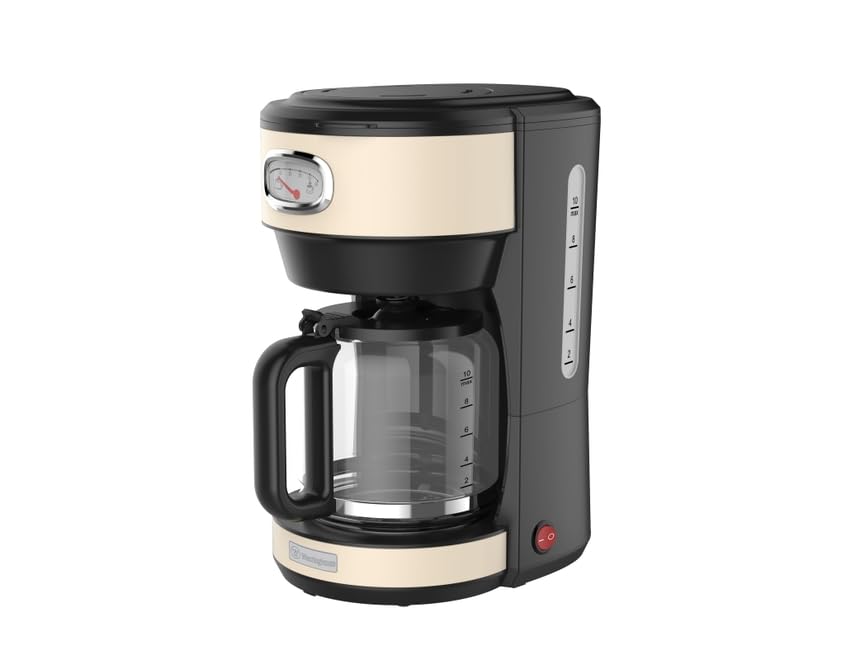
Image 1.1: Front view of the Westinghouse Retro Series Coffee Maker.
2. Important Safeguards
When using electrical appliances, basic safety precautions should always be followed to reduce the risk of fire, electric shock, and/or injury to persons, including the following:
- Read all instructions before operating the coffee maker.
- Do not touch hot surfaces. Use handles or knobs.
- To protect against electric shock, do not immerse cord, plugs, or the coffee maker in water or other liquid.
- Close supervision is necessary when any appliance is used by or near children.
- Unplug from outlet when not in use and before cleaning. Allow to cool before putting on or taking off parts, and before cleaning the appliance.
- Do not operate any appliance with a damaged cord or plug, or after the appliance malfunctions or has been damaged in any manner.
- The use of accessory attachments not recommended by the appliance manufacturer may result in fire, electric shock, or injury to persons.
- Do not use outdoors.
- Do not let cord hang over edge of table or counter, or touch hot surfaces.
- Do not place on or near a hot gas or electric burner, or in a heated oven.
- Do not use appliance for other than intended use.
- The carafe is designed for use with this appliance. It must never be used on a range top.
- Do not place a hot carafe on a wet or cold surface.
- Do not use a cracked carafe or a carafe having a loose or weakened handle.
- Do not clean carafe with cleansers, steel wool pads, or other abrasive material.
- Ensure the lid is securely closed on the carafe before brewing.
3. Product Components
Familiarize yourself with the parts of your Westinghouse Retro Series Coffee Maker:
- Water Reservoir: Holds water for brewing.
- Water Level Indicator: Shows the amount of water in the reservoir.
- Lid: Covers the water reservoir and filter basket area.
- Filter Basket: Holds the coffee filter and grounds.
- Permanent Filter (optional): Reusable filter for coffee grounds.
- Shower Head: Distributes water evenly over coffee grounds.
- Carafe: Glass pot for collecting brewed coffee.
- Heating Plate: Keeps the carafe warm after brewing.
- Power Switch/Indicator Light: Turns the unit on/off and indicates operation.
- Power Cord: Connects the appliance to an electrical outlet.
Image 3.1: Diagram of coffee maker components (refer to text for specific labels).
4. Setup
4.1. Before First Use
- Unpack the coffee maker and remove all packaging materials, labels, and stickers.
- Wash the carafe, carafe lid, and permanent filter (if using) in warm, soapy water. Rinse thoroughly and dry.
- Wipe the exterior of the coffee maker with a damp cloth.
- To clean the internal components, fill the water reservoir with clean water to the maximum level. Place the empty carafe on the heating plate. Run a full brewing cycle without coffee grounds. Discard the water and repeat this process 2-3 times.
4.2. Placement
- Place the coffee maker on a flat, stable, heat-resistant surface.
- Ensure there is adequate ventilation around the appliance.
- Keep the coffee maker away from sources of water, heat, and direct sunlight.
- Ensure the power cord is not dangling over the edge of a counter or table to prevent accidental pulling.
5. Operating Instructions
5.1. Brewing Coffee
- Open the lid of the coffee maker.
- Fill the water reservoir with fresh, cold water to the desired level, using the water level indicator as a guide. Do not exceed the MAX fill line.
- Place a paper filter (cone-shaped, size 4) into the filter basket, or use the permanent filter.
- Add the desired amount of ground coffee into the filter. A general guideline is one tablespoon of coffee grounds per cup (5 oz/150ml) of water, adjust to taste.
- Close the lid securely.
- Place the empty carafe with its lid on the heating plate, ensuring it is properly seated to activate the drip-stop mechanism.
- Plug the power cord into a standard electrical outlet.
- Press the Power Switch. The indicator light will illuminate, and the brewing process will begin.
- Once brewing is complete, the coffee maker will automatically switch to the 'keep warm' function.
- Allow the coffee to finish dripping before removing the carafe.
5.2. Keep Warm Function
After brewing, the heating plate will automatically keep the coffee warm for approximately 30 minutes. The indicator light will remain on during this period. For optimal flavor, it is recommended to serve coffee shortly after brewing.
5.3. Auto Shut-Off
For safety and energy conservation, the coffee maker will automatically shut off approximately 30 minutes after the brewing cycle is complete. The indicator light will turn off. If you wish to brew another pot, wait a few minutes for the appliance to cool down before repeating the brewing steps.
6. Maintenance and Cleaning
Regular cleaning ensures optimal performance and extends the lifespan of your coffee maker.
6.1. Daily Cleaning
- Always unplug the coffee maker and allow it to cool completely before cleaning.
- Remove the filter basket and discard the used coffee grounds and paper filter.
- Wash the carafe, carafe lid, and filter basket in warm, soapy water. Rinse thoroughly and dry. These parts are generally top-rack dishwasher safe, but hand washing is recommended for longevity.
- Wipe the exterior of the coffee maker with a soft, damp cloth. Do not use abrasive cleaners or scouring pads.
- Never immerse the main unit, cord, or plug in water or any other liquid.
6.2. Descaling (Mineral Deposit Removal)
Mineral deposits (calcium) can build up in your coffee maker over time, affecting performance and coffee taste. Descale your coffee maker every 2-4 weeks, or more frequently if you have hard water.
- Fill the water reservoir with a mixture of white vinegar and water (1 part vinegar to 2 parts water) to the MAX fill line.
- Place a paper filter in the filter basket (without coffee grounds).
- Place the empty carafe on the heating plate.
- Turn on the coffee maker and allow half of the solution to brew through.
- Turn off the coffee maker and let it soak for at least 15 minutes to allow the solution to work on the deposits.
- Turn the coffee maker back on and brew the remaining solution.
- Discard the solution from the carafe and rinse the carafe thoroughly.
- Fill the water reservoir with clean, fresh water and run 2-3 full brewing cycles with water only to rinse out any remaining vinegar taste.
7. Troubleshooting
Before contacting customer support, please refer to the following troubleshooting guide:
| Problem | Possible Cause | Solution |
|---|---|---|
| Coffee does not brew. | 1. Coffee maker not plugged in. 2. No water in reservoir. 3. Power switch not turned on. | 1. Ensure the power cord is securely plugged into a working outlet. 2. Fill the water reservoir with water. 3. Press the Power Switch. |
| Coffee is too weak. | 1. Not enough coffee grounds. 2. Coffee grounds too coarse. 3. Water-to-coffee ratio incorrect. | 1. Add more coffee grounds. 2. Use a finer grind of coffee. 3. Adjust the amount of coffee or water to your preference. |
| Coffee overflows from filter basket. | 1. Too many coffee grounds. 2. Filter basket clogged. 3. Carafe not properly seated. | 1. Reduce the amount of coffee grounds. 2. Clean the filter basket and ensure no grounds are blocking the drip. 3. Ensure the carafe is fully pushed onto the heating plate. |
| Coffee tastes bad. | 1. Old or stale coffee. 2. Coffee maker needs cleaning/descaling. 3. Incorrect water quality. | 1. Use fresh, high-quality coffee beans/grounds. 2. Clean and descale the coffee maker as per Section 6. 3. Use filtered water for brewing. |
| Water leaks from the unit. | 1. Water reservoir overfilled. 2. Loose connections or damaged parts. | 1. Do not exceed the MAX fill line. 2. If leakage persists, discontinue use and contact customer support. |
8. Specifications
Product specifications for the Westinghouse Retro Series 1.25-Liter Coffee Maker:
| Feature | Detail |
|---|---|
| Model Number | B0DN64C15V |
| Capacity | 1.25 Liters (approx. 10 cups) |
| Power | 900W |
| Voltage | 120V ~ 60Hz |
| Dimensions (approx.) | 10.5" H x 8" W x 6.5" D |
| Weight (approx.) | 3.5 lbs |
| Auto Shut-off | Yes, after 30 minutes |
| Drip Stop Feature | Yes |
9. Warranty and Support
This Westinghouse Retro Series Coffee Maker is covered by a limited one-year warranty from the date of purchase against defects in material and workmanship. This warranty does not cover damage caused by misuse, neglect, accident, commercial use, or unauthorized modification.
For warranty claims, technical support, or general inquiries, please contact Westinghouse customer service. Please have your model number (B0DN64C15V) and proof of purchase available when contacting support.
Customer Support:
Website: www.westinghouse.com/support (example link)
Phone: 1-800-XXX-XXXX (example number)