Introduction
This manual provides detailed instructions for the installation, operation, and maintenance of your FEKOTS HD3 Universal Ceiling Fan Thermostatic Remote Control Kit. This kit is designed to enhance the functionality of your ceiling fan by offering convenient control over fan speed, light, and temperature settings. Please read this manual thoroughly before installation and use to ensure proper function and safety.
Key Features
- Universal Compatibility: Designed for Hampton Bay, Hunter, Home Decorators Collection, and other 3-speed AC ceiling fan brands.
- 3-Speed Fan Control: Adjust fan speed to Low, Medium, or High.
- Light Control: Turn lights On/Off and dim them as desired.
- Thermostatic Feature: Automatically turns the fan On/Off based on a set room temperature range (±1°C or ±1°F).
- Walk Away Time Delay: Keeps lights illuminated for a short period after turning them off, providing a safe exit path.
- Comfort Breeze Setting: Randomly alternates fan speed to simulate a natural breeze.
- Timer Function: Set the fan and light to operate for 2, 4, or 8 hours.
Setup and Installation
Package Contents
- 1 x Remote Control
- 1 x Receiver Unit
- 1 x Wall Holder Mount
- 1 x Instruction Manual
- 6 x Wire Connectors
Battery Installation (Remote Control)
The remote control requires 2 AAA batteries (not included). Open the battery compartment cover on the back of the remote and insert the batteries, ensuring correct polarity (+/-). Close the cover securely.

This image details the battery compartment for the remote control (requires 2 AAA batteries, not included) and the DIP switches on the receiver unit, which must be set to match the remote for proper pairing.
DIP Switch Configuration
Before installing the receiver, ensure the DIP switches on both the remote control and the receiver unit are set to the same pattern. There are 16 different frequency combinations available. It is recommended to avoid the default setting of '0000' to prevent interference with other remote-controlled devices.
- Locate the DIP switches inside the battery compartment of the remote control.
- Locate the DIP switches on the receiver unit.
- Set the switches on both devices to an identical pattern.
Receiver Wiring
Warning: Disconnect power to the ceiling fan at the circuit breaker before beginning installation to prevent electrical shock.
- Disconnect the existing wiring from your ceiling fan.
- Connect the receiver unit according to the wiring diagram provided. Use the included wire connectors to secure all connections.
- Ensure all connections are tight and properly insulated.
- Carefully tuck the receiver unit into the fan canopy.
- Restore power at the circuit breaker and test the remote control functions.

This image illustrates the wiring process for installing the HD3 receiver into a ceiling fan, showing connections for AC power, fan, and light, along with the DIP switch settings.
Operating Instructions
Remote Control Functions

This image illustrates the various functions of the HD3 remote control, including power, fan speed, light control, thermostatic settings, and timer options. The LCD displays current temperature and fan status.
- Power Button (⏻): Press to turn the fan On/Off. Also activates the "Walk Away Time Delay" function.
- Fan Speed Control (☺): Cycles through High, Medium, Low, and Off fan speeds.
- Light On/Off/Dimmer (💡): Press briefly to turn the light On/Off. Press and hold to dim or brighten the light.
- FAN AUTO Button: Switches between manual fan operation and automatic thermostatic control.
- Temperature Adjustment (▲ / ▼): Adjusts the desired room temperature when in thermostatic mode. The LCD displays the actual or set temperature.
- Comfort Breeze (🌊): Activates the Comfort Breeze setting, which randomly alternates fan speed to simulate a natural breeze.
- Timer Function (⏱): Cycles through 2, 4, and 8-hour timer settings for fan and light operation.
Compatibility
Fan Compatibility
This remote control kit is compatible with most 3-speed AC downrod style ceiling fans. It is not recommended for use with hugger style fans.
Light Bulb Compatibility
The remote control supports various light bulb types:
- Halogen & Incandescent lamps (up to 4.2A/500W Max)
- Dimmable CFL (up to 1.5A/150W Max)
- Dimmable LED (up to 1.5A/150W Max)
Note: Some LED and CFL lamps are not dimmable; they will only support ON and OFF functions.
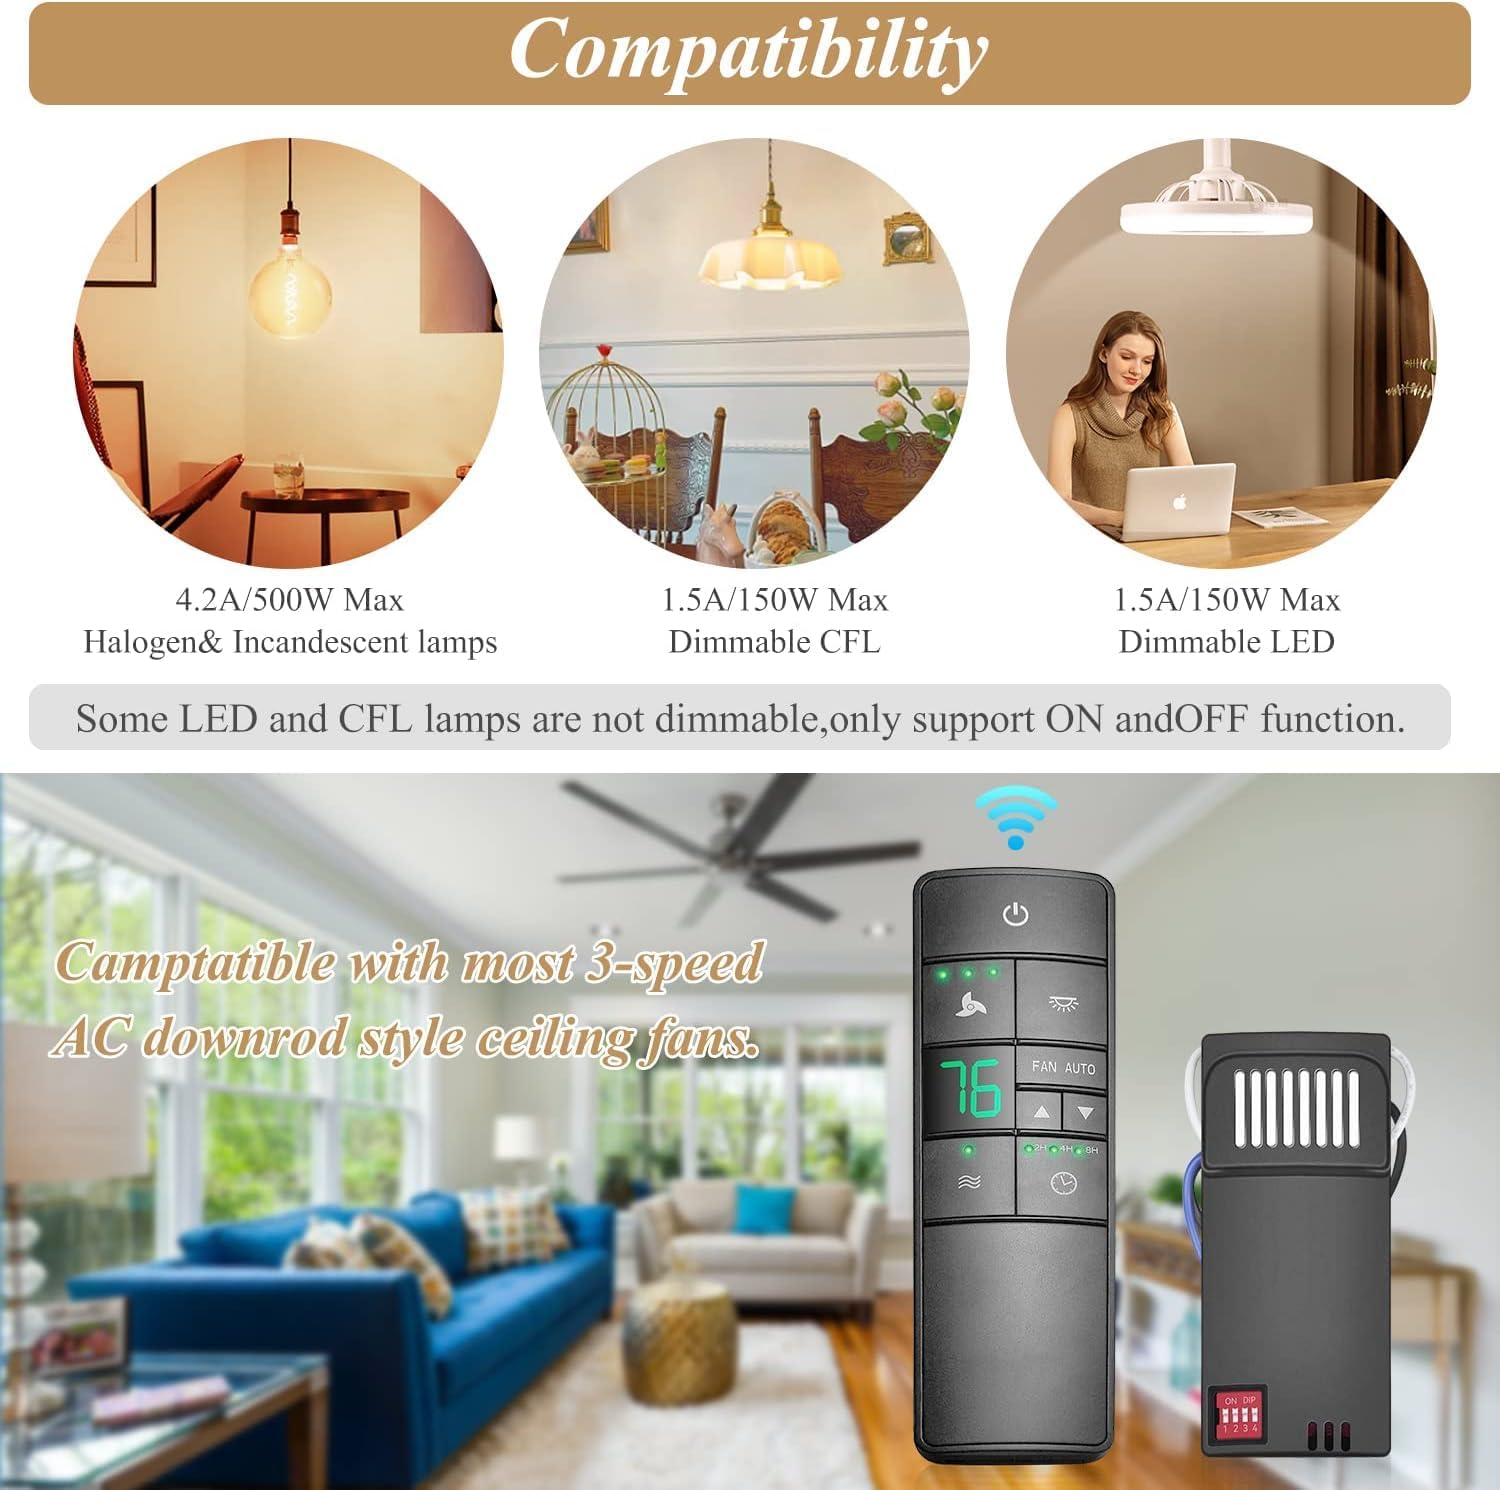
This image shows the compatibility of the remote control with various light bulb types (Halogen/Incandescent, Dimmable CFL, Dimmable LED) and highlights its suitability for most 3-speed AC downrod style ceiling fans.
Maintenance
- Battery Replacement: Replace AAA batteries in the remote control when the display becomes dim or the remote's range decreases.
- Cleaning: Wipe the remote control and receiver with a soft, dry cloth. Do not use abrasive cleaners or allow moisture to enter the devices.
- Storage: If storing the remote for an extended period, remove the batteries to prevent leakage.
Troubleshooting
| Problem | Possible Cause | Solution |
|---|---|---|
| Fan or light does not respond to remote. | Incorrect DIP switch settings. Dead batteries in remote. Power not supplied to receiver. | Verify DIP switch settings match on remote and receiver. Replace remote batteries. Check circuit breaker and wiring connections. |
| Light does not dim. | Non-dimmable light bulbs installed. | Ensure dimmable LED or CFL bulbs are used. Incandescent bulbs are generally dimmable. |
| Fan operates erratically or turns on/off by itself. | Interference from other remote devices. Thermostatic mode active. | Change DIP switch settings to a different pattern. Check if FAN AUTO mode is enabled and adjust temperature settings or switch to manual mode. |
| Remote range is poor. | Low remote battery. Obstructions between remote and receiver. | Replace remote batteries. Ensure clear line of sight or reduce obstructions. |
Specifications
- Model Number: HD3
- Package Dimensions: 6.29 x 4.72 x 1.57 inches
- Item Weight: 0.35 ounces
- Batteries: 2 AAA batteries required (not included)
- Max Number of Supported Devices: 1
- Compatible Devices: 3-speed AC ceiling fans
- Special Features: Comfort Breeze Setting, Thermostatic feature, 3 Speed and Light Control, Walk Away Time Delay Function
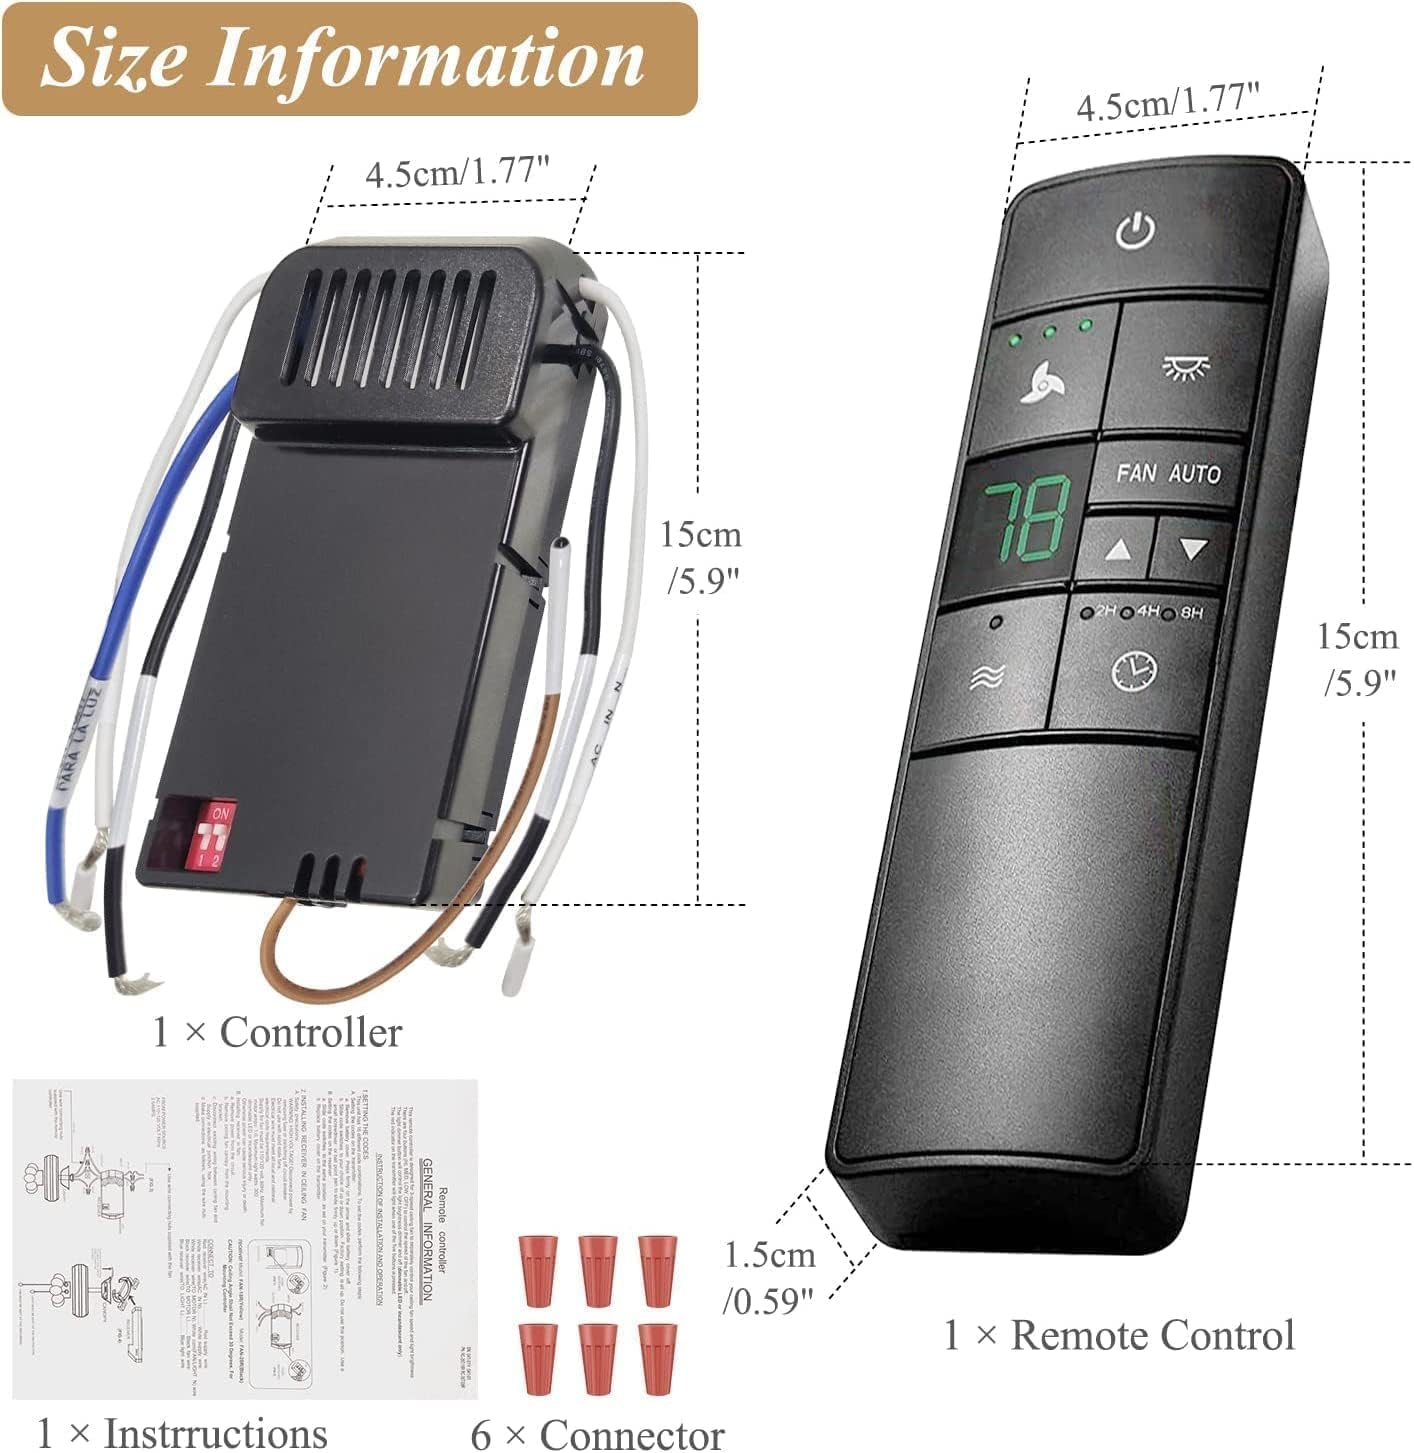
This image provides the physical dimensions of both the HD3 remote control and the receiver unit, along with included accessories like instructions and connectors.
Warranty Information
Specific warranty details for the FEKOTS HD3 Universal Ceiling Fan Thermostatic Remote Control Kit are not provided in the product information. Please refer to the product packaging or contact the manufacturer directly for warranty terms and conditions.
Customer Support
For further assistance, technical support, or inquiries regarding your FEKOTS HD3 Universal Ceiling Fan Thermostatic Remote Control Kit, please contact the manufacturer, FEKOTS, through their official channels. Contact information may be available on the product packaging or their official website.