
1. Introduction
The BIGTREETECH SKR PICO V1.0 is a compact yet powerful 32-bit control board designed for 3D printers, particularly optimized for Voron V0 and V0.1 models. It features an ARM Cortex-M0+ MCU (RP2040) and integrated TMC2209 UART stepper motor drivers, offering silent operation and precise control. This manual provides essential information for the setup, operation, maintenance, and troubleshooting of your SKR PICO V1.0 control board.
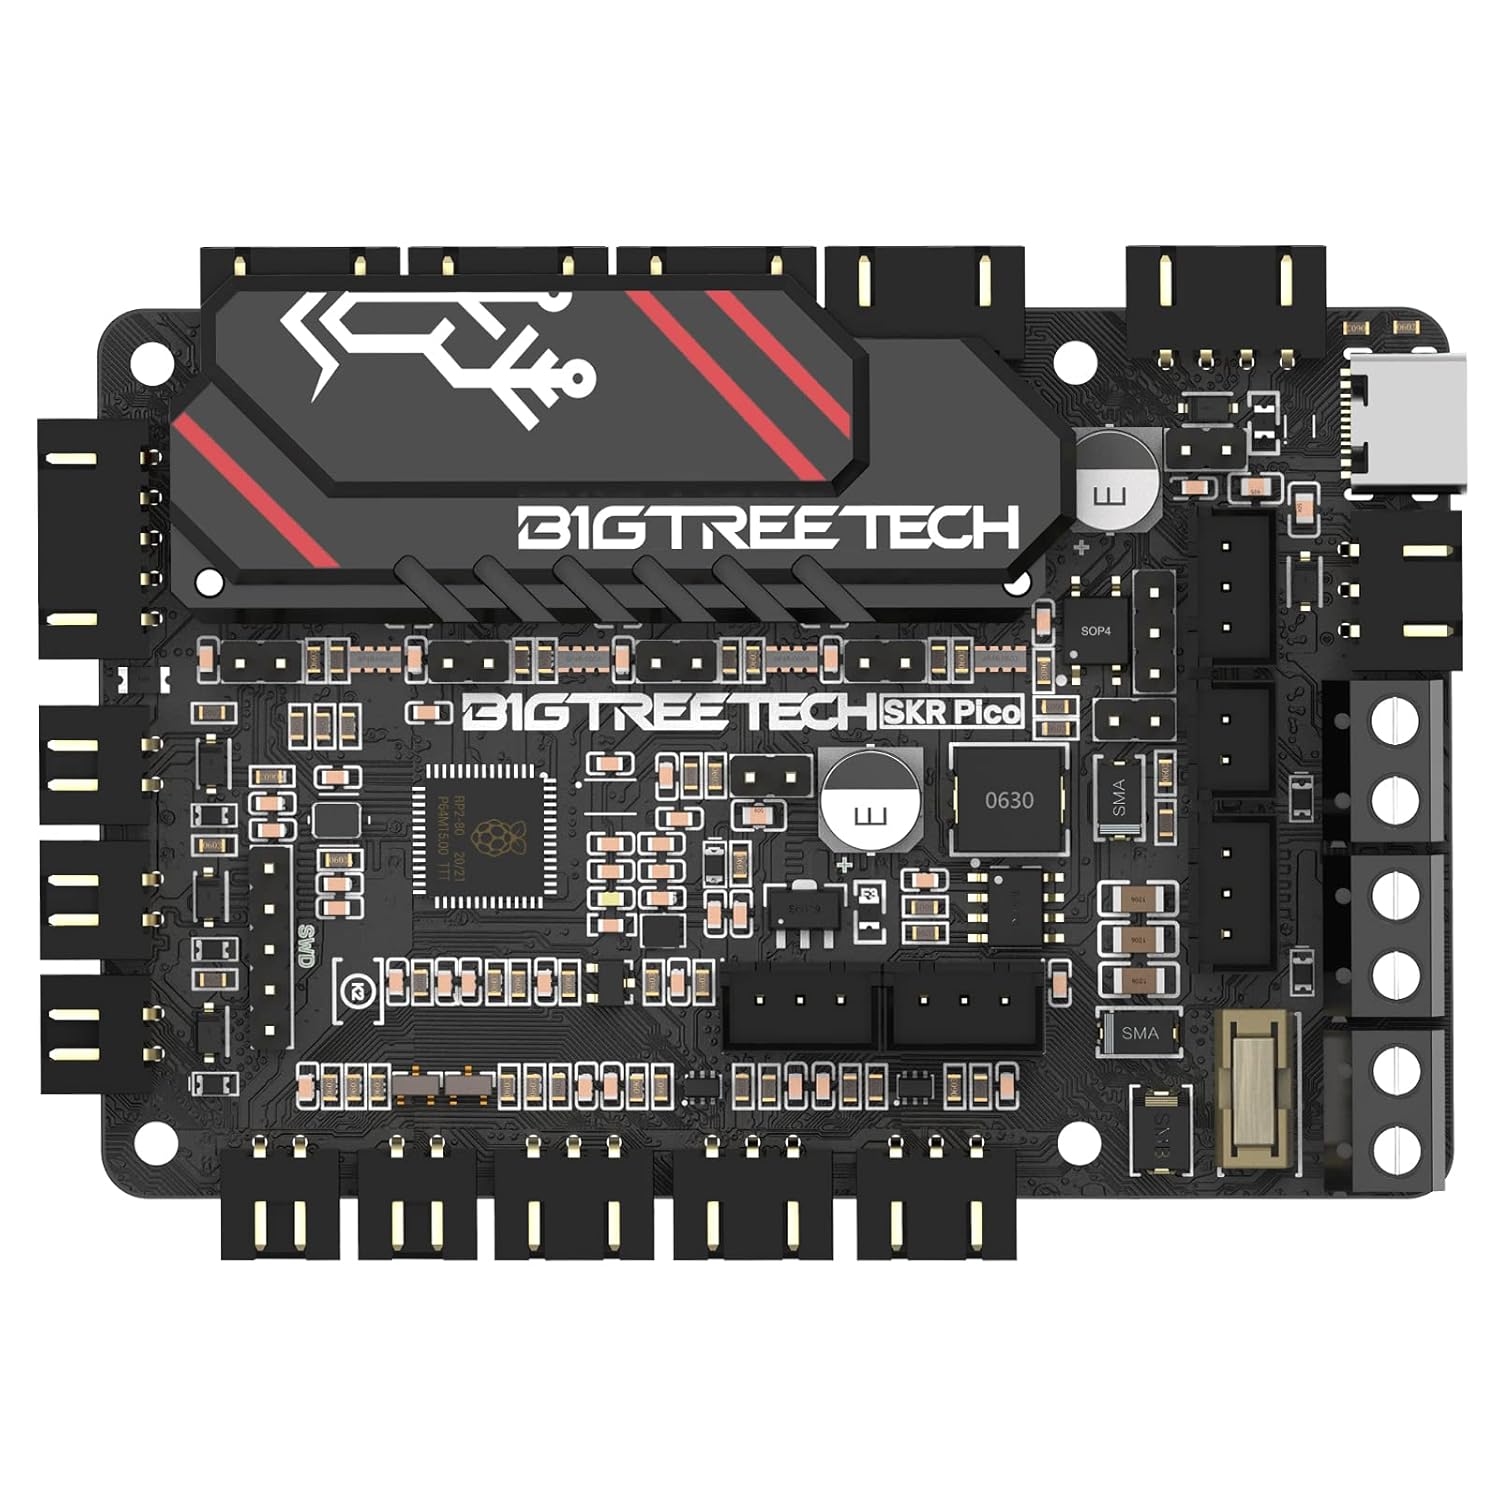
Image: The BIGTREETECH SKR PICO V1.0 Control Board, showcasing its compact design and various connectors.
2. Setup Guide
2.1 Component Overview
The SKR PICO V1.0 board integrates key components for 3D printer control. Understanding its layout is crucial for proper installation and wiring.

Image: Detailed pinout diagram of the SKR PICO V1.0 board, indicating motor interfaces, fan connectors, sensor inputs, and other ports.
2.2 Physical Installation
The SKR PICO V1.0 is designed for seamless integration, particularly with Raspberry Pi boards. It features a dedicated board frame allowing a Raspberry Pi to be mounted directly on top, optimizing space within your printer enclosure.
- Ensure the printer is powered off and disconnected from any power source before installation.
- Mount the SKR PICO V1.0 board securely within your printer's control box using appropriate standoffs and screws.
- If using a Raspberry Pi, align the mounting holes and gently press the Raspberry Pi onto the designated pins on the SKR PICO board.
Image: The SKR PICO V1.0 board shown alongside a Raspberry Pi and a 3D printer, illustrating its intended use and compact integration.
2.3 Wiring Connections
Refer to the pinout diagram for precise wiring. Key connections include:
- Power Input: Connect DC 12V/24V power to the designated terminals.
- Motor Drivers: The board has integrated TMC2209 drivers for X, Y, Z1, Z2, and E axes. Connect stepper motors accordingly.
- Endstops: Connect X-STOP, Y-STOP, Z-STOP to your printer's endstop switches.
- Heaters & Thermistors: Connect hotend (HE) and heated bed (HB) heaters, and their respective thermistors (TH0, THB).
- Fans: Connect controllable fans to FAN1, FAN2, FAN3.
- USB Type-C: Used for main control communication with a host device like a Raspberry Pi.
2.4 Firmware Installation (Klipper)
The SKR PICO V1.0 is highly compatible with Klipper firmware. Detailed instructions for compiling and flashing Klipper firmware can be found on the official BIGTREETECH GitHub repository or Klipper documentation. Ensure you select the correct MCU and board configuration for the RP2040 chip.

Image: The SKR PICO V1.0 board highlighting its compatibility with Klipper firmware, Raspberry Pi, and Octoprint.
3. Operating Instructions
3.1 Power On and Initial Checks
After completing all physical connections and firmware installation:
- Connect the power supply to the board.
- Verify that all connected components (motors, fans, heaters) respond as expected through your chosen control interface (e.g., Klipper web interface).
- Monitor temperatures to ensure thermistors are reading correctly.
3.2 Mute Printing with TMC2209
The integrated TMC2209 stepper motor drivers operate in UART mode, providing significantly quieter motor operation compared to traditional drivers. This feature is active by default when configured correctly in firmware.
3.3 Onboard Sensorless Homing
The SKR PICO V1.0 supports sensorless homing for compatible stepper motors. This feature can be enabled by simply plugging jump caps into the designated pins on the board, as illustrated below. Refer to your firmware documentation for specific configuration steps.

Image: Close-up view of the SKR PICO V1.0 board, highlighting the jumper caps for enabling onboard sensorless homing.
4. Maintenance
4.1 Heat Dissipation
The board features an upgraded heat sink design and supports controllable fans to manage operating temperatures. Ensure proper airflow around the board, especially during extended operation, to maintain optimal performance and longevity.

Image: Diagram illustrating the beefy built-in heat sink on the SKR PICO V1.0, designed to provide efficient cooling during heavy computations.
4.2 Fuse Replacement
The SKR PICO V1.0 includes a fuse kit with an easy-to-disassemble and assemble fixing seat. In case of a power surge or short circuit, the fuse may blow to protect the board. Replace with a fuse of the same rating if necessary.

Image: Close-up view of the fuse kit on the SKR PICO V1.0 board, highlighting its easy removal and installation.
4.3 General Cleaning
Periodically inspect the board for dust accumulation. Use compressed air or a soft brush to gently clean the components. Ensure the board is powered off and disconnected before cleaning.
5. Troubleshooting
- Board Not Powering On: Check power supply connections and ensure the fuse is intact. Verify input voltage is within the specified range (DC 12V/24V).
- Motors Not Moving: Confirm motor wiring is correct. Check firmware configuration for stepper drivers and motor current settings. Ensure sensorless homing jumpers are correctly set if used.
- Communication Issues: Verify the Type-C USB cable is securely connected to both the SKR PICO and the host device (e.g., Raspberry Pi). Check host device drivers and serial port configuration.
- Temperature Reading Errors: Ensure thermistors are correctly wired and configured in firmware. Check for loose connections or damaged thermistors.
- Firmware Flashing Problems: Double-check the firmware compilation steps and ensure the correct board and MCU are selected. Refer to BIGTREETECH's official documentation for specific flashing procedures.
6. Specifications
The following table outlines the key technical specifications for the BIGTREETECH SKR PICO V1.0 Control Board:
| Feature | Detail |
|---|---|
| Product Dimensions | 33.46 x 22.04 x 0.11 inches; 5.61 ounces |
| Item Model Number | 1060000513 |
| Manufacturer | BIGTREETECH |
| Color | Black |
| Brand | BIGTREETECH Direct |
| Voltage | 24 Volts (DC) |
| Material | PCB |
| Operating Temperature | 15 Degrees Celsius |
| MCU | ARM Cortex-M0+ RP2040 |
| Logic Voltage | 3.3V |
| Motor Driver | UART mode of on-board TMC2209 |
| Motor Driver Interface | X, Y, Z1, Z2, E |
| Temperature Sensor Interface | TH0, THB, 2-way 100K NTC (RTD) |

Image: Visual representation of the SKR PICO V1.0 specifications, including external size, board layers, MCU, power input, and various interfaces.
7. Warranty and Support
BIGTREETECH Direct is committed to providing satisfying after-sales support for the SKR PICO V1.0 control board. For any issues or questions regarding the product, please contact BIGTREETECH customer service through the platform where the product was purchased. Our professional technical team is available to provide technical assistance.
For additional resources, including firmware, schematics, and pinout diagrams, please refer to the official BIGTREETECH GitHub repository.