1. Introduction
Thank you for choosing the EKONO Nugget Ice Maker. This manual provides essential information for the safe operation, maintenance, and troubleshooting of your new ice machine. Please read it thoroughly before first use and retain it for future reference.
This compact and portable countertop ice maker is designed to produce chewable nugget ice quickly, making it suitable for various settings including kitchens, RVs, and offices. It features a daily ice production capacity of 34 lbs and includes a self-cleaning function for convenience.
2. Safety Instructions
To reduce the risk of fire, electric shock, or injury, always follow these basic safety precautions:
- Read all instructions before using the appliance.
- Ensure the voltage matches the rating label on the appliance.
- Do not immerse the power cord, plug, or any part of the appliance in water or other liquids.
- Unplug the appliance from the outlet when not in use, before cleaning, and before servicing.
- Do not operate any appliance with a damaged cord or plug, or after the appliance malfunctions or has been damaged in any manner.
- Use only manufacturer-recommended attachments.
- Do not use outdoors.
- Keep the appliance away from heat sources and direct sunlight.
- Ensure proper ventilation around the unit. Maintain at least 5 inches of clearance on all sides.
- Do not use the appliance for anything other than its intended purpose.
- Children should be supervised to ensure they do not play with the appliance.
3. Package Contents
Upon unpacking, please verify that all items are present:
- EKONO Nugget Ice Maker
- Ice Scoop
- Reusable Cup with Straw
- Instruction Manual
4. Product Overview
Familiarize yourself with the components of your EKONO Nugget Ice Maker:

Image: The EKONO Nugget Ice Maker, shown in black, with a clear lid revealing nugget ice inside. A clear plastic cup with a straw and an ice scoop filled with ice are positioned next to the machine.

Image: A close-up view of the white ice basket with a ramp design to prevent ice jams, and a white ice scoop.
Key Components:
- Ice Outlet: Where ice is dispensed into the basket.
- Ice Basket: Removable basket for collecting ice.
- Water Reservoir: Holds water for ice production.
- Control Panel: Features 'ICE FULL' indicator, 'ADD WATER' indicator, and 'ICE/CLEAN' button.
- Drain Plug: Located at the base for draining water.
5. Setup
- Unpack: Carefully remove all packaging materials and inspect the ice maker for any damage.
- Placement: Place the ice maker on a stable, level surface, away from direct sunlight and heat sources. Ensure there is at least 5 inches of clearance around the unit for proper ventilation.
- Initial Cleaning: Before first use, clean the interior of the ice maker. Refer to the 'Maintenance and Cleaning' section for detailed instructions.
- Add Water: Open the lid and fill the water reservoir with potable water up to the 'MAX' fill line. Do not overfill.
- Power On: Plug the power cord into a grounded electrical outlet.
6. Operating Instructions
Making Ice:
- Ensure the water reservoir is filled and the unit is plugged in.
- Press the 'ICE/CLEAN' button once to start the ice-making cycle. The indicator light will illuminate.
- The first batch of nugget ice will be produced in approximately 6-7 minutes. Subsequent batches may be faster.
- The machine will continue to make ice until the ice basket is full or the water reservoir is empty.
- When the 'ICE FULL' indicator lights up, the ice production will pause. Remove ice from the basket to resume production.
- When the 'ADD WATER' indicator lights up, the water reservoir is low. Add more water to resume ice production.
- To stop ice production, press the 'ICE/CLEAN' button again.
Important Notes:
- The ice maker operates with low noise technology, typically below 43dB.
- Nugget ice melts slower than traditional ice cubes, ideal for various beverages.
- For best results, use filtered water.
7. Maintenance and Cleaning
Regular cleaning and maintenance ensure optimal performance and longevity of your ice maker.
Self-Cleaning Function (15 Minutes):
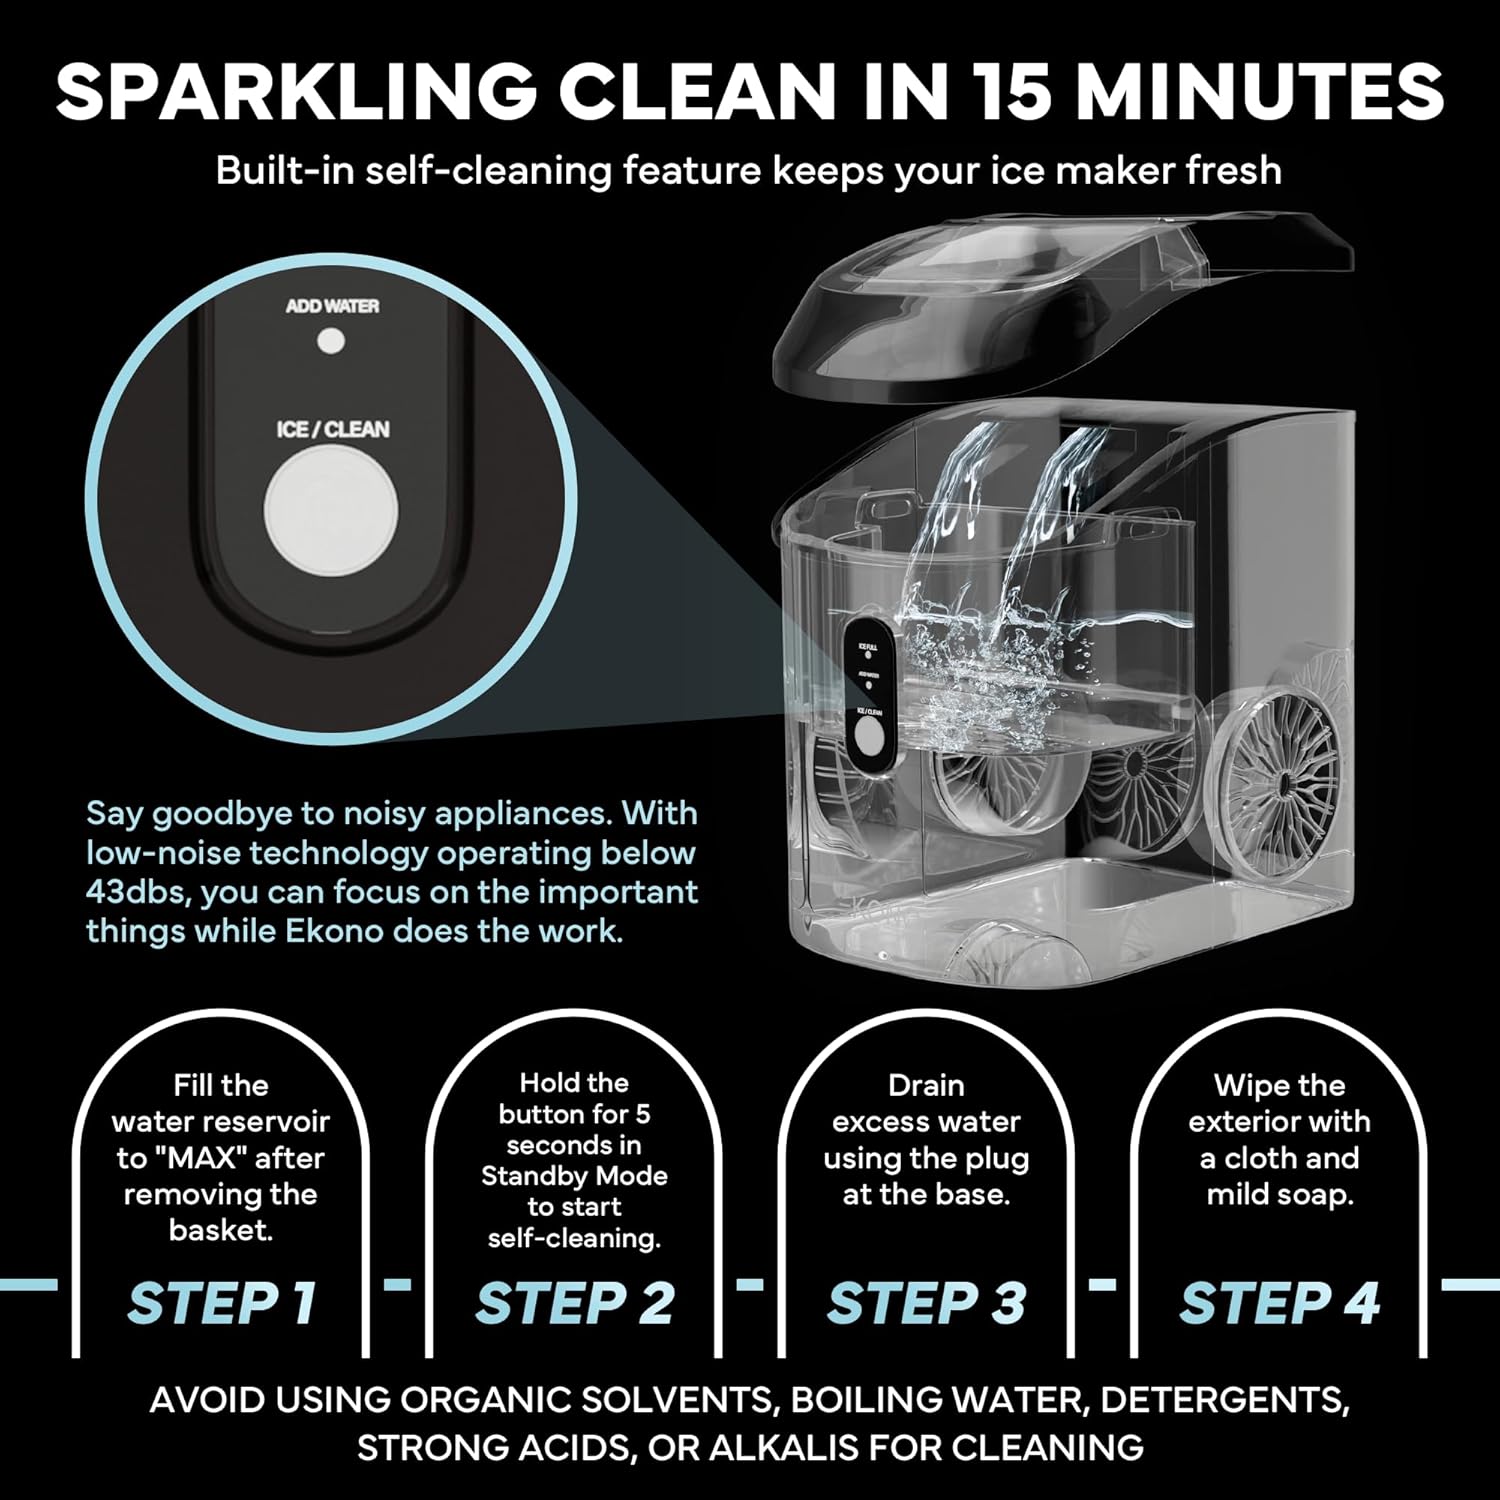
Image: A visual guide illustrating the four steps of the self-cleaning process: filling water, holding the button, draining water, and wiping the exterior.
- Remove the ice basket.
- Fill the water reservoir to the 'MAX' line with clean water.
- In standby mode (unit plugged in but not making ice), press and hold the 'ICE/CLEAN' button for 5 seconds. The self-cleaning cycle will begin and last for approximately 15 minutes.
- Once the cycle is complete, drain the excess water using the drain plug at the base of the unit.
- Wipe the exterior with a soft cloth and mild soap.
Manual Cleaning:
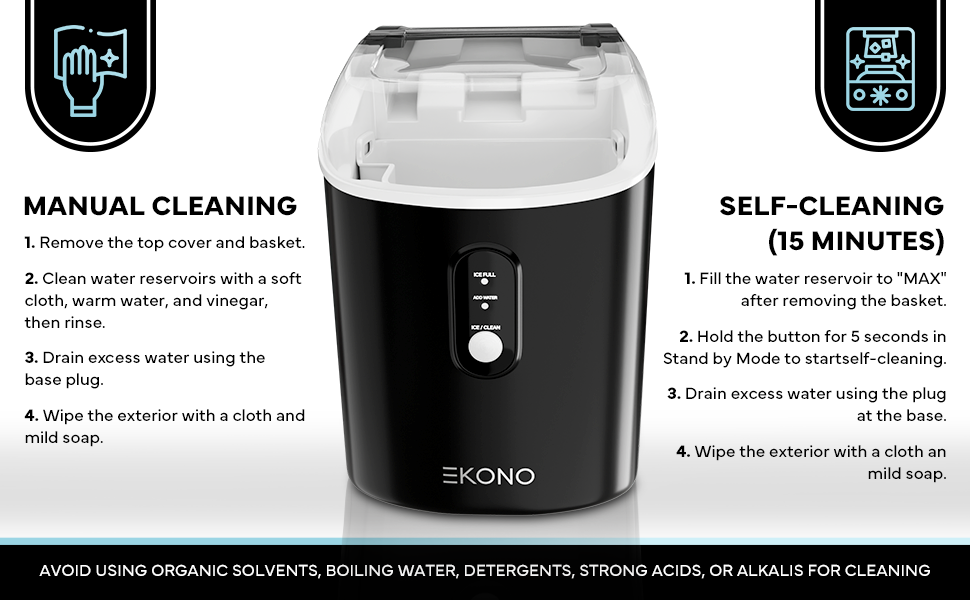
Image: A graphic comparing manual cleaning steps (removing cover, cleaning reservoirs, draining, wiping) with self-cleaning steps.
- Unplug the ice maker.
- Remove the top cover and ice basket.
- Clean the water reservoirs with a soft cloth, warm water, and a small amount of vinegar. Rinse thoroughly.
- Drain any remaining water using the base plug.
- Wipe the exterior with a clean, damp cloth and mild soap.
- Ensure all parts are dry before reassembling and using the machine.
Avoid using organic solvents, boiling water, detergents, strong acids, or alkalis for cleaning, as these can damage the appliance.
Descaling:
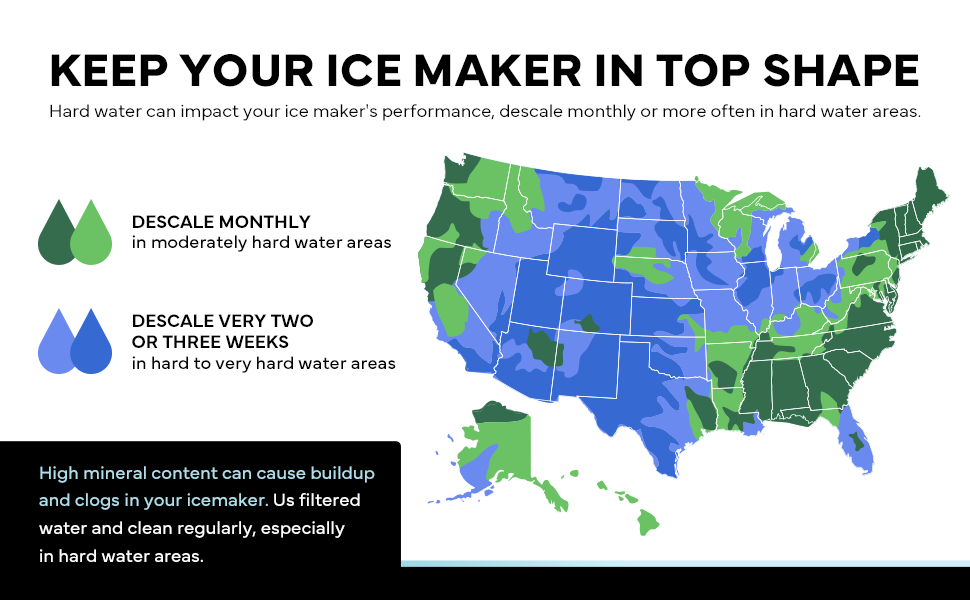
Image: A map of the United States indicating regions with varying water hardness, with recommendations to descale monthly in moderately hard water areas and every two to three weeks in hard to very hard water areas.
Hard water can lead to mineral buildup and affect your ice maker's performance. Descale your unit regularly:
- Moderately Hard Water Areas: Descale monthly.
- Hard to Very Hard Water Areas: Descale every two to three weeks.
Use filtered water to minimize mineral content and clean regularly, especially in hard water areas.
8. Troubleshooting
If you encounter issues with your ice maker, refer to the following common problems and solutions:
| Problem | Possible Cause | Solution |
|---|---|---|
| Ice maker not producing ice. | No water in reservoir; unit not plugged in; ambient temperature too high. | Fill water reservoir; ensure power connection; move unit to a cooler location. |
| 'ADD WATER' indicator is on. | Water level is low. | Add potable water to the reservoir up to the 'MAX' line. |
| 'ICE FULL' indicator is on. | Ice basket is full. | Remove ice from the basket. Production will resume automatically. |
| Ice tastes strange or has an odor. | Unit needs cleaning; old water in reservoir. | Perform a self-cleaning cycle or manual clean. Use fresh, filtered water. |
| Ice production is slow. | High ambient temperature; poor ventilation; mineral buildup. | Ensure proper ventilation; descale the unit if necessary. |
9. Specifications

Image: The EKONO Nugget Ice Maker with its dimensions (11.3"D x 8.66"W x 12.68"H) clearly labeled, and an ETL Listed certification logo.
- Model Name: EKONO NUGGET ICE MAKER
- Brand: EKONO
- Product Dimensions: 11.3"D x 8.66"W x 12.68"H
- Weight: Approximately 20 Pounds
- Ice Making Capacity: 34 lbs per 24 hours
- Voltage: 110 Volts
- First Ice Production: 6-7 minutes
- Noise Level: Below 43dB
- Certifications: ETL Listed
10. Warranty and Support
For warranty information and customer support, please refer to the documentation included with your purchase or visit the official EKONO website. Keep your proof of purchase for warranty claims.