1. Introduction
This manual provides essential information for the safe and effective use of your Mini Electric Screwdriver Cordless Set. This compact electric precision screwdriver kit is designed for various tasks including assembling and disassembling electronics, computer components, mobile phones, watches, and cameras. Please read this manual thoroughly before operation and retain it for future reference.
2. Package Contents
Upon opening the package, please verify that all the following items are included:
- Electric Screwdriver Handle (1 unit)
- S2 Bit Set (60 pieces)
- USB Charging Cable (1 unit)
- Metal Storage Tube (1 unit)
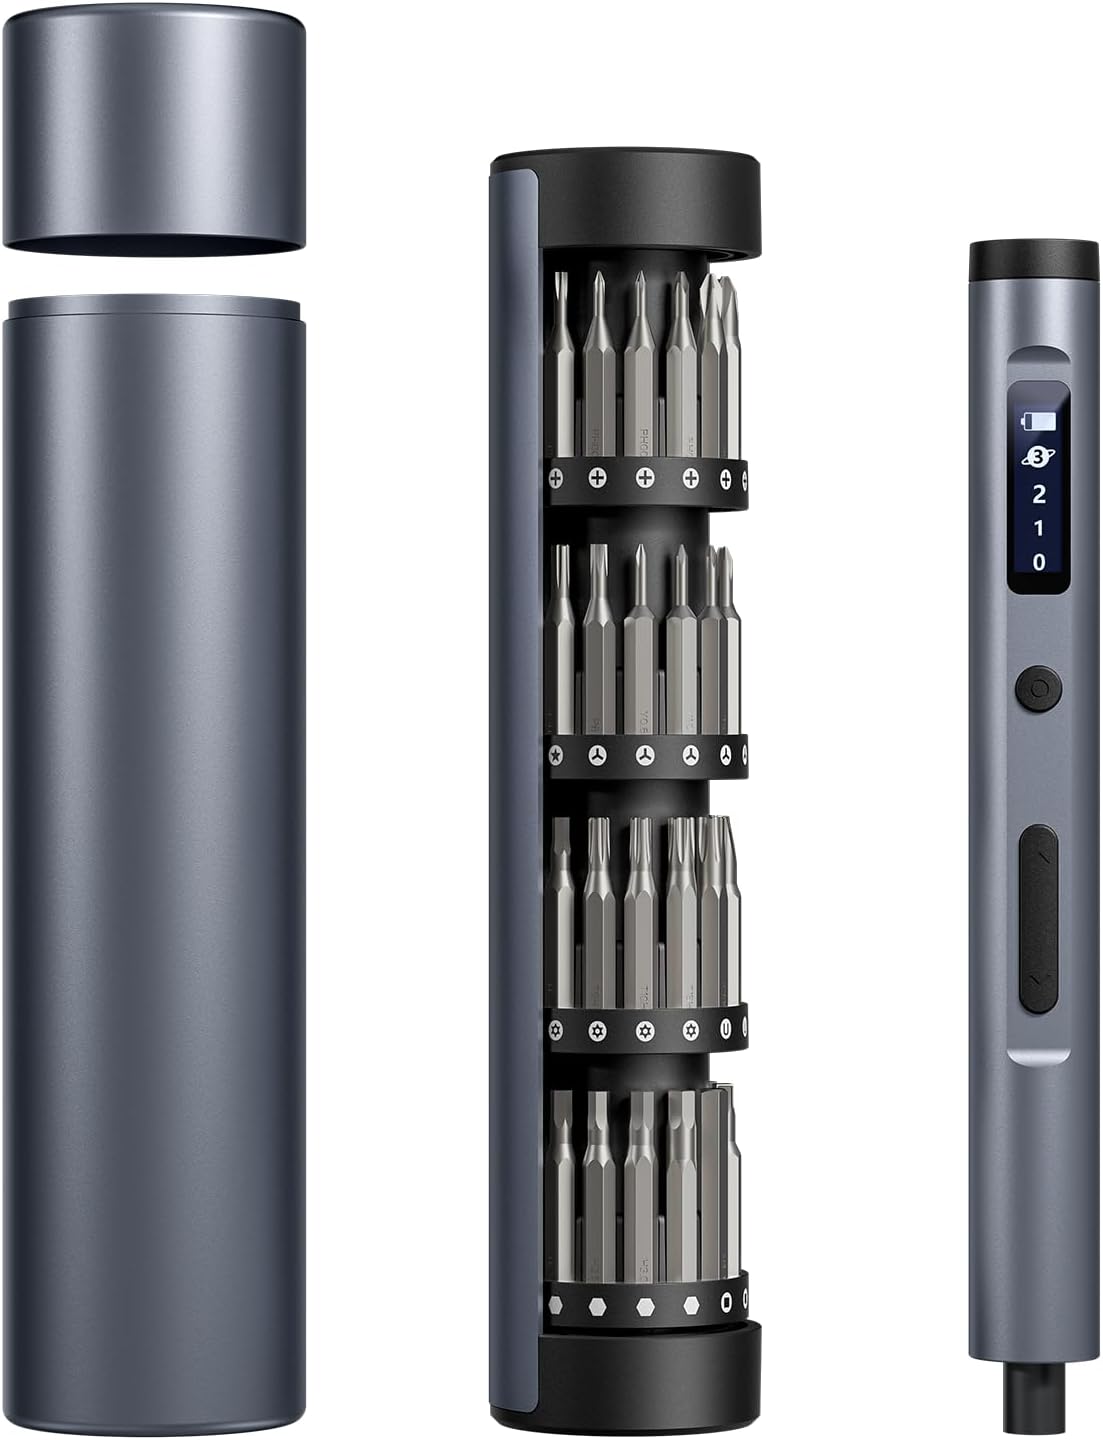
Image: The complete Mini Electric Screwdriver Cordless Set, including the screwdriver handle, the bit holder with 60 S2 bits, and the magnetic aluminum storage case.
3. Product Overview
The Mini Electric Screwdriver Cordless Set features a high-performance motor, adjustable torque settings, and an integrated LED lighting system for precision work. The ergonomic design ensures comfortable handling during extended use.
3.1 Components
- Electric Screwdriver Handle: Main unit with motor, battery, control buttons, and LED display.
- S2 Bits: A comprehensive collection of 60 precision bits for various screw types and sizes.
- Magnetic Storage Box: An aluminum case designed to securely hold the screwdriver and bits.
- Type-C Charging Port: Located on the screwdriver handle for convenient recharging.
- LED Lights: Four built-in lights illuminate the working area.
- LCD Screen: Displays charge status and selected torque level.

Image: An overhead view of the screwdriver, bit holder, and magnetic case, showcasing the sleek design and organized components.
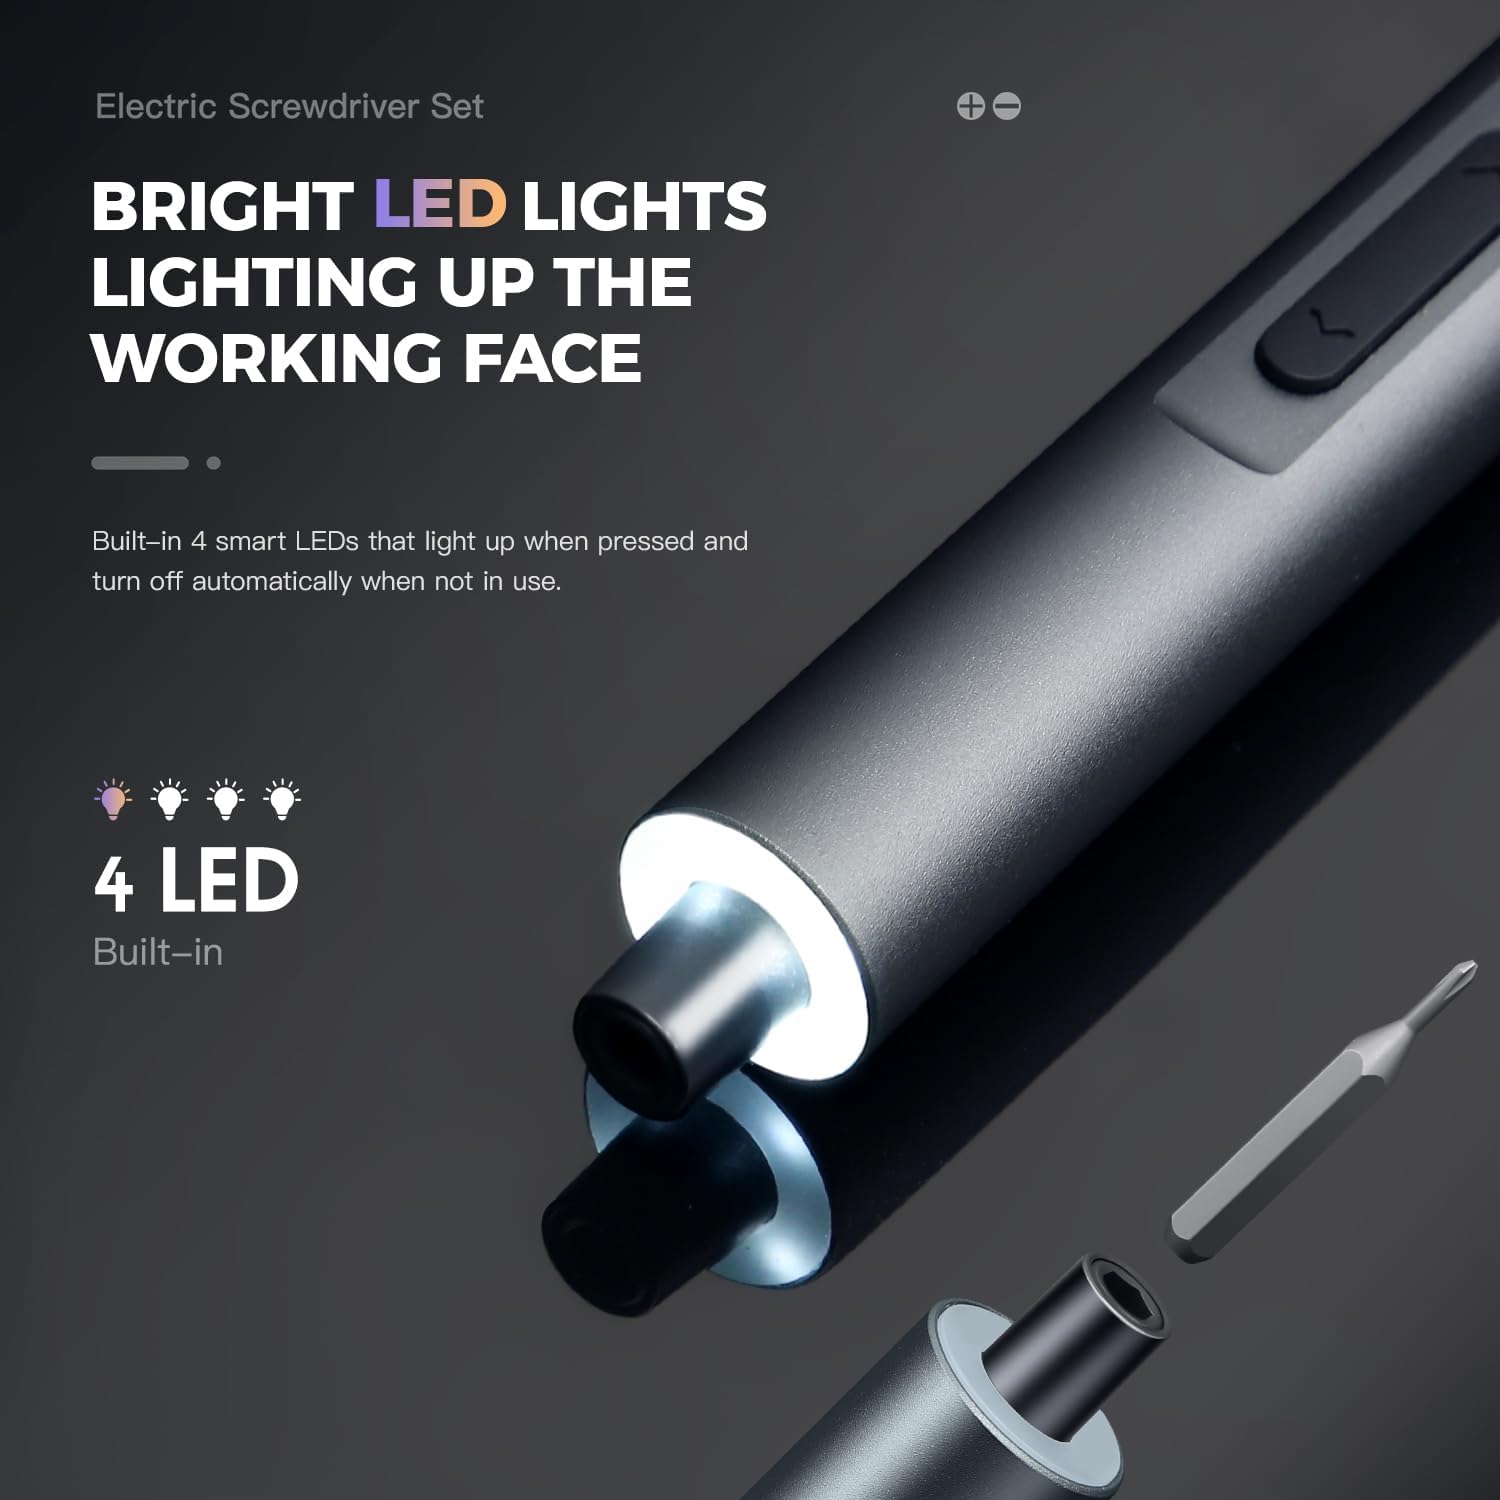
Image: A detailed view of the screwdriver's front end, highlighting the four integrated LED lights that provide illumination to the work surface.

Image: An X-ray style diagram illustrating the powerful magnetic motor and planetary gearbox within the screwdriver, designed for efficient and precise operation.
4. Setup
4.1 Charging the Screwdriver
Before first use, fully charge the electric screwdriver. The device features a built-in long-lasting battery.
- Locate the Type-C charging port on the screwdriver handle.
- Connect the provided USB charging cable to the screwdriver and a compatible USB power source (e.g., computer, wall adapter).
- The LCD screen will display the charging status. A full charge typically takes approximately 90 minutes.
- Once fully charged, disconnect the cable. The screwdriver can drive up to 1000 screws on a single charge.

Image: A close-up view of the screwdriver's Type-C charging port with the charging cable inserted, indicating the fast charging capability.
4.2 Installing a Bit
The screwdriver uses S2 bits that are magnetically held in place.
- Select the appropriate S2 bit from the magnetic storage tube for your task.
- Insert the bit firmly into the magnetic chuck at the tip of the screwdriver handle. The magnetic connection will secure the bit.
- To remove, simply pull the bit straight out.
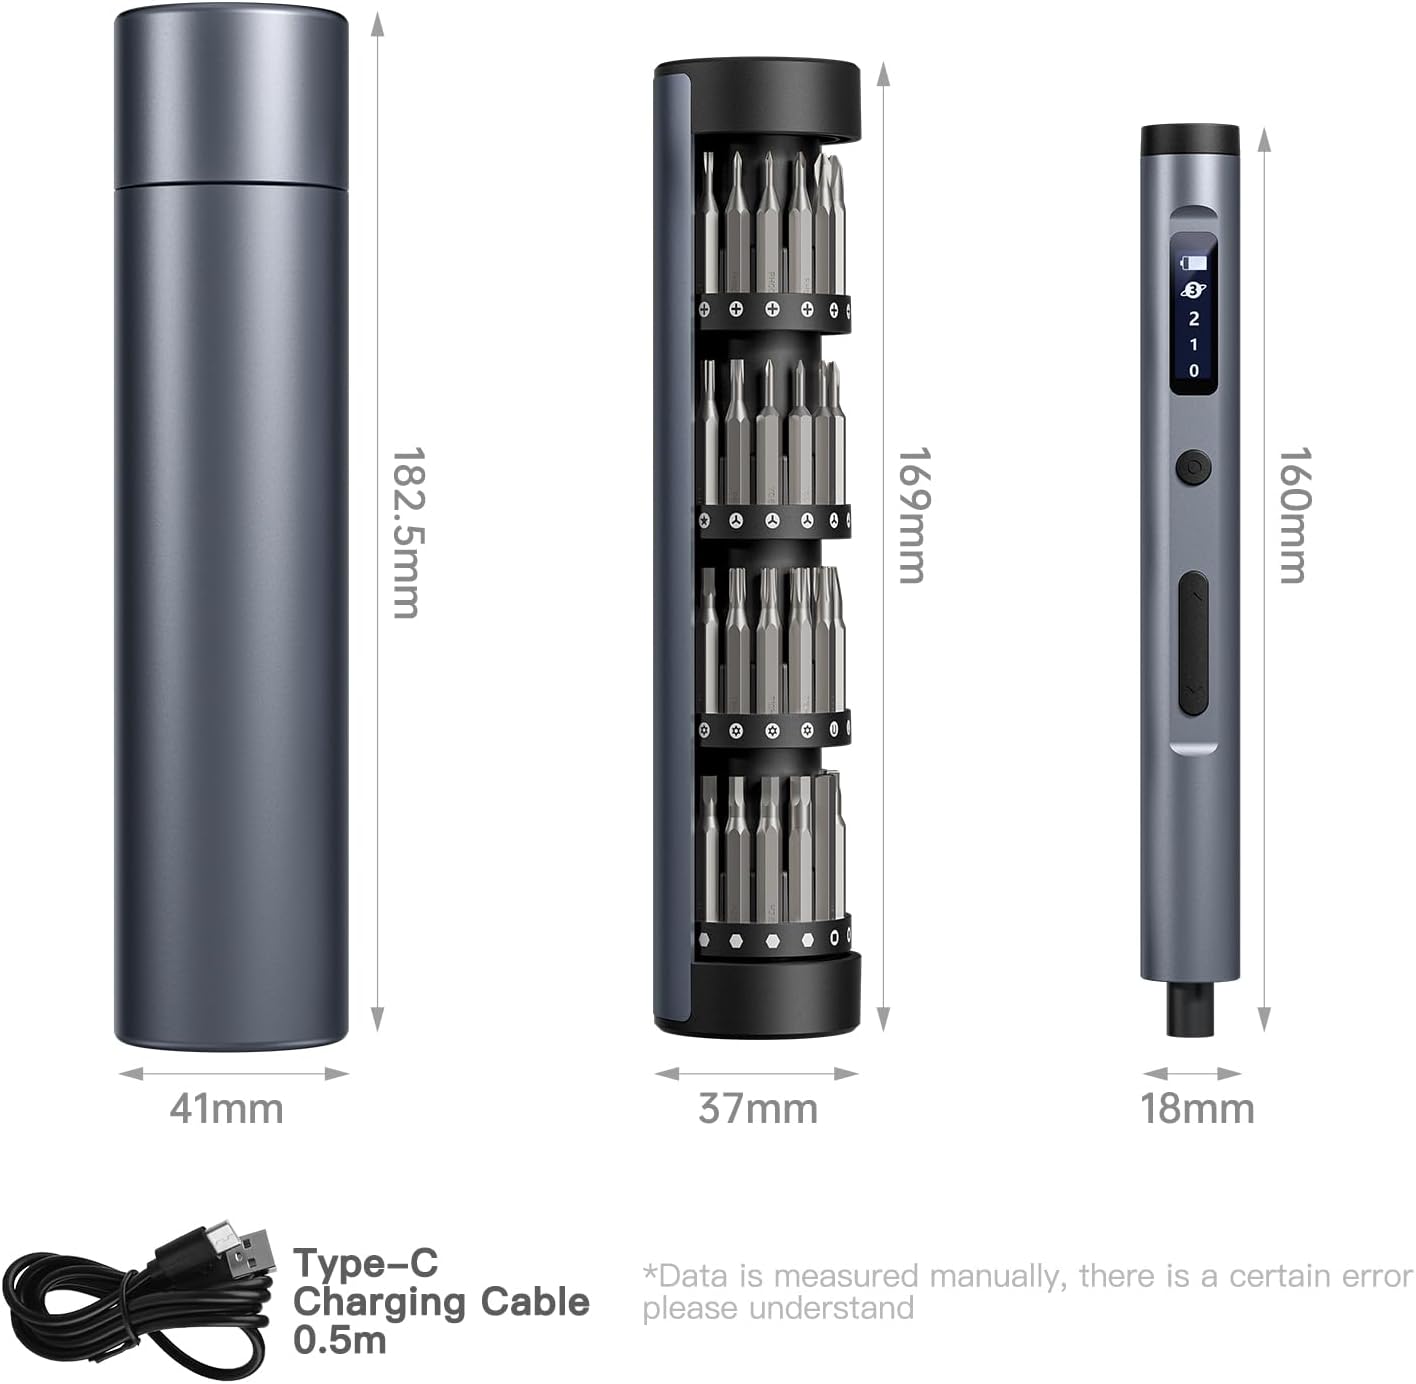
Image: An illustrative diagram demonstrating how the bits are stored within the roller mechanism of the case and how they are magnetically attached to the screwdriver.
5. Operating Instructions
5.1 Powering On/Off
The screwdriver does not have a dedicated power button. It activates when a direction button is pressed and automatically turns off when not in use for a period.
5.2 Adjusting Torque Levels
The screwdriver offers three adjustable torque levels (0.1 Nm to 0.35 Nm) for various applications. The LCD screen displays the current torque setting.
- 0.1 - 0.15 Nm: Ideal for delicate repairs on smartphones, watches, and glasses.
- 0.15 - 0.25 Nm: Suitable for smart speakers, laptops, and general electronics.
- 0.25 - 0.35 Nm: For tougher tasks such as desktops, cameras, and gaming equipment.
Use the torque adjustment button (usually labeled with '1', '2', '3' or similar indicator on the display) to cycle through the available torque settings. The LCD screen will update to show the selected level.

Image: A close-up of the screwdriver's OLED HD display, showing the battery charge level and the three adjustable torque gears (0, 1, 2, 3) for precise control.
5.3 Screwing/Unscrewing
The screwdriver has user-friendly switches for directional control.
- Select the appropriate bit and torque level.
- Position the bit onto the screw head.
- Press the forward button (usually indicated by an arrow pointing clockwise or a '+' symbol) to tighten screws.
- Press the reverse button (usually indicated by an arrow pointing counter-clockwise or a '-' symbol) to loosen screws.
- The four auto-on bright LED lights will illuminate the work area automatically when the screwdriver is in use.

Image: A person wearing white gloves uses the electric screwdriver to work on a circuit board inside a computer tower, demonstrating its application in electronics repair.
6. Maintenance
Proper maintenance ensures the longevity and optimal performance of your electric screwdriver.
- Cleaning: Wipe the screwdriver handle and bits with a dry, soft cloth after each use to remove dust and debris. Do not use harsh chemicals or abrasive cleaners.
- Storage: Always store the screwdriver and bits in the provided magnetic aluminum storage box when not in use. This protects the components from damage and keeps them organized. Store in a cool, dry place away from direct sunlight and moisture.
- Battery Care: To prolong battery life, avoid completely draining the battery frequently. Recharge the screwdriver when the battery indicator shows low charge. If storing for an extended period, charge the battery to approximately 50% every few months.
- Bit Inspection: Periodically inspect the S2 bits for wear or damage. Replace worn bits to ensure effective and safe operation.
7. Troubleshooting
If you encounter issues with your electric screwdriver, refer to the following common problems and solutions:
| Problem | Possible Cause | Solution |
|---|---|---|
| Screwdriver does not turn on. | Battery is depleted. | Charge the screwdriver using the provided USB Type-C cable. |
| Screwdriver lacks power or struggles with screws. | Incorrect torque setting selected. Battery is low. Bit is worn or incorrect size. | Increase the torque level. Recharge the battery. Ensure the correct and unworn bit is used. |
| Bit falls out or is not held securely. | Bit not fully inserted. Magnetic chuck is dirty. | Ensure the bit is pushed firmly into the chuck. Clean the magnetic chuck with a dry cloth. |
| LED lights do not turn on. | Screwdriver is not in operation. | The LED lights activate automatically when the screwdriver is in use (forward or reverse). |
If the problem persists after attempting these solutions, please contact customer support.
8. Specifications
Detailed technical specifications for the Mini Electric Screwdriver Cordless Set:
| Feature | Specification |
|---|---|
| Brand | Generic |
| Model Number | 60pcelectric |
| Material | Aluminum |
| Speed | 200 RPM |
| Power Source | Battery Powered |
| Voltage | 5 Volts (DC) |
| Item Torque | 0.1 - 0.35 Newton Meters (Adjustable) |
| Battery Type | Lithium Ion (1 included) |
| Charging Port | Type-C |
| Special Features | LED Light, Rechargeable, LCD Display |
| Item Weight | 1.04 pounds |
| Product Dimensions | 6.96 x 1.57 x 1.57 inches (Screwdriver and case) |

Image: A visual representation of the dimensions for the screwdriver, the bit holder, and the outer storage case, including the Type-C charging cable.
9. Safety Information
Please observe the following safety precautions to prevent injury and damage to the product:
- Always wear appropriate personal protective equipment, such as safety glasses, when operating power tools.
- Keep the work area clean and well-lit. Cluttered or dark areas invite accidents.
- Do not operate power tools in explosive atmospheres, such as in the presence of flammable liquids, gases, or dust.
- Keep children and bystanders away while operating a power tool. Distractions can cause you to lose control.
- Avoid accidental starting. Ensure the switch is in the off-position before connecting to battery pack, picking up or carrying the tool.
- Do not force the power tool. Use the correct power tool for your application.
- Disconnect the battery pack from the power tool before making any adjustments, changing accessories, or storing power tools.
- Store idle power tools out of the reach of children and do not allow persons unfamiliar with the power tool or these instructions to operate the power tool.
- Maintain power tools. Check for misalignment or binding of moving parts, breakage of parts and any other condition that may affect the power tool’s operation. If damaged, have the power tool repaired before use.
- Use the power tool, accessories and tool bits etc. in accordance with these instructions, taking into account the working conditions and the work to be performed.
- Do not expose power tools to rain or wet conditions. Water entering a power tool will increase the risk of electric shock.
- Use only with the specified charging cable and power source (5 Volts DC).
10. Warranty and Support
Information regarding product warranty is not explicitly provided in the product details. For specific warranty terms and conditions, please refer to the product packaging or contact the retailer where the product was purchased.
For technical support, troubleshooting assistance beyond this manual, or inquiries about replacement parts, please contact the manufacturer or your point of purchase. Please have your product model number (60pcelectric) and purchase date available when contacting support.