Introduction
Thank you for choosing the Fdsutvit 1.5 Cu Ft Steel Security Safe Box. This manual provides essential information for the safe and efficient operation of your new security safe. Please read it thoroughly before installation and use, and keep it for future reference.

Figure 1: Fdsutvit 1.5 Cu Ft Steel Security Safe Box, designed for securing valuables.
Safety Information
- Always keep emergency keys in a secure location away from the safe. Do not store them inside the safe.
- Ensure the safe is securely mounted to prevent unauthorized removal.
- Do not expose the safe to extreme temperatures or humidity.
- Keep children away from the safe and do not allow them to play with the keypad or keys.
- Replace batteries promptly when the low battery indicator appears to avoid lockouts.
Parts List
The following components are included with your Fdsutvit Safe Box:

Figure 2: Included components for the Fdsutvit Safe Box.
- Fdsutvit Safe Box (1)
- Removable Shelf (1)
- Instruction Manual (1)
- Fireproof Waterproof Bag (1)
- Type-C Cable (1)
- Emergency Keys (2)
- Expansion Screws (4)
- Anti-scratch Floor Mat (1)
Setup
1. Initial Unlocking (Using Emergency Key)
- Locate the emergency keyhole, usually hidden behind the keypad cover or a small panel.
- Insert one of the emergency keys into the keyhole.
- Rotate the key clockwise while simultaneously turning the knob clockwise to open the safe door.
- Once open, remove the key.
Video 1: Demonstrates how to open the safe using the emergency key. This method is crucial for initial access and in case of battery depletion or forgotten password.
2. Battery Installation
The safe requires 4 AA batteries (not included) for the electronic keypad to function.
- Open the safe door.
- Locate the battery compartment on the inside of the door.
- Insert 4 AA batteries, ensuring correct polarity (+/-).
- Close the battery compartment cover.

Figure 3: The safe's keypad and various unlocking methods, including emergency power via Type-C port.
3. Mounting the Safe
For enhanced security, it is highly recommended to mount the safe to a wall or floor using the provided expansion screws.
- Choose a suitable location for mounting.
- Mark the drilling points through the pre-drilled holes inside the safe.
- Drill holes in the wall or floor using an appropriate drill bit.
- Insert the expansion screws and secure the safe firmly.

Figure 4: Steps for securely mounting the safe to a wall.
Operating Instructions
1. Opening with Digital Keypad
The initial password is 159#.
- Input the default password: 159.
- Press the # key. The indicator light will turn green.
- Within 5 seconds, turn the knob clockwise to open the safe door.
Video 2: Demonstrates how to open the safe using the digital keypad with the default password.
2. Setting a New Password
You can change the password to a personal 3-8 digit code.
- Open the safe door.
- Locate and press the red setting button on the inside of the door (usually near the hinge).
- Input your new 3-8 digit password on the keypad.
- Press the # key to confirm.
- Repeat steps 3 and 4 to confirm the new password. The indicator light will flash green and beep to confirm success.
Video 3: Demonstrates the process of setting a new password for the safe.
3. Silent Mode (Mute Function)
You can turn off the keypad sound for silent operation.
- To turn off the sound: Input *633 on the keypad.
- To turn on the sound: Input *66 on the keypad.

Figure 5: The safe features a smart alarm system and an optional silent keypad mode.
Video 4: Demonstrates how to activate and deactivate the silent mode for the keypad.
4. Emergency Power (Type-C Port)
In case of battery depletion, you can power the safe externally using a Type-C cable (included) connected to a power source.
- Connect the Type-C cable to the port on the keypad.
- Input your password and press #.
- Turn the knob clockwise to open the safe.
5. Alarm System
The safe is equipped with a strong alarming system for enhanced security:
- Incorrect Password Alarm: After 3 consecutive incorrect password attempts, the safe will trigger an alarm beep and lock the keypad for 20 seconds.
- Extended Lockout: After 6 consecutive incorrect password attempts, the safe will enter a 5-minute lockdown with a continuous alarm.
6. Removable Shelf
The safe includes a removable shelf to help organize your valuables and maximize storage efficiency.
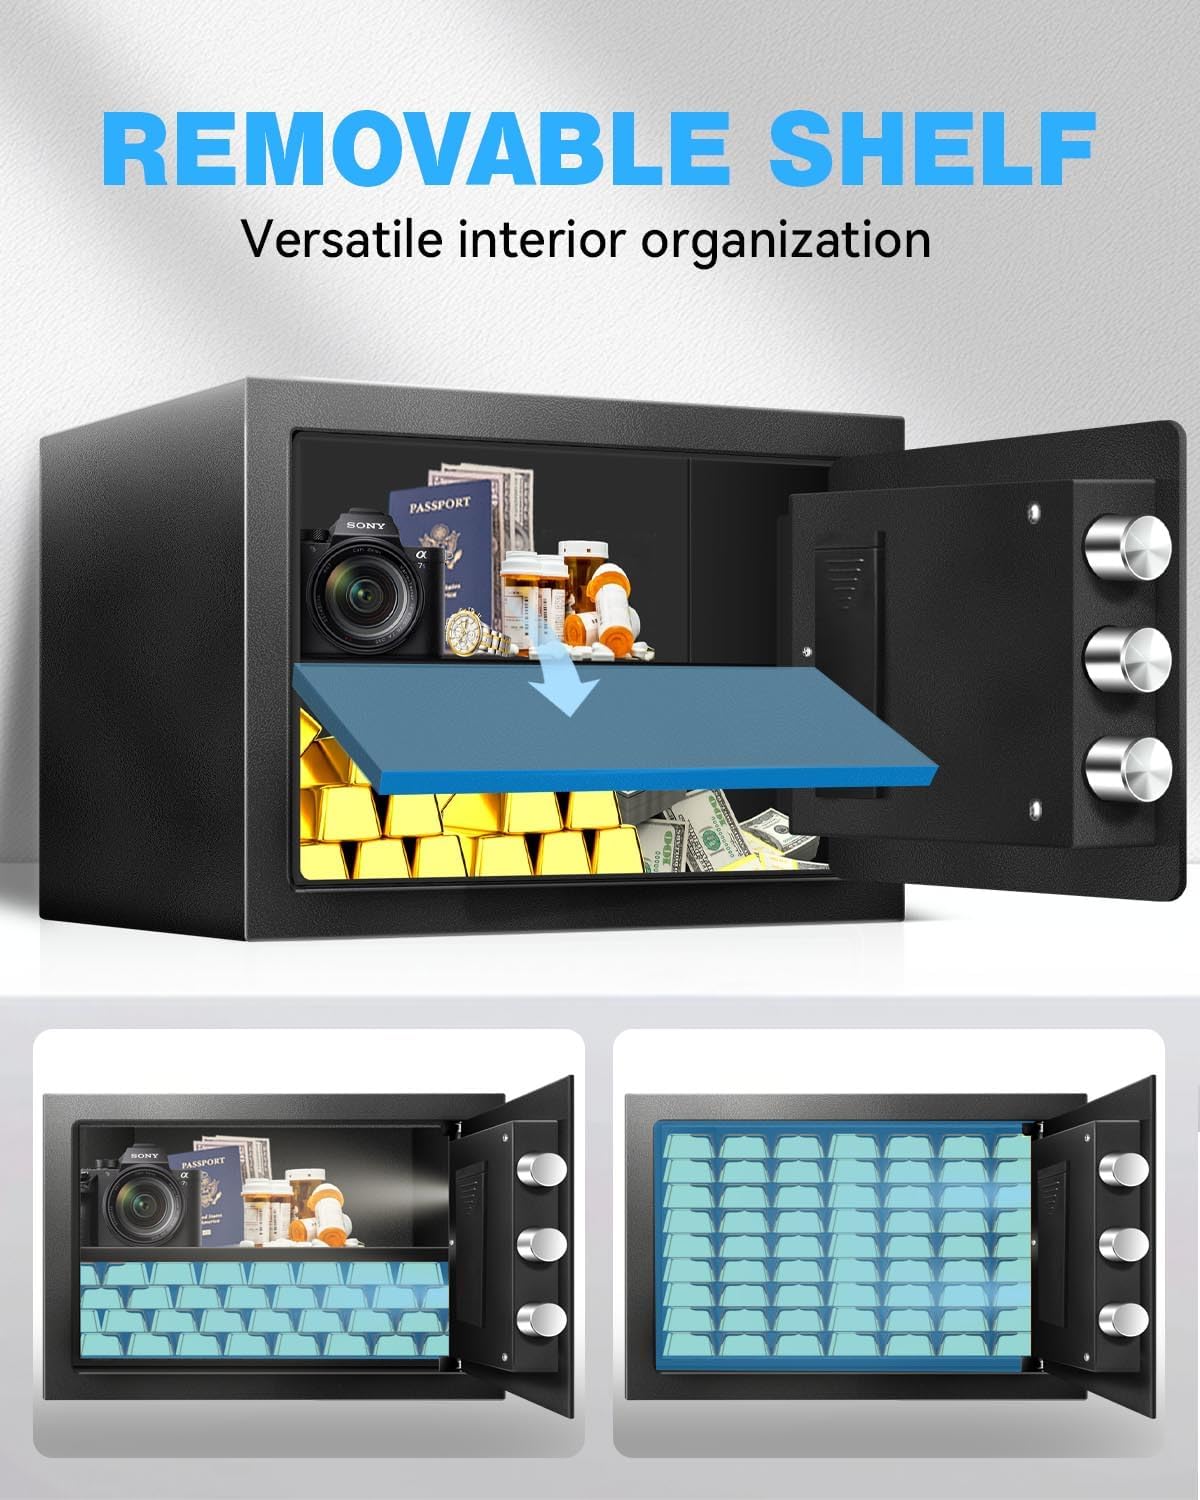
Figure 6: The removable shelf allows for versatile interior organization.
7. Sensor Light
The safe features a built-in motion sensor light that illuminates the interior when the door is opened, making it easier to see your valuables.

Figure 7: Built-in motion sensor lights illuminate the safe's interior.
Maintenance
- Cleaning: Wipe the safe's exterior with a soft, damp cloth. Avoid abrasive cleaners or solvents.
- Battery Replacement: Replace all 4 AA batteries when the low battery indicator appears on the keypad. Use high-quality alkaline batteries for optimal performance.
- Key Care: Keep emergency keys clean and dry. Do not force them into the lock.
Troubleshooting
| Problem | Possible Cause | Solution |
|---|---|---|
| Safe does not open with password. | Incorrect password entered; batteries are low or dead. | Verify password and re-enter. Replace batteries or use emergency Type-C power. Use emergency key to open. |
| Keypad is unresponsive. | Batteries are dead; keypad is locked due to multiple incorrect entries. | Replace batteries or use emergency Type-C power. Wait for the lockout period to expire (20 seconds or 5 minutes). |
| Alarm sounds unexpectedly. | Multiple incorrect password entries; physical tampering detected. | Ensure correct password entry. Check for any signs of tampering. The alarm will reset after a correct entry or lockout period. |
| Door does not close properly. | Obstruction in the door frame; locking bolts are extended. | Check for any items blocking the door. Ensure the knob is turned to retract the locking bolts before closing. |
Specifications
| Feature | Detail |
|---|---|
| Brand | Fdsutvit |
| Model | FW-25G |
| Product Dimensions | 9.84"D x 13.77"W x 9.84"H |
| Capacity | 1.5 Cubic Feet |
| Material | Alloy Steel |
| Lock Type | Electronic Combination Lock |
| Special Features | Alarm System, Anti-Theft, Combination Lock, Removable Shelf, Sensor Light |
| Mounting Type | Floor Mount |
| Item Weight | 16.52 Pounds |
| Power Source | 4 x AA Batteries (not included) |
Warranty and Support
For warranty information or technical support, please refer to the contact details provided on the product packaging or visit the official Fdsutvit website. Keep your purchase receipt as proof of purchase for warranty claims.
For additional assistance, you may contact Fdsutvit customer service through their Amazon store page: Fdsutvit Store.


