APPASO APS137-04
APPASO Touchless Kitchen Faucet with Pull Down Sprayer
Model: APS137-04 | Brand: APPASO
Introduction
Thank you for choosing the APPASO Touchless Kitchen Faucet. This manual provides essential information for the safe and efficient installation, operation, and maintenance of your new faucet. Please read these instructions thoroughly before installation and retain them for future reference.

Image: The APPASO Touchless Kitchen Faucet in brushed nickel, demonstrating the motion sensor activation with a hand.

Image: An overview highlighting key features such as hands-free technology, battery operation, three water modes, automatic shut-off, and premium quality construction.
Safety Information
- Ensure the main water supply is turned off before beginning any installation or maintenance.
- Wear appropriate personal protective equipment, such as safety glasses and gloves, during installation.
- Do not overtighten connections, as this may cause damage to the faucet or plumbing.
- Verify all connections are secure and leak-free before restoring water supply.
- This faucet requires 4 AA batteries for the motion sensor. Ensure correct battery polarity during installation.
- Keep the control box and battery box in a dry location, away from direct water exposure.
Package Contents
Please verify that all components are present before beginning installation:

Image: An exploded diagram showing all parts included in the APPASO faucet package, labeled for identification.
| Item No. | Component | Quantity |
|---|---|---|
| 1 | Kitchen Faucet Assembly | 1 |
| 2 | Hot and Cold Water Inlet Pipes | 1 set |
| 3 | Weight Ball | 1 |
| 4 | Lock Nuts and Washers | 1 set |
| 5 | Deck Plate (optional for 3-hole sinks) | 1 |
| 6 | Control Box | 1 |
| 7 | Battery Box | 1 |
| 8 | Battery Box Holder | 1 |
Setup and Installation
Pre-Installation Checklist
- Ensure your sink has 1 or 3 holes for installation. The included deck plate is for 3-hole sinks.
- Confirm the mounting hole size is between 1-1/4" to 1-1/2" (3.2-3.5 cm).
- Verify countertop thickness is no more than 1-3/5" (4 cm).
- Gather necessary tools: adjustable wrench, screwdriver, plumber's putty or silicone sealant, flashlight.
Installation Steps
Follow these steps carefully for proper installation. It is recommended to have assistance during certain steps.

Image: A visual guide illustrating the eight key steps for installing the APPASO Touchless Kitchen Faucet.
- Prepare the Sink: Turn off the main water supply. Remove any existing faucet. Clean the mounting area. If using the deck plate for a 3-hole sink, place it over the holes.
- Mount the Faucet: Insert the faucet body through the hole(s) in the sink/deck plate. From underneath, secure it with the rubber washer, metal washer, and lock nut. Hand-tighten, then use a wrench to snug it, ensuring the faucet is aligned.
- Connect Water Lines: Connect the hot and cold water inlet pipes (pre-attached to the faucet) to your hot and cold water supply lines. Use an adjustable wrench to tighten connections, but do not overtighten.
- Install Control Box: Mount the control box in an accessible location under the sink using screws or adhesive. Connect the faucet's sensor cable and water lines to the control box as indicated in the diagram.
- Install Weight Ball: Attach the weight ball to the pull-down hose, typically about 6-8 inches from the end of the hose where it connects to the control box. This ensures the sprayer retracts properly.
- Connect Sprayer Hose: Connect the pull-down sprayer hose from the faucet to the designated port on the control box.
- Install Battery Box: Insert 4 AA batteries (not included) into the battery box, ensuring correct polarity. Mount the battery box using its holder in a dry, easily accessible location under the sink. Connect the battery box cable to the control box.
- Test for Leaks: Slowly turn on the main water supply. Check all connections for leaks. If leaks are present, tighten the connections slightly.
Battery Installation
The motion sensor requires 4 AA batteries for operation. These are not included in the package.
- Open the battery box cover.
- Insert 4 new AA batteries, observing the correct positive (+) and negative (-) terminals.
- Close the battery box cover securely.
- Connect the battery box cable to the control box.
Operating Instructions
Touchless vs. Manual Operation
The APPASO faucet offers both touchless and manual operation for convenience and hygiene.

Image: A comparison illustrating the hygienic benefits of touchless operation, reducing secondary contamination compared to conventional manual faucets.
Motion Sensor Operation
The faucet features an infrared motion sensor for hands-free operation.

Image: A visual guide demonstrating the activation of the infrared motion sensor by waving a hand near the sensor located at the base of the faucet.
- Activation: Ensure the manual handle is in the "open" position. Wave your hand within 10 cm (approximately 3.9 inches) of the sensor located at the base of the faucet. Water will begin to flow.
- Deactivation: Wave your hand near the sensor again to turn off the water.
- Automatic Shut-off: For water conservation and safety, the faucet will automatically shut off after 3 minutes of continuous flow if activated by the motion sensor.

Image: A detailed view of the intelligent chip within the faucet, indicating its fast response and automatic shut-off feature after 3 minutes, with a sensing distance of 10cm.
Manual Handle Operation
The faucet can also be operated manually using the side handle.
- Turn On/Off: Lift the handle to turn on the water and push it down to turn off.
- Adjust Temperature: Move the handle left for hot water and right for cold water.
- Adjust Flow: The further the handle is lifted, the greater the water flow.
Water Flow Modes
The pull-down sprayer offers three distinct water flow modes.

Image: Three distinct views of the faucet head demonstrating the Waterfall, Stream, and Sweep spray patterns.
- Waterfall Mode: Provides a wide, gentle sheet of water, ideal for rinsing large areas or delicate items.
- Soft Stream Mode: Delivers a steady, aerated stream for general washing and filling pots quickly without splashing.
- Sweep Mode: Offers a powerful, blade-like spray for cleaning stubborn food residues from dishes and the sink.
- To switch between modes, press the button located on the sprayer head.
Pull-Down Sprayer Function
The faucet features a pull-down sprayer with a flexible hose for extended reach.
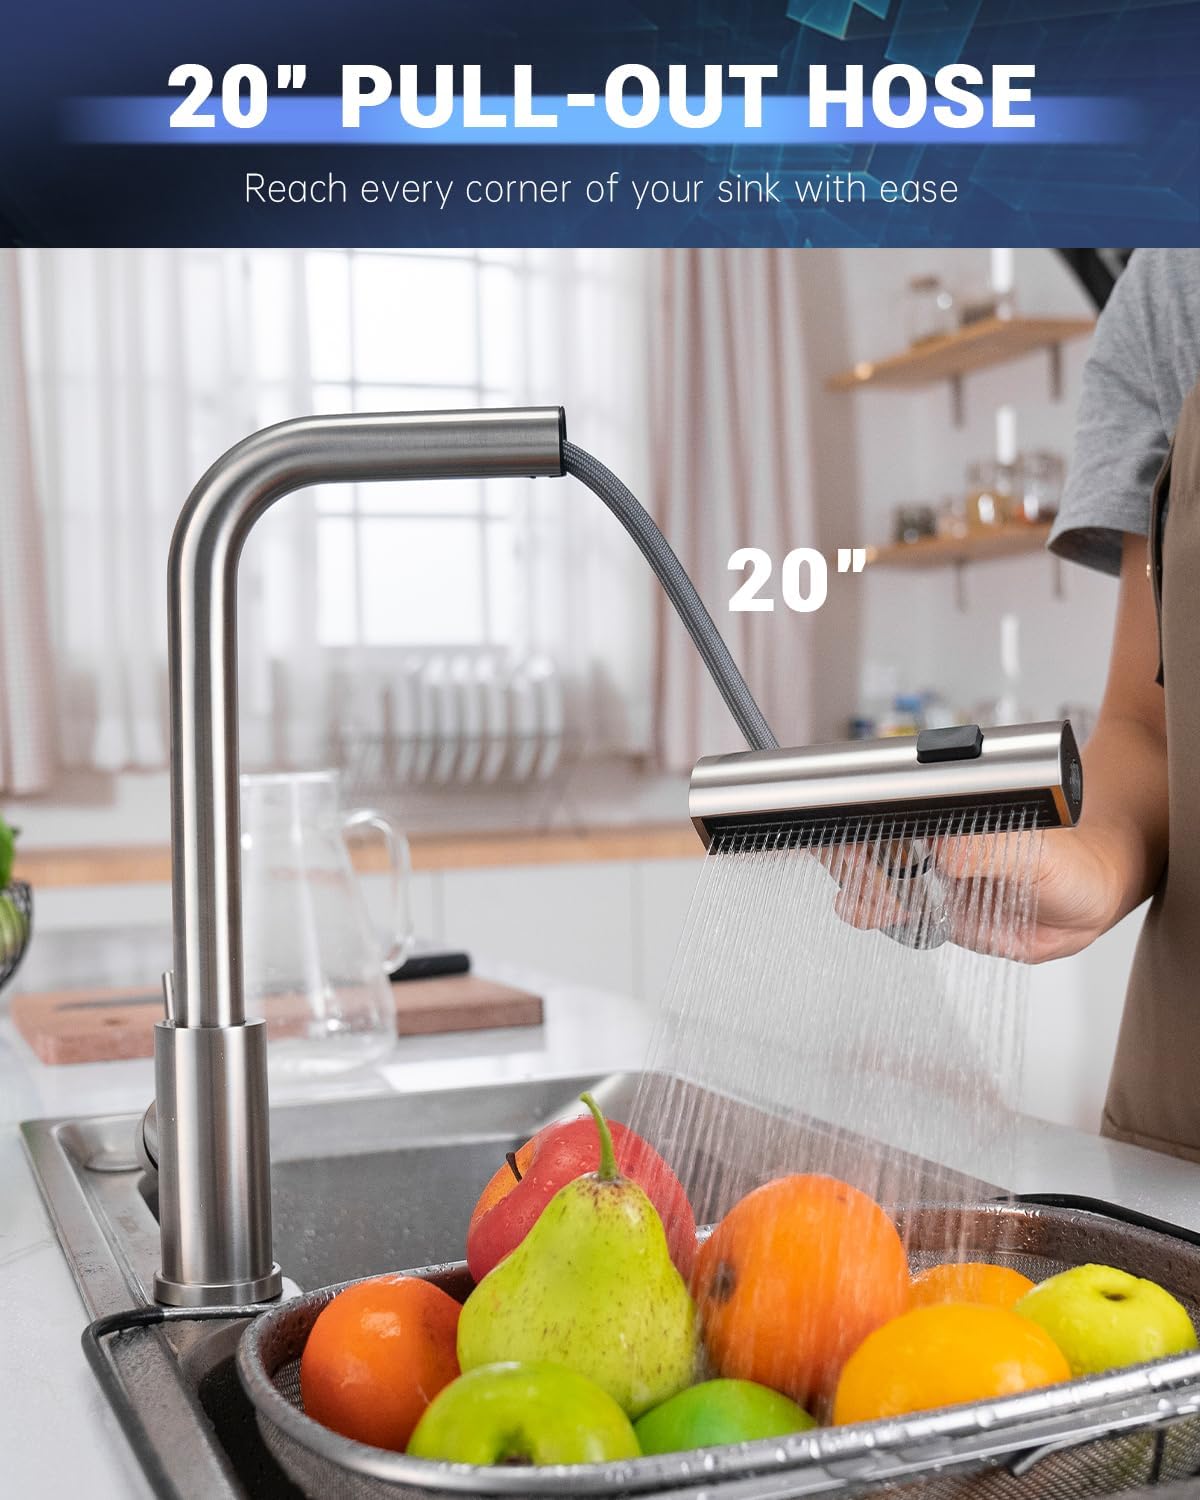
Image: The APPASO faucet with its pull-down sprayer extended, demonstrating its 20-inch reach for cleaning various areas of the sink.
- Gently pull the sprayer head downwards to extend the hose.
- The flexible hose allows you to direct water to all corners of your sink.
- When finished, release the sprayer head, and the weight ball will retract it back into place.
Maintenance
Cleaning the Faucet
The brushed nickel finish is designed to be spot-resistant, reducing fingerprints and water spots.
- Clean the faucet regularly with a soft, damp cloth.
- Avoid using abrasive cleaners, harsh chemicals, or scouring pads, as these can damage the finish.
- For stubborn spots, use a mild soap solution and rinse thoroughly.
Sensor Maintenance
Keep the motion sensor clean and unobstructed for optimal performance.
- Wipe the sensor window with a soft, dry cloth to remove any dust or water residue.
- Ensure no objects are blocking the sensor's path during operation.
Battery Replacement
When the sensor's response becomes slow or inconsistent, it may be time to replace the batteries.
- Locate the battery box under the sink.
- Open the cover and replace all 4 AA batteries with new ones, ensuring correct polarity.
- Close the cover and test the sensor operation.
- It is recommended to use high-performance alkaline batteries for best results.
Filter Cleaning
Over time, mineral deposits or debris can accumulate in the faucet's filter, affecting water flow.
- Turn off the water supply to the faucet.
- Carefully unscrew the aerator or filter screen from the end of the sprayer head.
- Rinse the filter under running water to remove any debris. For stubborn mineral deposits, soak in a vinegar solution.
- Reassemble the filter and aerator, then turn the water supply back on and check for leaks.
Troubleshooting
Refer to this table for common issues and their solutions.
| Problem | Possible Cause | Solution |
|---|---|---|
| No water flow (manual or sensor) | Water supply turned off; clogged filter; kinked hose. | Check water supply valves; clean filter; straighten hose. |
| Sensor not activating water | Manual handle closed; dead batteries; obstructed sensor; sensor cable disconnected. | Open manual handle; replace batteries; clean sensor window; check sensor cable connection to control box. |
| Water flow is weak | Clogged aerator/filter; low water pressure; kinked hose. | Clean aerator/filter; check household water pressure; straighten hose. |
| Faucet leaks from connections | Loose connections; damaged O-rings/washers. | Tighten connections (do not overtighten); inspect and replace O-rings/washers if damaged. |
| Sprayer does not retract fully | Weight ball improperly positioned or obstructed; hose kinked. | Adjust weight ball position; clear any obstructions; straighten hose. |
| Sensor activates intermittently or stays on | Low batteries; sensor interference; faulty sensor. | Replace batteries; ensure no reflective surfaces or constant movement near sensor; contact support if issue persists. |
Specifications

Image: Detailed diagram illustrating the dimensions of the faucet and requirements for sink hole count, mounting hole size, and countertop thickness.
| Feature | Detail |
|---|---|
| Model Name | APS137-04 |
| Material | Stainless Steel |
| Finish Type | Brushed Nickel |
| Mounting Type | Deck Mount |
| Number of Handles | 1 |
| Hole Count | 1 (or 3 with deck plate) |
| Maximum Flow Rate | 1.8 Gallons Per Minute (GPM) |
| Spout Height | 13.8 Inches (350mm) |
| Spout Reach | 6.7 Inches (170mm) |
| Hose Length | 27.5 Inches (PEX supply lines) |
| Special Features | 360° Swivel, Pull Down Sprayer, Touchless Operation, Waterfall Mode, Automatic Shut-off (3 min) |
| Power Source | 4 x AA Batteries (not included) |
| Product Dimensions | 7"D x 9.8"W x 13.8"H |
| Item Weight | 4.97 pounds |

Image: A close-up view emphasizing the high-quality 304 stainless steel construction of the faucet, noting its corrosion resistance, high strength, and stability.
Warranty and Support
APPASO products are manufactured to high-quality standards and are backed by a manufacturer's warranty. For specific warranty details, please refer to the warranty card included with your purchase or visit the official APPASO website.
If you encounter any issues or have questions regarding your APPASO Touchless Kitchen Faucet, please contact APPASO customer support for assistance. You can typically find contact information on the product packaging or the brand's official website.
Online Support: For additional resources, FAQs, and product registration, please visit the APPASO official website.
Ask a question about this manual
Ask about setup, troubleshooting, compatibility, parts, safety, or missing instructions. Manuals+ will review the question and use this page’s manual context to help answer it.