ewtydvgg9031
Independence Eagle U.S.A. Flag Digital Alarm Clock User Manual
Model: ewtydvgg9031 | Brand: Generic
Introduction
This user manual provides comprehensive instructions for the Independence Eagle U.S.A. Flag Digital Alarm Clock. It covers setup, operation, maintenance, and troubleshooting to ensure optimal performance and longevity of your device. Please read this manual thoroughly before using the alarm clock.
Product Overview
The Independence Eagle U.S.A. Flag Digital Alarm Clock is a compact and versatile device designed for timekeeping, alarm functions, and ambient lighting. It features a clear digital display and a unique patriotic design.

Figure 1: Front view of the alarm clock displaying time, date, and temperature.
Key features include:
- Digital Time Display: Shows current time in a clear, easy-to-read format.
- 7-Color LED Night Light: Adjustable LED lighting that changes colors, providing ambient illumination.
- Alarm Function: Configurable alarm to assist with wake-up routines.
- Temperature Display: Integrated sensor to show indoor temperature.
- Compact Design: Lightweight and portable cube shape, suitable for various settings.

Figure 2: The alarm clock demonstrating its 7-color LED glow feature.
Setup
Before using your alarm clock, please follow these steps for initial setup:
- Battery Installation:
The alarm clock requires 3 AA batteries (not included). Locate the battery compartment on the bottom of the unit. Open the cover, insert the batteries according to the polarity indicators (+/-), and then close the cover securely.

Figure 3: Battery compartment location and dimensions.
- Initial Power-On:
Once batteries are installed, the clock display should illuminate, and it will be ready for time and alarm settings.
Operating Instructions
This section details how to operate the various functions of your alarm clock.
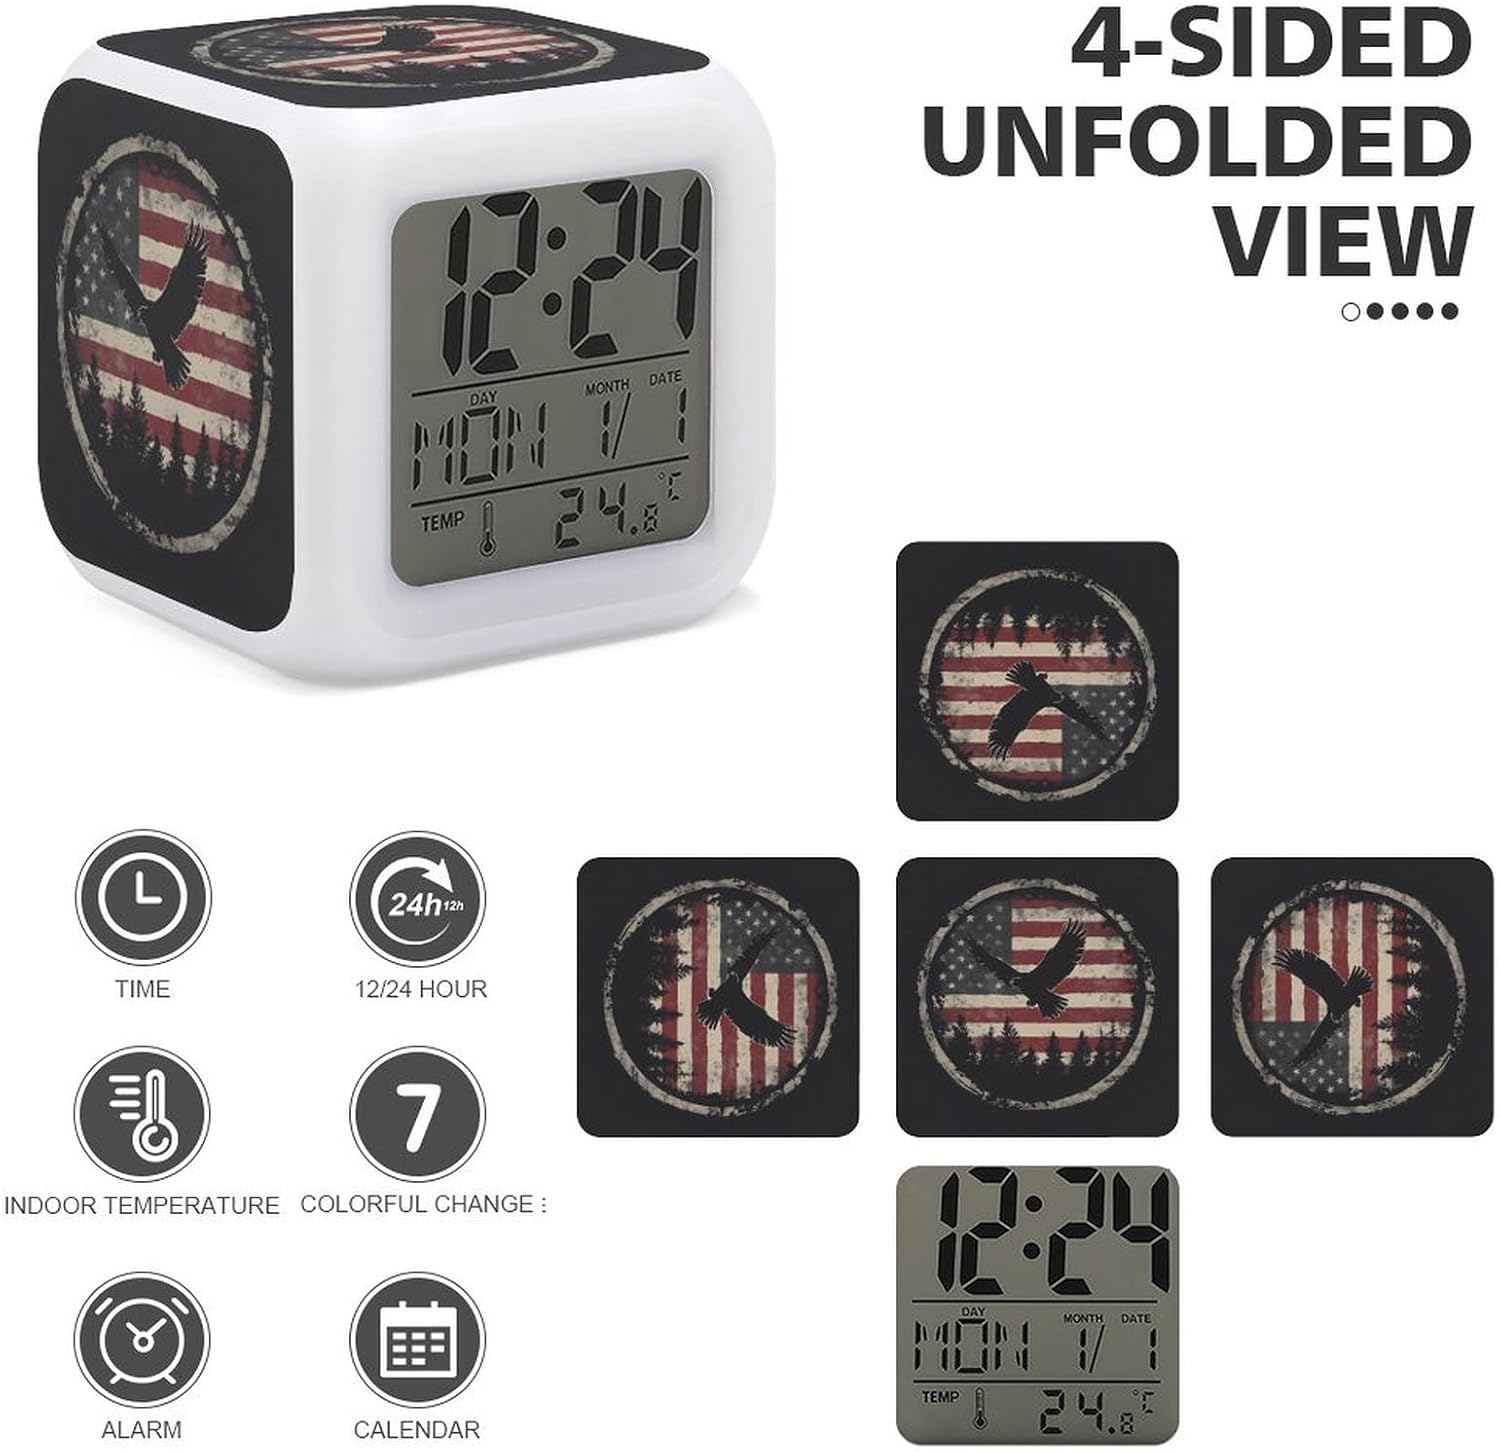
Figure 4: Overview of clock functions and display elements.
Setting Time and Date
- Press the "SET" button (location typically on the bottom or back) to enter time setting mode.
- Use the "UP" and "DOWN" buttons to adjust the hour. Press "SET" again to confirm and move to minutes.
- Repeat for minutes, year, month, and day.
- To switch between 12-hour and 24-hour format, press the "UP" button while in normal time display mode.
Setting the Alarm
- Press the "ALARM" button (location typically on the bottom or back) to enter alarm setting mode.
- Use the "UP" and "DOWN" buttons to set the desired alarm hour. Press "ALARM" again to confirm and move to minutes.
- Repeat for minutes.
- To activate or deactivate the alarm, press the "ALARM" button repeatedly until the alarm icon appears or disappears on the display.
- When the alarm sounds, press any button to snooze, or press the "ALARM" button to turn it off for the day.
Changing LED Colors
The clock features 7 different LED colors. To cycle through the colors or set a specific color:
- In normal time display mode, press the "LIGHT" button (location typically on the bottom or back).
- Each press will cycle to the next color. Hold the button to activate a continuous color-changing mode.
Temperature Display
The clock automatically displays the indoor temperature. To switch between Celsius and Fahrenheit, press the "DOWN" button while in normal time display mode.
Maintenance
Proper maintenance ensures the longevity and optimal performance of your alarm clock.
- Cleaning: Use a soft, dry cloth to wipe the surface of the clock. Do not use abrasive cleaners or solvents, as they may damage the finish or display.
- Battery Replacement: When the display dims or functions become erratic, it is time to replace the batteries. Follow the battery installation steps outlined in the "Setup" section.
- Storage: If storing the clock for an extended period, remove the batteries to prevent leakage and potential damage to the unit.
Troubleshooting
If you encounter issues with your alarm clock, refer to the following common problems and solutions:
| Problem | Possible Cause | Solution |
|---|---|---|
| Display is blank or dim. | Low or dead batteries; incorrect battery installation. | Replace with new AA batteries, ensuring correct polarity. |
| Alarm does not sound. | Alarm not activated; alarm volume too low (if applicable); incorrect alarm time set. | Ensure alarm is activated (alarm icon visible). Verify alarm time. (Note: This model may not have volume control). |
| Time is incorrect. | Time not set correctly; power interruption (battery removal). | Re-set the time and date following the "Setting Time and Date" instructions. |
| LED colors are not changing. | "LIGHT" button not pressed or held correctly. | Press or hold the "LIGHT" button to cycle through colors or activate color-changing mode. |
Specifications
The following are the technical specifications for the Independence Eagle U.S.A. Flag Digital Alarm Clock:
| Brand | Generic |
| Model Number | ewtydvgg9031 |
| ASIN | B0DMWJVGD1 |
| Color | Style (referring to the design pattern) |
| Shape | Cube (listed as Oval, Rectangular, Round, Square in data, but product is clearly cube) |
| Batteries Required | 3 x AA (not included) |
| Item Weight | 5.6 ounces (0.35 Pounds) |
| Number of Items | 1 |
| Package Dimensions | 3.35 x 3.35 x 3.35 inches |
| Manufacturer | AXEDENRRT |
| Date First Available | November 13, 2024 |
Customer Support
For any questions, concerns, or assistance regarding your Independence Eagle U.S.A. Flag Digital Alarm Clock, please contact the seller directly. Your satisfaction is our priority, and we are committed to providing support to ensure a positive experience with our product.
Please refer to your purchase platform for seller contact information.
Ask a question about this manual
Ask about setup, troubleshooting, compatibility, parts, safety, or missing instructions. Manuals+ will review the question and use this page’s manual context to help answer it.