Important Safety Information
Please read all instructions carefully before installation and use. Failure to follow these instructions could result in serious injury or death.
- This gate is designed for children from 6 to 24 months of age and for pets.
- This gate must be hardware-mounted with drilling for maximum strength and security. It is ideal for high-risk areas like the top of stairs.
- Always anchor screws into a stud for drywall installations. Not suitable for metal surfaces without appropriate anchors.
- Never use this gate at the top of stairs without proper hardware mounting.
- Regularly check all fasteners to ensure they are tight and secure.
- Never leave children unattended near the gate.
Product Overview
The Cumbor 34" Extra Tall No Bottom Bar Baby Gate provides a secure barrier for doorways, stairways, and other openings. Its hardware-mounted design ensures maximum stability, while the no-bottom-bar feature eliminates tripping hazards. The gate is designed for easy one-handed operation and offers a wide walk-through space.
Key Features:
- Hardware-Mounted: Ensures maximum safety and stability, especially for stairs.
- Extra Tall & Expandable: 34" tall, fits openings 29.2–43 inches wide.
- No Bottom Bar: Eliminates tripping hazards for safe passage.
- Double-Lock Safety: Prevents toddlers from opening the gate easily.
- One-Handed Operation: Convenient for busy parents.
- Two-Way Opening: Gate swings open in both directions.
- Auto-Close & Stay-Open: Automatically closes from any angle, or stays open at 90 degrees.
Package Contents:
- Cumbor Baby Gate Assembly
- Wall Mounting Hardware (screws, anchors)
- Installation Templates
- Hexagon Wrench
Installation Guide
Proper installation is crucial for the safety and functionality of your Cumbor Baby Gate. This gate requires drilling for secure hardware mounting.
Before You Begin:
- Measure Your Opening: Ensure your opening is between 29.2 and 43 inches wide. Measure both the top and bottom mounting points.
- Gather Tools: You will need an electric drill, appropriate drill bits (5/64" for wood/drywall, 5/16" for concrete/brick), a stud finder (for drywall), a pencil, and a tape measure.
- Identify Wall Material: The type of wall material (drywall with stud, wooden wall, concrete, or brick) will determine the specific hardware and drill bits needed.
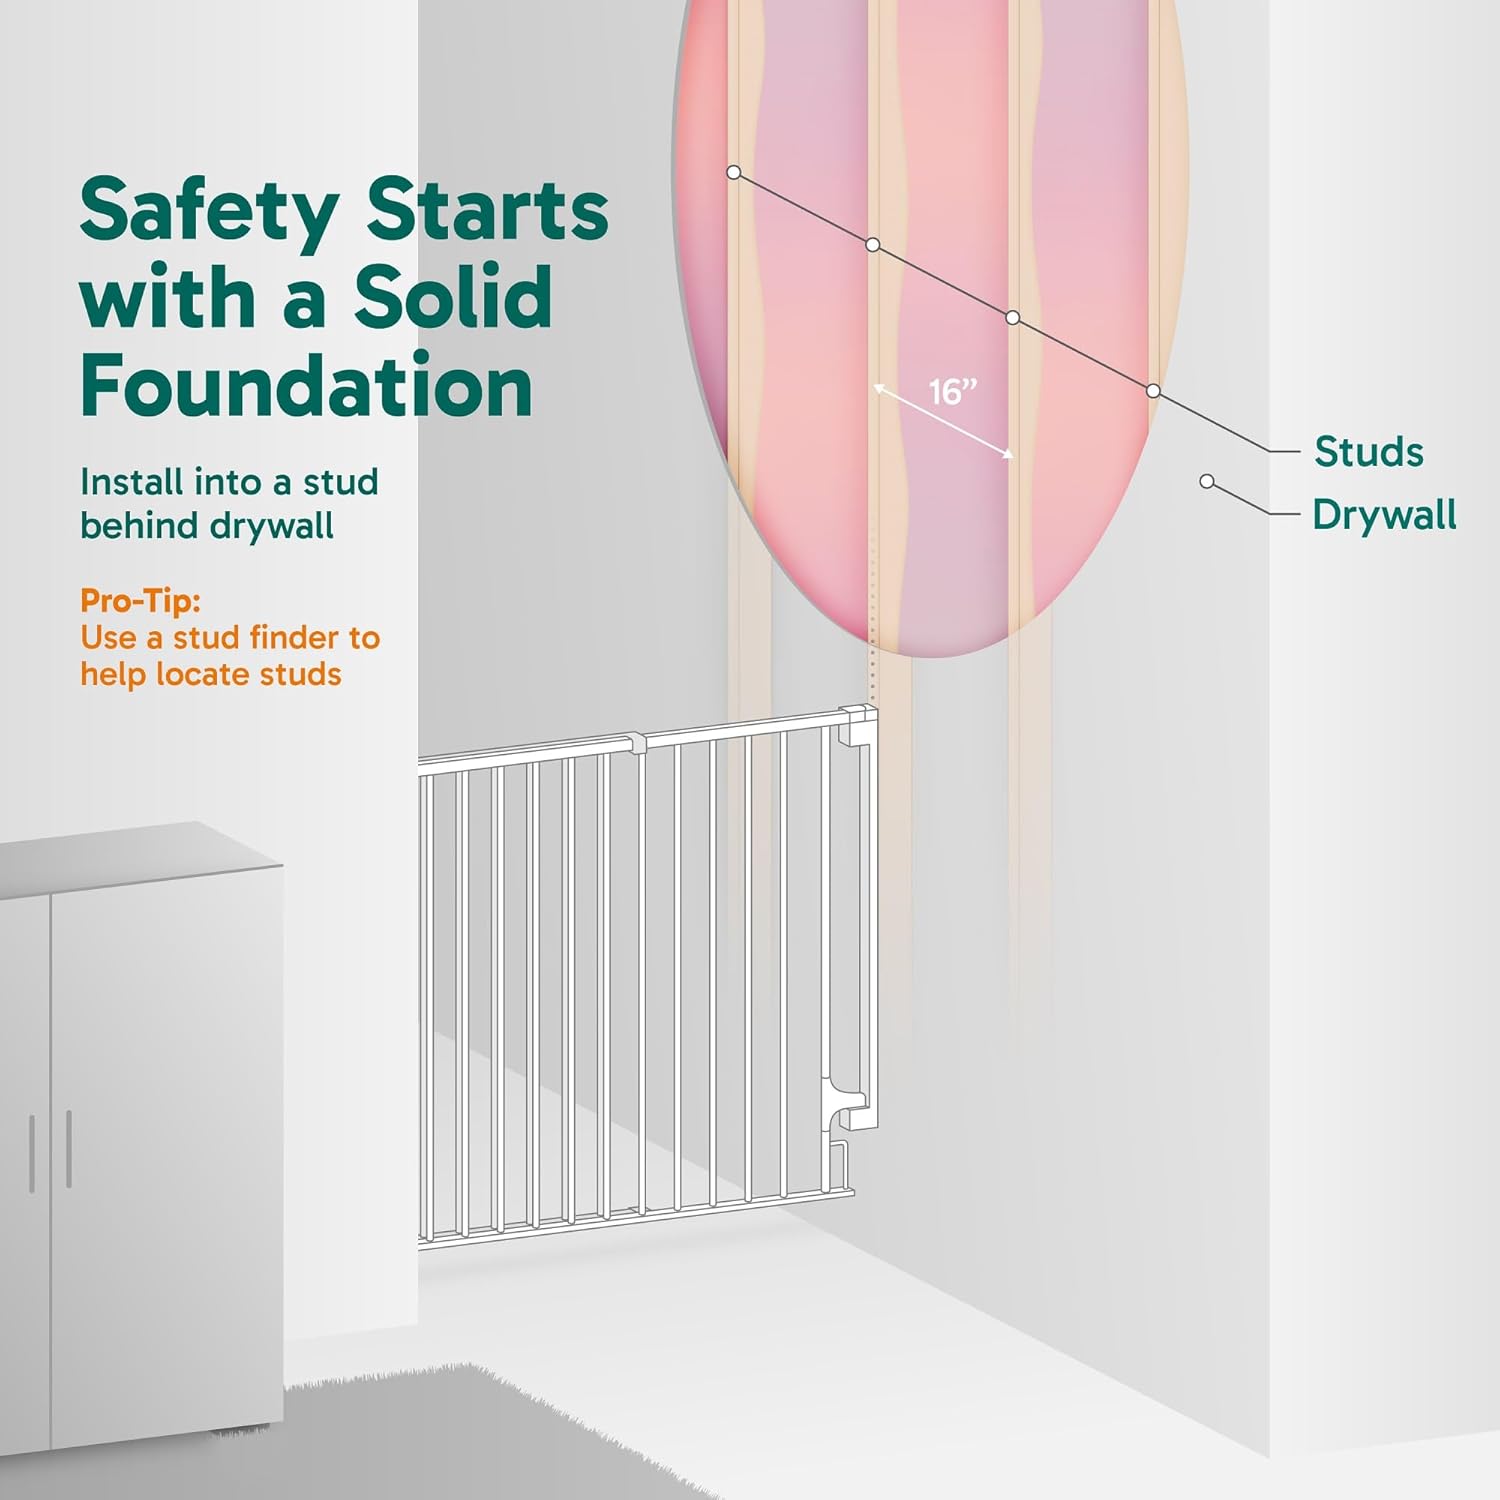
Image: Use a stud finder to locate studs for secure drywall installation.

Image: Tools for drywall and wooden walls: Electric Drill, 5/64" Drill Bit, Short Screws, Stud Finder.

Image: Tools for concrete and brick walls: Electric Drill, 5/16" Drill Bit, Long Screws, Wall Anchors.
Step-by-Step Installation:
- Position Templates: Place the provided installation templates vertically on both sides of your opening. Ensure they are parallel and the distance to both edges is the same. The bottom of the template should be approximately 2 inches from the floor.
- Mark Drill Holes: Using a pencil, mark the 5 designated drill holes on each template.
- Pre-Drill Holes: Remove the templates. Using the appropriate drill bit for your wall material, pre-drill holes at the marked locations.
- Install Mounting Brackets: Secure the gate's mounting brackets to the wall using the provided screws. For drywall, ensure screws are anchored into studs. For concrete/brick, use wall anchors.
- Attach Gate: With assistance, lift the gate and align it with the installed mounting brackets. Secure the gate to the brackets using the remaining screws.
- Adjust Width: The gate features adjustable panels. Loosen the hexagon screws on the gate's top and bottom bars, slide the panels to fit your opening width (29.2-43 inches), and then tighten the screws securely.
- Adjust Height (if needed): The metal pipe on the hinge side can be adjusted. Loosen the screws on the pipe slightly until it can be moved up and down. Align the two locks on the gate with the metal pipe's height to the same level, then tighten the screws firmly in place.

Image: Loosen screws and slide panels to adjust the gate's width to fit your opening.

Image: The Cumbor no-bottom-bar gate easily adjusts from 29.2 to 43 inches to fit various spaces.
Video: Official Cumbor Baby Gate Wall Mounted Installation Guide. This video demonstrates the step-by-step process for securely mounting the gate to your wall.
Operating the Gate
The Cumbor Baby Gate is designed for convenient and secure operation.
Opening and Closing:
- One-Handed Operation: To open, slide the button on the top handle and lift the gate slightly. This allows for easy access while holding a child or carrying items.
- Two-Way Opening: The gate can swing open in both directions, providing flexibility for different areas of your home.
- Auto-Close Feature: When released from any open position less than 90 degrees, the gate will automatically swing shut and lock securely.
- Stay-Open Feature: To keep the gate open, simply push it to a full 90-degree angle. It will remain open until you gently push it to close.
- Double-Lock System: The gate features a double-lock design to prevent toddlers from easily opening it. Always ensure the gate is properly latched after each pass.

Image: The gate allows for easy one-handed operation, ideal for busy parents.

Image: The gate features a 180-degree door swing and a stay-open function when opened fully.
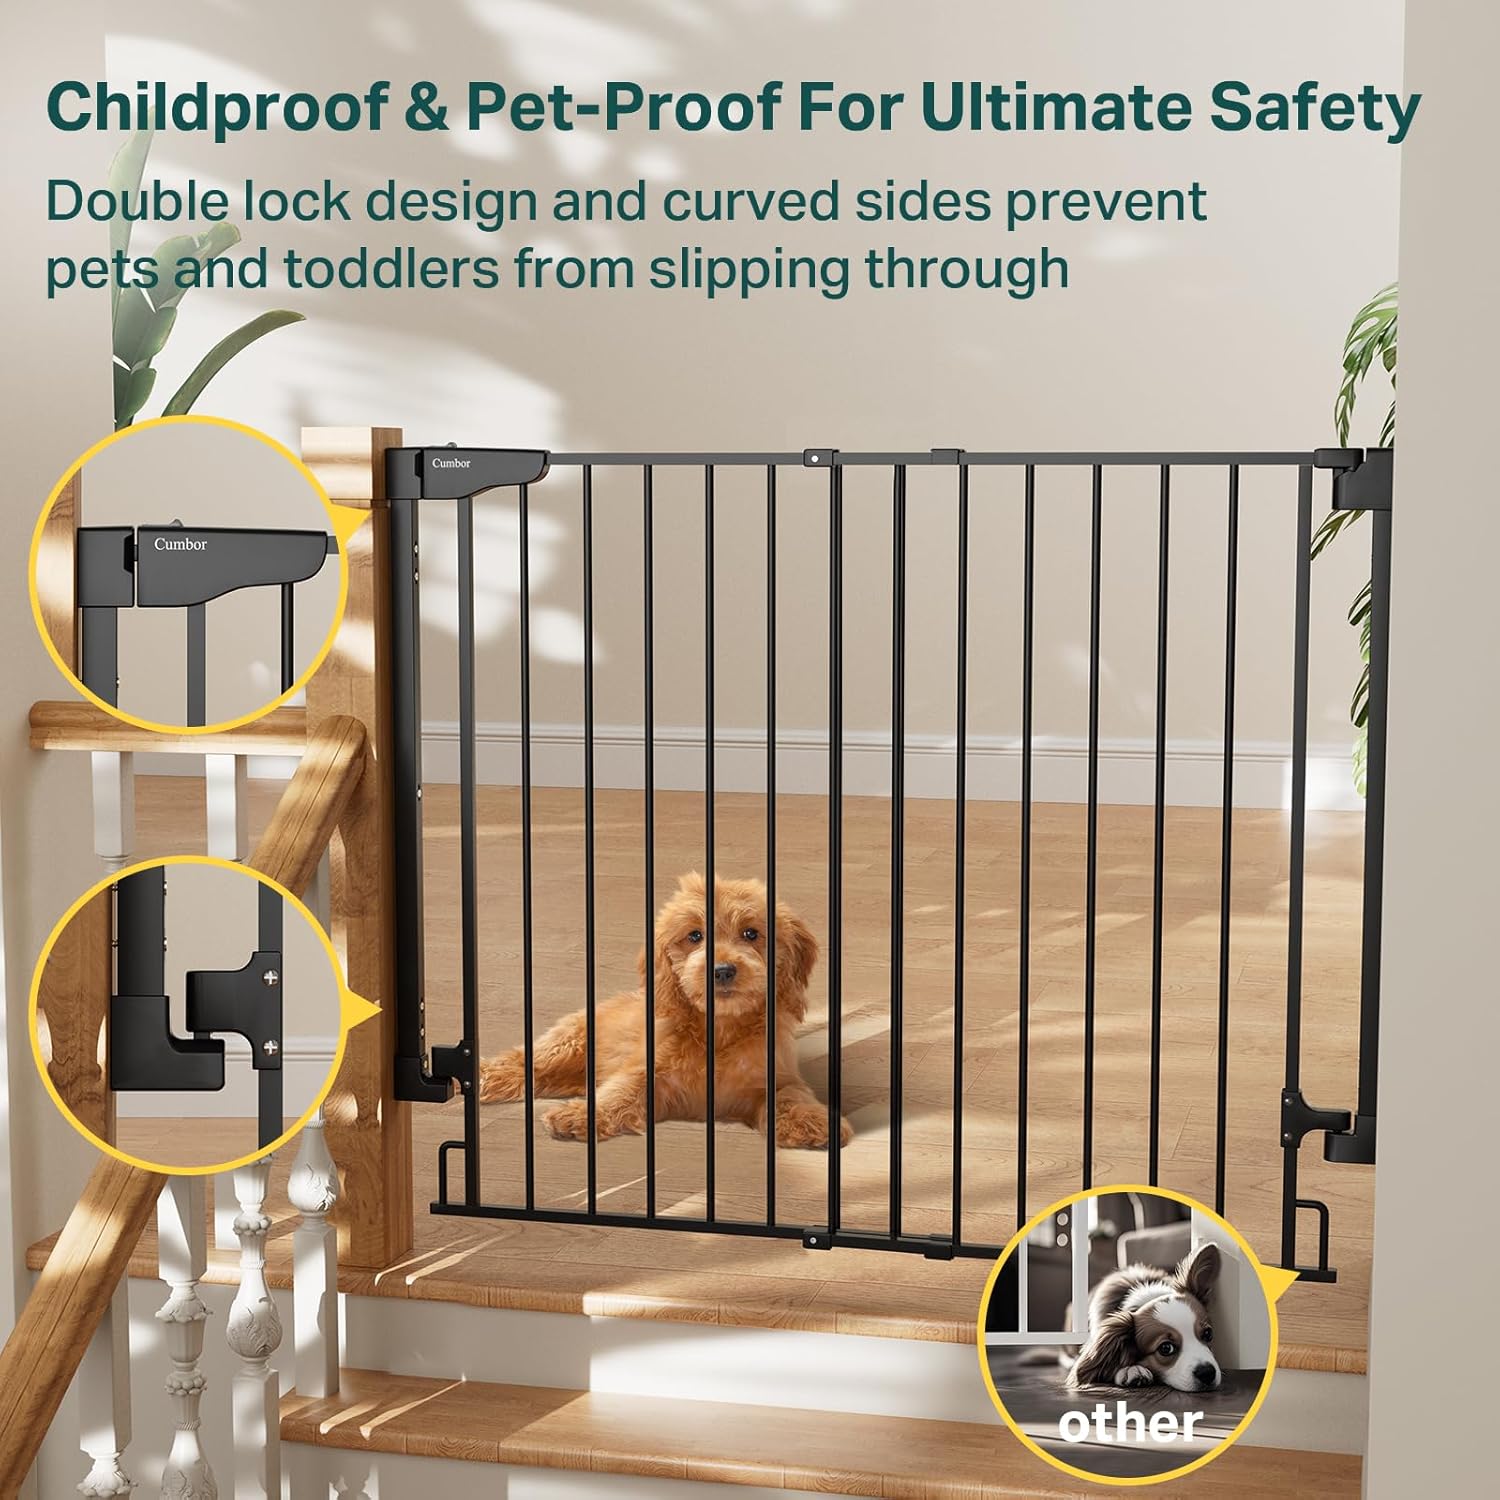
Image: Childproof and pet-proof design with a double-lock system and curved sides for ultimate safety.
Video: This official Cumbor video showcases the gate's features, including one-handed operation, auto-close, and spacious passageway.
Maintenance
- Cleaning: Wipe the gate with a soft, damp cloth and mild soap. Do not use abrasive cleaners or harsh chemicals.
- Regular Checks: Periodically inspect all hardware and mounting points to ensure they remain tight and secure. Re-tighten screws as necessary.
- Lubrication: If the gate's hinges become stiff, apply a small amount of silicone-based lubricant to ensure smooth operation.
Troubleshooting
- Gate Not Latching: Check if the gate is installed level and plumb. Ensure all mounting screws are tight. The adjustable panels might need slight re-adjustment.
- Gate Feels Loose: Verify that all hardware is securely fastened to the wall and the gate. If installed into drywall, confirm screws are in studs or appropriate heavy-duty anchors are used.
- Difficulty Opening/Closing: Check for any obstructions. Ensure the gate is not binding against the wall or floor. Lubricate hinges if necessary.
Specifications
| Feature | Detail |
|---|---|
| Brand | Cumbor |
| Model Number | CP7V1 |
| Mounting Type | Wall Mount (Hardware Required) |
| Height | 34 inches |
| Adjustable Width | 29.2 - 43 inches |
| Material | Metal |
| Color | Black |
| Item Weight | 12.32 pounds (5.6 Kilograms) |
| Product Dimensions | 43 x 43 x 34 inches (W x D x H) |
| UPC | 850055912359 |
Warranty and Support
For warranty information or product support, please refer to the documentation included with your purchase or contact Cumbor customer service directly. Keep your purchase receipt for warranty claims.