1. Introduction
Thank you for choosing the Flashstar Mini RC Monster Truck, Model HG4-94. This 1:64 scale remote control truck is designed for versatile play, featuring a durable alloy body, adjustable speed settings, and realistic lights. This manual provides essential information for setting up, operating, and maintaining your RC truck to ensure optimal performance and enjoyment.

Image 1.1: The Flashstar Mini RC Monster Truck (Grey) and its remote control.

Image 1.2: The compact 1:64 scale of the Flashstar Mini RC Monster Truck, easily held in one hand.
2. Safety Information
Please read and understand all safety instructions before operating the RC truck. Failure to do so may result in injury or damage to the product.
- Age Recommendation: This product is recommended for ages 6-10 years. Adult supervision is advised for younger users.
- Battery Safety: Use only the specified batteries and charging methods. Do not mix old and new batteries, or different types of batteries. Do not attempt to charge non-rechargeable batteries.
- Choking Hazard: Small parts may be present. Keep away from young children to prevent choking.
- Operating Environment: Operate the RC truck in open areas, away from people, pets, and obstacles. Avoid operating near water, heat sources, or electrical outlets.
- Impacts: While the truck features an alloy shell for durability, excessive impacts can cause damage.
- Cleaning: Disconnect power before cleaning. Use a dry cloth; do not immerse in water.
3. Package Contents
Ensure all items are present in the package:
- Flashstar Mini RC Monster Truck (Model HG4-94)
- Remote Control
- Rechargeable Battery Pack (for truck)
- LR44 Battery (for remote control)
- USB Type-C Charging Cable
- Instruction Manual (this document)
4. Setup
4.1. Battery Installation
For the RC Truck:
- Locate the battery compartment on the underside of the RC truck.
- Open the battery compartment cover.
- Insert the rechargeable battery pack, ensuring correct polarity.
- Close the battery compartment cover securely.
For the Remote Control:
- Locate the battery compartment on the back of the remote control.
- Open the battery compartment cover.
- Insert the LR44 battery, observing the correct polarity (+/-).
- Close the battery compartment cover securely.
4.2. Charging the RC Truck Battery
The RC truck uses a USB-rechargeable battery pack. To charge:
- Connect the USB Type-C charging cable to the charging port on the RC truck.
- Connect the other end of the USB cable to a standard USB power adapter (not included) or a computer USB port.
- The charging indicator light (if present) will show the charging status. Refer to the truck's specific indicator behavior for full charge.
- Once fully charged, disconnect the charging cable.
5. Operating Instructions
5.1. Power On and Pairing
- Ensure both the RC truck and the remote control have fresh or fully charged batteries.
- Turn on the power switch on the RC truck.
- Turn on the power switch on the remote control.
- The remote control and truck should automatically pair using 2.4Ghz technology. If pairing fails, turn both devices off and on again, ensuring they are close to each other.
5.2. Driving Controls
The remote control features precise five-channel control for movement and speed adjustment.

Image 5.1: Remote control layout with labeled functions.
- Advance/Recoil: Use the designated buttons/joystick on the remote to move the truck forward or backward.
- Steering: Use the left/right buttons/joystick to steer the truck.
- Speed Adjustment (Three-Gear Shift): The truck offers three speed settings:
- First Gear: Approximately 20% speed. Ideal for precision control or indoor use.
- Second Gear: Approximately 50% speed. Balanced for various environments.
- Third Gear: Approximately 100% speed. For high-speed outdoor racing.
- Automatic Demonstration: Press the auto-demonstration button to activate a pre-programmed driving sequence.
- Constant Cruising: Engage the constant cruising function for continuous forward movement without holding the advance button.
5.3. Lights
The RC truck is equipped with functional headlights and taillights that enhance realism.

Image 5.2: Flashstar Mini RC Monster Trucks demonstrating illuminated headlights and taillights.
- Headlights: White headlights illuminate when the truck is moving forward.
- Taillights: Red taillights illuminate, typically when the truck is braking or reversing.
6. Maintenance
Proper maintenance will extend the life and performance of your RC truck.
- Cleaning: After use, gently wipe the truck with a dry, soft cloth to remove dust and debris. Do not use water or chemical cleaners.
- Storage: Store the RC truck and remote control in a cool, dry place away from direct sunlight and extreme temperatures. Remove batteries from both the truck and remote if storing for extended periods.
- Battery Care: Do not overcharge the rechargeable battery. Allow the battery to cool down before recharging.
- Inspection: Periodically check for loose screws, damaged parts, or worn tires. Replace any damaged components as necessary.
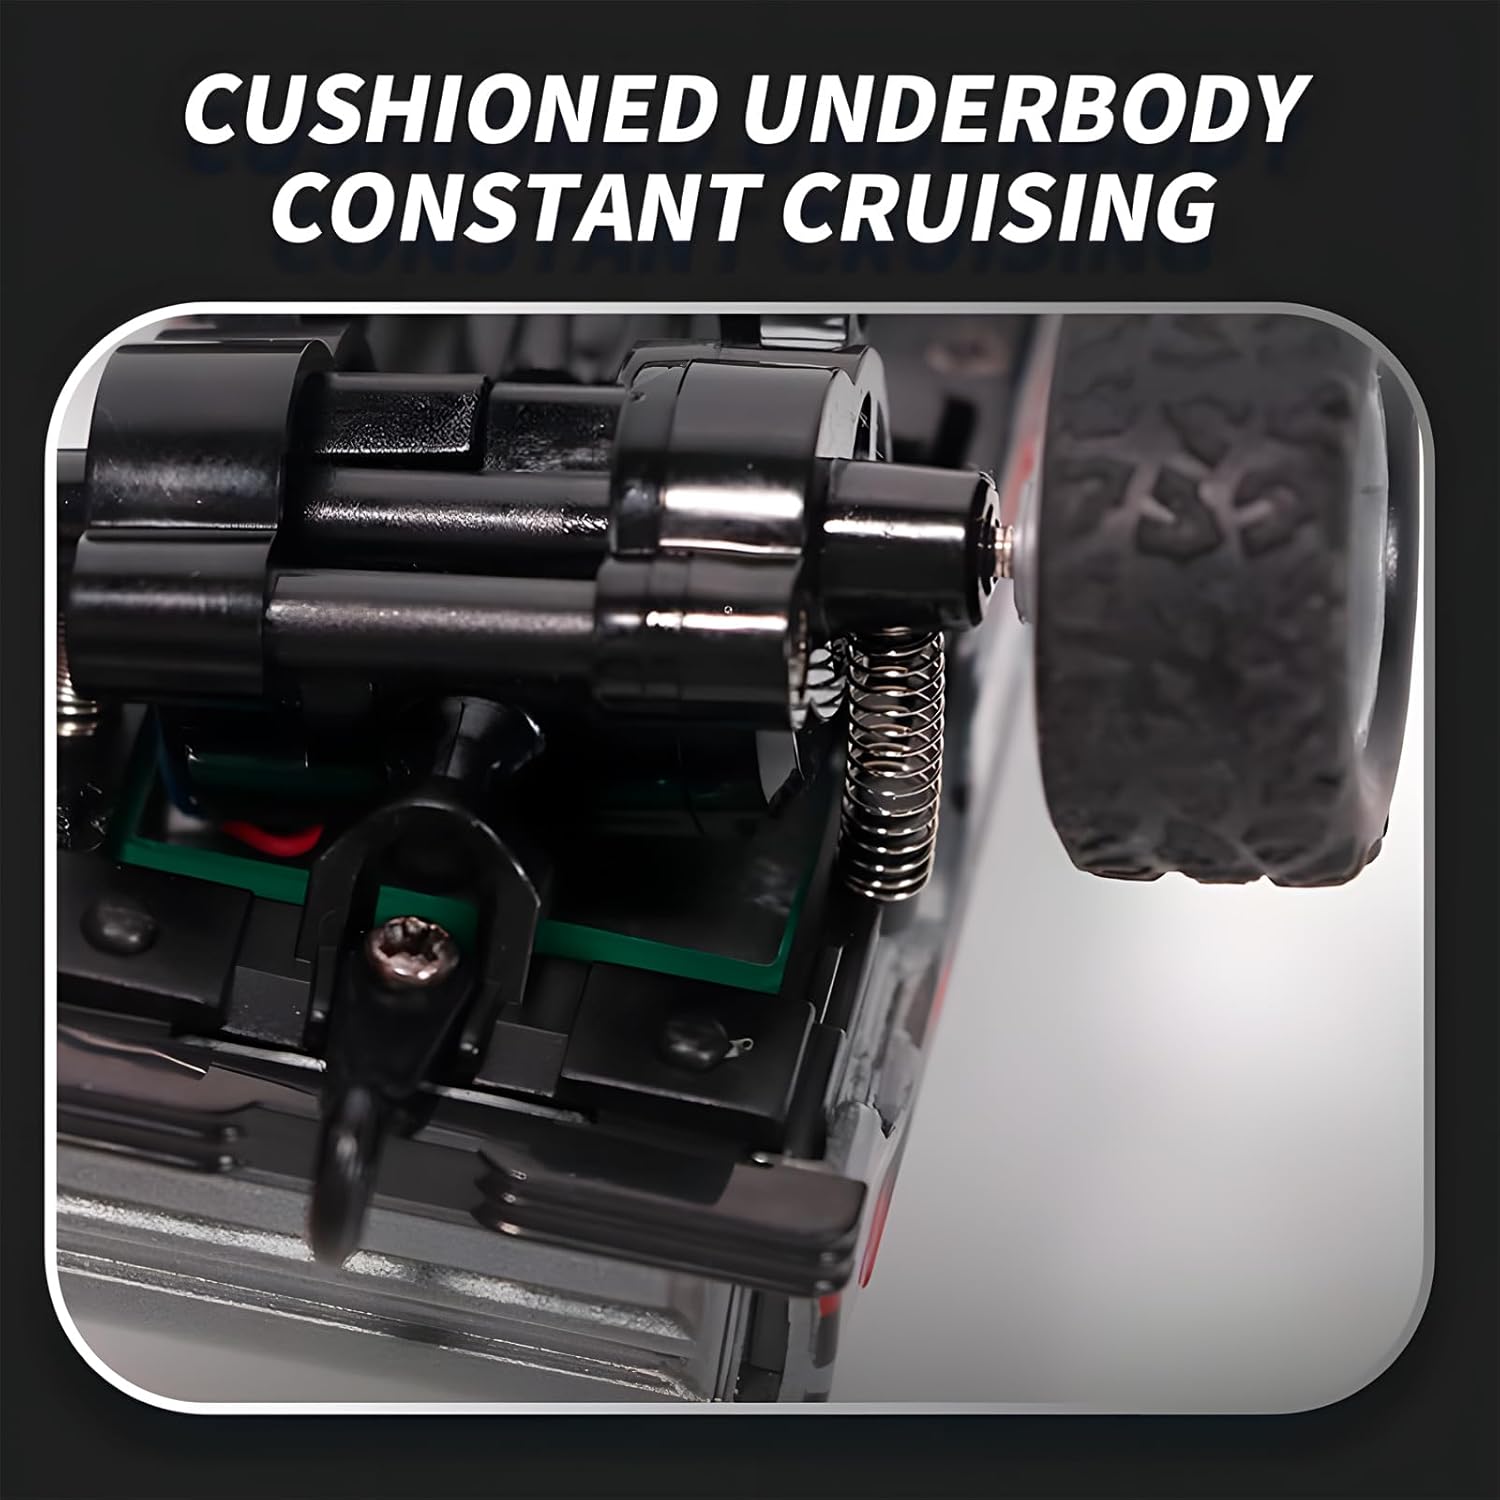
Image 6.1: The cushioned underbody design, contributing to the truck's durability and smooth operation.

Image 6.2: The durable alloy shell designed to resist impacts and deformation.
7. Troubleshooting
If you encounter issues with your Flashstar Mini RC Monster Truck, refer to the following common problems and solutions:
| Problem | Possible Cause | Solution |
|---|---|---|
| Truck does not turn on. | Battery not installed correctly or discharged. | Check battery polarity. Recharge or replace batteries. |
| Remote control does not respond. | Remote control battery discharged or not installed correctly. | Replace LR44 battery in the remote. Check polarity. |
| Truck and remote do not pair. | Interference or pairing sequence issue. | Ensure truck and remote are close. Turn both off, then turn on the truck first, then the remote. Avoid other 2.4Ghz devices during pairing. |
| Truck moves slowly or erratically. | Low battery in truck or remote. Obstruction in wheels. | Recharge truck battery. Replace remote battery. Check wheels for debris. |
| Lights are not working. | Low battery or internal wiring issue. | Ensure truck battery is charged. If problem persists, contact support. |
8. Specifications
| Feature | Detail |
|---|---|
| Model Number | HG4-94 |
| Scale | 1:64 |
| Product Dimensions | 3.54 x 2.36 x 2 inches (9 x 6 x 5 cm) |
| Item Weight | 5.6 ounces (158.7 grams) |
| Control Frequency | 2.4 GHz |
| Speed Settings | 3 (20%, 50%, 100%) |
| Lighting | White Headlights, Red Taillights |
| Truck Battery | USB-rechargeable battery pack |
| Remote Control Battery | 1 x LR44 battery (included) |
| Recommended Age | 6 - 10 years |
| Material | Alloy Shell |
9. Warranty and Support
For warranty information or technical support, please refer to the retailer's return policy or contact the manufacturer directly. Keep your purchase receipt as proof of purchase.
Manufacturer: Guangdonghengguankejishiyeyouxiangongsi
For further assistance, please visit the Flashstar store on Amazon: Flashstar Store
10. Video Resources
No official product videos from the seller were available for embedding in this manual. Please check the product page for any available video demonstrations.