1. Important Safety Information
Please read all instructions carefully before using the Portable Mini Washing Machine. Retain this manual for future reference.
- Ensure the power supply matches the voltage specified on the appliance.
- Do not immerse the main unit in water or other liquids.
- Keep out of reach of children. This appliance is not intended for use by persons with reduced physical, sensory, or mental capabilities unless supervised.
- Unplug the machine from the power outlet when not in use or before cleaning.
- Do not operate the machine if the power cord or plug is damaged. Contact customer support for assistance.
- Use only the accessories provided or recommended by the manufacturer.
- Do not overload the machine. Adhere to the specified capacity for optimal performance and safety.
- Place the machine on a stable, level surface during operation.
- Avoid washing delicate items that require dry cleaning or specific hand-wash only instructions.
2. Product Overview
The Portable Mini Washing Machine is designed for compact spaces and small garment washing. It features two cleaning modes and a dehydration function.
2.1 Components
- Main Washing Unit (with pulsator)
- Foldable Dehydration Basket
- Power Adapter
- Lid
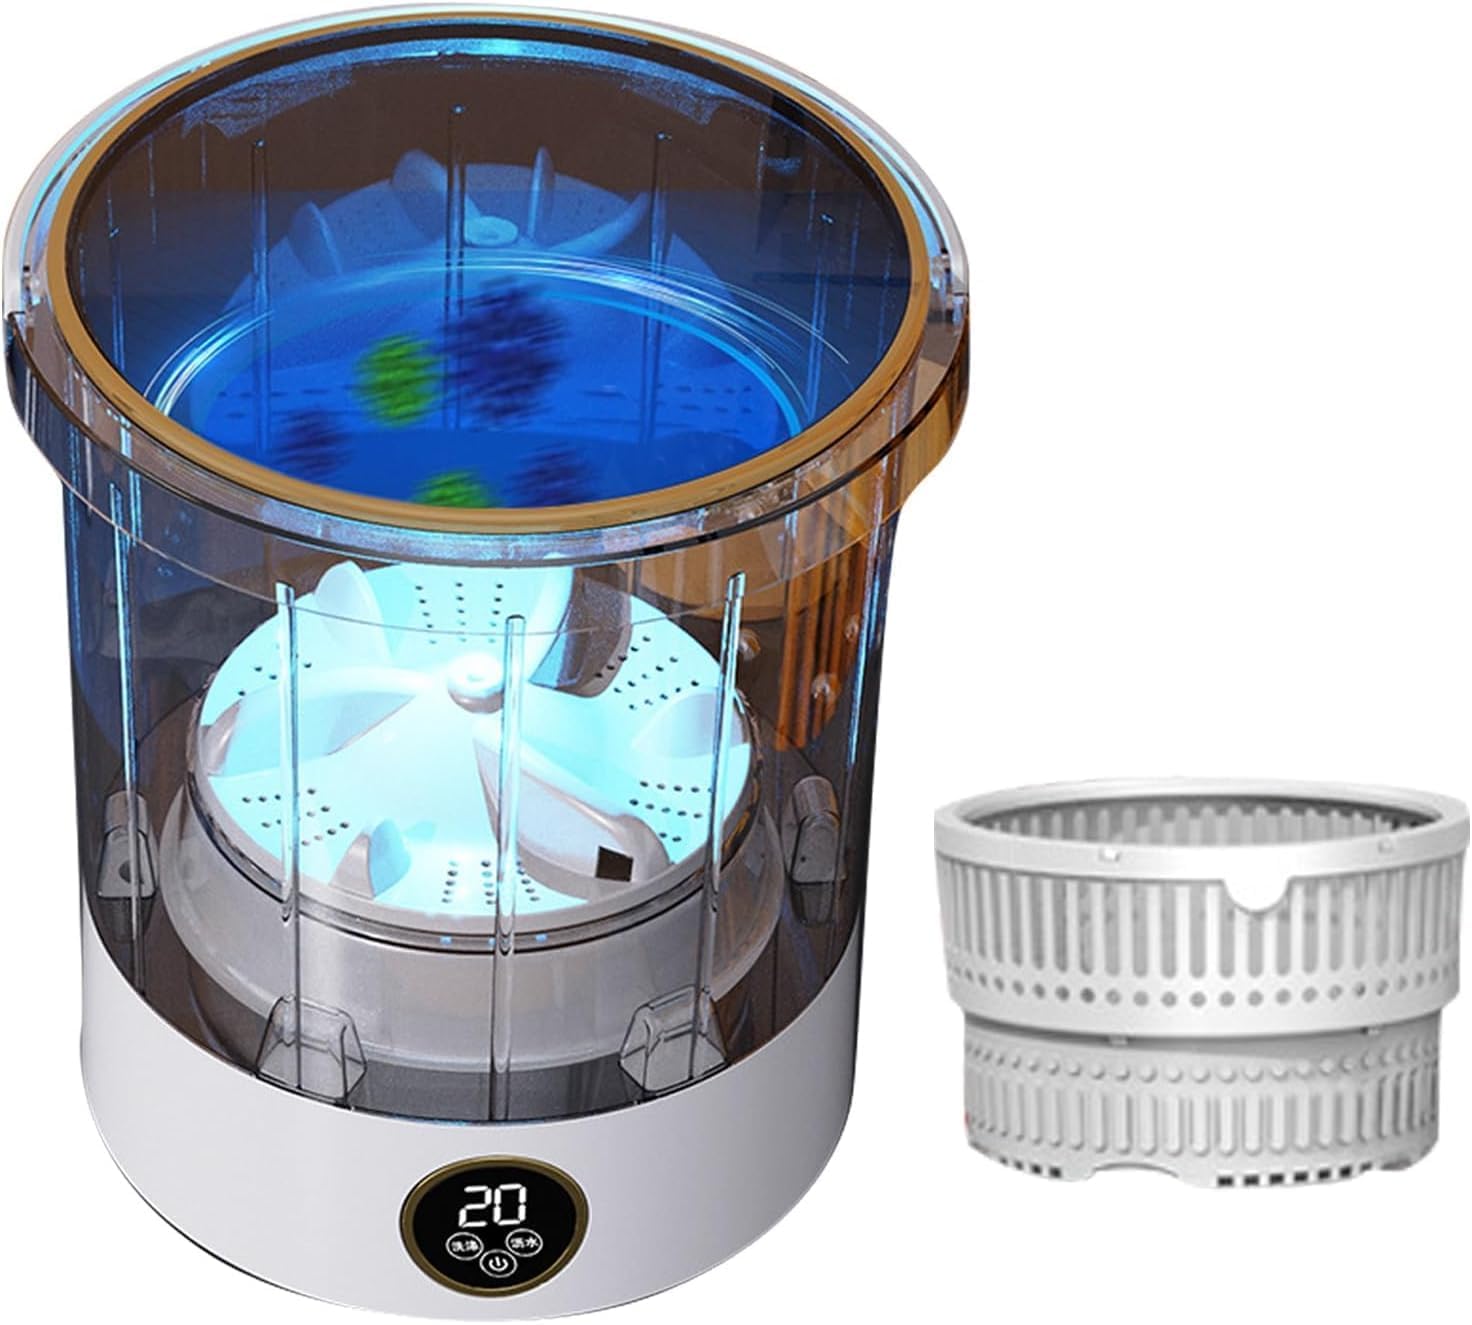
Figure 2.1: The Portable Mini Washing Machine, showing the main washing unit and the separate foldable dehydration basket.
2.2 Key Features
- Compact Design: Measures approximately 10 x 10 x 11.1 inches (25.5 cm x 25.5 cm x 28.2 cm), ideal for small living spaces.
- 6L Capacity: Suitable for small garments.
- Two Cleaning Modes: Offers versatile washing options.
- 360° Deep Cleaning: Utilizes front and reverse pulsators for effective stain removal.
- Dehydration Function: Integrated foldable basket for water removal.
- Durable Material: Constructed from environmentally friendly ABS material.
- LED Touch Panel: For easy operation.

Figure 2.2: Product dimensions, illustrating the compact size of the washing machine.

Figure 2.3: Overview of the washing machine's functional upgrades, including deep cleaning, quiet operation, and 6L capacity.

Figure 2.4: Detailed view highlighting the environmentally friendly ABS material, the foldable drain basket, and the LED touch panel.
3. Setup
- Unpack: Carefully remove all components from the packaging.
- Placement: Place the washing machine on a flat, stable, and dry surface. Ensure there is enough space around the unit for proper ventilation and operation.
- Power Connection: Connect the power adapter to the machine and then plug it into a suitable power outlet.
- Initial Cleaning: Before first use, it is recommended to run a short cycle with clean water to remove any manufacturing residues.
4. Operating Instructions
4.1 Preparing Garments
- Separate clothes by color and fabric type.
- Check garment care labels for washing instructions.
- Remove any sharp objects from pockets.

Figure 4.1: Recommended garment capacities for various small items such as underwear, socks, and t-shirts.
4.2 Washing Cycle
- Add Water: Fill the washing machine with an appropriate amount of water, ensuring it covers the garments but does not exceed the maximum fill line.
- Add Detergent: Add a small amount of liquid detergent suitable for machine washing. Avoid excessive foaming detergents.
- Load Garments: Place the garments into the washing unit. Do not overload. Refer to Figure 4.1 for capacity guidelines.
- Select Mode: Use the LED touch panel to select one of the two available cleaning modes. The display will show the selected mode or remaining time.
- Start: Press the start button to begin the washing cycle.
- Separate Washing: For hygiene, consider washing certain items like baby clothes or undergarments separately.

Figure 4.2: The washing machine demonstrating the concept of separate bucket washing for improved hygiene.
4.3 Dehydration Function
- After the washing cycle is complete, remove the washed garments from the main unit.
- Insert the foldable dehydration basket into the main unit.
- Place the washed garments evenly inside the dehydration basket. Do not overfill.
- Close the lid.
- Select the dehydration mode on the LED touch panel.
- Press the start button. The machine will spin to remove excess water.
- Once the dehydration cycle is complete, carefully remove the garments.
Note: The dehydration function is designed to remove excess water, not to fully dry garments.
5. Maintenance
5.1 Cleaning the Machine
- Always unplug the machine before cleaning.
- Wipe the exterior of the machine with a soft, damp cloth. Do not use abrasive cleaners or solvents.
- Rinse the inside of the washing unit and the dehydration basket with clean water after each use.
- Ensure all parts are thoroughly dry before storing.
5.2 Storage
- Store the machine in a cool, dry place away from direct sunlight and extreme temperatures.
- Ensure the machine is completely dry before storing to prevent mold or mildew.
- The compact design allows for easy storage in small spaces.
6. Troubleshooting
| Problem | Possible Cause | Solution |
|---|---|---|
| Machine does not turn on. | Not plugged in; Power outlet issue; Damaged power cord. | Ensure power cord is securely plugged in; Test outlet with another device; Contact customer support if cord is damaged. |
| Washing cycle not starting. | Lid not closed properly; Mode not selected. | Ensure lid is securely closed; Select a washing mode on the LED panel. |
| Poor washing performance. | Overloaded; Insufficient water/detergent; Incorrect mode. | Reduce load size; Add appropriate amount of water/detergent; Select suitable washing mode. |
| Machine is noisy during operation. | Unstable surface; Uneven load. | Place machine on a stable, level surface; Redistribute garments evenly inside. |
| Dehydration not effective. | Overloaded dehydration basket; Garments not evenly distributed. | Reduce load in basket; Arrange garments evenly. |

Figure 6.1: The washing machine is designed for quiet operation, minimizing disturbance.
7. Specifications
| Attribute | Detail |
|---|---|
| Brand | generic |
| Model Number | JKXKBADXH-CLEAR |
| Capacity | 6 Liters |
| Product Dimensions | Approx. 10 x 10 x 11.1 inches (25.5 x 25.5 x 28.2 cm) |
| Item Weight | Approx. 4.41 pounds (2 kg) |
| Material | ABS |
| Color | Clear |
8. Warranty and Support
This product comes with a manufacturer's warranty. For specific warranty details, please refer to the documentation included with your purchase or contact the seller directly.
For any questions, concerns, or technical support, please contact our responsive after-sales support team. We are committed to ensuring your satisfaction.
Contact Information: Please refer to your purchase receipt or the seller's information on the platform where the product was purchased for direct contact details.
Note: Protection plans may be available for purchase separately. Refer to your retailer for details.


