Introduction
This manual provides comprehensive instructions for the assembly, operation, and maintenance of your AX WABER Universal Floor TV Stand with Shelf. Designed for most 27 to 65 inch LCD, LED, and OLED TVs, this stand offers a 70-degree swivel range, 9 levels of height adjustment, and an integrated shelf for media devices. Please read this manual thoroughly before beginning assembly to ensure safe and correct installation and use.
Safety Information
- Weight Capacity: Do not exceed the maximum weight capacity of 77 lbs (35 kg) for the TV mount and 11 lbs (5 kg) for the shelf. Overloading can cause instability and damage.
- TV Size Compatibility: Ensure your TV's VESA pattern falls between 100x100mm and 400x400mm, and its size is between 27 and 65 inches.
- Stable Surface: Place the TV stand on a flat, stable, and level surface to prevent tipping.
- Children and Pets: Keep children and pets away from the stand during assembly. Do not allow them to climb on or play with the stand or attached TV.
- Cable Management: Properly route all cables to prevent tripping hazards and ensure they are not pinched or strained.
- Moving the Stand: When moving the stand with a TV attached, always do so carefully and with assistance if necessary. Avoid sudden movements.
- Tempered Glass: The base is made of tempered glass. Handle with care during assembly and avoid dropping heavy objects on it.
Package Contents
Please verify that all components listed below are present and undamaged before proceeding with assembly. If any parts are missing or damaged, contact customer support.
- A. Base (Tempered Glass)
The sturdy glass base provides stability for the TV stand.

Image: Tempered glass base
- B. Main Support Pillar (Alloy Steel)
The central steel column that supports the TV mount and shelf.

Image: Main support pillar
- C. TV Mounting Bracket
The bracket that attaches to the back of your TV.

Image: TV mounting bracket
- D. Media Shelf
Adjustable shelf for placing media devices like soundbars or streaming boxes.
Image: Media shelf
- E. Hardware Kit
Includes various screws, washers, spacers, and tools for assembly.
- F. Cable Management Clips
Clips to organize and hide cables along the main pillar.

Image: Cable management clips
Assembly Instructions
Follow these steps carefully for proper assembly. It is recommended to have a second person assist with attaching the TV.
Step 1: Assemble the Base and Main Pillar
- Carefully unbox all components and lay them out on a soft, clean surface to prevent scratches.
- Attach the main support pillar (B) to the tempered glass base (A) using the provided screws and tools from the hardware kit (E). Ensure the pillar is securely fastened and aligned.
Image: The main support pillar securely attached to the tempered glass base.
Step 2: Attach the Media Shelf
- Slide the media shelf (D) onto the main support pillar (B) at your desired height.
- Secure the shelf in place using the designated screws or locking mechanism. The shelf is adjustable, allowing for optimal positioning of your media devices.

Image: The media shelf positioned on the main pillar, demonstrating height adjustability.
Step 3: Install TV Mounting Brackets to TV
- Identify the VESA mounting holes on the back of your TV.
- Select the appropriate screws, washers, and spacers from the hardware kit (E) that fit your TV's VESA pattern.
- Attach the TV mounting bracket (C) to the back of your TV. Ensure the brackets are level and securely tightened. Do not overtighten.
Image: A close-up view of the TV mounting bracket attached to the rear of a television, illustrating VESA compatibility.
Step 4: Mount TV to Stand
- With assistance, carefully lift the TV and hook the attached mounting brackets onto the main support pillar's TV mount.
- Secure the TV to the stand using the safety screws or locking mechanism provided. This prevents accidental dislodgement.
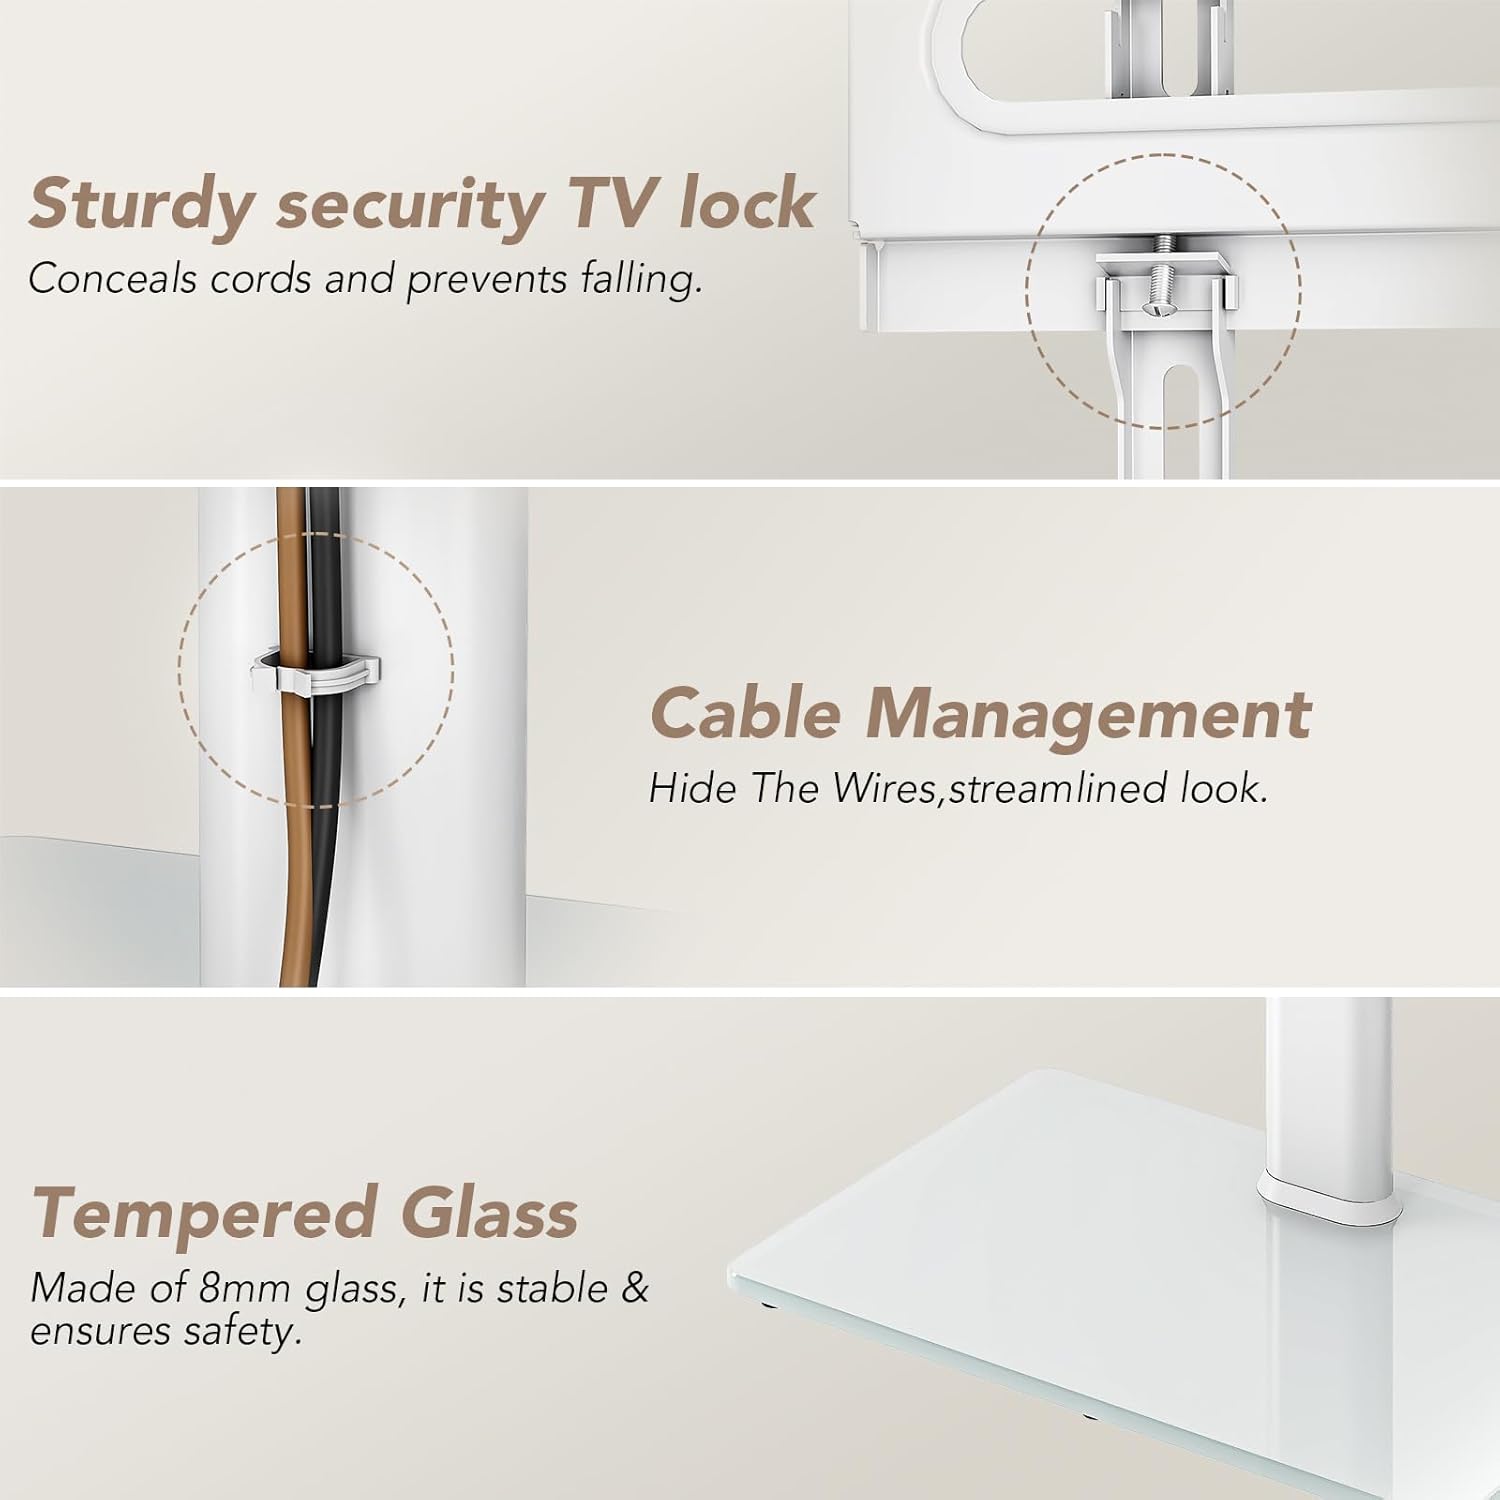
Image: The TV securely mounted on the stand, highlighting the sturdy security TV lock mechanism that conceals cords and prevents falling.
Step 5: Cable Management
- Gather all TV and media device cables.
- Use the provided cable management clips (F) to route and secure the cables along the back of the main support pillar. This creates a tidy and streamlined appearance.
Image: Cables neatly organized and hidden using the integrated cable management clips on the stand's pillar.
Operating Instructions
Height Adjustment
The TV mount offers 9 levels of height adjustment. To adjust the height:
- Ensure the TV is securely mounted.
- Loosen the height adjustment screws on the back of the TV mount (if applicable, refer to specific hardware instructions).
- Carefully slide the TV mount up or down to the desired height. It is recommended to have assistance for larger TVs.
- Retighten the height adjustment screws firmly to lock the TV in position.
Image: Illustration of the TV stand's 9-level height adjustment feature, showing minimum and maximum heights for optimal viewing.
Swivel Function
The TV mount allows for a swivel range of -35 to +35 degrees, providing optimal viewing angles from various positions in your room.
- Gently grasp the sides of your TV.
- Rotate the TV left or right to achieve your preferred viewing angle. The swivel mechanism is designed for smooth movement.

Image: A family watching TV, demonstrating the ±35 degree swivel capability of the TV stand for flexible viewing angles.
Maintenance
- Cleaning: Use a soft, dry cloth to wipe down the metal and glass surfaces. For stubborn marks on glass, a mild glass cleaner can be used. Avoid abrasive cleaners or solvents.
- Hardware Check: Periodically check all screws and connections to ensure they remain tight. Retighten if necessary.
- Cable Inspection: Regularly inspect cables for any signs of wear, pinching, or damage. Replace damaged cables immediately.
Troubleshooting
| Problem | Possible Cause | Solution |
|---|---|---|
| Stand feels wobbly/unstable. | Screws are loose; stand is on an uneven surface; TV weight exceeds capacity. | Ensure all screws are tightened. Move stand to a level surface. Verify TV weight is within limits (max 77 lbs). |
| TV does not swivel smoothly. | Dust or debris in swivel mechanism; excessive weight. | Clean around the swivel joint. Ensure TV weight is within limits. |
| Cannot adjust TV height. | Height adjustment screws are too tight; mechanism is jammed. | Loosen height adjustment screws. Check for obstructions. |
| Missing parts after unboxing. | Packaging error. | Contact AX WABER customer support immediately with your purchase details. |
Specifications
- Brand: AX WABER
- Model: B0DMVKZDC4
- Compatible TV Sizes: 27 to 65 inches
- Maximum TV Weight Capacity: 77 lbs (35 kg)
- VESA Compatibility: 100x100mm to 400x400mm
- Swivel Range: ±35 degrees
- Height Adjustment: 9 levels (47.5" to 59.3" from floor to center of TV)
- Shelf Weight Capacity: 11 lbs (5 kg)
- Materials: Alloy Steel (pillar), Tempered Glass (base)
- Color: White
- Item Weight: 21.2 pounds
- Package Dimensions: 28.6 x 16.6 x 3 inches

Image: Detailed diagram showing the product dimensions, including height, width, and VESA mounting ranges.
Warranty and Support
AX WABER products are manufactured to high-quality standards. For information regarding warranty coverage, product support, or to report missing/damaged parts, please contact AX WABER customer service directly. Refer to your purchase documentation for specific contact details or visit the official AX WABER website.
Online Support: Visit the AX WABER Store on Amazon