Introduction
This manual provides comprehensive instructions for the installation, operation, and maintenance of your MSI PRO H510M-B II Micro-ATX Motherboard. Designed for Intel Core 10th Generation Processors with an LGA 1200 socket, this motherboard offers essential features for building a reliable personal computer system. Please read this manual thoroughly before proceeding with installation.

Figure 1: MSI PRO H510M-B II Motherboard and Retail Box.
This image displays the MSI PRO H510M-B II motherboard alongside its retail packaging, providing a visual overview of the product as it appears out of the box.
1. Setup and Installation
Follow these steps carefully to install your motherboard and its components.
1.1. Preparing the Chassis
Ensure your computer chassis is prepared for motherboard installation. Install standoffs in the chassis that align with the screw holes on the motherboard. Refer to your chassis manual for specific instructions.
1.2. CPU Installation
- Locate the LGA 1200 CPU socket on the motherboard.
- Open the CPU socket lever and lift the load plate.
- Carefully align the notches on your Intel 10th Gen Core processor with the socket. Do not force the CPU into place.
- Lower the load plate and secure it with the lever.
- Install the CPU cooler according to its manufacturer's instructions.
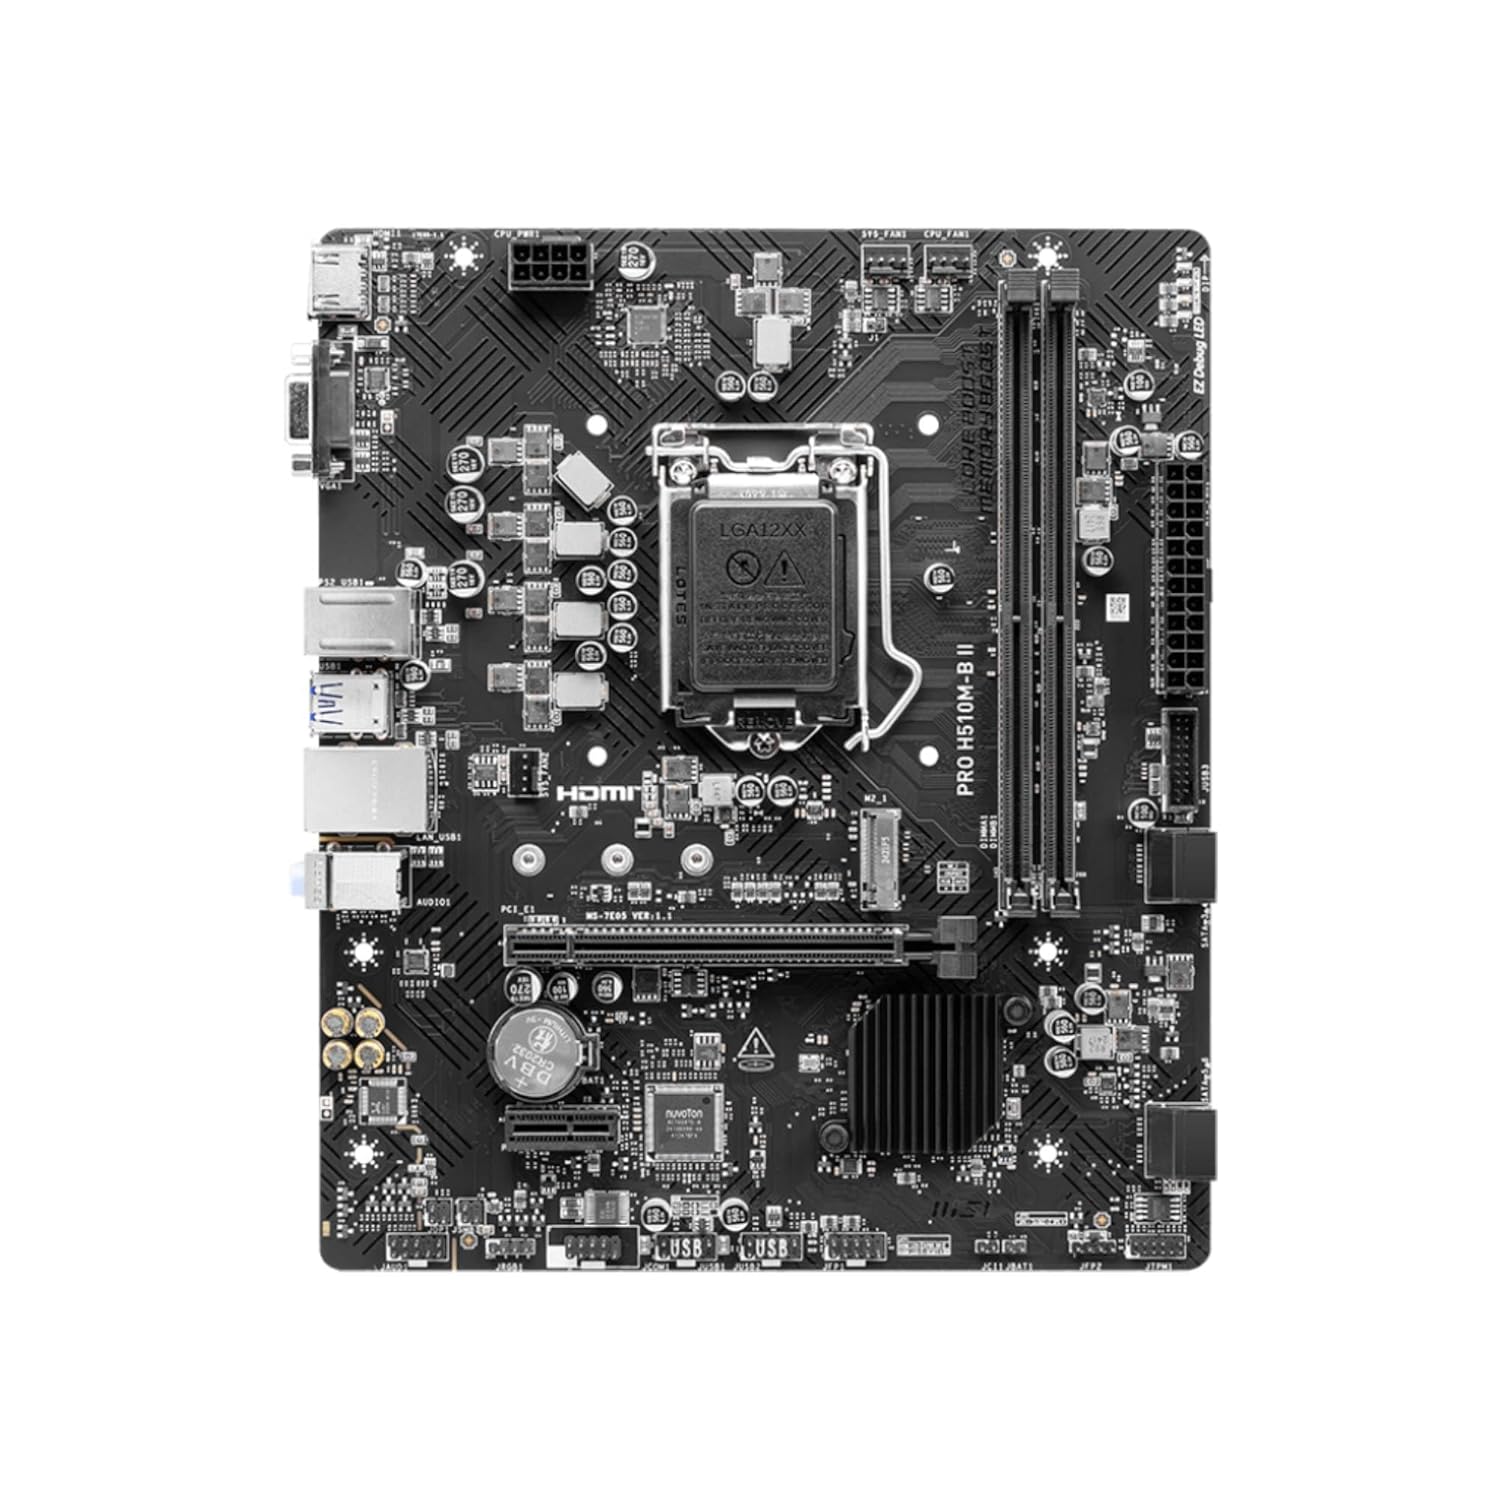
Figure 2: Top-down view of the motherboard, highlighting the LGA 1200 CPU socket.
This image provides an overhead perspective of the MSI PRO H510M-B II motherboard, clearly showing the central LGA 1200 CPU socket and surrounding components.
1.3. Memory (RAM) Installation
The motherboard supports DDR4 memory modules. It features two DIMM slots.
- Open the clips at both ends of the DIMM slot.
- Align the notch on the DDR4 memory module with the notch in the DIMM slot.
- Insert the module firmly until the clips snap into place.
1.4. Graphics Card Installation
The motherboard includes one PCIe 3.0 x16 slot for a graphics card.
- Locate the PCIe 3.0 x16 slot.
- Remove the corresponding expansion slot cover from your chassis.
- Align your graphics card with the slot and press down firmly until it is seated.
- Secure the graphics card to the chassis with a screw.
1.5. M.2 SSD Installation
The motherboard has one M.2 Gen3 x4 32Gb/s slot for NVMe SSDs.
- Locate the M.2 slot.
- Insert the M.2 SSD into the slot at a 30-degree angle.
- Gently push the SSD down and secure it with the provided screw.
1.6. Power Connections
Connect the 24-pin ATX main power connector and the 8-pin CPU power connector from your power supply unit (PSU) to the motherboard.
1.7. Front Panel Connectors
Connect the chassis front panel cables (power button, reset button, HDD LED, power LED, USB ports, audio jacks) to their respective headers on the motherboard. Refer to the motherboard layout diagram in the full manual for exact locations.

Figure 3: Angled view of the motherboard, illustrating various headers and slots.
This image presents an angled perspective of the MSI PRO H510M-B II motherboard, detailing the placement of expansion slots, memory DIMMs, and various internal connectors.
2. Operating Instructions
Once all components are installed and connected, you can power on your system.
2.1. Initial Boot-Up
Press the power button on your chassis. The system should power on, and you should see a display on your monitor. If not, refer to the Troubleshooting section.
2.2. BIOS/UEFI Access
To enter the BIOS/UEFI setup utility, press the DEL key repeatedly during the initial boot sequence. The BIOS allows you to configure system settings, boot order, and monitor hardware status.
2.3. Driver Installation
After installing your operating system, install the necessary drivers for the motherboard components (chipset, LAN, audio, etc.). These drivers are typically provided on a support DVD or can be downloaded from the official MSI website.
2.4. Cooling System
The motherboard features a chipset heatsink for passive cooling. Additionally, MSI's Smart Fan Control automatically adjusts system fan settings based on CPU and GPU temperatures to maintain optimal thermal performance and acoustics.
2.5. Connectivity
The rear I/O panel provides various connectivity options:
- USB Ports: Multiple USB 3.2 Gen 1 Type-A (5Gbps) and USB 2.0 ports.
- Video Output: HDMI 1.4 for display connectivity.
- Network: 1Gbps LAN controller for wired internet access.
- Audio: 7.1 HD Audio with Audio Boost for high-quality sound.
- Legacy Ports: PS/2 port for older keyboards/mice, VGA port.

Figure 4: Rear I/O panel connectors.
This image provides a close-up view of the rear input/output panel of the MSI PRO H510M-B II motherboard, detailing all available ports for external device connections.
3. Maintenance
Proper maintenance ensures the longevity and stable operation of your motherboard.
- Cleaning: Regularly clean dust from the motherboard and components using compressed air. Ensure the system is powered off and unplugged before cleaning.
- BIOS Updates: Periodically check the MSI website for BIOS/UEFI updates. Updates can improve compatibility, stability, and performance. Follow MSI's instructions carefully when updating the BIOS.
- Driver Updates: Keep your chipset, LAN, audio, and other drivers updated to ensure optimal performance and compatibility with new software and hardware.
4. Troubleshooting
If you encounter issues, refer to the following common troubleshooting steps:
- No Power:
- Check all power connections (24-pin ATX, 8-pin CPU, GPU power).
- Ensure the PSU is switched on.
- Verify the front panel power button connection.
- No Display:
- Ensure the monitor is connected to the graphics card (or motherboard if using integrated graphics) and powered on.
- Reseat the graphics card and RAM modules.
- Test with a different monitor or cable if possible.
- System Instability/Crashes:
- Check CPU and GPU temperatures.
- Verify RAM modules are properly seated.
- Run memory diagnostic tools.
- Ensure all drivers are up to date.
- Component Not Detected:
- Reseat the component (e.g., M.2 SSD, SATA drive).
- Check power and data cables.
- Verify BIOS settings for component detection.
- Fan Error:
- Ensure all fans (CPU, chassis) are properly connected to the motherboard headers.
- Check fan rotation and clear any obstructions.
- Adjust fan speed settings in BIOS if necessary.
For further assistance, consult the full MSI user manual or contact MSI technical support.
5. Specifications
Key technical specifications for the MSI PRO H510M-B II Motherboard:
| Feature | Specification |
|---|---|
| Brand | MSI |
| Model | PRO H510M-B II |
| Form Factor | Micro-ATX |
| CPU Socket | LGA 1200 |
| Compatible Processors | Intel Core 10th Gen Processors |
| Chipset | Intel H510 |
| Memory Type | DDR4 |
| Memory Slots | 2 x DIMM |
| Max Memory Capacity | 64 GB |
| Memory Clock Speed | Up to 2933 MHz |
| PCIe x16 Slot | 1 x PCIe 3.0 x16 (with Steel Slot) |
| M.2 Slot | 1 x M.2 Gen3 x4 32Gb/s |
| LAN | 1Gbps LAN Controller |
| Video Output | HDMI 1.4, VGA |
| USB Ports (Rear) | USB 3.2 Gen 1 Type-A (5Gbps), USB 2.0 |
| Audio | 7.1 HD Audio with Audio Boost |
| Dimensions (LxWxH) | 23.6 x 20.2 x 5 cm |
| Item Weight | 660 g |
6. Warranty and Support
For detailed warranty information, please refer to the warranty card included with your product or visit the official MSI website. Warranty terms and conditions may vary by region.
For technical support, driver downloads, BIOS updates, and additional resources, please visit the official MSI support page:
When contacting support, please have your motherboard model (PRO H510M-B II) and serial number ready.


