1. Introduction
This manual provides detailed instructions for the safe and effective use of your DEPSTECH DS650 210° Two-Way Articulating Borescope and DEPSTECH DS520 Dual Lens Sewer Inspection Camera. Please read this manual thoroughly before operating the devices to ensure proper functionality and to prevent damage.

Image 1.1: The DEPSTECH DS650 Articulating Borescope and DS520 Sewer Camera kit, showing both main units and their respective probes.
2. Safety Information
Observe the following safety precautions to prevent injury or damage to the device:
- Do not use the device in environments with flammable or explosive gases.
- Keep the device away from water and other liquids, except for the waterproof probe.
- Do not attempt to disassemble or modify the device. Repairs should only be performed by authorized personnel.
- Store the device in a dry, cool place when not in use.
- Ensure the probe is clean before and after each use to maintain optimal performance.
- Avoid bending the probe cable excessively, especially for the DS650 articulating probe, to prevent internal damage.
3. Package Contents
Verify that all items are present in your package:
- DEPSTECH DS650 Articulating Borescope Unit
- DEPSTECH DS520 Sewer Camera Unit
- DS650 Articulating Probe (6.2mm diameter)
- DS520 Dual Lens Probe (50ft cable)
- USB Charging Cable
- User Manual (this document)
- Carrying Case (for DS650)
- Accessories (e.g., hooks, magnets, side mirror - specific to model, check individual packaging)
4. Product Overview
4.1. DEPSTECH DS650 Articulating Borescope
The DS650 features a 4.5-inch IPS display and a 6.2mm diameter probe with 210° two-way articulation for precise inspection in confined spaces.
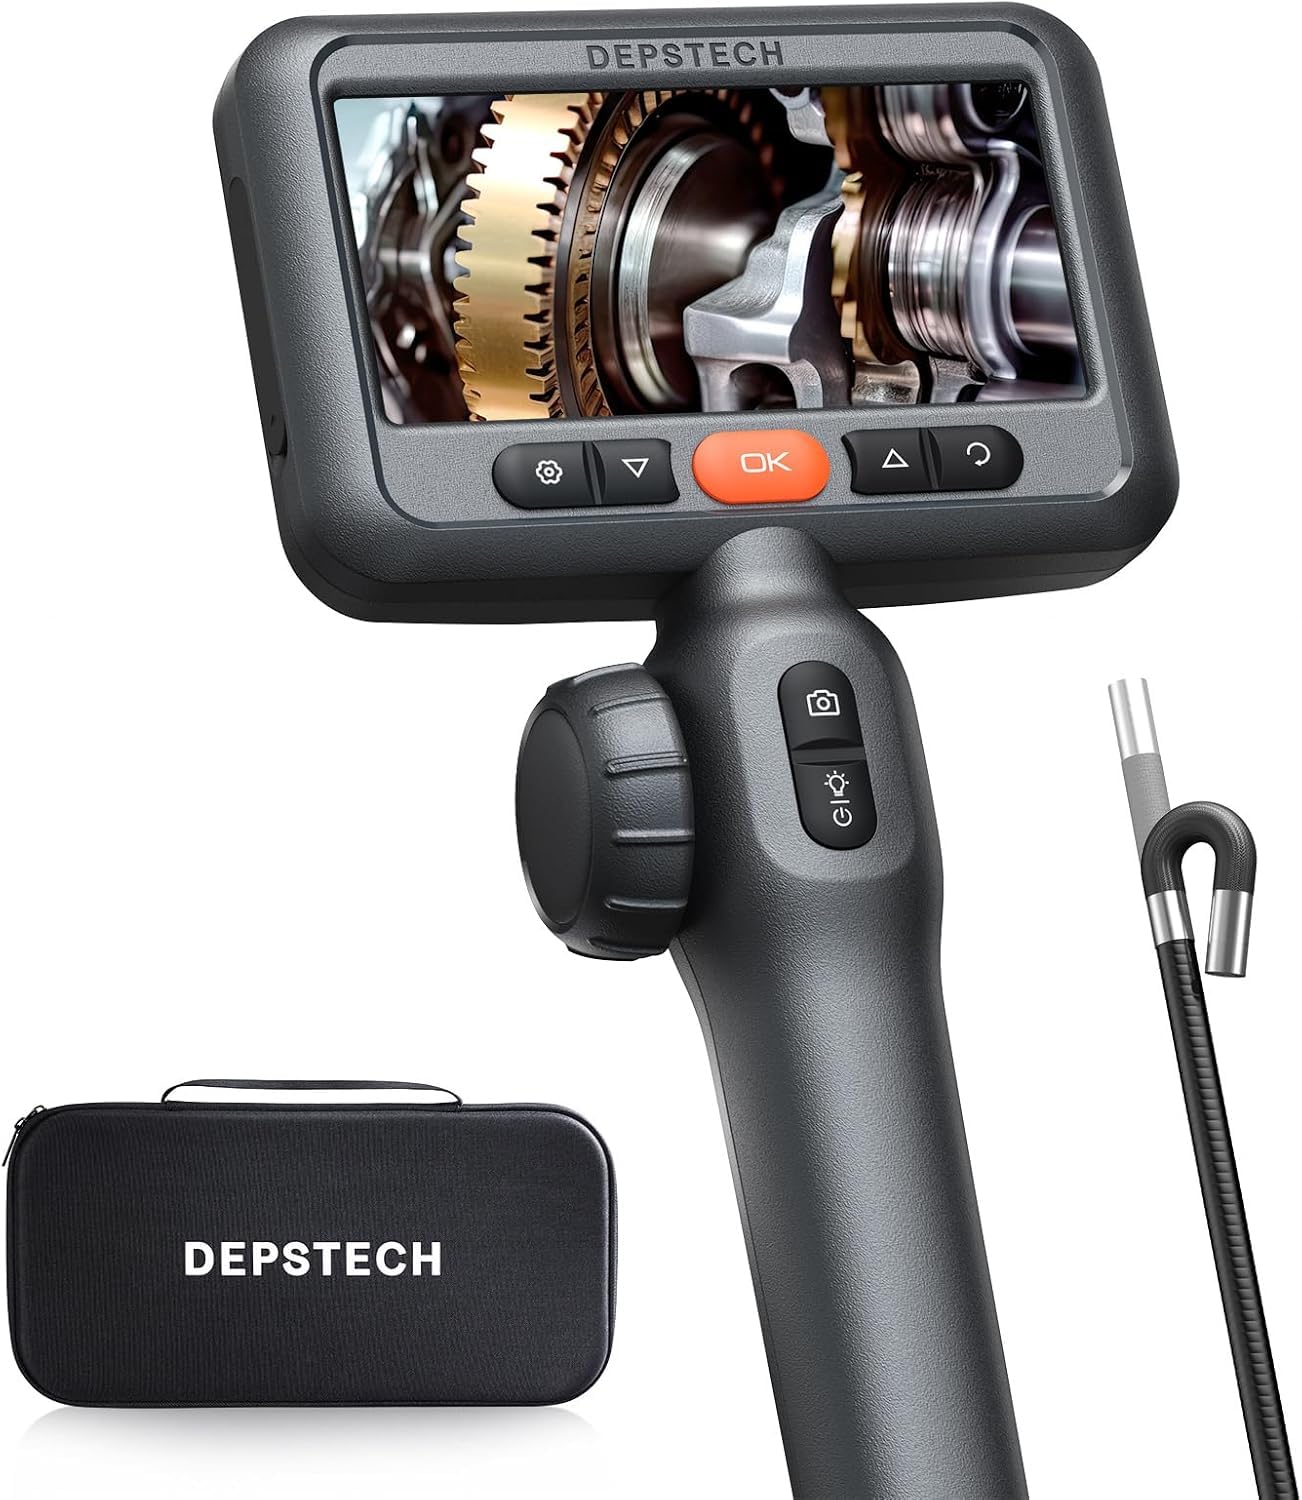
Image 4.1: The DEPSTECH DS650 Articulating Borescope, showing the main display unit, ergonomic handle, and the articulating probe.
- Display: 4.5-inch IPS Screen
- Probe Diameter: 6.2mm
- Articulation: 210° Two-Way
- Lighting: Adjustable LED lights
- Controls: Power button, articulation joystick, photo/video button, menu/OK buttons.
4.2. DEPSTECH DS520 Dual Lens Sewer Camera
The DS520 is equipped with a 5-inch IPS screen and a 50ft semi-rigid cable with dual lenses, ideal for inspecting longer pipes and sewer lines.
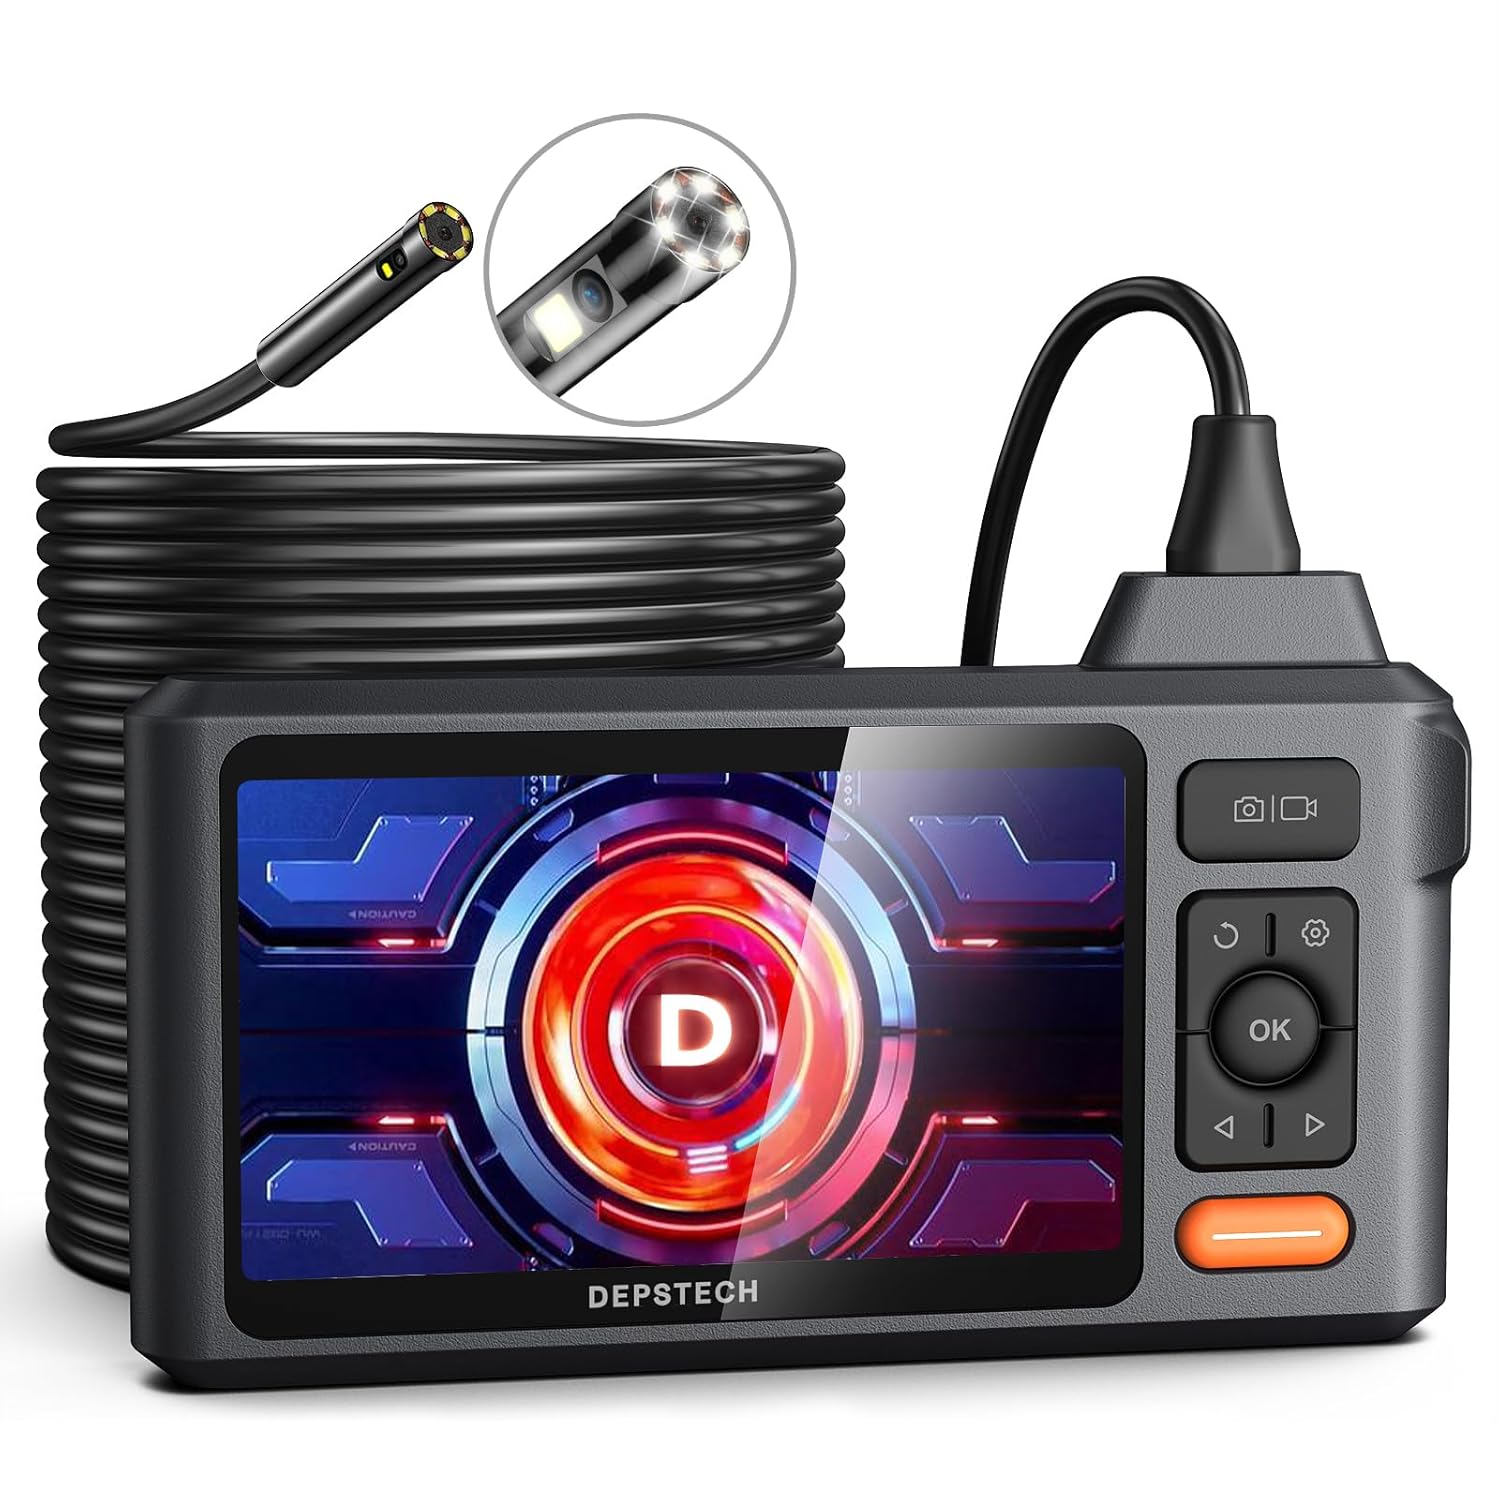
Image 4.2: The DEPSTECH DS520 Dual Lens Sewer Camera, featuring the main display unit and the long, coiled 50ft probe cable.
- Display: 5-inch IPS Screen (179° ultra-wide angle)
- Cable Length: 50ft (semi-rigid)
- Lenses: Dual Lens (front and side view)
- Lighting: 6+1 Adjustable LED lights
- Waterproof: IP67 rated probe
5. Setup
5.1. Charging the Device
Before first use, fully charge the device. Connect the provided USB charging cable to the charging port on the main unit and to a standard USB power adapter (not included). The charging indicator will show the charging status.
5.2. Inserting the TF Card
Locate the TF card slot on the side of the main unit. Insert a compatible TF card (up to 32GB, typically included) with the gold contacts facing down until it clicks into place. This card is necessary for saving photos and videos.
5.3. Attaching the Probe
Carefully align the connector of the probe cable with the port on the main unit. Push firmly until it is securely connected. Ensure a tight connection to prevent signal loss.
6. Operating Instructions
6.1. Powering On/Off
Press and hold the Power button (usually marked with a power symbol) for a few seconds to turn the device on or off.
6.2. Adjusting LED Lights
The probe is equipped with adjustable LED lights. Use the dedicated light adjustment button or scroll wheel (depending on model) to increase or decrease brightness for optimal visibility in dark environments.

Image 6.1: Close-up of the IP67 waterproof probe tip, illustrating the adjustable LED lights for illumination in dark inspection areas.
6.3. Articulating the DS650 Probe
For the DS650, use the articulation joystick or control wheel on the handle to bend the probe tip up to 210° in two directions. This allows navigation around obstacles and viewing at various angles without repositioning the entire cable.

Image 6.2: A hand demonstrating the articulation control of the DS650 borescope, showing the probe tip bending to inspect an engine component.
6.4. Using the DS520 Dual Lens
The DS520 features dual lenses (front and side). A dedicated button on the unit allows switching between the front view, side view, or a split-screen display of both, providing comprehensive coverage for pipe inspections.
6.5. Capturing Images and Videos
Press the Photo button (camera icon) to take a still image. Press the Video button (video camera icon) to start recording; press it again to stop. All captured media is saved to the inserted TF card.

Image 6.3: The borescope display interface, highlighting icons for 32GB TF card support, 180° image rotation, time watermark, and tutorial video access, indicating its photo and video capabilities.
6.6. Viewing and Managing Files
Access the playback mode from the main menu to view saved photos and videos. Use the navigation buttons to browse through files. Files can be deleted directly from the device or by connecting the device to a computer via USB.
6.7. System Settings
Navigate to the 'Settings' menu to adjust various parameters, including:
- Language: Select your preferred language.
- Date/Time: Set the correct date and time for accurate timestamps on recordings.
- Resolution: Adjust photo and video resolution settings.
- Format TF Card: Erase all data on the TF card.
- Factory Reset: Restore default settings.
7. Maintenance
7.1. Cleaning the Probe and Screen
After each use, especially in dirty environments, gently wipe the probe tip and cable with a soft, damp cloth. For stubborn grime, a mild detergent can be used, followed by a clean, damp cloth. Ensure the probe is dry before storage. Clean the display screen with a soft, lint-free cloth.
7.2. Storage
Store the device and its components in a clean, dry, and cool environment. Avoid extreme temperatures and direct sunlight. Coil the probe cable loosely to prevent kinks or damage.
7.3. Battery Care
To prolong battery life, avoid fully discharging the battery frequently. If storing for extended periods, charge the battery to approximately 50-70% every few months.
8. Troubleshooting
| Problem | Possible Cause | Solution |
|---|---|---|
| Device does not power on. | Low battery; device malfunction. | Charge the device fully. If problem persists, contact support. |
| No image on screen. | Probe not connected properly; damaged probe. | Ensure probe is securely connected. Try reconnecting. If still no image, the probe may be damaged. |
| Cannot save photos/videos. | No TF card; TF card full; TF card error. | Insert a TF card. Delete old files or replace TF card. Format TF card in settings. |
| Image is blurry/dark. | Insufficient lighting; dirty lens. | Adjust LED brightness. Clean the probe lens. |
| DS650 probe articulation not working. | Mechanical obstruction; internal damage. | Ensure no physical obstruction. Avoid forcing articulation. If damaged, contact support. |
9. Specifications
9.1. DEPSTECH DS650 Articulating Borescope
- Display: 4.5-inch IPS Display
- Probe Diameter: 6.2mm
- Articulation Angle: 210° Two-Way
- Resolution: 2.0MP (Bluart 3.0 technology)
- Lighting: Adjustable LED Lights
- Storage: Supports up to 32GB TF Card
- Waterproof Rating: IP67 (probe only)
9.2. DEPSTECH DS520 Dual Lens Sewer Camera
- Display: 5-inch IPS Screen (179° ultra-wide angle)
- Cable Length: 50ft (semi-rigid)
- Lenses: Dual Lens (Front and Side)
- Lighting: 6+1 Adjustable LED Lights
- Waterproof Rating: IP67 (probe only)
- Storage: Supports up to 32GB TF Card
10. Warranty and Support
DEPSTECH products come with a standard manufacturer's warranty. For specific warranty details, please refer to the warranty card included in your package or visit the official DEPSTECH website. For technical support, troubleshooting assistance, or warranty claims, please contact DEPSTECH customer service through their official channels or visit the DEPSTECH Store on Amazon.