1. Introduction
This manual provides detailed instructions for the installation, operation, and maintenance of your ZBARK 10.25 Inch Android Auto Touchscreen. Please read this manual thoroughly before installation and use to ensure proper functionality and to avoid damage.
2. Important Compatibility Check
Before proceeding with installation, it is critical to verify your vehicle's original system type. This device is specifically designed for BMW 3 Series (F30, F31, F34) and 4 Series (F32, F33, F36) models manufactured between 2012 and 2015 that are equipped with the NBT System.
To confirm compatibility, check the LVDS connection socket on the back of your OEM display and the interface displayed on your original car screen. In some cases, the UI may appear NBT-like, but the map version indicates an EVO system. This device is not compatible with EVO systems.

Image 2.1: OEM Display Interface Compatibility Check. This image illustrates how to identify the correct LVDS plug (6-pin) and the NBT system interface for compatibility. It explicitly shows incompatibility with CIC (4-pin and 6-pin) and EVO systems.
3. Setup and Installation
3.1 Package Contents
Please ensure all components are present before beginning installation:
- 10.25 Inch Touchscreen Display
- ISO Wiring Harness
- Audio Cable
- USB Cable
- Installation Manual (this document)
- RCA Cable

Image 3.1: Product Dimensions and Included Accessories. This image displays the front and rear views of the 10.25-inch display unit and lists the main accessories provided in the package.
3.2 General Installation Overview
Installation involves replacing the original display and connecting the new unit to the vehicle's existing wiring harness. Professional installation is recommended.

Image 3.2: Wiring Diagram for Installation. This diagram shows the connections between the new display, the ISO harness, and the original CD unit. It also highlights the crucial step of transferring the 2-pin optical fiber cable from the original plug to the new Linux harness.
3.3 Optical Fiber Cable Transfer
During installation, it is essential to properly transfer the 2-pin optical fiber cable from the original ISO plug of the vehicle to the new Linux harness. Failure to do so may result in audio issues or other malfunctions.
3.4 AUX Audio Connection
For audio output, especially in models where the AUX connection directly leads to the audio amplifier, you must plug the provided audio cable into the AUX interface located in the armrest box. This ensures sound from the new system is routed through your car's speakers.

Image 3.3: AUX Audio Connection Diagram. This image illustrates how to connect the audio cable from the new unit to the vehicle's AUX input, typically found in the armrest, to enable sound output.
4. Operating Instructions
4.1 Powering On and Initial Setup
After successful installation, turn on your vehicle's ignition. The new display should power on automatically. The Linux system allows for quick access to the CarPlay or Android Auto interface.
4.2 Wireless CarPlay and Android Auto
This device supports both wired and wireless CarPlay and Android Auto connectivity. No additional adapters are required.
- For Wireless CarPlay: Connect your iPhone to the display via Bluetooth. Follow the on-screen prompts to establish the CarPlay connection.
- For Wireless Android Auto: Connect your Android phone to the display via Bluetooth. Follow the on-screen prompts to establish the Android Auto connection.
- For Wired Connection: Connect your smartphone using a USB cable to the provided USB port.
You can answer calls via CarPlay or Android Auto using the original car's Bluetooth system.

Image 4.1: Wireless CarPlay and Android Auto Functionality. This image demonstrates the wireless connection of both Apple CarPlay and Android Auto to the new display, showing the respective interfaces.

Image 4.2: CarPlay and Android Auto Interface. This image displays the main interface of the new screen with CarPlay and Android Auto icons, along with a smartphone showing the CarPlay interface.
4.3 Switching Between Interfaces
The device allows seamless switching between the factory OEM interface and the new CarPlay/Android Auto interface. This can typically be done using a dedicated button or through the car's original iDrive controller.
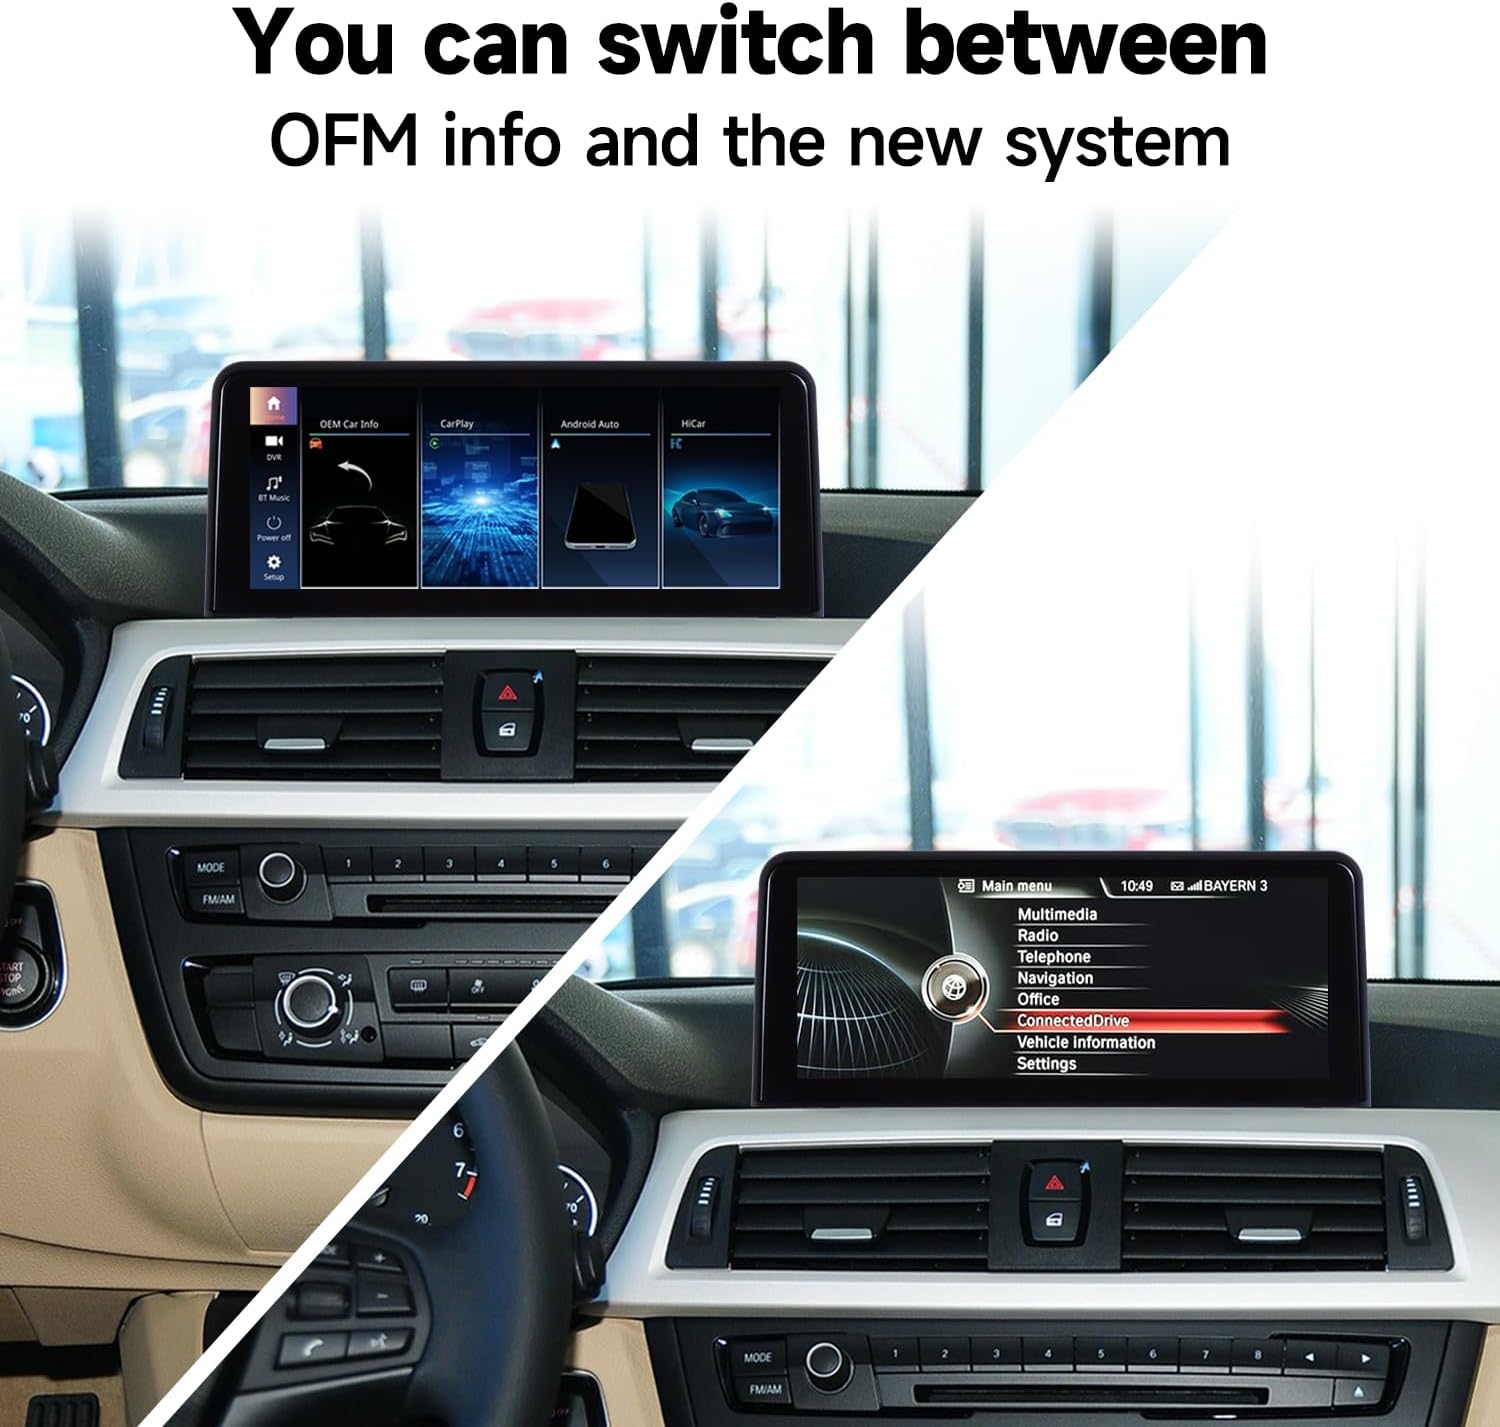
Image 4.3: Interface Switching. This image demonstrates the ability to switch between the original BMW interface and the new system's interface.
4.4 Displaying Original Car Information
The new display supports showing information from the original car's instrument panel, ensuring no loss of critical vehicle data.
4.5 Control Methods
- Touchscreen: The 1920*720 HD display features capacitive touch functionality for direct interaction.
- Car Knob Control: You can control the CarPlay or Android Auto interface using the car's original iDrive knob.
- Steering Wheel Buttons: The device is compatible with your vehicle's existing steering wheel button functions.
4.6 Bluetooth Calls and Music
The built-in Bluetooth functionality allows for hands-free calls and audio streaming. Pair your phone with the device via Bluetooth to use these features.

Image 4.4: Bluetooth Hands-free Calls and Music. This image illustrates the Bluetooth connectivity for making calls and playing music hands-free.
4.7 USB Media Playback
The device supports playing music and videos directly through the USB port. Connect a USB drive containing your media files.
4.8 Camera Adaptation
The system supports the car's original reversing camera and radar information display. It is also compatible with aftermarket CVBS format cameras. Please note that it does not support aftermarket AHD format cameras.

Image 4.5: Camera Support. This image displays the reversing camera settings and a visual of how the system integrates with original and aftermarket CVBS cameras for parking assistance.
5. Maintenance
To ensure the longevity and optimal performance of your ZBARK display, follow these maintenance guidelines:
- Cleaning: Use a soft, lint-free cloth to clean the screen. Avoid abrasive cleaners or solvents that could damage the display.
- Temperature: Avoid exposing the device to extreme temperatures, both hot and cold, for extended periods.
- Moisture: Keep the device dry. Do not expose it to water or other liquids.
- Software Updates: Check the manufacturer's website periodically for any available software updates to improve performance and add features.
6. Troubleshooting
If you encounter issues with your ZBARK display, refer to the following common troubleshooting steps:
- No Power:
- Check all power connections to ensure they are securely plugged in.
- Verify the vehicle's fuse for the stereo system is intact.
- No Sound:
- Ensure the AUX audio cable is correctly connected to the vehicle's AUX input (refer to Section 3.4).
- Check the volume levels on both the display and your vehicle's audio system.
- Confirm the 2-pin optical fiber cable was transferred correctly (refer to Section 3.3).
- CarPlay/Android Auto Not Connecting:
- Ensure Bluetooth is enabled on your smartphone and the display.
- Try forgetting the device on your phone's Bluetooth settings and re-pairing.
- For wired connections, try a different USB cable.
- Restart both your phone and the display unit.
- Display Not Switching to OEM Interface:
- Ensure all LVDS connections are secure.
- Verify the compatibility of your original system (NBT only, not EVO or CIC).
- Rear Camera Not Displaying:
- Check the camera input connection on the display unit.
- Confirm that aftermarket cameras are CVBS format, as AHD cameras are not supported.
- Verify camera settings in the display's menu.
If problems persist after attempting these steps, please contact ZBARK customer support for further assistance.
7. Specifications
| Feature | Specification |
|---|---|
| Display Size | 10.25 inches |
| Display Resolution | 1920*720 HD |
| Operating System | Linux |
| Connectivity | Wireless CarPlay, Wireless Android Auto, Bluetooth |
| Input Ports | USB, RCA, HDMI |
| Audio Output Mode | Stereo |
| Video Encoding Support | H.264, H.265/HEVC, MPEG-4 |
| Compatible Camera Formats | OEM, Aftermarket CVBS (AHD not supported) |
| Item Weight | 3.54 pounds |
| Model Number | ZBARK-CAR-1025-NA |
8. Warranty and Support
For warranty information and technical support, please refer to the documentation included with your purchase or visit the official ZBARK website. Keep your proof of purchase for warranty claims.