Introduction
This manual provides detailed instructions for the safe and effective use of your WWOAA Super Bright Headlamp MX-S90. Please read this manual thoroughly before operating the device and retain it for future reference.
The WWOAA Super Bright Headlamp is a versatile lighting device designed for various activities including camping, hiking, fishing, hunting, night running, home repairs, and emergencies. It features a powerful XHP90.2 LED chip, multiple lighting modes, a motion sensor, and a digital battery display.
Package Contents
Upon unpacking, please ensure all items listed below are present:
- 1 × Rechargeable LED Headlamp
- 1 × USB-C Cable
- 1 × User Manual (this document)
- 6 × Hat Clips
- 2 × Lithium Ion Batteries (pre-installed or separate)


Setup
1. Battery Installation/Charging
The headlamp requires 1 Lithium Ion battery (included). Ensure the battery is correctly inserted into the battery compartment located at the rear of the head strap. The headlamp is rechargeable via the included USB-C cable.
- Open the battery compartment on the rear unit.
- Insert the included Lithium Ion batteries, observing the correct polarity (+/-).
- Close the battery compartment securely.
- To charge, connect the USB-C cable to the charging port on the battery pack and to a suitable USB power source. The digital display will show the charging progress.
2. Adjusting the Head Strap
The head strap is adjustable to fit various head sizes and can be worn over safety helmets. Adjust the straps for a comfortable and secure fit.
- Place the headlamp on your head or helmet.
- Adjust the elastic straps on the top and sides to achieve a snug fit without being too tight.
- Use the included hat clips to secure the headlamp to a hard hat if necessary.
Operating Instructions
1. Power Button and Lighting Modes
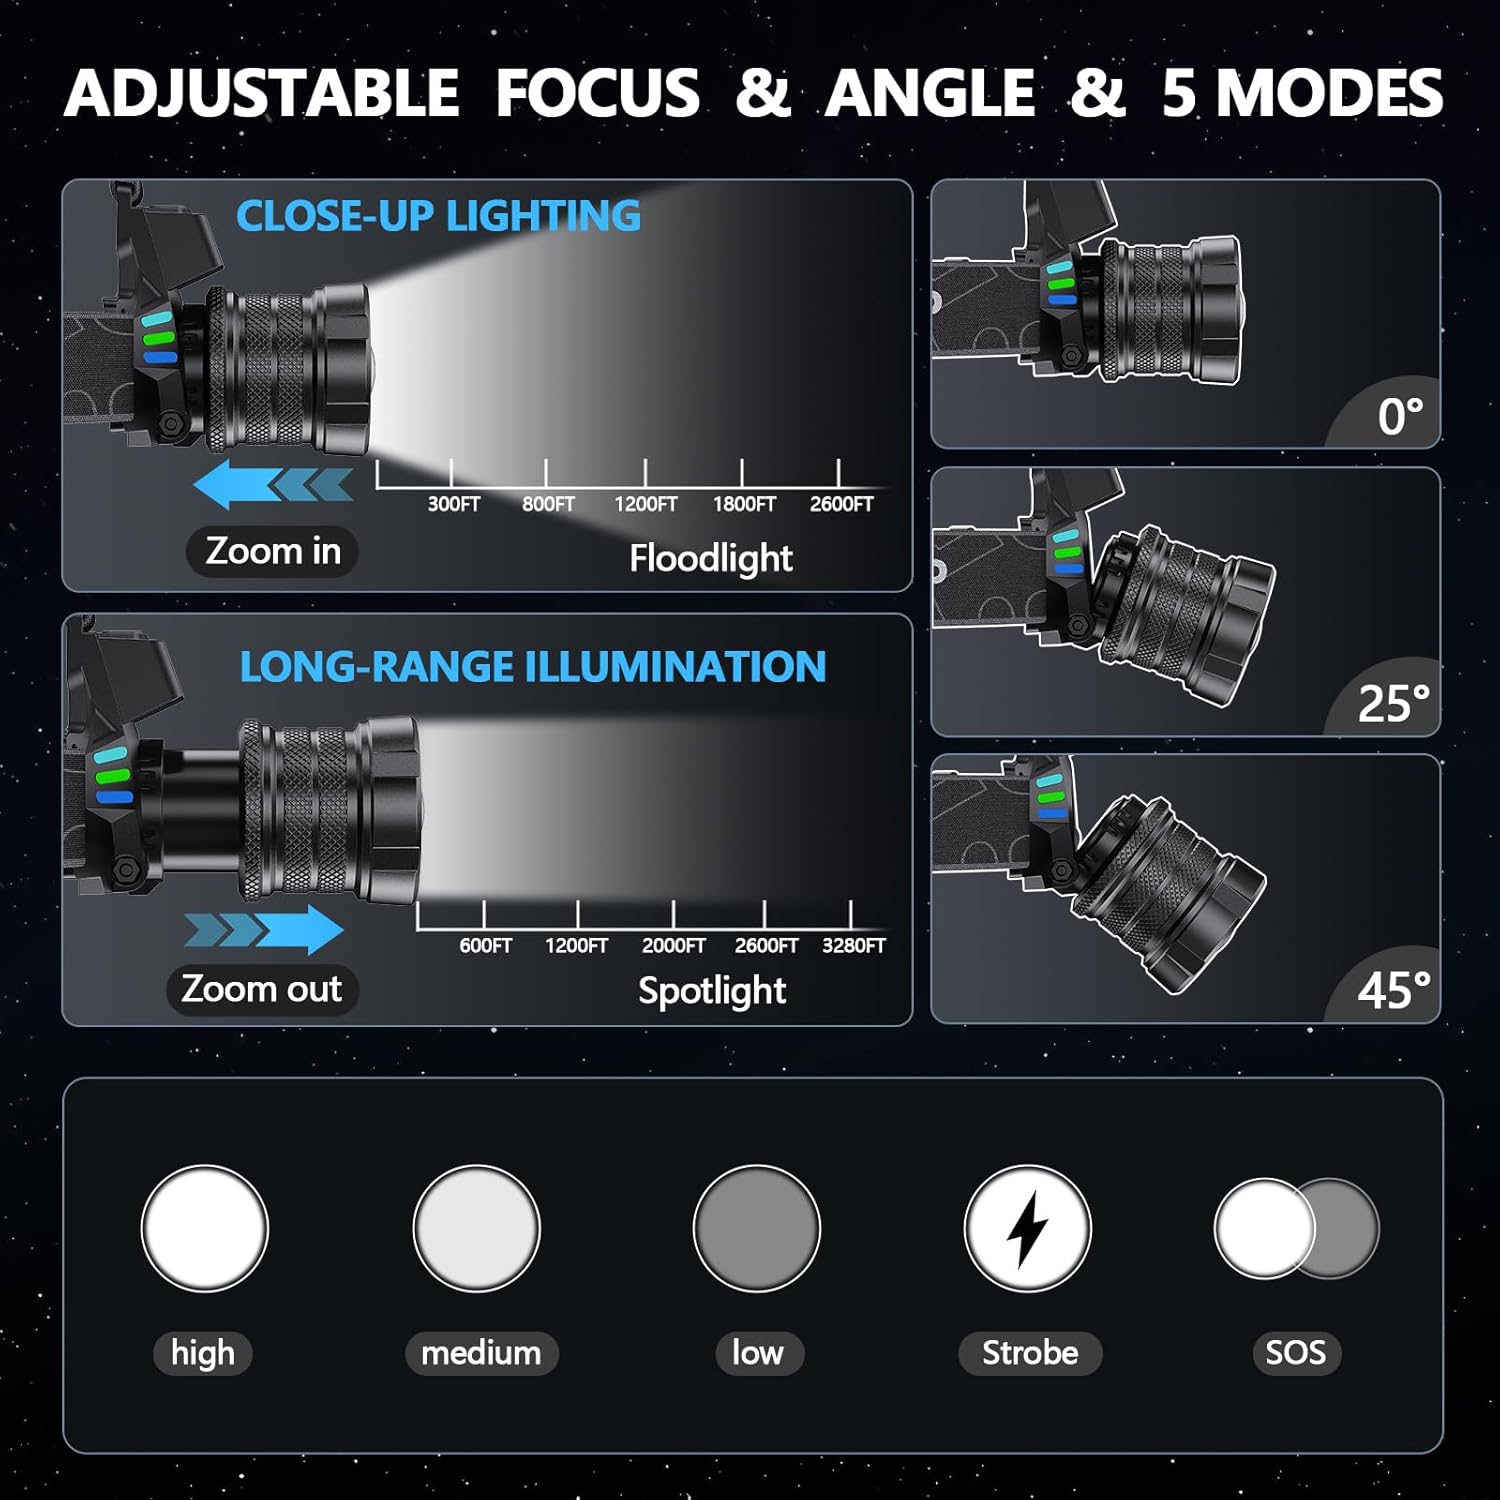
The headlamp features multiple lighting modes to suit different needs. Press the power button to cycle through the modes:
- High: Maximum brightness for long-distance illumination.
- Medium: Balanced brightness for general use.
- Low: Reduced brightness for close-up tasks or extended battery life.
- Strobe: Flashing light for signaling or emergency situations.
- SOS: International Morse code signal for emergencies.
The headlamp also includes a rear red warning light for enhanced visibility from behind, especially useful during nighttime activities like running or cycling.

2. Zoomable Function
Adjust the beam from a wide floodlight to a focused spotlight by rotating the front bezel of the headlamp. This allows for versatile illumination depending on your activity.
- Rotate the bezel clockwise to zoom in for a focused spotlight (long-distance illumination).
- Rotate the bezel counter-clockwise to zoom out for a wide floodlight (broad area illumination).
3. Motion Sensor Switch
The headlamp is equipped with a motion sensor for hands-free operation. This feature is particularly useful when your hands are occupied or wearing gloves.
- Press the dedicated motion sensor button to activate the sensing mode. An indicator light will confirm activation.
- Wave your hand within approximately 6 inches (15 cm) in front of the headlamp to turn the light on or off.
- Press the motion sensor button again to deactivate the sensing mode and return to manual control.
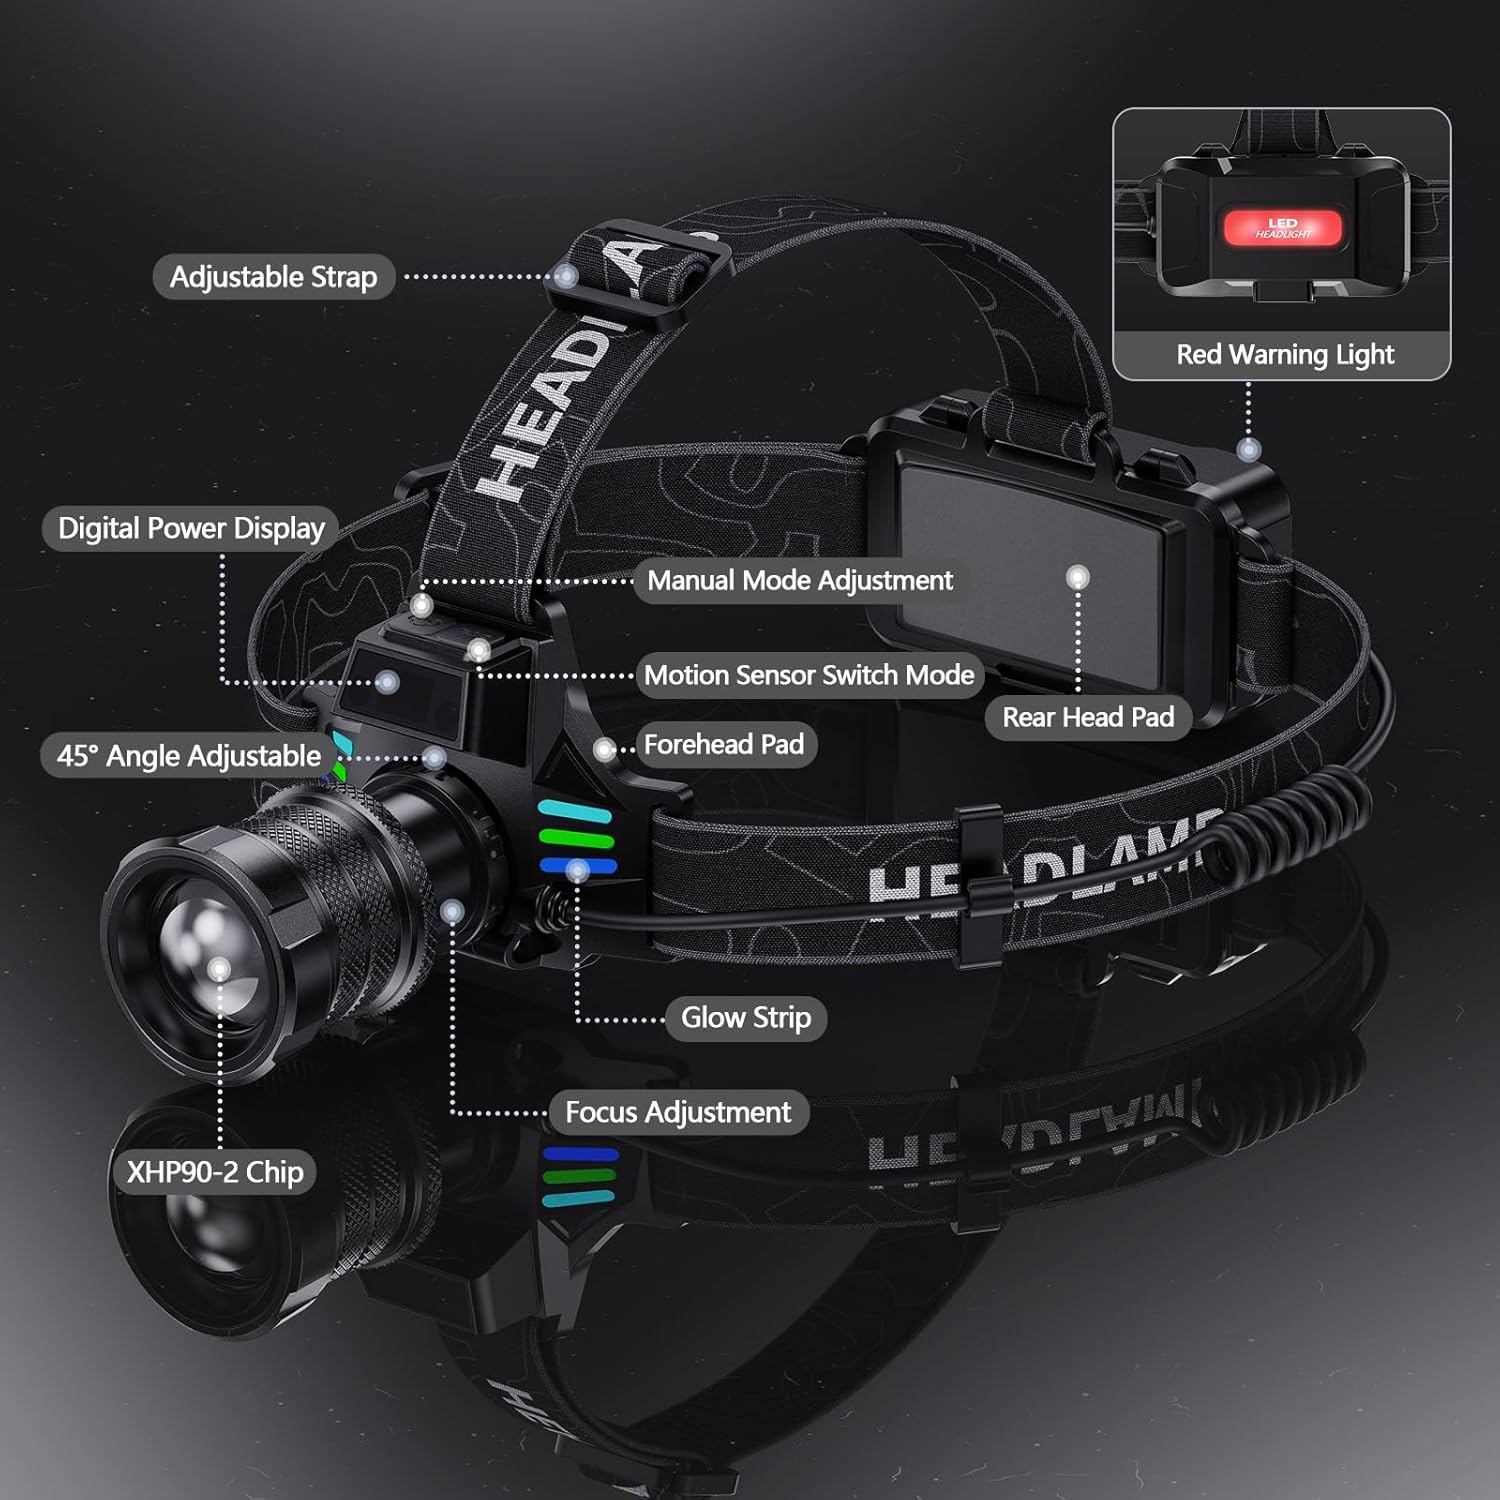
4. 45-Degree Adjustable Head
The headlamp's light unit can be tilted up to 45 degrees, allowing you to direct the beam precisely where needed without adjusting your head position.
- Gently tilt the light unit up or down to adjust the angle of illumination.
- This feature is ideal for tasks requiring focused light on a specific area, such as reading maps or repairing equipment.

Maintenance
1. Battery Care
- Regularly check the digital battery display to monitor the charge level.
- Recharge the batteries using the provided USB-C cable when the charge is low to prolong battery life.
- Store the headlamp in a cool, dry place when not in use, especially for extended periods.
2. Cleaning
- Wipe the headlamp body with a soft, damp cloth to remove dirt and debris.
- Avoid using harsh chemicals or abrasive cleaners, as these can damage the device.
- Ensure the charging port cover is securely closed to maintain water resistance.
Troubleshooting
1. Light Not Turning On
- Check if the batteries are correctly inserted and fully charged.
- Ensure the power button is pressed firmly.
- If using motion sensor mode, ensure it is activated and your hand is within the sensing range.
2. Motion Sensor Too Sensitive/Not Responding
- The motion sensor has an optimal sensing range of approximately 6 inches. Ensure objects are not constantly within this range if unintended activation occurs.
- If the sensor is not responding, try deactivating and reactivating the motion sensor mode.
3. Dim Light Output
- Check the battery level; dim light often indicates low battery.
- Ensure the headlamp is not in a lower brightness mode. Cycle through the modes to select a brighter setting.
Specifications
| Feature | Detail |
|---|---|
| Brand | WWOAA |
| Model Number | MX-S90 |
| Light Source Type | LED (XHP90.2 chip) |
| Brightness | Up to 4000 Lux (2080 Lumens White Brightness) |
| Illumination Range | Approx. 1000 feet (floodlight) to 3280 feet (spotlight) |
| Power Source | Cell Powered (1 Lithium Ion battery included) |
| Battery Type | Lithium-Ion Polymer (3000mAh*2 cells - 6000mAh) |
| Charging | USB-C Cable |
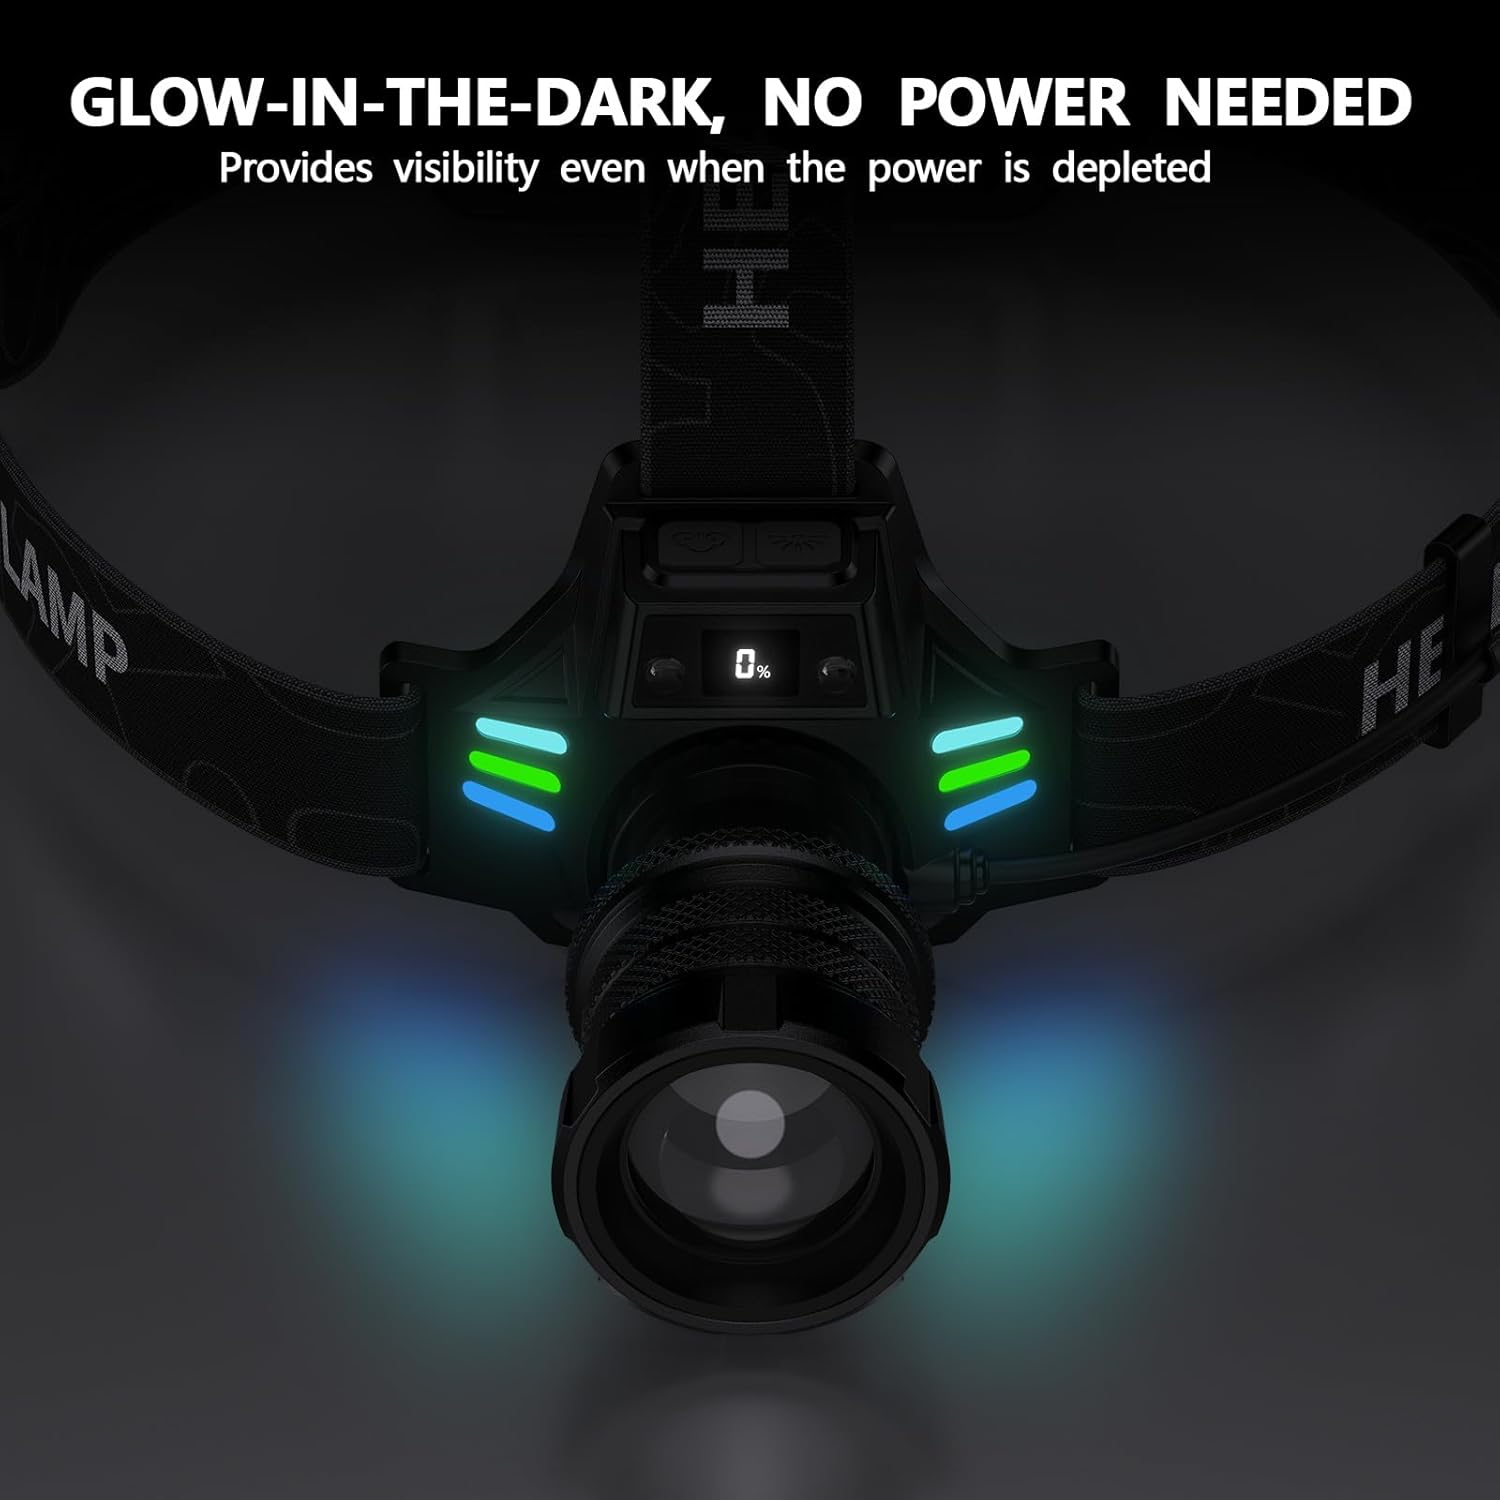
| Special Features | Adjustable Focus, Adjustable Lamp Head (45-degree), 12 Light Modes, Red Warning Light, Digital Power Display, Motion Sensor, Luminous Strip |
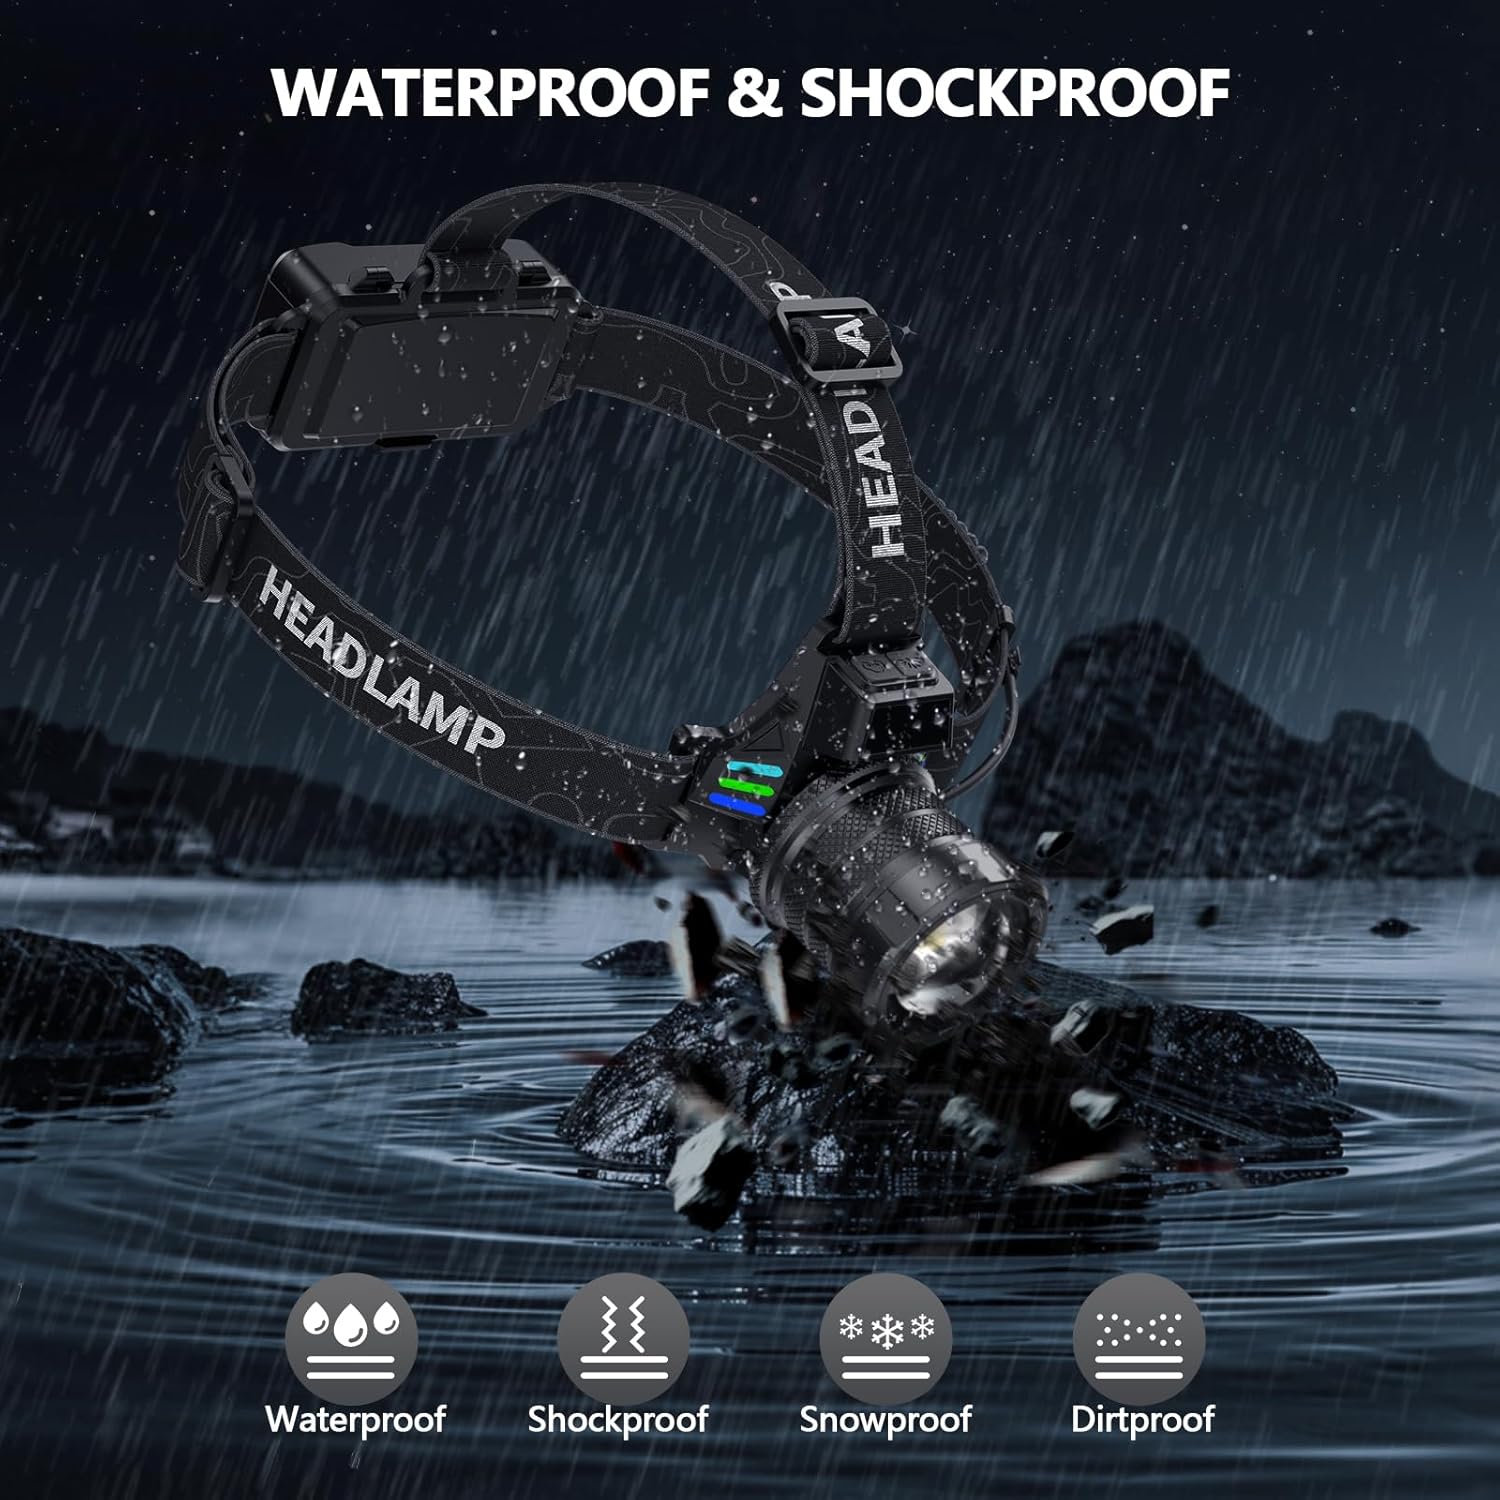
| Water Resistance Level | Waterproof |
| Material | Aluminum |
| Product Dimensions | 4.69"D x 3.98"W x 4.53"H |
| Item Weight | 12.3 ounces |
Warranty and Support
The WWOAA Super Bright Headlamp MX-S90 comes with a 10-year free replacement service, ensuring peace of mind with your purchase. For any issues or inquiries, our professional customer support team is available 24/7, all year round.
Please contact us for fast, professional, and satisfying solutions to any problem you may encounter.
For further assistance, please refer to the contact information provided with your product packaging or visit the official WWOAA website.
Product Videos
WWOAA Headlamp Features Overview
Video: This video provides a concise overview of the WWOAA headlamp's key features, including its bright illumination, motion sensor, adjustable head, and digital battery display. It demonstrates the product's design and functionality.
WWOAA Headlamp Unboxing and Initial Impressions
Video: This video shows the unboxing experience of the WWOAA headlamp, highlighting the included accessories like rechargeable batteries, hat clips, and the USB-C charging cable. It also briefly demonstrates the headlamp's brightness and red warning light.