1. Introduction
This instruction manual provides important information regarding the GeoTech Front Brake Rotor, Model 2054097. It covers product overview, safety guidelines, installation procedures, break-in recommendations, maintenance, and specifications. This brake rotor is designed for specific Ford and Mazda vehicle models manufactured between 2001 and 2011.
The GeoTech brake rotor is a fully coated, corrosion-protected component engineered for consistent and reliable braking performance. It undergoes multi-stage quality control to ensure precise fitment and adherence to dimensional and weight specifications.
2. Safety Information
Warning: Brake system components are critical for vehicle safety. Improper installation or maintenance can lead to serious injury or death. It is highly recommended that installation be performed by a qualified automotive technician.
- Always wear appropriate personal protective equipment (PPE), including safety glasses and gloves, when working on brake systems.
- Ensure the vehicle is securely supported on jack stands before beginning any work. Never rely solely on a jack.
- Allow brake components to cool completely before handling to prevent burns.
- Keep brake fluid away from painted surfaces, as it can damage paint.
- Dispose of old brake components and fluids according to local environmental regulations.
3. Package Contents
Verify that all components are present and undamaged upon opening the package.
- 1 x GeoTech Front Brake Rotor (Model 2054097)
4. Installation
This section outlines the general steps for installing the GeoTech Front Brake Rotor. Refer to your vehicle's specific service manual for detailed instructions and torque specifications.
- Prepare Vehicle: Park the vehicle on a level surface, engage the parking brake, and block the rear wheels. Loosen the lug nuts on the front wheels.
- Lift and Secure: Safely lift the front of the vehicle using a jack and support it with jack stands. Remove the front wheels.
- Remove Caliper: Unbolt the brake caliper from its mounting bracket. Do not let the caliper hang by the brake hose; support it with a wire or bungee cord.
- Remove Caliper Bracket: Remove the caliper mounting bracket from the steering knuckle.
- Remove Old Rotor: Remove any retaining screws or clips holding the old brake rotor in place. The rotor may be seized to the hub; use a rubber mallet to gently tap it loose if necessary.
- Clean Hub Surface: Thoroughly clean the wheel hub mounting surface to remove any rust, dirt, or debris. A clean surface is crucial for proper rotor seating and to prevent runout.
- Install New Rotor: Place the new GeoTech Front Brake Rotor onto the wheel hub. Ensure it sits flush against the hub surface.
- Reinstall Caliper Bracket: Reinstall the caliper mounting bracket and torque bolts to manufacturer specifications.
- Reinstall Caliper: Reinstall the brake caliper, ensuring new brake pads are properly seated. Torque caliper bolts to manufacturer specifications.
- Bleed Brakes (if necessary): If the brake lines were opened, bleed the brake system according to the vehicle manufacturer's procedure.
- Reinstall Wheels: Reinstall the wheels, hand-tighten lug nuts, lower the vehicle, and then torque lug nuts to manufacturer specifications.
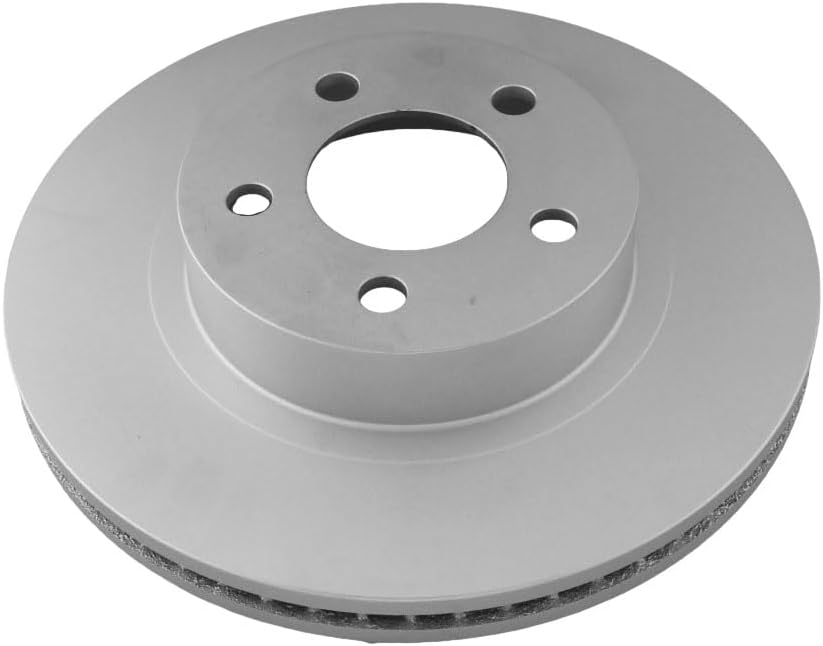
This image displays the GeoTech Front Brake Rotor from a top-down perspective, highlighting the smooth braking surface and the central mounting hub with bolt holes. This view is typical for initial inspection of the rotor's condition.

This image presents an angled view of the GeoTech Front Brake Rotor, showcasing its vented design. The internal fins are visible, which are crucial for dissipating heat generated during braking, ensuring consistent performance and preventing warping.
5. Operating (Brake Break-in Procedure)
Proper break-in of new brake rotors and pads is essential for optimal performance and longevity. This process helps to transfer a thin, even layer of friction material from the pads to the rotor surface.
- Initial Stops: Perform 5-10 moderate stops from 30-35 mph (48-56 km/h) down to 5-10 mph (8-16 km/h). Allow approximately 30 seconds between stops for the brakes to cool slightly. Avoid coming to a complete stop during this phase.
- Cool Down: After the initial stops, drive for several minutes without using the brakes excessively to allow them to cool down.
- Repeat (if necessary): For some applications, a second set of 5-10 moderate stops may be beneficial. Consult your brake pad manufacturer's recommendations.
- Avoid Hard Braking: For the first 200-300 miles (320-480 km) after installation, avoid sudden, hard braking or prolonged heavy braking. This allows the pads and rotors to fully seat.
6. Maintenance
Regular inspection and maintenance of your brake system are crucial for safety and performance.
- Routine Inspection: Inspect brake rotors for signs of wear, cracks, deep grooves, or discoloration during tire rotations or other vehicle servicing.
- Pad Replacement: Replace brake pads when they reach their minimum thickness. Always replace rotors when replacing pads if the rotors are worn beyond manufacturer specifications or show significant damage.
- Cleanliness: Keep brake components free from oil, grease, and other contaminants.
- Fluid Check: Regularly check brake fluid level and condition. Replace brake fluid according to your vehicle manufacturer's recommendations.
7. Troubleshooting
If you experience any issues with your brake system after installing the GeoTech Front Brake Rotor, consider the following common problems and potential causes:
- Brake Noise (Squealing/Grinding):
- Cause: Improper break-in, worn pads, foreign material between pad and rotor, caliper issues, or lack of lubrication on caliper slides.
- Action: Re-evaluate break-in, inspect pads, clean components, check caliper function.
- Brake Vibration/Pulsation:
- Cause: Rotor runout (improper seating), warped rotors (due to overheating or improper torque), uneven pad material transfer.
- Action: Re-check hub cleanliness and rotor seating, ensure proper lug nut torque, re-perform break-in procedure.
- Reduced Braking Performance:
- Cause: Air in brake lines, contaminated pads/rotors, worn components, or improper break-in.
- Action: Bleed brake system, inspect for contamination, ensure proper break-in.
If troubleshooting steps do not resolve the issue, consult a qualified automotive technician.
8. Specifications
| Attribute | Specification |
|---|---|
| Brand | GeoTech |
| Model Number | 2054097 |
| Manufacturer | UQuality Automotive |
| Position | Front |
| Item Weight | 18.8 pounds |
| Package Dimensions | 12.5 x 12.5 x 3.25 inches |
| Exterior Finish | Machined |
| Automotive Fit Type | Vehicle Specific Fit |
| UPC | 677255940971 |
| Compatible Vehicles | 2001-2011 Ford Explorer Sport Trac, Ford Ranger, Mazda B3000, Mazda B4000 |
9. Warranty and Support
GeoTech products are manufactured to high-quality standards. For specific warranty information or technical support, please refer to the documentation provided with your purchase or contact the retailer where the product was acquired. Keep your proof of purchase for warranty claims.