Introduction
This manual provides detailed instructions for the installation, operation, and maintenance of your QDVOPHZA 8MP WiFi Surveillance Camera System. Please read this manual thoroughly before using the product to ensure proper setup and functionality. Keep this manual for future reference.

Image: Overview of the QDVOPHZA 8MP WiFi Surveillance Camera System, showing the NVR unit and several wireless IP cameras.
Package Contents
Verify that all items listed below are included in your package. If any items are missing or damaged, please contact customer support.
- 1 × 8-Channel (8CH) WiFi Network Video Recorder (NVR)
- 1 × NVR Power Adapter
- 1 × USB Mouse for NVR
- 1 × User's Manual (this document)
- 2 × 8MP WiFi Cameras
- 2 × Camera Power Adapters
- 2 × Screw Kits for camera installation
- Note: Hard Disk is optional and may not be included depending on your purchase.
Product Features
The QDVOPHZA 8MP WiFi Surveillance Camera System offers advanced features for comprehensive security monitoring:
- 8MP Ultra HD Display: Provides high-definition video images with exceptional detail and clarity.
- Advanced H.265 Video Compression: Efficiently stores and transmits video while maintaining quality.
- IP66 Waterproof & Dustproof Cameras: Durable ABS plastic cameras suitable for both indoor and outdoor use.
- Flexible Connectivity: Supports AP Mode, WiFi, and Wired connections for versatile setup.
- AI Human Motion Detection: Intelligent detection reduces false alarms and focuses on relevant events.
- Two-Way Audio: Built-in microphone and speaker in each camera allow for real-time communication.
- Full-Color Day & Night Vision: Offers clear, full-color images even in low-light conditions, supplemented by IR-CUT dual filter switch for accurate color representation.
- Storage Options: Supports TF Card storage up to 128GB and Cloud Storage (subscription may be required).
- Multi-User View: Access and control the system remotely via Android and iOS devices.
- 360° Panoramic PTZ Control: Remotely adjust camera pan, tilt, and zoom for comprehensive coverage without blind spots.
- Dual Screens / Dual Lenses: Cameras feature dual lenses for monitoring multiple locations simultaneously, enhancing situational awareness.
- Integrated NVR: The Smart 8CH Wi-Fi NVR supports 4K video recording and playback, with built-in storage (optional hard disk).
- Easy Wireless Installation: Simplifies setup by eliminating complex wiring, ideal for various environments like homes, offices, or shops.
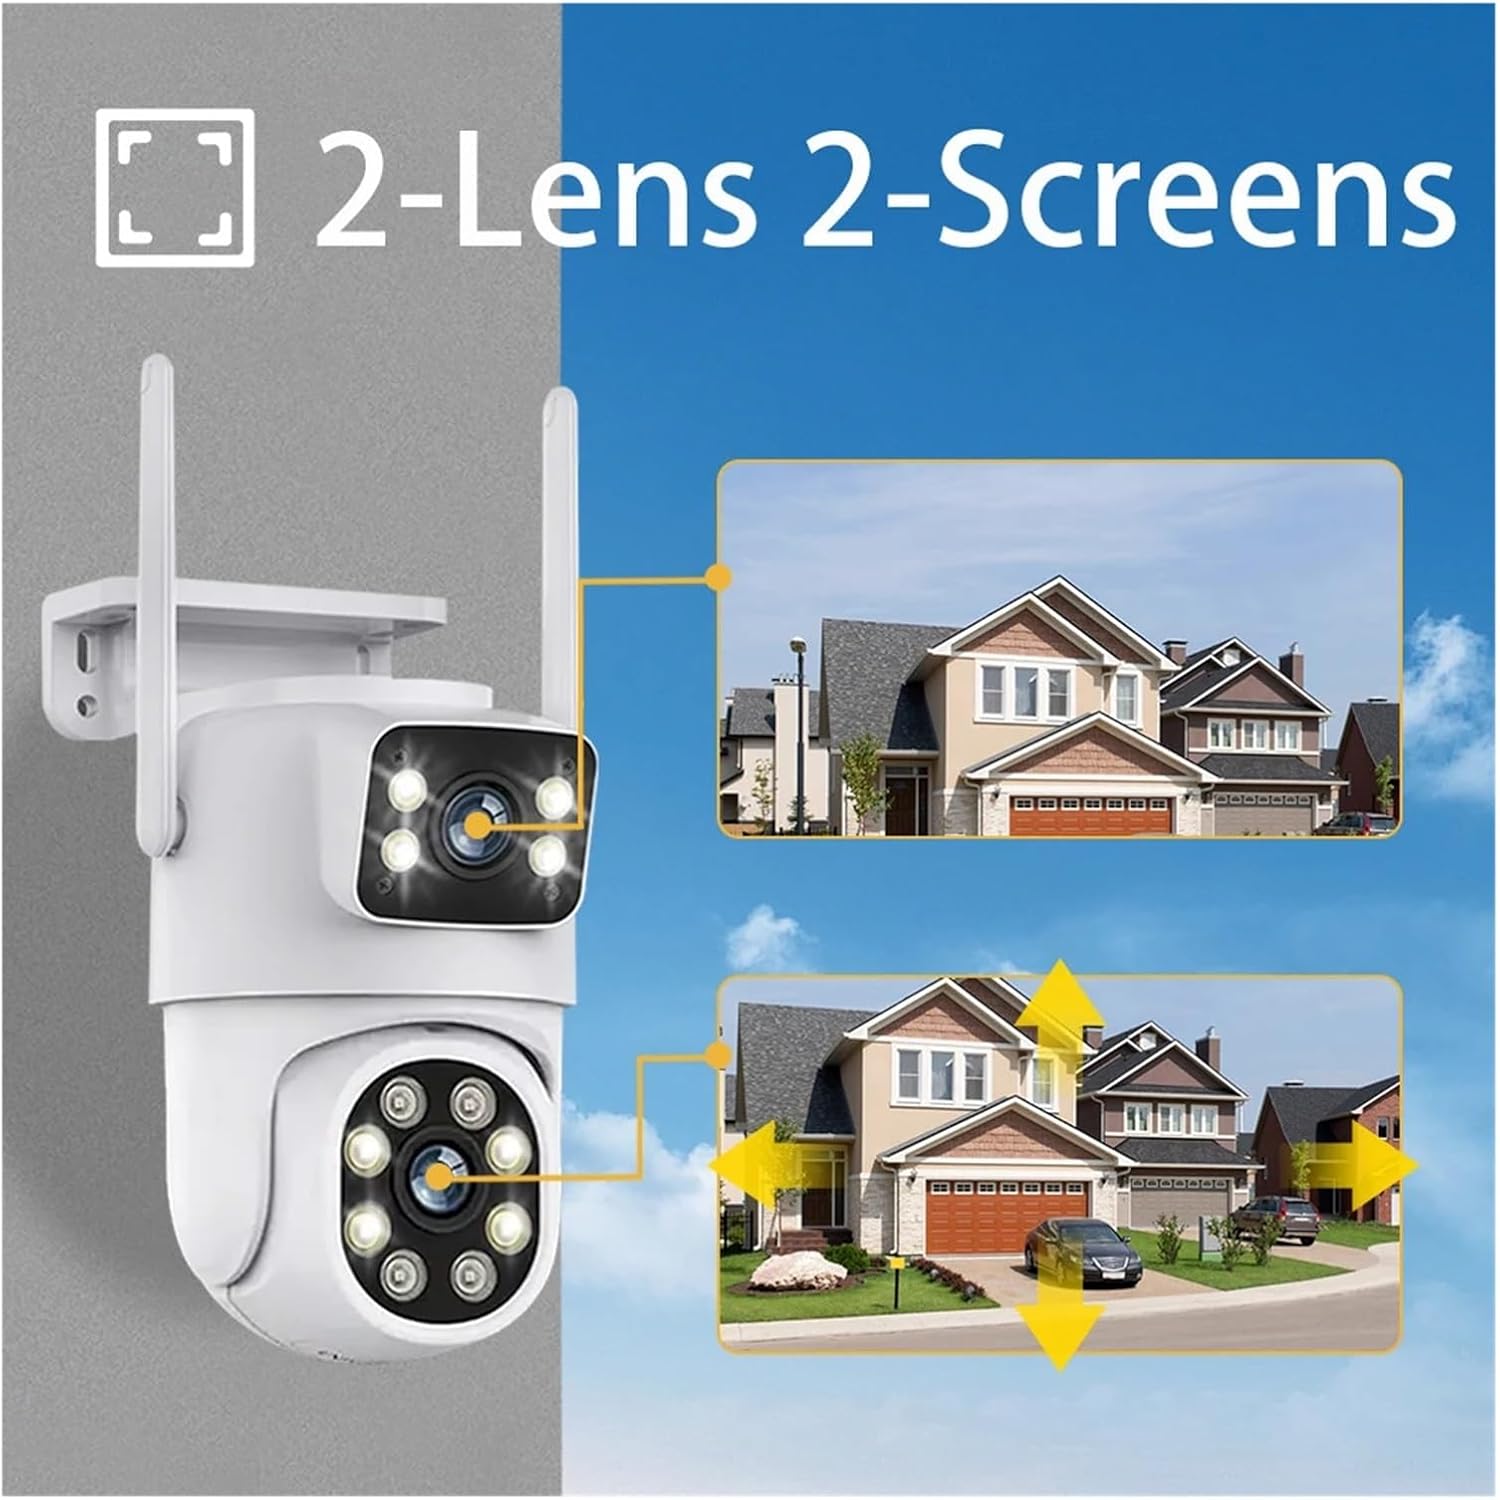
Image: Illustration of the camera's dual-lens design, enabling simultaneous monitoring of two distinct areas on separate screens.
Setup Guide
1. Initial NVR Setup
- Connect the NVR to a power source using the provided NVR Power Adapter.
- Connect the NVR to a monitor (VGA or HDMI) and a mouse to the USB port for initial configuration.
- Power on the NVR. Follow the on-screen prompts to complete the initial setup wizard, including setting up a password and network settings.
2. Camera Installation
- Choose suitable locations for your cameras, ensuring good WiFi signal strength and clear line of sight for monitoring.
- Mount the cameras using the provided screw kits. Ensure the mounting surface is stable.
- Connect each camera to its respective Camera Power Adapter.
- Once powered, the cameras will automatically attempt to connect to the NVR via WiFi.
3. Network Connection
The system supports both wired and wireless network connections for remote access.
- Wired Connection: Connect the NVR to your router using an Ethernet cable.
- WiFi Connection: On the NVR interface, navigate to Network Settings and select your WiFi network. Enter the password to connect.

Image: A diagram illustrating the easy connection process, showing cameras wirelessly connected to the NVR, which is then connected to a network for remote viewing via PC, TV, or mobile app.
4. Mobile App Setup (P2P Remote View)
- Download the official mobile application (e.g., "EseeCloud" or similar, refer to NVR interface for exact app name) from your device's app store (Android/iOS).
- Register an account and log in.
- Add your NVR device by scanning the QR code displayed on the NVR's monitor (usually found in System Info or Network settings) or by manually entering the device ID.
- Once added, you can view live feeds, playback recordings, and control PTZ functions remotely.
Operating Instructions
1. Live View
- On the NVR monitor, the live view of all connected cameras will be displayed.
- Use the mouse to double-click a camera channel to view it in full screen. Double-click again to return to multi-channel view.
- On the mobile app, select the NVR device to see the live feeds. Tap on a camera to view it individually.
2. Recording
- The NVR is typically configured for continuous recording or motion-triggered recording by default.
- To adjust recording settings (e.g., schedule, motion detection sensitivity), right-click on the NVR interface, go to "Record Settings" or "Alarm Settings".
- Ensure a hard disk is installed for local recording storage.
3. Playback
- On the NVR, right-click and select "Playback". Choose the date and camera channel to review recorded footage.
- On the mobile app, navigate to the "Playback" section, select the desired camera and date to view recordings.
4. PTZ Control
- For cameras with PTZ (Pan/Tilt/Zoom) functionality, controls will appear on the NVR interface or mobile app when viewing a single camera.
- Use the directional arrows or touch gestures (on mobile) to adjust the camera's viewing angle.
- Digital zoom may also be available.
5. Two-Way Audio
- When viewing a live feed on the NVR or mobile app, look for a microphone icon.
- Tap/click the microphone icon to speak through the camera's speaker. Tap/click again to mute.
- Ensure your device's microphone is enabled for the app.
Maintenance
1. Cleaning
- Regularly clean the camera lenses with a soft, dry cloth to ensure clear image quality.
- Do not use harsh chemicals or abrasive materials.
- Keep the NVR unit free from dust and ensure proper ventilation.
2. Firmware Updates
- Check the manufacturer's website or the NVR's system settings periodically for firmware updates.
- Firmware updates can improve performance, add new features, and enhance security.
- Follow the update instructions carefully to avoid damaging the device.
3. Storage Management
- If using a local hard disk, monitor its storage capacity through the NVR interface.
- Configure the NVR to overwrite old recordings automatically when the disk is full, or manually back up important footage.
- For cloud storage, manage your subscription and storage limits via the mobile app or web portal.
Troubleshooting
| Problem | Possible Cause | Solution |
|---|---|---|
| No image from camera | Camera not powered; WiFi connection issue; Camera out of range. | Check power adapter connection. Verify camera is within NVR's WiFi range. Re-pair camera if necessary. |
| NVR not connecting to network | Ethernet cable loose; Incorrect WiFi password; Router issue. | Ensure Ethernet cable is securely connected. Re-enter WiFi password. Restart router and NVR. |
| No recording | Hard disk not installed/formatted; Recording schedule not set; Motion detection not configured. | Install and format hard disk. Check recording schedule. Configure motion detection settings. |
| Mobile app cannot connect | NVR not online; Incorrect device ID; Network firewall. | Ensure NVR is connected to the internet. Verify device ID. Check router/firewall settings. |
| Poor image quality | Dirty lens; Low light conditions; WiFi interference. | Clean camera lens. Ensure adequate lighting or rely on night vision. Reduce WiFi interference. |
If you encounter issues not listed here, please refer to the manufacturer's online support resources or contact customer service.
Specifications
| Feature | Detail |
|---|---|
| Brand | QDVOPHZA |
| Model Number | w0u5903wei |
| ASIN | B0DMPHSH7V |
| Camera Resolution | 8MP Ultra HD |
| NVR Channels | 8CH (8-Channel) |
| Connectivity | WiFi, Wired (Ethernet) |
| Camera Features | 360° PTZ, Dual Lenses, Two-Way Audio, AI Human Motion Detection, IP66 Waterproof |
| Video Compression | H.265 |
| Night Vision | Ultra HD Full Color Day Night Vision, IR-CUT |
| Storage | Supports TF Card up to 128GB, Cloud Storage, NVR Hard Disk (Optional) |
| Mobile OS Support | Android, iOS |
| Package Dimensions | 1.18 x 0.79 x 0.39 inches |
| Item Weight | 1.76 ounces |
Warranty and Support
This product comes with a standard return policy of 30 days for refund or replacement. For extended protection, 2-Year and 3-Year Protection Plans may be available for purchase.
For technical assistance, troubleshooting, or warranty claims, please contact QDVOPHZA customer support through the retailer's platform or the contact information provided with your purchase documentation.
Manufacturer: w0u5903wei