1. Important Safety Instructions
Before operating the BH Fitness Sherpa Run treadmill, please read and understand all safety instructions. Keep this manual for future reference.
- Always consult with a physician before starting any new exercise program.
- Place the treadmill on a flat, stable surface with adequate clearance around it (at least 2 meters behind and 0.6 meters on each side).
- Ensure the safety key is properly attached to your clothing and the console before starting. In case of emergency, the safety key will stop the treadmill.
- Do not allow children or pets near the treadmill while it is in operation.
- The maximum user weight for this treadmill is 110 kg (242 lbs).
- Wear appropriate athletic footwear and clothing.
- Do not operate the treadmill if it is damaged or malfunctioning.
- Keep hands and feet clear of all moving parts.
- Unplug the treadmill from the power outlet when not in use or before cleaning and maintenance.
2. Product Overview
The BH Fitness Sherpa Run treadmill is designed for regular home use, offering a combination of convenience and performance. It features a compact folding design, a 120x42cm running surface, and a maximum speed of 14 km/h. The treadmill includes 12 pre-defined training programs and 15 levels of electrical incline.
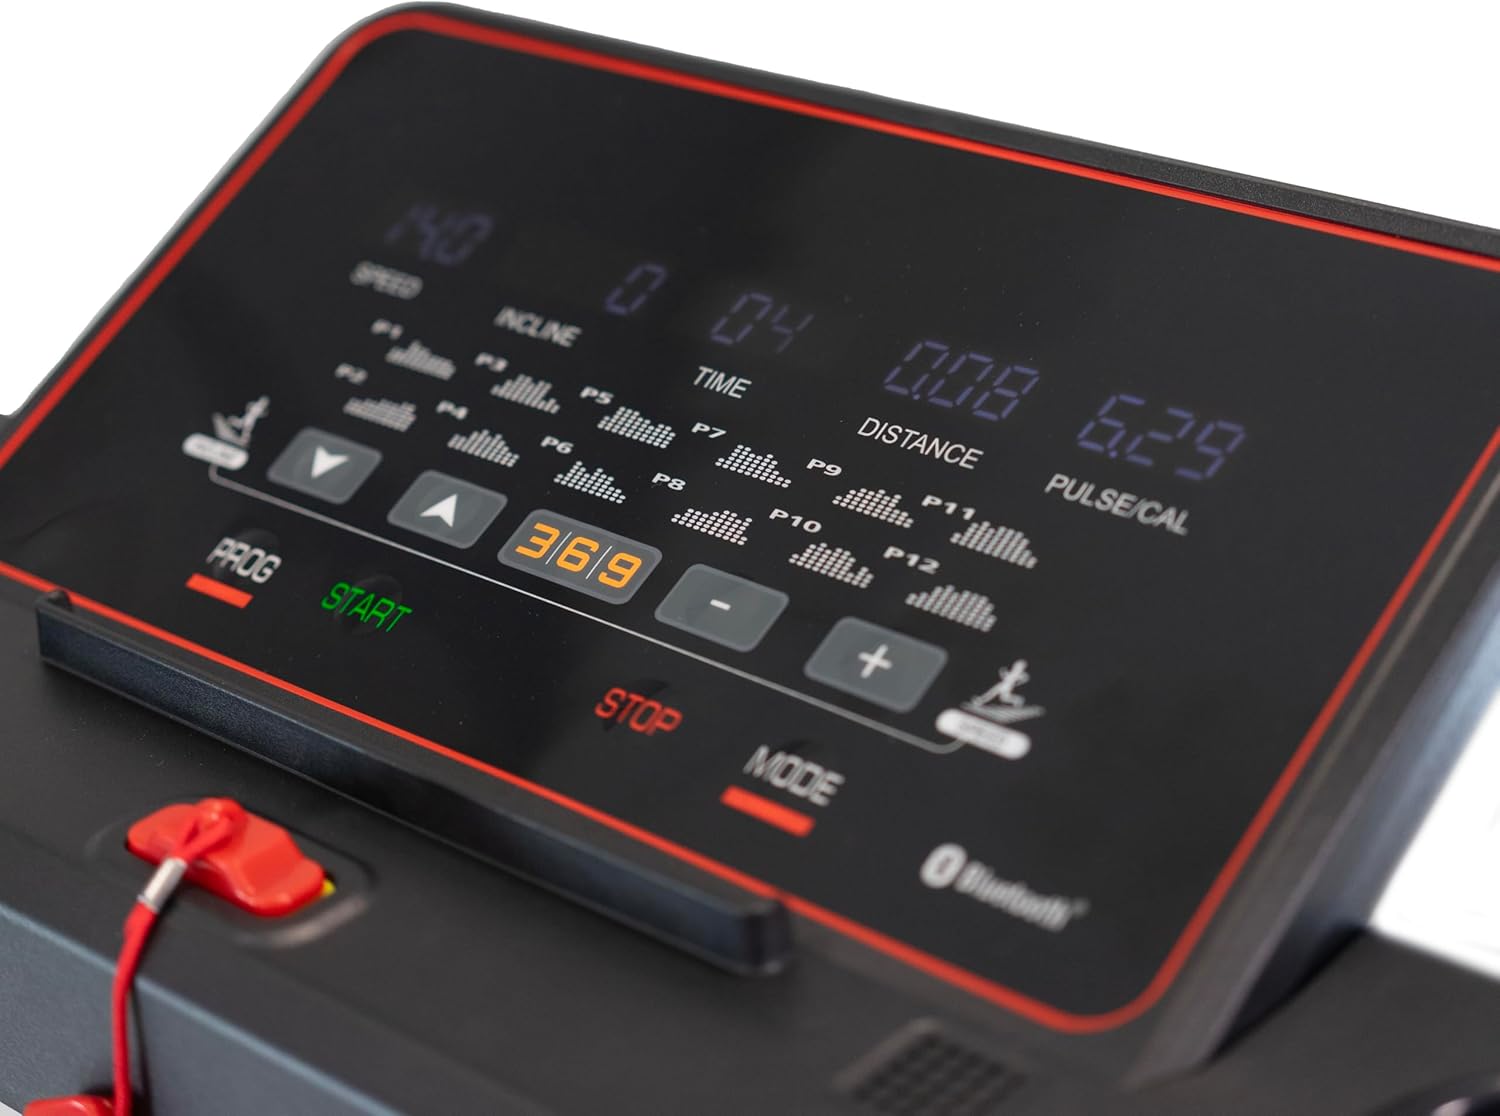
Figure 2.1: BH Fitness Sherpa Run treadmill in unfolded position.
This image shows the complete treadmill with its running deck, console, and handrails, ready for exercise.

Figure 2.2: BH Fitness Sherpa Run treadmill in folded position.
The treadmill is shown vertically folded, highlighting its compact design for easy storage, with wheels visible at the base.
3. Setup and Assembly
The BH Fitness Sherpa Run treadmill is semi-assembled for your convenience. Minimal assembly is required to get your treadmill ready for use.
3.1 Unpacking
- Carefully remove all components from the packaging.
- Verify that all parts listed in the 'What's in the Box' section are present.
3.2 Assembly Steps
- Place the treadmill base on a clear, level surface.
- Carefully unfold the handrails into their upright position.
- Using the provided assembly tool kit, tighten the 4 screws that secure the handrails.
- Ensure all connections are secure and the treadmill is stable.
- Connect the power cable to the treadmill and then to a grounded electrical outlet.
Your treadmill should be ready for use in less than 5 minutes after unfolding and securing the handrails.
4. Operating Instructions
Familiarize yourself with the control panel and functions before beginning your workout.
4.1 Control Panel Overview
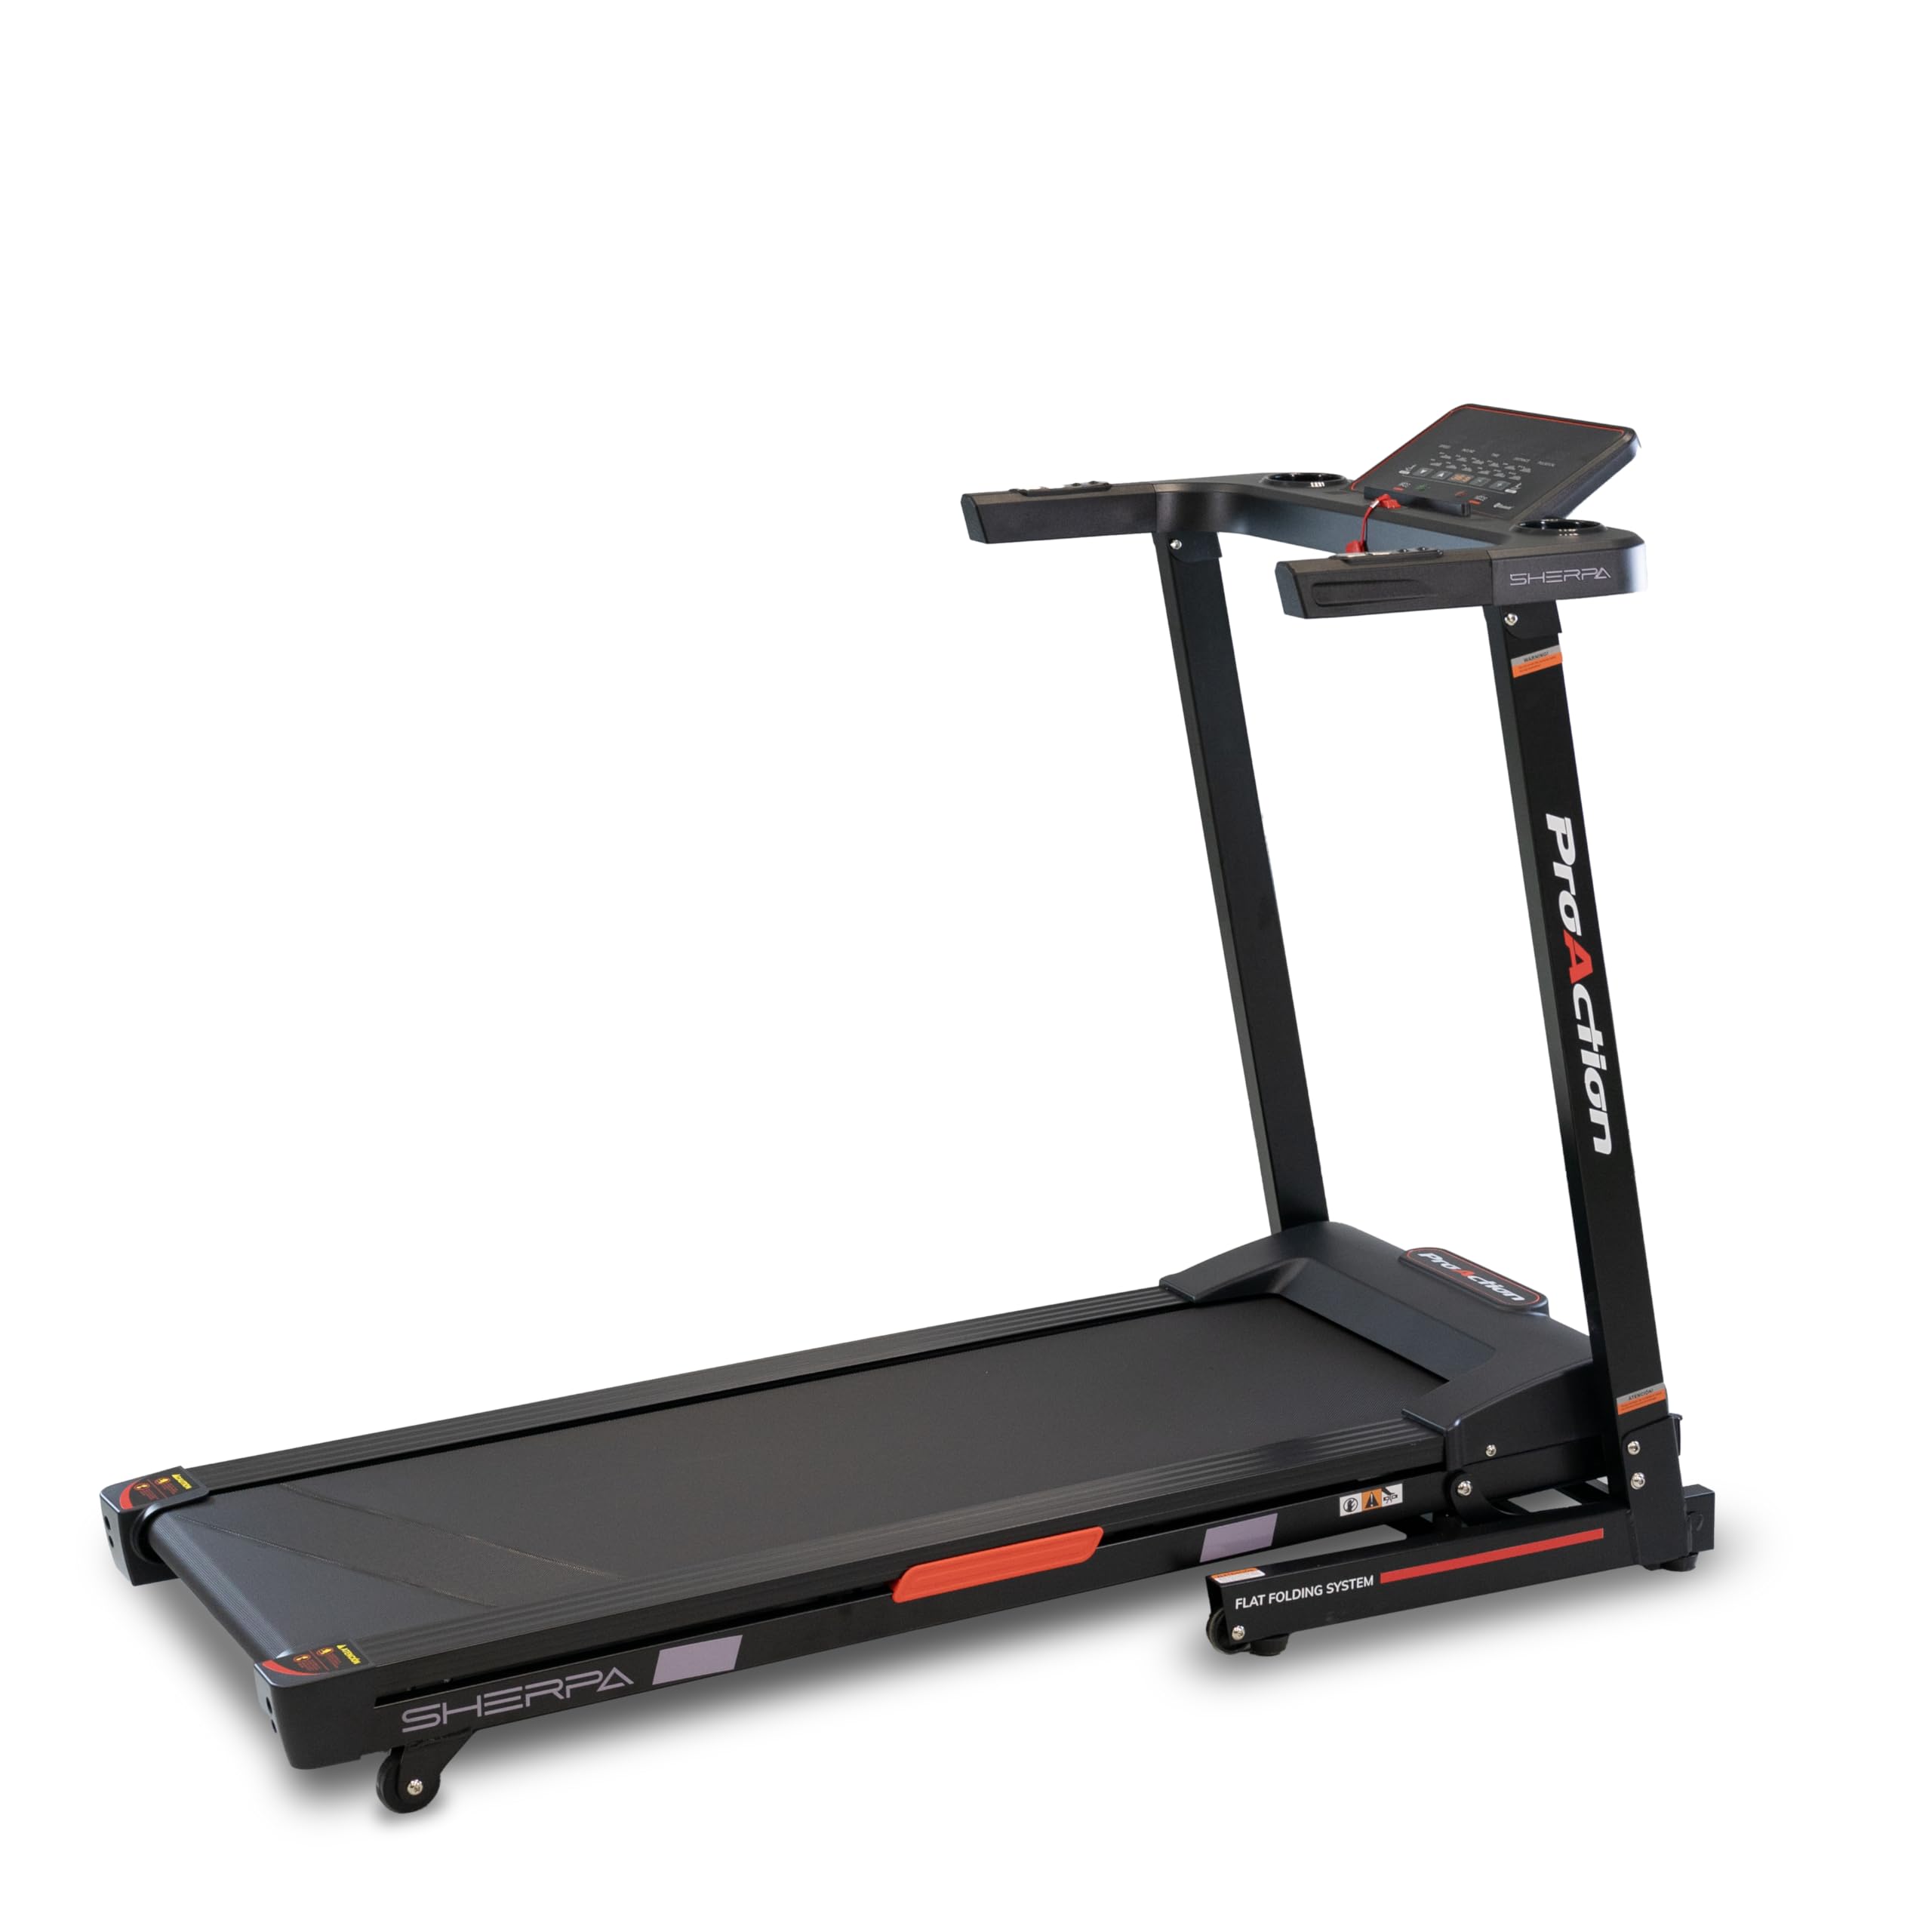
Figure 4.1: LED Monitor and Control Panel.
The LED monitor displays speed, incline, time, distance, pulse, and calories. Control buttons for programs, start, stop, mode, speed, and incline are visible.
- LED Monitor: Displays real-time information including speed, incline, time, distance, pulse, and calories burned.
- START Button: Initiates the treadmill belt movement.
- STOP Button: Halts the treadmill belt movement.
- MODE Button: Cycles through different display modes or settings.
- PROG Button: Selects from the 12 pre-defined training programs.
- Speed Buttons (+/-): Adjusts the treadmill speed (up to 14 km/h).
- Incline Buttons (Up/Down): Adjusts the electrical incline (15 levels).
- Safety Key: A magnetic key that must be placed on the console for the treadmill to operate. Pulling it off will immediately stop the treadmill.
4.2 Starting a Workout
- Stand on the side rails of the treadmill.
- Attach the safety key clip to your clothing and place the magnetic end onto the designated area on the console.
- Press the START button. The treadmill will begin at a low speed.
- Gradually increase the speed using the + button to your desired pace.
- Adjust the incline using the Up/Down incline buttons as needed.
- To stop, press the STOP button or pull the safety key.
4.3 Using Pre-defined Programs
The treadmill offers 12 pre-defined programs to vary your workout intensity.
- From the standby screen, press the PROG button to cycle through the available programs (P1-P12).
- Once you have selected a program, press START to begin. The treadmill will automatically adjust speed and incline according to the program profile.
4.4 Bluetooth FTMS Connectivity
The integrated Bluetooth FTMS technology allows you to connect your treadmill to compatible fitness applications on your smartphone or tablet for enhanced interactivity and personalized training options.
- Ensure Bluetooth is enabled on your smart device.
- Open your preferred fitness application that supports FTMS.
- Follow the app's instructions to search for and connect to your BH Fitness Sherpa Run treadmill.
4.5 Integrated Speakers and Audio Input
Connect your smartphone or tablet via the auxiliary audio jack to enjoy music through the integrated speakers during your workout.

Figure 4.2: Console with Cup Holder.
A close-up of the console showing the convenient cup holder, designed to keep hydration accessible during workouts.

Figure 4.3: Handrail Controls.
This image focuses on the buttons located on the handrails, providing quick access to speed or incline adjustments during a workout.
5. Maintenance
Regular maintenance ensures the longevity and optimal performance of your treadmill.
5.1 Cleaning
- Always unplug the treadmill before cleaning.
- Wipe down the console and other surfaces with a damp cloth after each use to remove sweat and dust. Avoid abrasive cleaners.
- Periodically vacuum underneath the treadmill to prevent dust buildup from affecting motor performance.
5.2 Running Belt Lubrication
The running belt requires periodic lubrication to reduce friction and extend its lifespan. Refer to the specific lubrication instructions provided with your treadmill or contact customer support for guidance on the correct lubricant and frequency.
5.3 Running Belt Adjustment
Over time, the running belt may become off-center or loose. Consult the detailed instructions in the full manual (if provided separately) or contact customer support for proper adjustment procedures. Incorrect adjustment can damage the treadmill.
6. Troubleshooting
If you encounter issues with your treadmill, refer to the following common troubleshooting steps.
- Treadmill does not start: Ensure the power cable is securely plugged into a grounded outlet and the treadmill. Check that the safety key is correctly placed on the console. Verify the circuit breaker has not tripped.
- Belt stops or slips: The running belt may require tension adjustment or lubrication. Refer to the maintenance section or contact customer support.
- Unusual noises: Check for any loose parts or foreign objects under the belt. If the noise persists, discontinue use and contact customer support.
- Console display not working: Ensure all cables are securely connected. Try unplugging the treadmill for 5 minutes and plugging it back in to reset the console.
For issues not covered here, please contact BH Fitness customer support.
7. Specifications
| Feature | Specification |
|---|---|
| Model | G6319 |
| Brand | BH Fitness |
| Running Surface | 120 x 42 cm |
| Maximum Speed | 14 km/h |
| Incline Levels | 15 (Electrical) |
| Pre-defined Programs | 12 |
| Maximum User Weight | 110 kg |
| Monitor | LED (Speed, Incline, Time, Distance, Pulse, Calories) |
| Connectivity | Bluetooth FTMS, Auxiliary Audio Jack |
| Special Features | Integrated Speakers, K-Dumpers (shock absorption) |
| Unfolded Dimensions (L x W x H) | 143 x 66 x 104 cm |
| Folded Dimensions (L x W x H) | 64 x 66 x 130 cm |
| Material | Plastic, Rubber, Fiberglass (frame) |
| Power Source | Electric Cable |
8. Warranty and Support
8.1 Product Warranty
The BH Fitness Sherpa Run treadmill comes with a warranty period of 3 years in Spain and 2 years in Germany, France, Italy, Netherlands, and Belgium. Please retain your proof of purchase for warranty claims.
8.2 Customer Support
For technical assistance, spare parts, or warranty inquiries, please contact BH Fitness customer support. Refer to the contact information provided in your warranty documentation or visit the official BH Fitness website.