Introduction
Thank you for choosing the NineLeaf Bike Alarm. This device is designed to provide enhanced security for your bicycle, motorcycle, e-bike, or even doors and windows, utilizing advanced 3D displacement sensors. Please read this manual carefully to ensure proper installation and operation.
Setup
Charging the Alarm
The alarm unit is equipped with a 4.2V 700mAh lithium battery. Before first use, fully charge the alarm using the provided USB-C cable. The red LED light inside the alarm will illuminate during charging and turn off when fully charged.
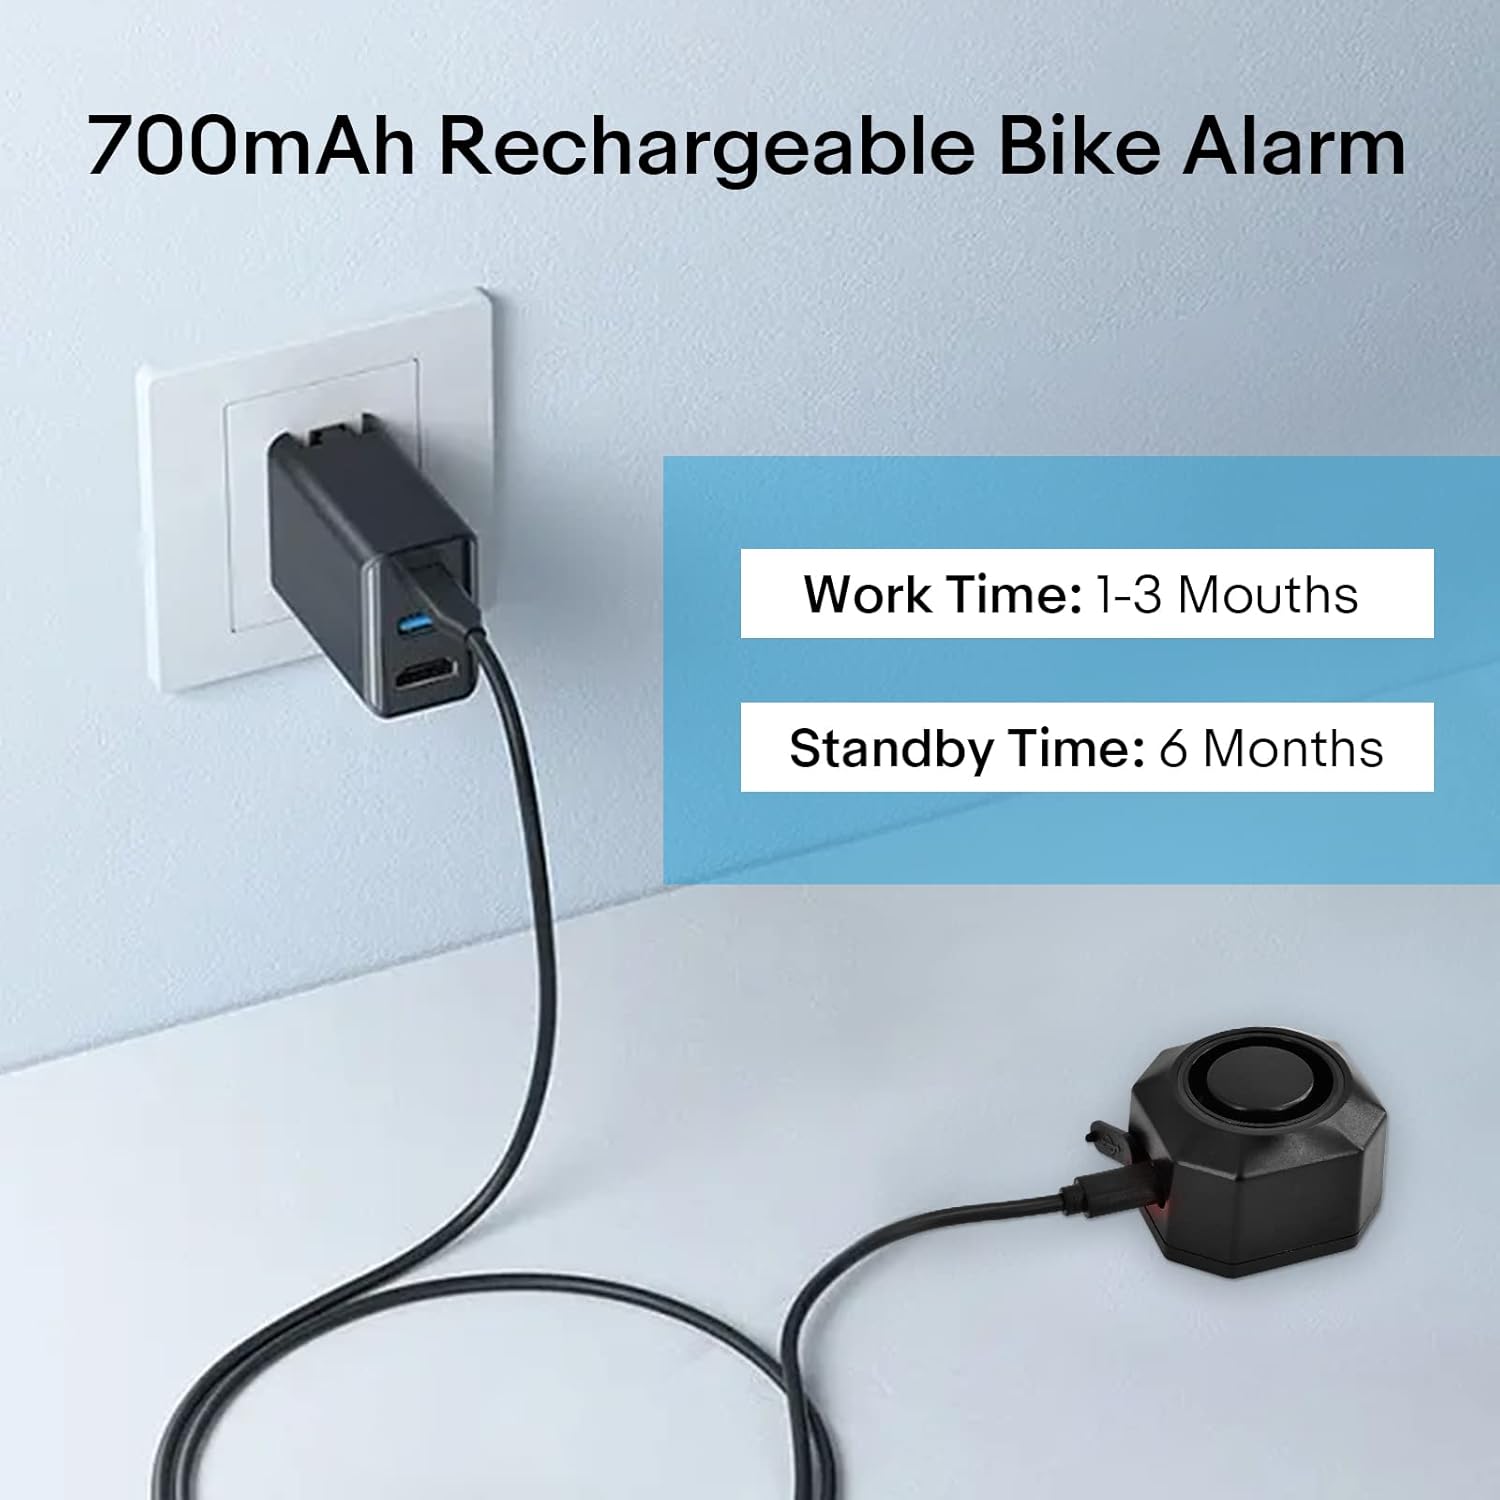
This image demonstrates the USB-C charging port and the expected battery life of the alarm, showing it connected to a wall adapter.
Remote Control Battery
The remote control uses either a 27A (12V) Alkaline battery (WL03C model) or a CR2032 (3V) Button battery (WL09C model). These batteries typically last 1-2 years (WL03C) or 2-4 years (WL09C) with average use (5 times per day).
Installation Methods
The NineLeaf Bike Alarm offers multiple installation options to suit various applications.

This image demonstrates the versatile installation options for the alarm, including bracket mounting on a seat post, and alternative methods using zip ties or double-sided tape for other locations.
Method 1: Bracket Installation
This method is ideal for bikes, electric bikes, and tricycles, allowing fixation on handlebars, front axle frames, seat tubes, or rear frames.
- Step 1: Rotate the bracket into the back of the alarm unit until it locks. Then, screw it on to secure it.
- Step 2: Place two silicone pads on the two-part bracket, aligning the contours with the grooves. Position the bracket with pads on the chosen tube (e.g., seat post) and tighten the screw until the mount is secure and does not slide.
- Note: Periodically check the tightness of the screw to ensure the alarm remains firmly attached.
Method 2: Zip Ties / Double-sided Tape Installation
Use this method if the bracket diameter is unsuitable for your frame, or for installation in areas like seat cushions, trunks, under pedals, or in front storage boxes.
- Step 1: If using zip ties, rotate the bracket base into the back of the alarm until it locks.
- Step 2: Secure the alarm to the desired position using zip ties or double-sided adhesive tape.
Operating Instructions
The NineLeaf Bike Alarm is controlled via its remote. Familiarize yourself with the remote's functions for optimal use.

This image displays the remote control for the alarm, detailing its functions: arming the alarm, disarming it, changing the alarm sound, and using a search function to locate the bike.
Arming and Disarming
- Arm: Press the Lock button on the remote to arm the alarm. A confirmation sound will indicate it is armed.
- Disarm: Press the Unlock button on the remote to disarm the alarm.
Adjusting Sensitivity
The alarm features 7 levels of sensitivity, allowing you to customize how easily it triggers. This helps reduce false alarms while maintaining effective theft deterrence.

This diagram explains the seven sensitivity levels of the alarm, allowing users to customize how easily the alarm is triggered, from a light touch to a significant impact.
Refer to the remote control instructions for specific button presses to cycle through sensitivity levels. Higher sensitivity levels (e.g., 'Si') will trigger the alarm with a gentle touch, while lower levels (e.g., 'Do') require a stronger impact.
Adjusting Volume and Ringtones
The alarm offers a three-step volume adjustment and a variety of ringtones. Use the designated button on the remote (often labeled 'Change tone' or similar) to cycle through ringtones and adjust the volume to your preference. The maximum volume is 110dB.

This image illustrates the alarm's loud 110dB sound output, designed to deter theft when triggered by movement.
Search Function
If you need to locate your bike in a crowded area, press the 'Search function' button on the remote. The alarm will emit a distinct sound to help you find it.
Maintenance
Battery Care
- Recharge the alarm unit when the battery is low to ensure continuous protection.
- The alarm features a power-saving technology to extend battery life.
- Replace the remote control battery as needed.
Waterproof and Dustproof
The alarm is constructed from PC+ anti-UV material and features an IP54 waterproof and dustproof rating, making it suitable for various outdoor environments.

This image highlights the alarm's IP54 waterproof rating, showing it enduring exposure to water, suitable for various weather conditions.
Cleaning
Wipe the alarm unit and remote control with a soft, damp cloth. Avoid using harsh chemicals or abrasive cleaners.
Troubleshooting
- Alarm not responding to remote:
Check the remote control battery and replace if necessary. Ensure you are within the effective range of the alarm. - Alarm not charging:
Ensure the USB-C cable is properly connected to both the alarm and a working power source. Some quick chargers may not be compatible; try a standard 5V USB charger. - Frequent false alarms:
Adjust the sensitivity level to a lower setting. Ensure the alarm is securely mounted and not subject to excessive vibrations from external factors (e.g., strong winds, passing heavy vehicles). - Alarm sound is too low:
Adjust the volume setting using the remote control. Ensure the alarm speaker is not obstructed.
Specifications
| Alarm Battery | 4.2V 700mAh Lithium Battery |
| Alarm Working Time | Approx. 1-3 months |
| Alarm Standby Time | Approx. 6 months |
| Alarm Charge Port | Standard USB-C 5V |
| Remote Battery (WL03C) | 27A (12V) Alkaline Battery |
| Remote Battery (WL09C) | CR2032 (3V) Button Battery |
| Working Frequency | 433.92MHz |
| Working Environment Temperature | -40°C to +70°C |
| Working Environment Humidity | <80% |
| Storage Temperature | -40°C to +70°C |
| Model Number | KS-SF32R |
| Waterproof Rating | IP54 |
Dimensions

This image provides the physical dimensions of both the alarm unit and its remote control, useful for understanding their size.
- Alarm Unit: Approximately 1.77 inches (width) x 1.77 inches (depth) x 1.26 inches (height)
- Remote Control: Approximately 2.4 inches (length) x 1.3 inches (width)
Warranty and Support
For warranty information or technical support, please refer to the product packaging or contact NineLeaf customer service through the retailer where the product was purchased. Keep your purchase receipt for warranty claims.