Introduction
Thank you for choosing the Shadowhawk S1618 Rechargeable LED Flashlight. This manual provides essential information for the safe and efficient operation of your device. Please read it thoroughly before use and retain it for future reference.
The Shadowhawk S1618 is a high-performance LED flashlight designed for various applications, including outdoor activities, emergencies, and general household use. It features a powerful LED chip, multiple lighting modes, adjustable focus, and a rechargeable battery with a digital display.
1. Setup
1.1 Unpacking
Carefully remove all components from the packaging. Ensure the following items are present:
- 1 x Shadowhawk S1618 Rechargeable LED Flashlight
- 1 x Powerful Rechargeable Battery
- 3 x AAA Batteries
- 1 x 12-LED UV Lamp
- 1 x USB Charging Cable
- 1 x Transparent Battery Holder Sleeve (for AAA batteries)
1.2 Battery Installation
The Shadowhawk S1618 flashlight can be powered by its included rechargeable lithium-ion battery or by 3 AAA batteries using the provided adapter.

Image: Diagram showing installation of rechargeable and AAA batteries. For the rechargeable battery, remove the protective film and insert with correct polarity. For AAA batteries, insert into the transparent holder sleeve and then into the flashlight.
1.2.1 Rechargeable Battery Installation:
- Unscrew the tail cap of the flashlight.
- If a protective film is present on the rechargeable battery, gently peel it off.
- Insert the rechargeable battery into the flashlight body, ensuring the positive (+) end faces towards the flashlight head and the negative (-) end faces the tail cap.
- Screw the tail cap back on securely.
1.2.2 AAA Battery Installation (Alternative):
- Unscrew the tail cap of the flashlight.
- Insert 3 AAA batteries into the transparent holder sleeve, observing the correct polarity (+/-) for each battery.
- Insert the loaded holder sleeve into the flashlight body.
- Screw the tail cap back on securely.
1.3 Initial Charging
Before first use, fully charge the rechargeable battery. The flashlight features a USB-C charging port.
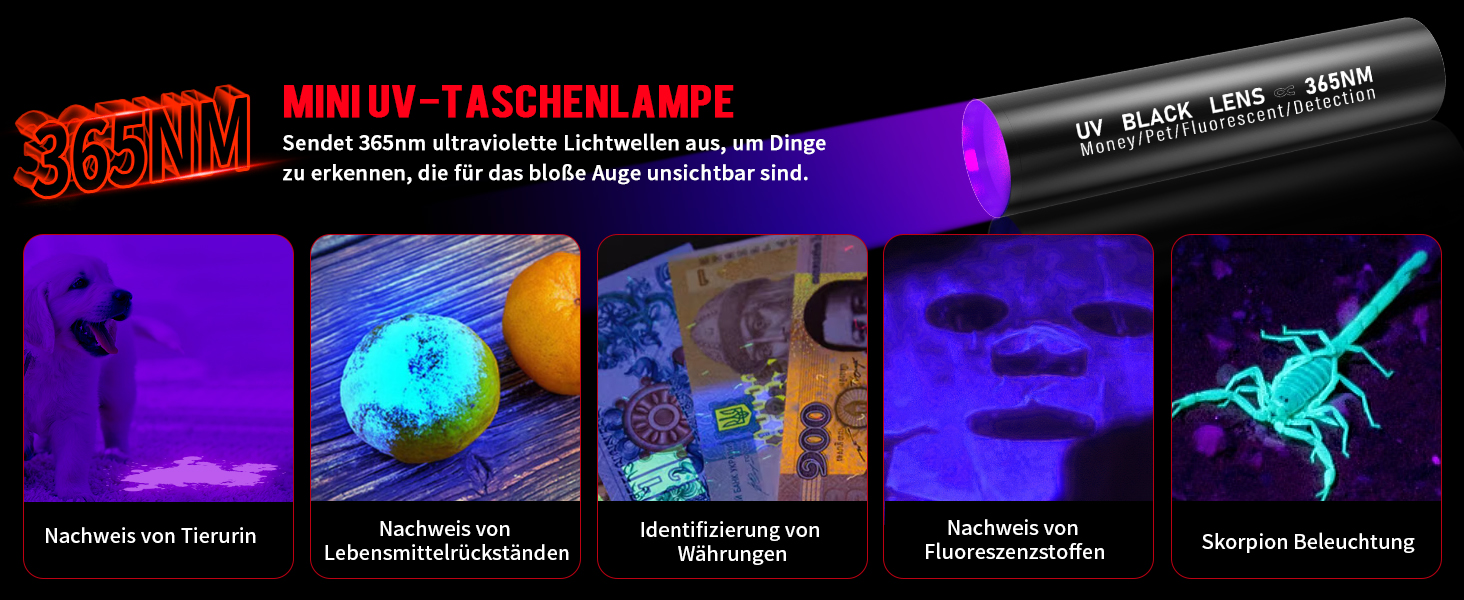
Image: Diagram showing the USB-C input for charging the flashlight and the USB output for using the flashlight as a power bank.
- Locate the USB-C charging port on the flashlight body, usually protected by a rubber cap.
- Open the rubber cap.
- Connect the provided USB-C cable to the flashlight's port and the other end to a USB power source (e.g., wall adapter, power bank, computer USB port).
- The LCD digital display will show the charging progress. A full charge typically takes 6-8 hours.
- Once fully charged, disconnect the cable and securely close the rubber cap to maintain water resistance.

Image: Close-up of the flashlight's LCD digital display showing the precise battery percentage, contrasting with less accurate LED indicators on other flashlights.
The integrated charging protection features include overcharge protection, deep discharge protection, overvoltage protection, and overcurrent protection.
2. Operating Instructions
2.1 Power On/Off and Mode Selection
The flashlight features a single button for power control and mode cycling.
- Power On: Press the power button once to turn on the flashlight.
- Mode Cycling: With the flashlight on, press the power button repeatedly to cycle through the available lighting modes: High > Medium > Low > Strobe > SOS.
- Power Off: Press and hold the power button for approximately 2 seconds to turn off the flashlight from any mode.

Image: Visual representation of the five lighting modes: High, Medium, Low, Strobe, and SOS. The image also highlights the smooth current system for gradual brightness changes.
The flashlight incorporates a "Smooth Current System" designed for gradual brightness changes, which helps prevent sudden eye strain and protects the internal components.
2.2 Adjustable Focus (Zoom Function)
The Shadowhawk S1618 features an adjustable head for focusing the beam from a wide floodlight to a concentrated spotlight.

Image: Illustration of the adjustable focus. Pushing the head forward creates a spotlight for long-range illumination, while pulling it back creates a floodlight for wide-area coverage.
- Spotlight: Extend the flashlight head forward to narrow the beam for long-distance illumination (up to 1200 meters).
- Floodlight: Retract the flashlight head backward to widen the beam for broad area lighting (up to 200 m²).
2.3 Power Bank Function (USB Output)
The Shadowhawk S1618 can also function as a power bank to charge other small electronic devices in emergencies.
- Open the rubber cap covering the USB ports.
- Connect your device's charging cable to the USB-A output port on the flashlight.
- The flashlight will begin charging your device.
- Remember to close the rubber cap after use to maintain water resistance.

Image: The flashlight connected via USB to a smartphone, demonstrating its emergency power bank capability.
2.4 Mini UV Flashlight Operation
The included mini UV flashlight (365nm) is useful for detecting pet urine, food residues, verifying currency, and identifying fluorescent substances.
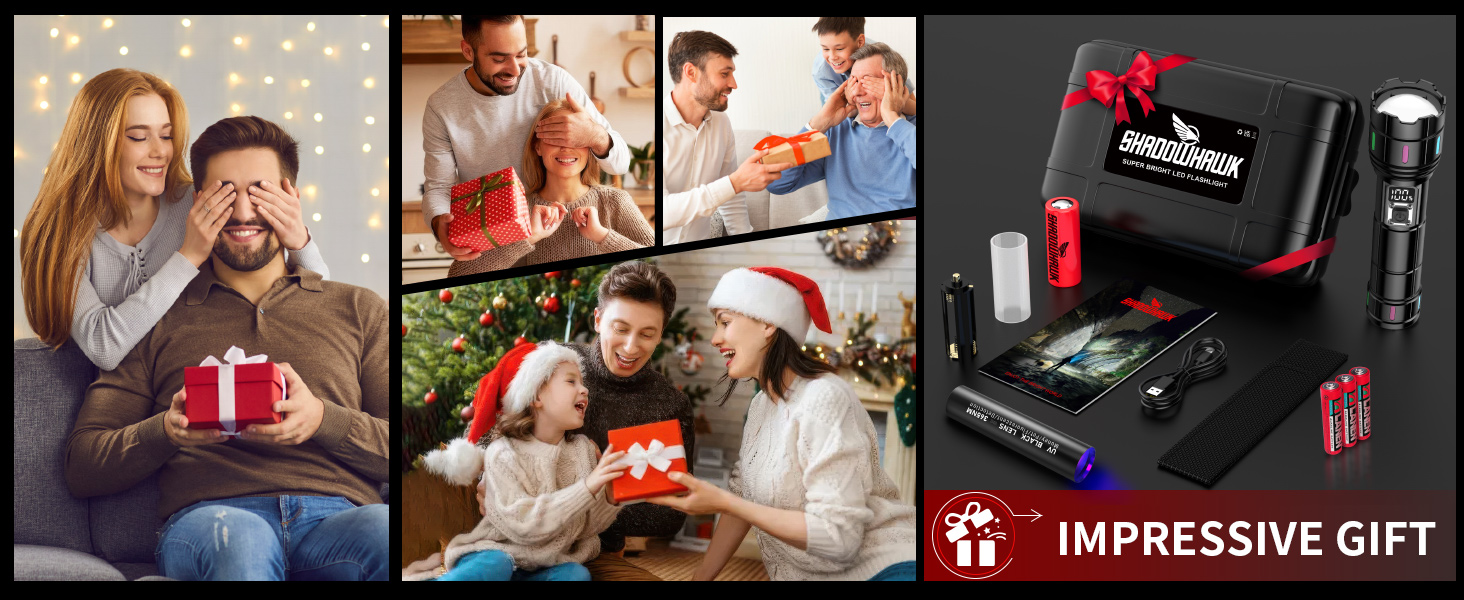
Image: The mini UV flashlight in use, demonstrating its ability to detect pet urine, food residues, verify currency, and identify fluorescent materials.
- Power On/Off: Press the button at the bottom of the mini UV flashlight to turn it on or off.
- Charging: The mini UV flashlight has its own USB charging port. Connect it to a USB power source using a compatible cable.
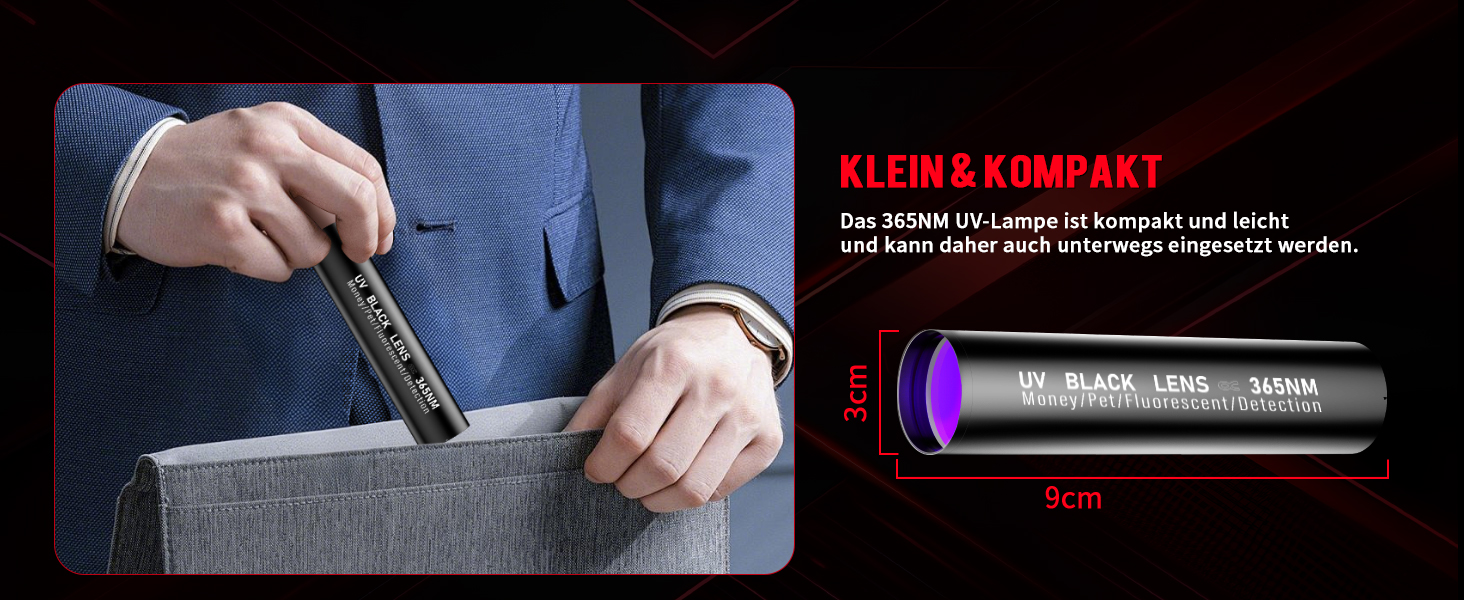
Image: Close-up of the mini UV flashlight showing its USB charging port and the power on/off button at the bottom.
3. Maintenance
3.1 Cleaning
- Wipe the flashlight body with a soft, damp cloth. Do not use abrasive cleaners or solvents.
- Keep the lens clean for optimal light output. Use a lens cleaning cloth or a soft, lint-free cloth.
3.2 Battery Care
- If storing the flashlight for an extended period, remove the rechargeable battery to prevent potential leakage.
- Recharge the battery every 3-6 months during storage to maintain its lifespan.
- If using AAA batteries, remove them when not in use for prolonged periods.
3.3 Water Resistance
The Shadowhawk S1618 is rated IP67 waterproof, meaning it is protected from dust and can withstand immersion in water up to 1 meter for 30 minutes. Ensure all rubber caps and the tail cap are securely closed to maintain water resistance.

Image: The Shadowhawk S1618 flashlight shown in rainy conditions, highlighting its IP67 waterproof rating and durable construction.
4. Troubleshooting
If you encounter issues with your Shadowhawk S1618 flashlight, please refer to the following common problems and solutions:
| Problem | Possible Cause | Solution |
|---|---|---|
| Flashlight does not turn on. | Low or depleted battery. Incorrect battery installation. Loose tail cap. | Charge the battery. Ensure battery is inserted with correct polarity. Tighten the tail cap. |
| Light is dim or flickers. | Low battery charge. Dirty lens or contacts. | Recharge the battery. Clean the lens and battery contacts. |
| Flashlight not charging. | Faulty USB cable or power source. Charging port obstruction. | Try a different USB cable and power source. Check the charging port for debris. |
| Adjustable focus is stiff. | Dirt or debris in the mechanism. | Gently clean the adjustable head area. Avoid forcing the mechanism. |
5. Specifications
| Feature | Detail |
|---|---|
| Model Number | SH-S1618 |
| Light Source Type | LED (Upgraded XHM90.2 Chip) |
| Luminosity | 500,000 Lumens |
| Wattage | 30 Watts |
| Lighting Modes | 5 modes (High, Medium, Low, Strobe, SOS) |
| Special Features | Adjustable focus (zoom), LCD digital power display, Power bank function, Smooth Current System |
| Battery Type | 1 x Lithium-ion rechargeable battery (included), 3 x AAA batteries (included, with adapter) |
| Run Time | Up to 12 hours |
| Charging Time | 6-8 hours (approx.) |
| Charging Port | USB-C |
| Water Resistance | IP67 (Waterproof) |
| Dimensions (L x W x H) | 4.51 x 3.5 x 16.5 cm (1.77 x 1.38 x 6.5 inches) |
| Weight | 45 Grams (0.1 lbs) |
| Included Components | Flashlight, rechargeable battery, 3 AAA batteries, 12-LED UV lamp, USB cable |
| UV Lamp Wavelength | 365nm |
6. Warranty & Support
6.1 Warranty Information
Shadowhawk products are manufactured with high-quality materials and undergo rigorous testing. Specific warranty details may vary by region. Please retain your proof of purchase for any warranty claims.
6.2 Customer Support
If you have any questions, concerns, or require assistance with your Shadowhawk S1618 flashlight, please contact our customer support team. We are committed to providing a satisfactory solution to your inquiries.
For support, please refer to the contact information provided with your product packaging or visit the official Shadowhawk website.
Note: The manufacturer aims to respond to inquiries promptly, typically within 24/7.