1. Introduction
This manual provides detailed instructions for the setup, operation, and maintenance of your PANDAAR Wireless Tour Guide System. This system is designed to facilitate clear and effective group communication in various environments, including guided tours, factory visits, and educational settings. Please read this manual thoroughly before using the product to ensure optimal performance and longevity.

Image 1.1: PANDAAR Wireless Tour Guide System (1 Transmitter, 6 Receivers)
The PANDAAR Wireless Tour Guide System (Model 302R) includes one transmitter and six receivers, offering a reliable solution for one-way communication over a significant distance.
2. Package Contents
Please verify that all items listed below are included in your package. If any items are missing or damaged, please contact customer support.
- 1 x Transmitter (Black)
- 6 x Receivers (White)
- 1 x Plug-in Microphone for Transmitter
- 1 x Head-worn Microphone for Transmitter
- 6 x Receiver Headsets (Ear-hook style)
- 6 x Charger Plugs
- 6 x Charging Cables

Image 2.1: System Components Diagram
3. Product Overview
3.1. Transmitter (Black Unit)
The transmitter is used by the guide or speaker to broadcast audio. It features a clear display, control buttons, and ports for microphones and auxiliary input.
- Display Screen: Shows power level, volume, and channel number.
- Control Buttons: Up/Down for navigation, Function button for settings, Mute.
- MIC Port: For connecting the included microphones.
- AUX Port: For connecting external audio sources (e.g., phone, MP3 player).
- Magnetic Charging Port: For convenient charging.
3.2. Receiver (White Units)
The receivers are distributed to participants to listen to the broadcast. Each receiver is lightweight and includes an ear-hook headset.
- Display Screen: Shows power level, signal strength, and channel number.
- Control Buttons: Up/Down for volume adjustment, Function button for settings.
- Headset Jack: For connecting the ear-hook headset.
- Magnetic Charging Port: For convenient charging.

Image 3.1: Transmitter and Receiver Features and Dimensions
4. Setup
4.1. Charging the Devices
Before first use, fully charge all transmitters and receivers.
- Connect the charging cable to the magnetic charging port on each device.
- Plug the charger plug into a standard power outlet.
- The battery indicator on the screen will show charging status. A full charge typically takes 2-3 hours.
- Disconnect the devices once fully charged.

Image 4.1: Magnetic Charging Port
4.2. Connecting Microphones and Headsets
- For the transmitter, plug your preferred microphone (plug-in or head-worn) into the MIC port.
- For each receiver, plug the ear-hook headset into the headset jack.
5. Operation
5.1. Power On/Off
- To Power On: Press and hold the Function button on both the transmitter and receivers until the screen illuminates.
- To Power Off: Press and hold the Function button on both the transmitter and receivers until the screen turns off.
- One-Click Receiver Shutdown: From the transmitter, press and hold the 'Down' button to remotely turn off all paired receivers.
5.2. Channel Selection and Pairing
The system supports 9999 channels, allowing multiple groups to operate simultaneously without interference. Devices are typically pre-paired.
- Transmitter Channel: On the transmitter, press the Function button to enter channel selection mode. Use the Up/Down buttons to select your desired channel. Press the Function button again to confirm.
- Receiver Channel: Receivers will automatically sync to the transmitter's channel when powered on within range. If a receiver does not connect, ensure it is powered on and within range of the transmitter.
5.3. Volume Adjustment
- Transmitter Volume: Adjust the microphone input volume using the Up/Down buttons on the transmitter.
- Receiver Volume: Participants can adjust their listening volume using the Up/Down buttons on their individual receivers.
5.4. Mute Function
On the transmitter, a single press of the Function button will mute the microphone. Press it again to unmute.

Image 5.1: One-to-Many Communication Setup
6. Key Features
6.1. Extended Working Range
The system provides a reliable working range of approximately 328 feet (100 meters) in open areas, ensuring consistent audio transmission without dropouts or interference.

Image 6.1: 328ft Working Range
6.2. Clear Sound Quality with Noise Reduction
Utilizing digital noise reduction technology, the system minimizes ambient noise, delivering clear and intelligible speech to all listeners.
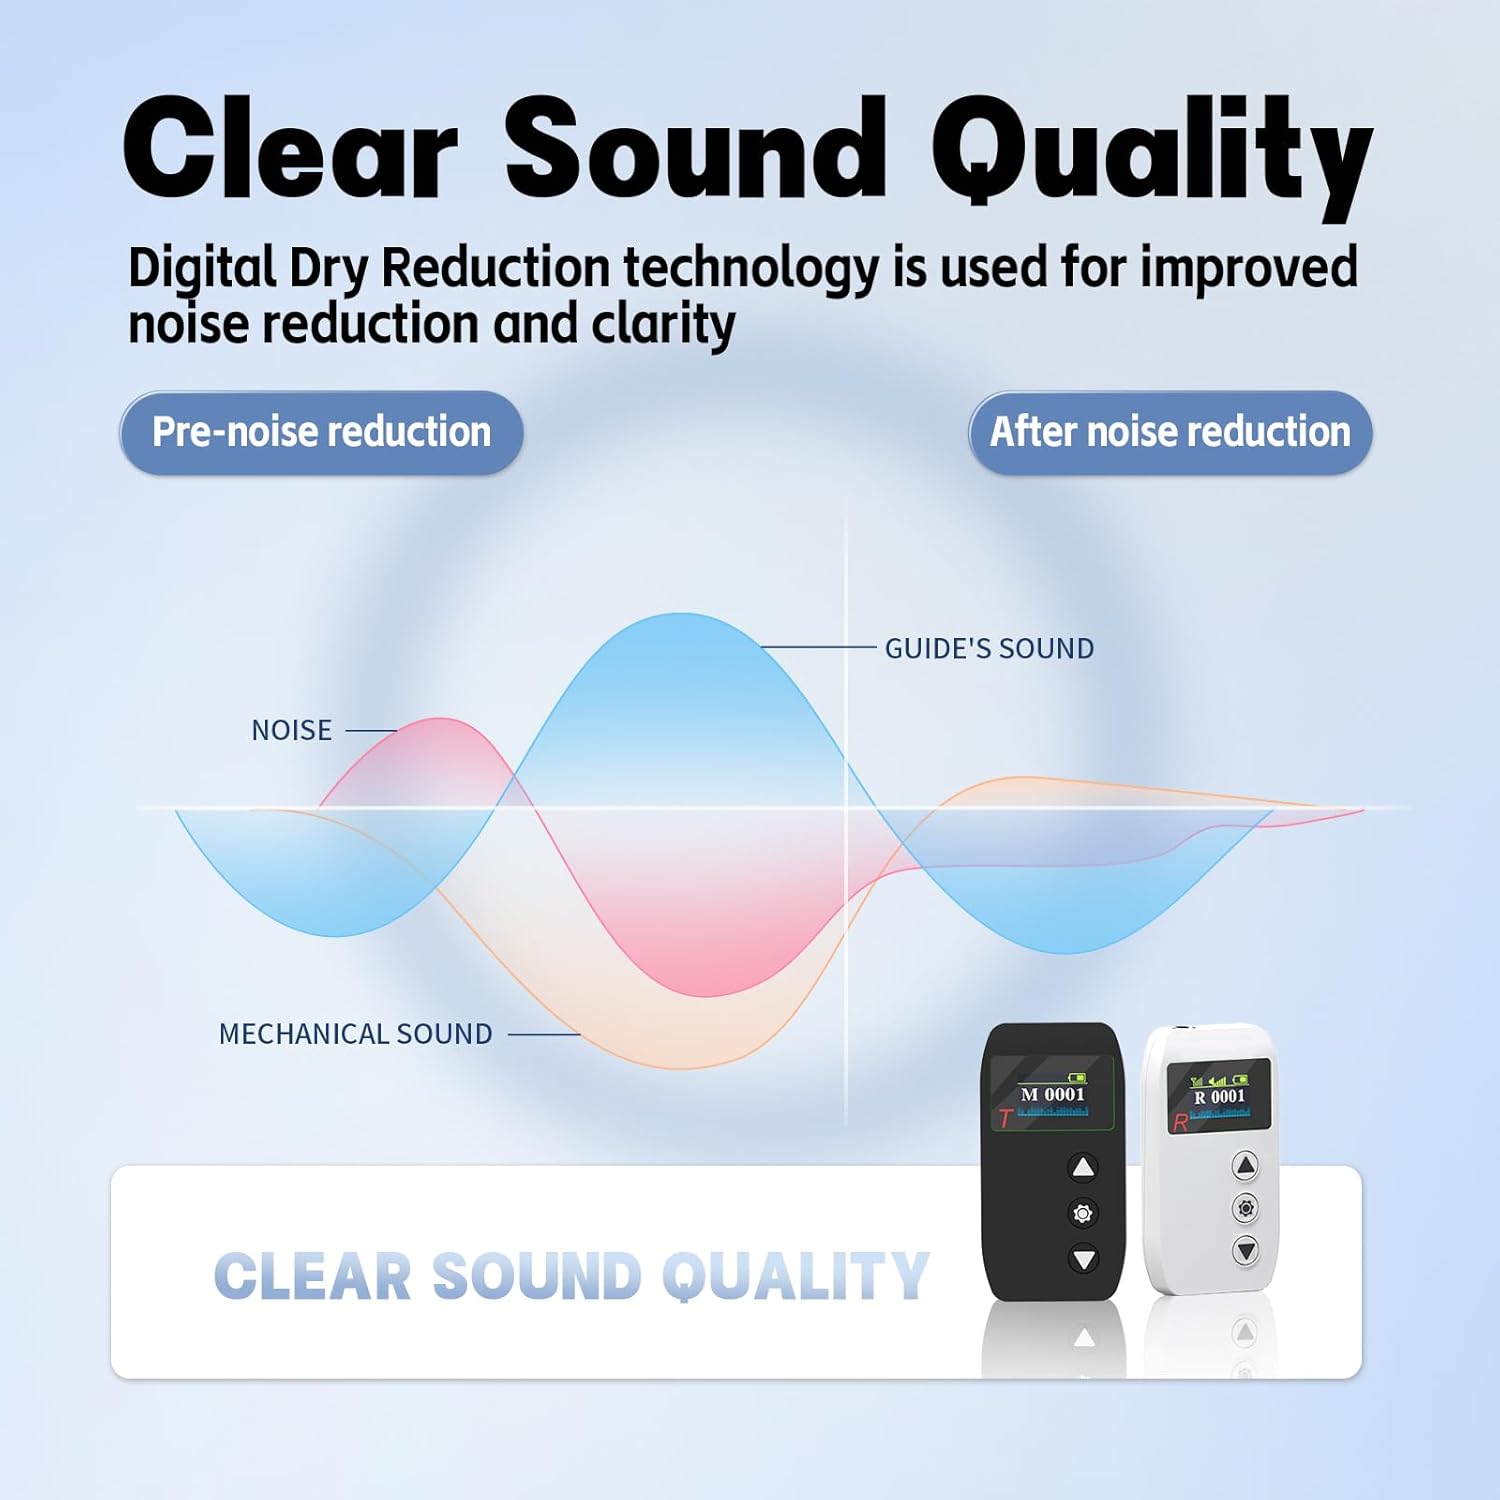
Image 6.2: Digital Noise Reduction for Clear Sound
6.3. Long-lasting Battery Life
The transmitter is equipped with a 1000 mAh battery, offering up to 12 hours of continuous use. Each receiver has a 500 mAh battery, providing up to 14 hours of continuous operation.
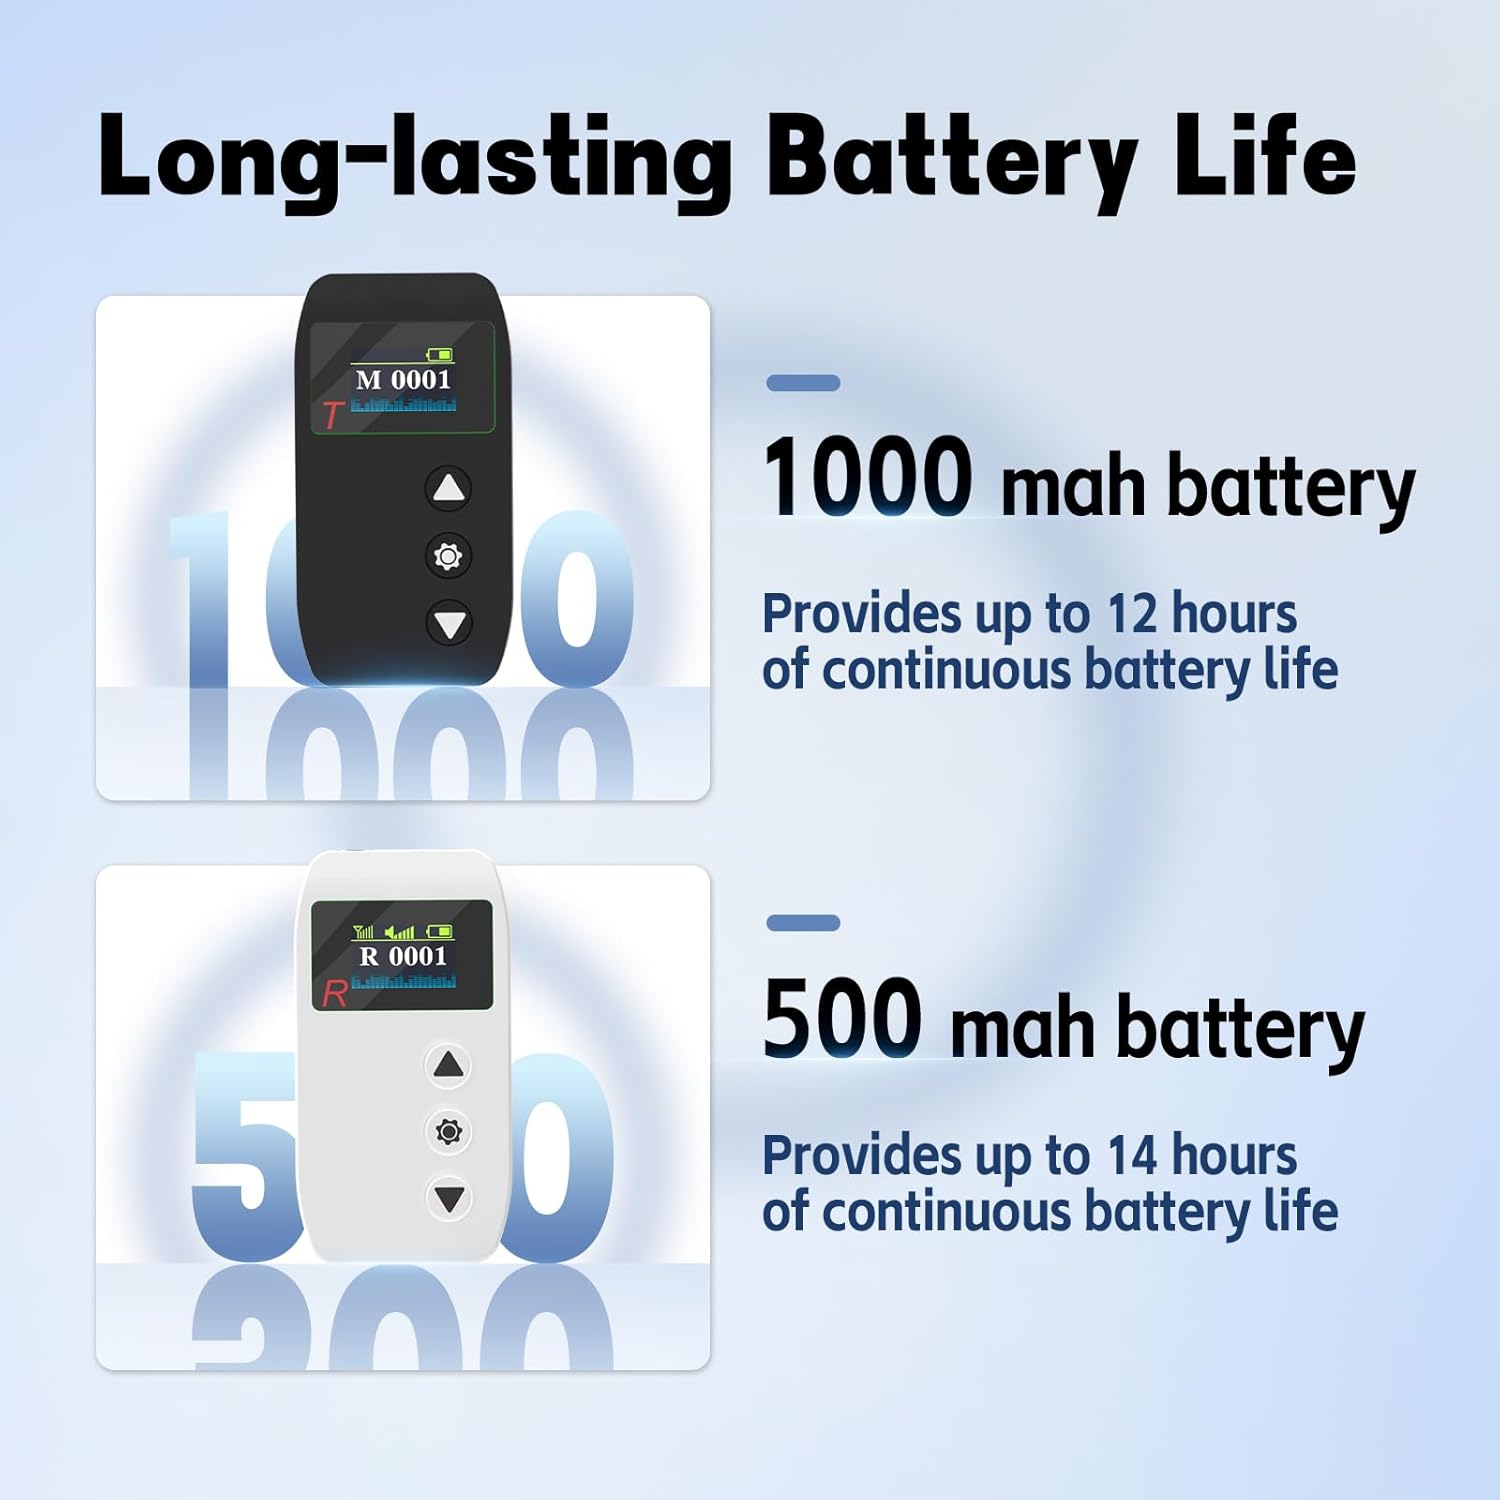
Image 6.3: Battery Life Overview
6.4. Lightweight and Comfortable Design
Both the transmitter and receivers are designed for portability. The transmitter weighs approximately 50g (0.11 lbs), and each receiver weighs about 41.5g (0.09 lbs). The included ear-hook headsets are lightweight (17g) and can be worn on either ear for extended comfort.

Image 6.4: Comfortable Ear-Hook Headset
6.5. AUX and MIC Input Ports
The transmitter includes both MIC and AUX input ports, allowing for connection of various audio devices such as phones, MP3 players, or computers, in addition to the provided microphones.
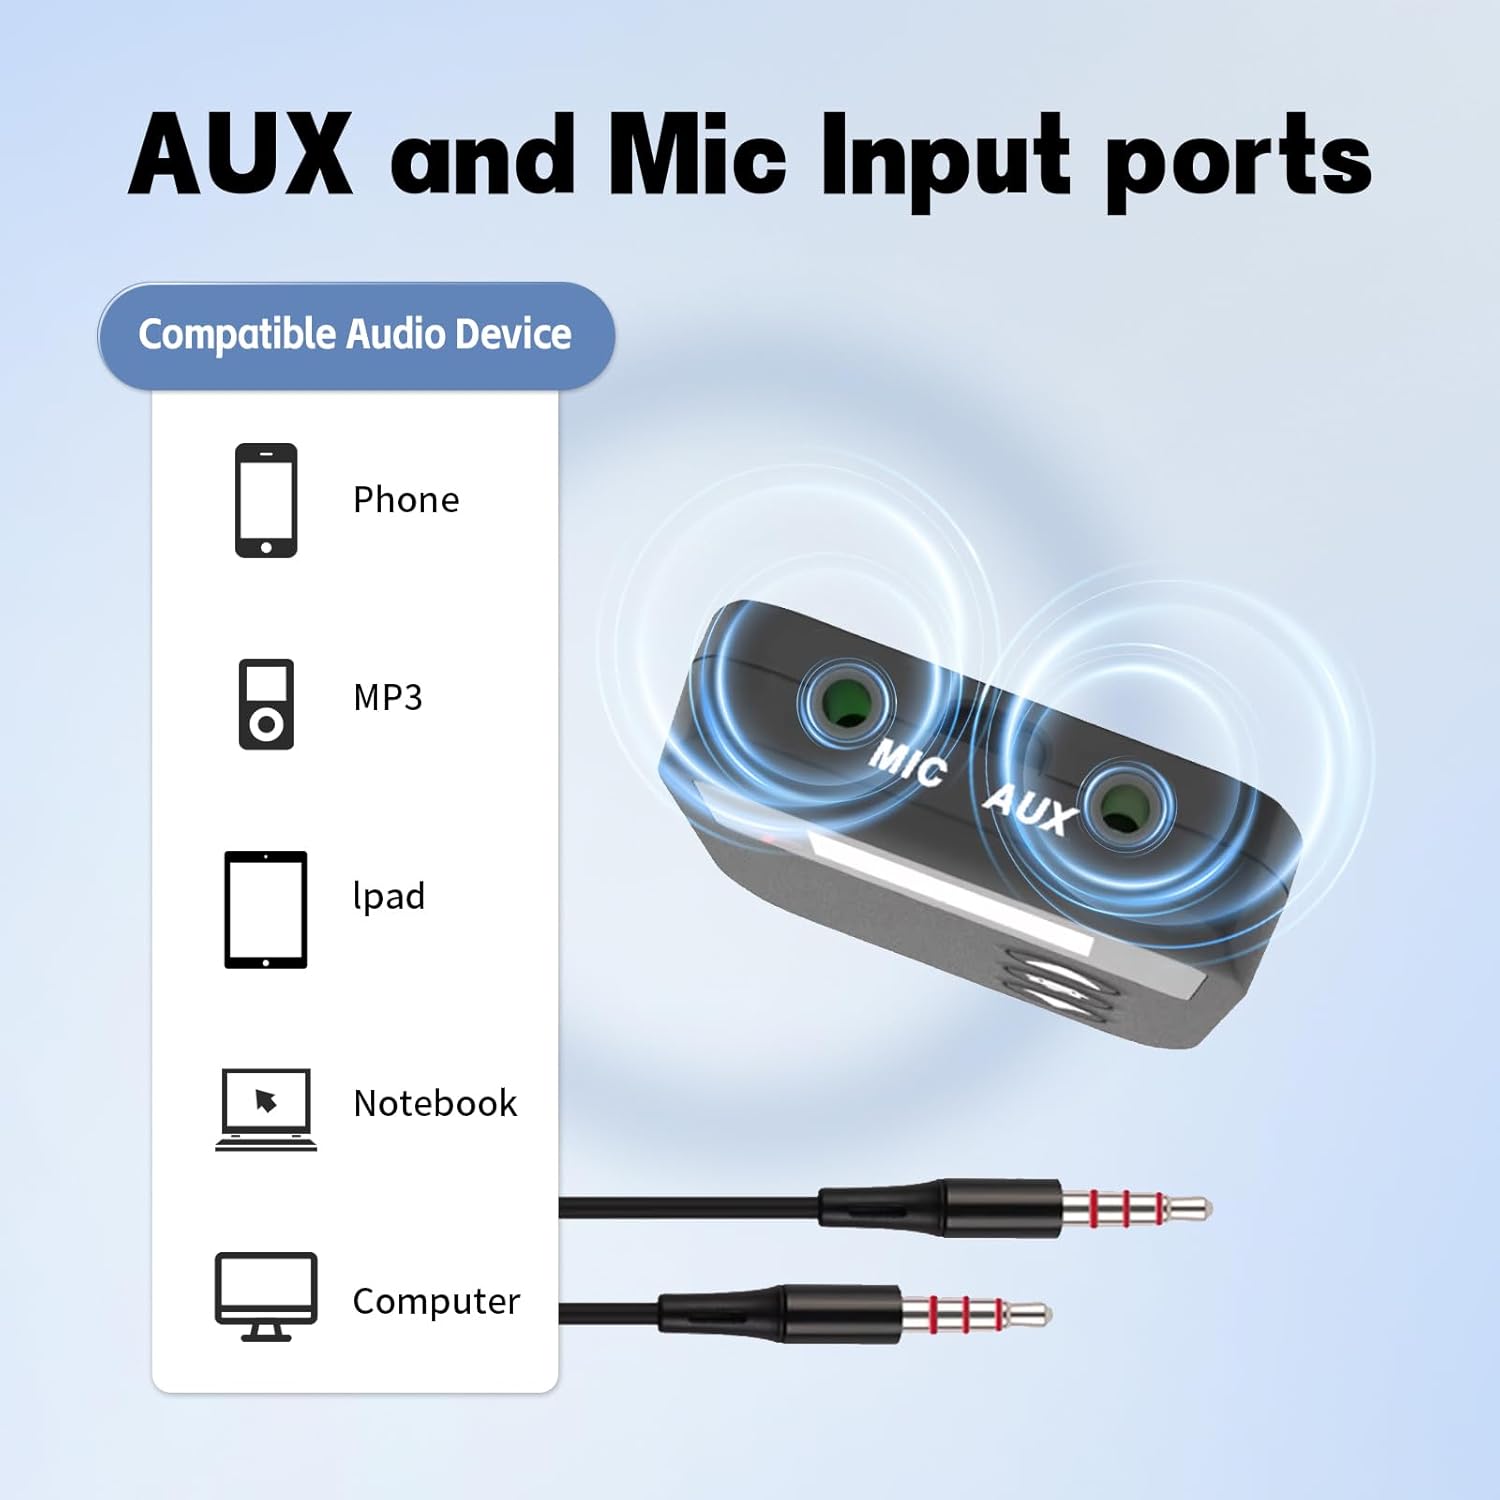
Image 6.5: AUX and MIC Input Compatibility
7. Applications
The PANDAAR Wireless Tour Guide System is suitable for a wide range of group communication scenarios:
- Group Tourism: Enhances the tour experience by ensuring all participants can clearly hear the guide.
- Factory Visits: Provides clear instructions and information in noisy industrial environments.
- Museum Tours: Allows guides to speak softly while ensuring visitors hear every detail.
- Church Activities: Facilitates clear communication for sermons, translations, or group discussions.
- Employee Training: Ideal for training sessions where clear audio is crucial.

Image 7.1: Diverse Applications of the System
8. Maintenance
- Cleaning: Use a soft, dry cloth to clean the devices. Do not use liquid cleaners or solvents.
- Storage: Store the system in a cool, dry place away from direct sunlight and extreme temperatures.
- Battery Care: For optimal battery life, avoid fully discharging the devices frequently. Recharge them regularly, especially if storing for extended periods.
- Headset Care: Handle headsets gently. Avoid pulling on cables.
9. Troubleshooting
| Problem | Possible Cause | Solution |
|---|---|---|
| No sound from receiver | Receiver is off; Low battery; Incorrect channel; Headset not connected; Transmitter is off or muted. | Ensure receiver is on; Charge receiver; Verify receiver is on the same channel as transmitter; Connect headset securely; Ensure transmitter is on and not muted. |
| Short reception range or interference | Obstacles between devices; Out of range; Strong electromagnetic interference. | Reduce obstacles; Move closer to the transmitter; Change to a different channel; Avoid areas with strong interference. |
| Microphone not working | Microphone not connected properly; Transmitter muted; Faulty microphone. | Ensure microphone is fully plugged into the MIC port; Unmute the transmitter; Try a different microphone if available. |
| Devices not charging | Charging cable or adapter faulty; Magnetic connection not secure; Power outlet issue. | Check cable and adapter; Ensure magnetic connection is firm; Try a different power outlet. |
10. Specifications
- Model Number: 302R
- Product Dimensions (each device): 3.7 x 1.91 x 0.51 inches
- Transmitter Weight: Approximately 0.11 lbs (50g)
- Receiver Weight: Approximately 0.09 lbs (41.5g)
- Headset Weight: Approximately 17g
- Working Range: Up to 328 feet (100 meters)
- Channels: 9999 selectable channels
- Transmitter Battery: 1000 mAh Lithium Ion (up to 12 hours continuous use)
- Receiver Battery: 500 mAh Lithium Ion (up to 14 hours continuous use)
- Connectivity: MIC port, AUX port (Transmitter)
11. Warranty and Support
For any questions, concerns, or technical support regarding your PANDAAR Wireless Tour Guide System, please contact PANDAAR customer service through the Amazon platform. We aim to respond to all inquiries within 12 hours.