Introduction
This instruction manual provides guidance for the installation and maintenance of the Generic Replacement Dryer Rollers, Belt, and Pulley Kit. This kit is designed to replace worn or damaged components in compatible Maytag dryer models, restoring proper function. Please read all instructions carefully before proceeding with installation.
Parts Included
Verify that all components listed below are present in your package. If any parts are missing or damaged, please contact your seller for assistance.
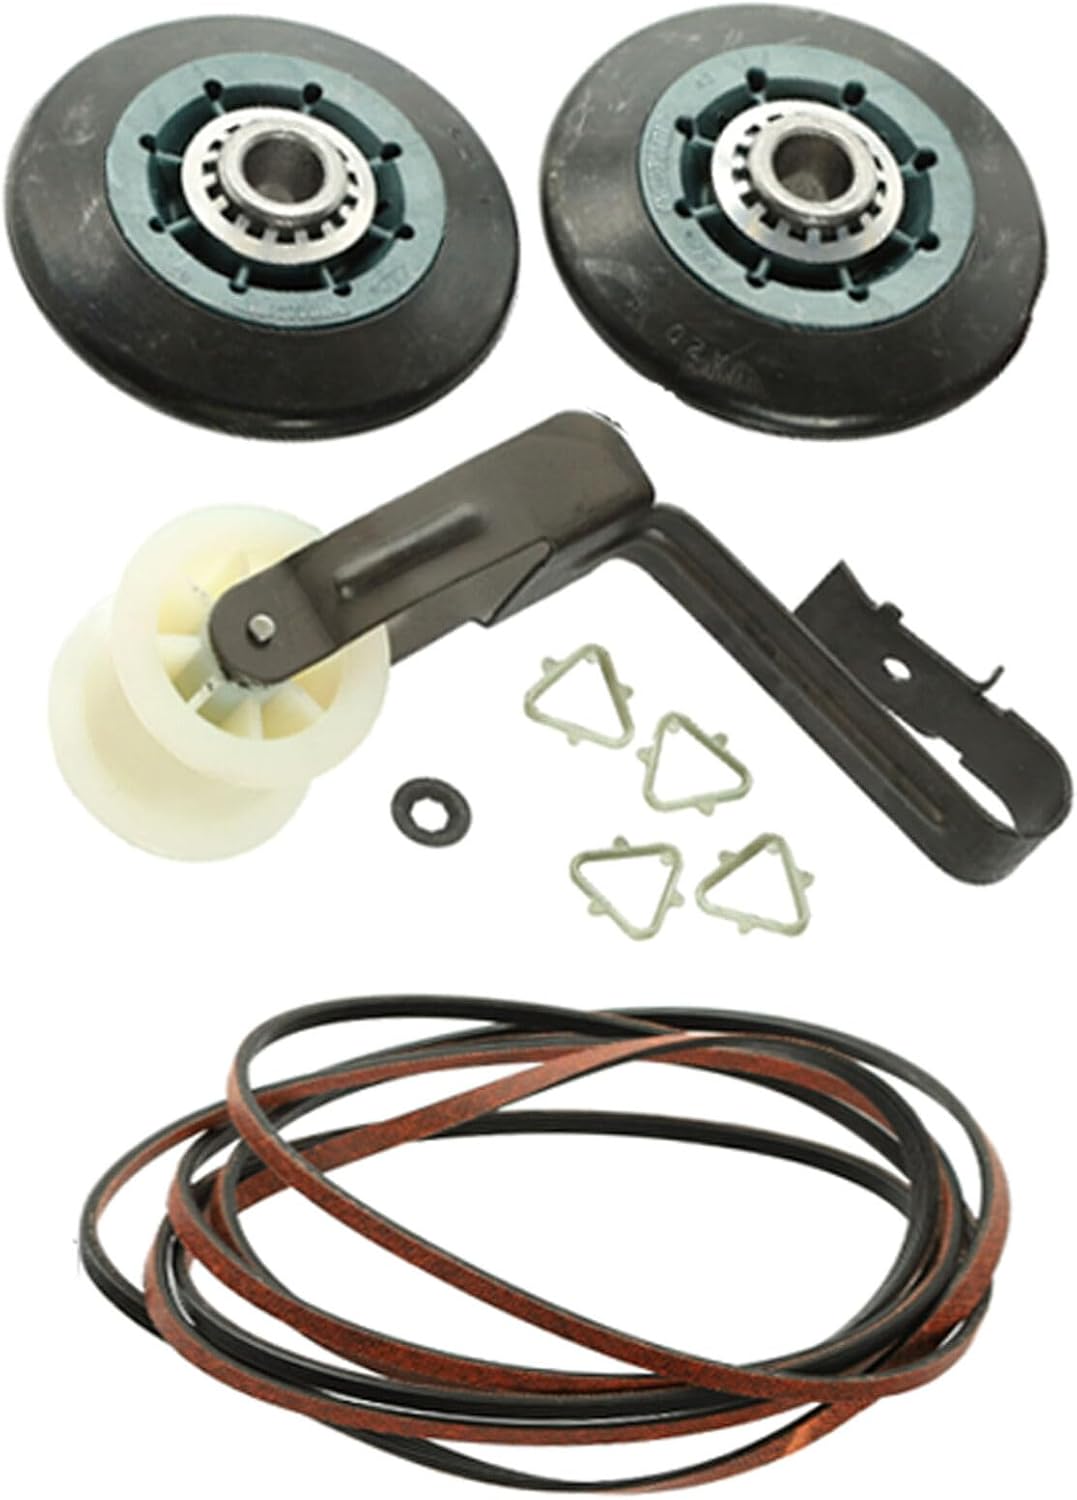
The image displays the complete kit, including rollers, idler pulley assembly, O-ring, clips, and belts.
- Dryer Drum Rollers: Two (2) black rollers with bearings.
- Idler Pulley Assembly: One (1) white pulley with a metal bracket.
- O-ring: One (1) small black O-ring.
- Triangular Clips: Four (4) small triangular clips.
- Dryer Belts: Multiple belts (quantity may vary, typically one main drive belt and possibly others).
Compatibility
This replacement kit is compatible with the following dryer model:
- Maytag MGDC300XW3
Always verify compatibility by comparing the part numbers and visual appearance of your existing parts with the components in this kit before installation. The kit's part number is pulpart#24105544.
Safety Information
Appliance repair can be hazardous. Always prioritize safety. If you are unsure about any step, consult a qualified technician.
- Disconnect Power: Before beginning any repair, always unplug the dryer from the electrical outlet or turn off the circuit breaker to prevent electric shock.
- Gas Dryers: For gas dryers, also turn off the gas supply valve.
- Wear Protective Gear: Use gloves to protect your hands from sharp edges and safety glasses to protect your eyes.
- Proper Tools: Use the correct tools for each task to avoid damage to the appliance or injury.
- Heavy Lifting: Dryers can be heavy. Seek assistance if you need to move or lift the appliance.
- Follow Manufacturer's Instructions: Refer to your specific dryer's service manual for detailed disassembly and reassembly procedures.
Setup and Installation
The following steps provide a general overview for replacing dryer components. Specific disassembly and reassembly procedures vary by dryer model. It is highly recommended to consult your dryer's official service manual or a reputable online repair guide for your specific Maytag MGDC300XW3 model.
- Preparation: Ensure the dryer is disconnected from all power and gas sources. Clear the work area around the dryer.
- Accessing Components: Depending on your dryer model, you may need to remove the top panel, front panel, or rear panel to gain access to the drum, rollers, belt, and idler pulley. This often involves removing screws and disconnecting wire harnesses.
- Removing the Drive Belt: Carefully remove the old drive belt from around the drum and the motor pulley. Note its routing for reinstallation.
- Removing the Drum: Once the belt is off, the dryer drum can usually be lifted out. This will expose the drum rollers and idler pulley assembly.
- Replacing Rollers: Locate the old drum rollers. They are typically mounted on shafts at the front and/or rear of the dryer base. Remove any retaining clips or screws, then slide off the old rollers. Install the new rollers from this kit, ensuring they are securely fastened.
- Replacing Idler Pulley: The idler pulley assembly tensions the drive belt. Remove the old idler pulley by detaching its mounting bracket. Install the new idler pulley assembly, ensuring it is correctly positioned to provide tension.
- Reinstalling the Drum: Carefully place the dryer drum back into position, ensuring it rests properly on the new drum rollers.
- Installing the New Drive Belt: Route the new drive belt around the dryer drum and the motor pulley, ensuring it passes correctly over the idler pulley to maintain tension. The ribbed side of the belt typically faces the drum.
- Reassembly: Reattach all panels, screws, and wire harnesses that were removed during disassembly. Double-check all connections.
- Testing: Reconnect power and gas (if applicable). Run a short cycle to ensure the dryer operates smoothly without unusual noises or vibrations.
If you encounter any difficulties or are unsure about any step, it is recommended to seek professional assistance.
Operating Instructions
This kit provides replacement parts for your dryer. Once correctly installed, your Maytag MGDC300XW3 dryer should operate according to its original manufacturer's specifications. There are no specific operating instructions for the replacement parts themselves. Refer to your dryer's user manual for general operating procedures.
Maintenance
Proper maintenance can extend the life of your dryer and its components.
- Regular Inspection: Periodically inspect the dryer drum rollers and belt for signs of wear, cracking, or damage. Listen for unusual noises during operation, which could indicate worn parts.
- Clean Lint Filter: Always clean the lint filter before or after each load to ensure proper airflow and prevent strain on dryer components.
- Vent Cleaning: Ensure the dryer vent is clear of lint and obstructions to maintain efficiency and prevent overheating.
Troubleshooting
If your dryer exhibits issues after installing the replacement kit, consult the table below for common problems and solutions. Always disconnect power before inspecting internal components.
| Problem | Possible Cause | Solution |
|---|---|---|
| Dryer drum does not turn | Broken or dislodged drive belt; faulty motor; seized rollers. | Check belt routing and tension. Inspect rollers for free movement. If belt is broken, replace it. |
| Loud squealing or thumping noise | Worn or seized drum rollers; worn idler pulley; foreign object. | Inspect drum rollers and idler pulley for wear. Replace if necessary. Remove any obstructions. |
| Dryer takes too long to dry | Restricted airflow (clogged vent/lint filter); faulty heating element; worn drive belt (slipping). | Clean lint filter and dryer vent. Check drive belt for proper tension and wear. |
| Burning smell | Overheated motor; lint accumulation; new belt breaking in. | Disconnect power immediately. Inspect for lint buildup. A new belt may emit a slight odor initially. If smell persists, seek professional help. |
Specifications
- Product Type: Dryer Replacement Parts Kit
- Compatible Dryer Model: Maytag MGDC300XW3
- Kit Part Number: pulpart#24105544
- Manufacturer: Generic
- Package Contents: 2 Drum Rollers, 1 Idler Pulley Assembly, 1 O-ring, 4 Triangular Clips, Multiple Dryer Belts (1 Set ONLY)
Warranty and Support
For information regarding the warranty of this replacement part kit, please refer to the terms and conditions provided by your original seller or retailer at the time of purchase. Warranty coverage typically applies to manufacturing defects.
If you require technical assistance or have questions about the installation or compatibility of this kit, please contact the seller directly through the platform where the purchase was made. Provide your order number and a detailed description of your issue for prompt support.
