1. Introduction
Thank you for purchasing the Generic 4 Styles 145CM Modern 57" TV Stand. This manual provides detailed instructions for assembly, operation of the LED lighting system, maintenance, and troubleshooting. Please read this manual carefully before assembly and use to ensure proper installation and safe operation of your new TV stand.
2. Safety Information
- Always assemble the TV stand on a soft, clean surface to prevent scratches.
- Ensure all screws and fasteners are securely tightened before use.
- Do not overload the TV stand. Refer to the specifications for weight limits.
- Keep small parts and packaging materials away from children and pets.
- Do not stand or climb on the TV stand.
- Place the TV stand on a level and stable surface to prevent tipping.
- Disconnect the LED power supply before cleaning or moving the unit.
3. Package Contents
Before beginning assembly, verify that all components listed below are present and undamaged. If any parts are missing or damaged, please contact customer support.
- Main Panels (Top, Bottom, Side Panels)
- Internal Shelves (Wood and Glass)
- Cabinet Doors
- Hardware Pack (Screws, Dowels, Hinges, Brackets, etc.)
- LED Lighting Kit with Remote Control
- Instruction Manual
4. Assembly Instructions (Setup)
This TV stand is designed for easy assembly. It is recommended to have two people for assembly. Please follow the step-by-step instructions provided in the included manual. A Phillips head screwdriver and a hammer may be required (not included).
- Prepare the Area: Clear a spacious, clean, and soft area for assembly to prevent damage to the components.
- Identify Components: Unpack all parts and identify them using the diagrams in the separate assembly guide.
- Assemble the Frame: Begin by connecting the main side panels to the base and top panels using the provided hardware. Ensure all connections are secure.
- Install Shelves: Insert the wooden and glass shelves into their designated slots. The glass shelves are adjustable.
- Attach Cabinet Doors: Secure the cabinet doors using the hinges. Adjust hinges as needed for proper alignment.
- Install LED Lighting: Follow the specific instructions provided with the LED lighting kit to install the LED strips and connect the power supply.
- Final Check: Ensure all screws are tightened and the stand is stable before placing any items on it.

Figure 4.1: Product Dimensions. This diagram illustrates the overall width, depth, and height of the TV stand, along with the internal measurements of its compartments, including shelf heights and door sizes.

Figure 4.2: Assembled TV Stand Front View. This image displays the completed TV stand from the front, showcasing its brown matte body and high-gloss black cabinet doors.

Figure 4.3: TV Stand with Doors Open. This view shows the TV stand with its two side cabinet doors open, providing a clear look at the internal storage spaces and the central glass shelves.
5. Operating Instructions (LED Lights)
Your TV stand features an integrated 16-color LED lighting system for enhanced ambiance. The LED lights are controlled via a remote control.

Figure 5.1: TV Stand with LED Lights Activated. This image shows the TV stand in a living room setting, with its internal compartments illuminated by the integrated LED lighting system, demonstrating its aesthetic appeal.
- Power On/Off: Use the power button on the remote control to turn the LED lights on or off.
- Color Selection: Press the color buttons on the remote to select from 16 different static colors.
- Brightness Adjustment: Use the brightness up/down buttons to adjust the intensity of the lights.
- Mode Selection: The remote may include buttons for various lighting modes such as flash, strobe, fade, or smooth transitions. Refer to the LED kit's specific remote instructions for detailed mode functions.
6. Maintenance and Care
To ensure the longevity and appearance of your TV stand, follow these care guidelines:
- Cleaning: Wipe surfaces with a soft, damp cloth. Avoid harsh chemicals or abrasive cleaners, which can damage the finish.
- Spills: Clean up spills immediately to prevent staining or damage to the particle board.
- Sunlight: Avoid prolonged exposure to direct sunlight, which can cause fading or discoloration.
- Heat: Do not place hot items directly on the surface. Use coasters or protective pads.
- Hardware: Periodically check and tighten all screws and fasteners to maintain stability.

Figure 6.1: Wood Grain Detail. This close-up image highlights the texture and pattern of the wood grain finish on the TV stand's surface, demonstrating its aesthetic quality.
7. Troubleshooting
If you encounter any issues with your TV stand, refer to the following common problems and solutions:
| Problem | Possible Cause | Solution |
|---|---|---|
| Stand is wobbly/unstable | Loose fasteners; Uneven floor | Tighten all screws and bolts. Move to a level surface or use shims under the legs. |
| Cabinet doors do not align | Hinges not adjusted correctly | Adjust the screws on the hinges to align the doors. Refer to hinge adjustment instructions. |
| LED lights not working | Power connection loose; Remote battery dead; LED strip damaged | Check all power connections. Replace remote battery. Contact customer support if LED strip is damaged. |
8. Specifications
Detailed specifications for the 4 Styles 145CM Modern 57" TV Stand:
| Feature | Detail |
|---|---|
| Model Number | EMEMUPBJU-BROWN |
| Dimensions (W x D x H) | 57.5" x 13.2" x 20.9" (145CM x 33.5CM x 53CM) |
| Material | Particle Board |
| Net Weight | 61.73 lbs (28 kg) |
| Color | Brown (Matte Body), Black (High Gloss Fronts) |
| Max TV Screen Size | Up to 65 inches |
| LED Lighting | 16 Color LED system with remote control |
| Country of Origin | China |
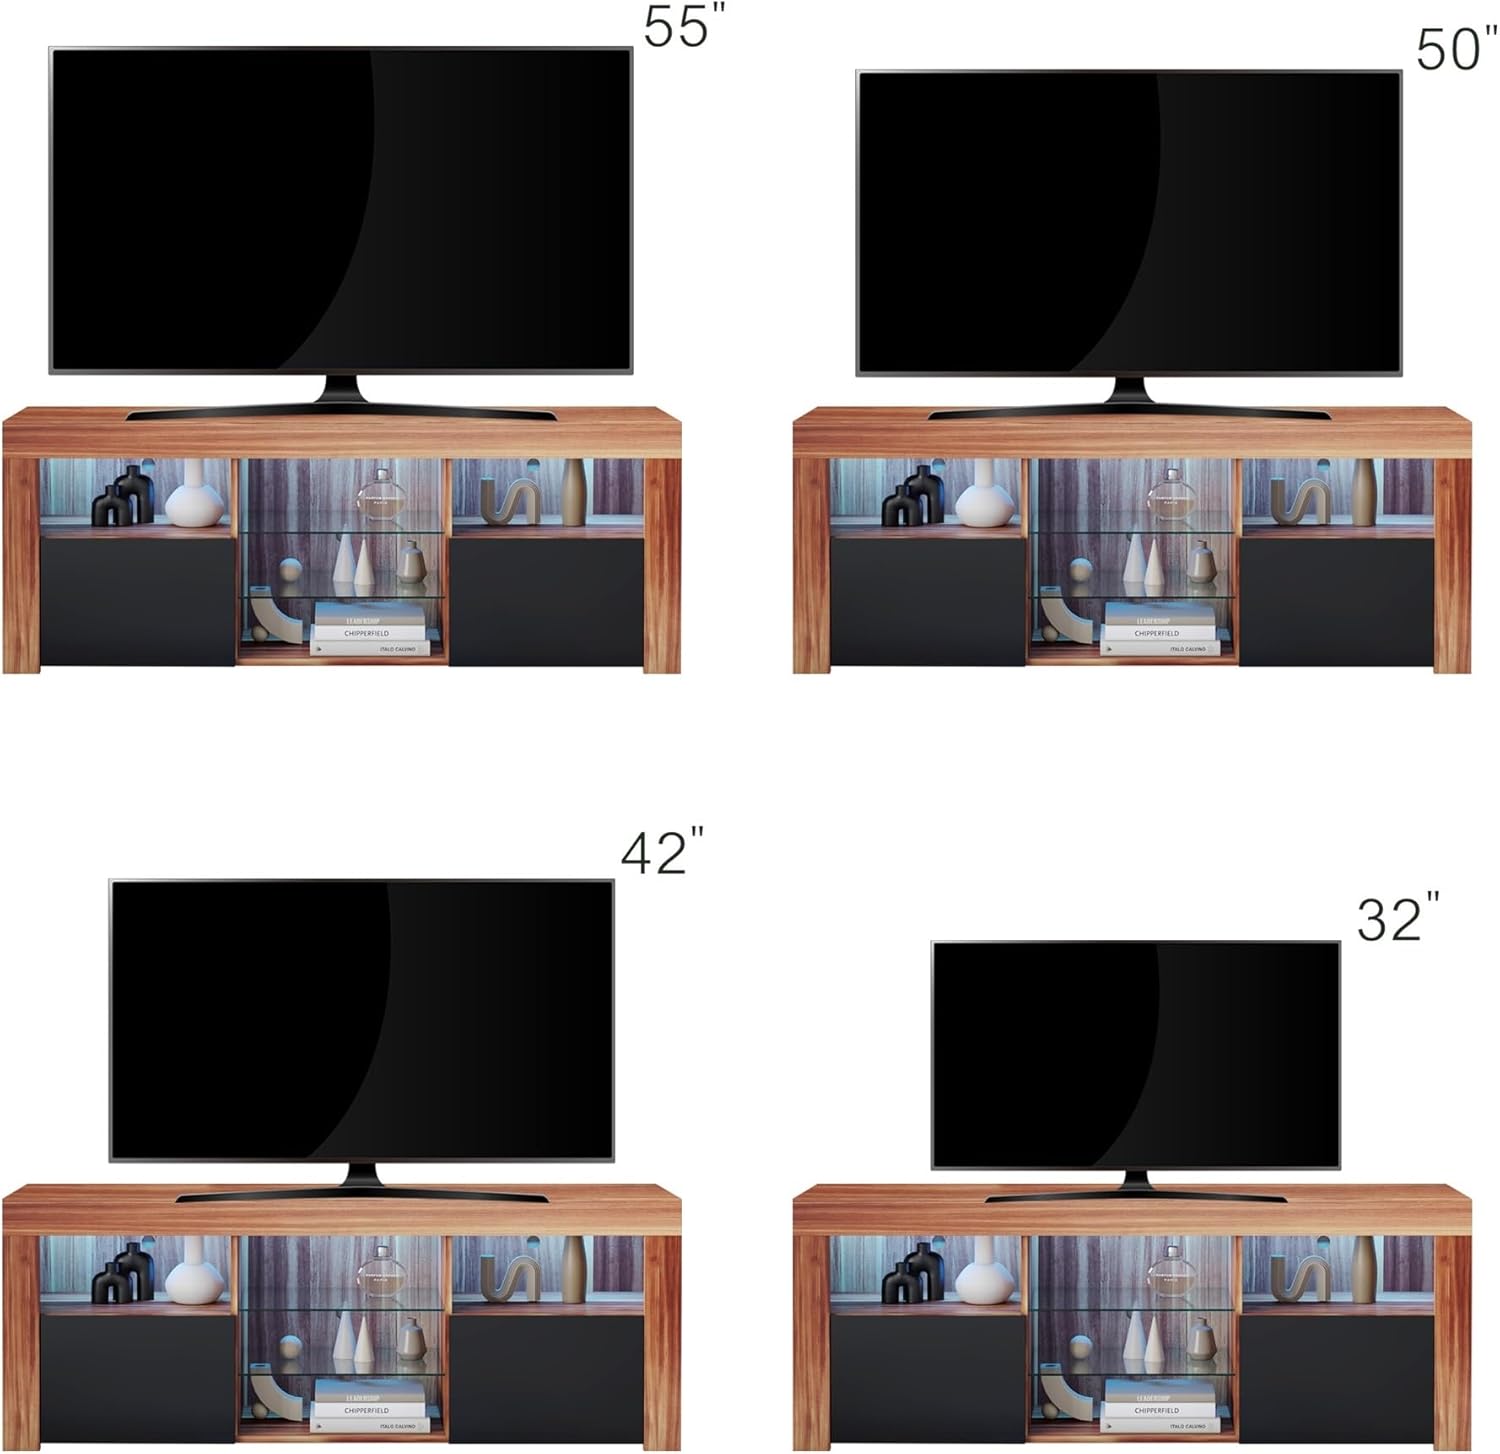
Figure 8.1: TV Size Compatibility. This visual guide demonstrates how different television sizes, from 32 inches up to 55 inches, fit proportionally on the TV stand, indicating its versatility.
9. Warranty and Support
For warranty information or technical support, please refer to the documentation included with your purchase or contact the retailer where the product was acquired. Keep your proof of purchase for any warranty claims.


