1. Introduction
This manual provides detailed instructions for the installation, operation, and maintenance of your QDVOPHZA 5MP 13-Inch CCTV Camera System. Please read this manual thoroughly before using the product to ensure proper setup and functionality. Keep this manual for future reference.
2. Product Overview
The QDVOPHZA 5MP 13-Inch CCTV Camera System is a comprehensive surveillance solution designed for both home and business security. It features high-resolution 5MP cameras, a 13-inch NVR monitor, and wireless connectivity for ease of installation and remote access.
Key Features:
- 5MP Ultra-High Resolution: Provides clear and detailed images, capturing fine details like facial features and license plates.
- Full-Color Night Vision: Delivers rich, detailed color images even in low-light or completely dark environments, enhancing nighttime surveillance.
- Intelligent Motion Tracking: Automatically identifies and tracks moving objects, ensuring critical areas remain under surveillance and reducing false alarms.
- 2.4GHz Wireless Wi-Fi Connection: Enables seamless remote control and real-time viewing via a mobile application, eliminating complex wiring.
- Two-Way Audio: Allows for real-time conversations with visitors or family members through the camera system via your mobile device.
- Pan 355°/Tilt 90°: Offers extensive coverage with remote-controlled pan and tilt capabilities.
- IP66 Weatherproof: Cameras are designed to withstand various outdoor weather conditions.
- NVR Capabilities: Supports wireless connection to a router, APP video playback, APP remote viewing, automatic video overwrite, up to 10 camera connections (K8508 model), and up to 4TB HDD for 24/7 recording.

Figure 2.1: Overview of the QDVOPHZA 5MP 13-Inch CCTV Camera System, showing the NVR monitor and multiple wireless cameras.
3. Setup
3.1 Unpacking and Initial Inspection
Carefully unpack all components and verify that all items listed in the package contents are present and undamaged. If any items are missing or damaged, contact your retailer immediately.
3.2 Powering On the NVR and Cameras
- Connect the NVR to a power outlet using the provided DC 12V/2A power adapter. The NVR will power on automatically.
- Connect each camera to a power outlet using its respective DC 12V/1A power adapter. The cameras will power on and begin their self-test sequence.
3.3 NVR and Camera Pairing (Wireless Connection)
The cameras are typically pre-paired with the NVR at the factory. Once both the NVR and cameras are powered on, the camera feeds should automatically appear on the NVR monitor. If a camera feed does not appear:
- Access the NVR's menu (refer to the NVR's specific interface instructions).
- Navigate to the 'Camera Management' or 'Wireless Pairing' section.
- Select the option to add or re-pair cameras. Follow the on-screen prompts to connect any unpaired cameras.
3.4 Network Connection
To enable remote viewing and app functionality, connect the NVR to your home or business network:
- Wireless Connection: The NVR supports wireless connection to your router. Access the NVR's network settings, select your Wi-Fi network, and enter the password.
- Wired Connection (Optional): For a more stable connection, you can connect the NVR to your router using an Ethernet cable.
3.5 Mobile App Installation and Setup
- Download the official mobile application (e.g., 'EseeCloud' or similar, check NVR interface for exact app name) from your smartphone's app store (iOS App Store or Google Play Store).
- Register a new account and log in.
- Add your NVR device to the app by scanning the QR code displayed on the NVR monitor (usually found in the 'Network' or 'Cloud ID' settings) or by manually entering the device ID.
- Once added, you should be able to view live feeds and access NVR functions remotely.
4. Operating Instructions
4.1 Live View and Remote Monitoring
After successful setup, you can view live camera feeds directly on the NVR monitor or remotely via the mobile application. Open the app and select the desired camera to view its live stream.
4.2 Two-Way Audio
The system supports two-way audio, allowing you to communicate through the camera. This feature is particularly useful for interacting with visitors or deterring intruders.
- While viewing a live feed on the mobile app, locate the microphone icon.
- Tap and hold the microphone icon to speak. Your voice will be transmitted through the camera's speaker.
- Release the icon to listen for a response.

Figure 4.1: Illustration of the two-way audio function, showing a person speaking through the mobile app to someone near the camera.
4.3 Motion Detection and Tracking
The system is equipped with intelligent motion detection and tracking. When motion is detected, the camera can automatically track the moving object and send alerts to your mobile app.
- Enable motion detection in the NVR settings or through the mobile app for each camera.
- Adjust sensitivity and detection zones as needed to minimize false alarms.
- When an event occurs, you will receive a notification on your mobile device.
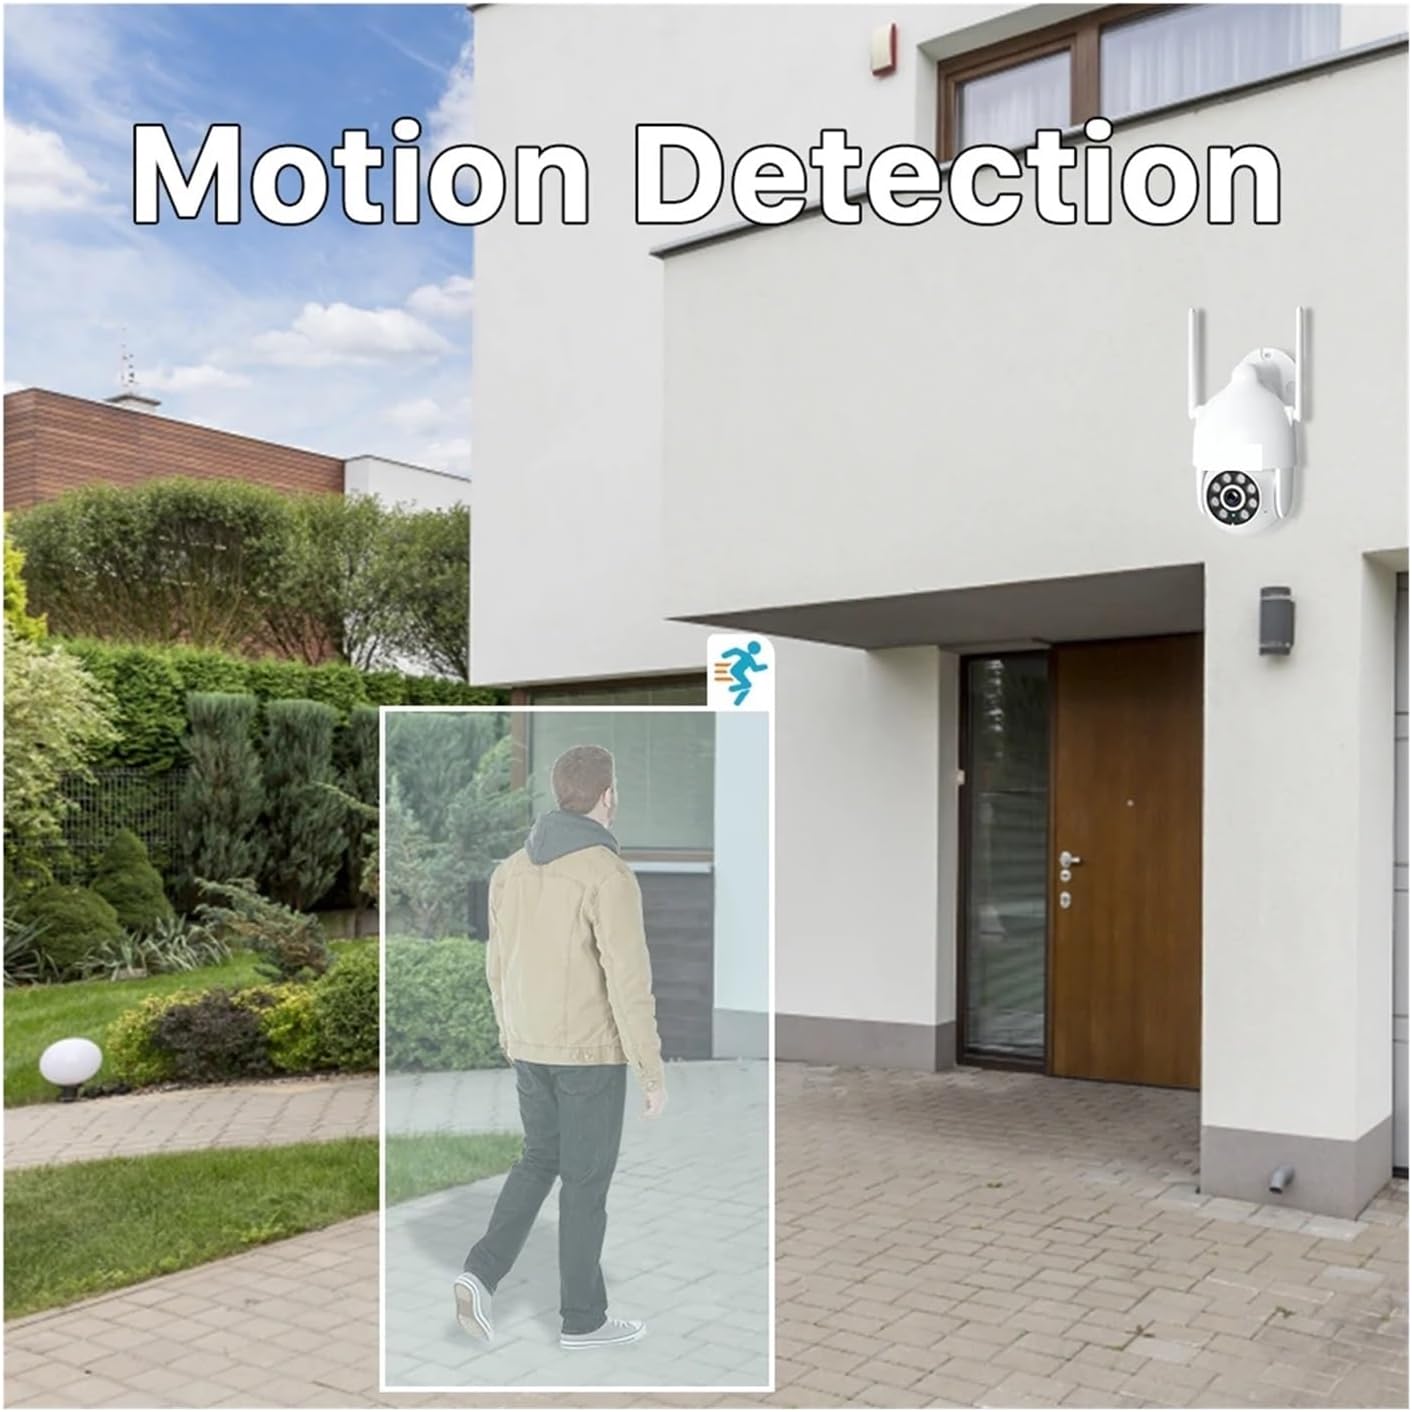
Figure 4.2: Visual representation of the motion detection capability, highlighting a detected person within the camera's view.
4.4 Pan and Tilt Control
Control the camera's viewing angle remotely using the pan (horizontal) and tilt (vertical) functions.
- In the mobile app's live view, locate the PTZ (Pan/Tilt/Zoom) controls.
- Use the directional arrows or swipe gestures to adjust the camera's position. The camera supports 355° pan and 90° tilt.

Figure 4.3: Diagram illustrating the 355° pan and 90° tilt range of the camera, controlled via a mobile device.
4.5 Night Vision Modes
The cameras offer both full-color and infrared night vision modes to adapt to different lighting conditions.
- Full-Color Night Vision: Utilizes built-in white lights to provide color images in dark environments.
- Infrared Night Vision: Uses infrared LEDs for black and white images in complete darkness, offering a discreet surveillance option.
You can typically switch between these modes or set them to automatic in the camera settings via the NVR or mobile app.

Figure 4.4: Side-by-side comparison showing the visual difference between full-color night vision and traditional infrared night vision.
4.6 Recording and Playback
The NVR supports 24/7 continuous recording and automatic overwrite of older footage when the hard drive is full.
- Recording: Ensure a compatible 2.5-inch HDD (up to 4TB) is installed in the NVR for continuous recording. Recording settings can be configured in the NVR menu.
- Playback: Access recorded footage via the NVR monitor or the mobile app. Select the desired date and time to review events.
5. Maintenance
5.1 Cleaning
- Regularly clean the camera lenses with a soft, damp cloth to ensure clear image quality. Avoid abrasive cleaners.
- Wipe down the NVR monitor and casing with a dry, soft cloth.
5.2 Firmware Updates
Periodically check for firmware updates for both the NVR and cameras through the NVR's system settings or the mobile app. Firmware updates can improve performance, add new features, and enhance security.
5.3 Hard Drive Management
The NVR's automatic overwrite function manages storage. However, it is good practice to periodically check the hard drive status in the NVR settings to ensure it is functioning correctly.
6. Troubleshooting
6.1 No Image Displayed on NVR Monitor
- Ensure the NVR is powered on and the power adapter is securely connected.
- Check the power connection for each camera.
- Verify that cameras are paired with the NVR (refer to Section 3.3).
- Restart both the NVR and cameras.
6.2 Cannot Connect to Mobile App
- Ensure the NVR is connected to the internet (Wi-Fi or Ethernet).
- Verify your mobile device has a stable internet connection.
- Check if the NVR's Cloud ID is correctly entered or scanned in the app.
- Restart your router, NVR, and mobile app.
6.3 Poor Image Quality
- Clean the camera lens (refer to Section 5.1).
- Ensure there are no obstructions in front of the camera.
- Check the camera's position and adjust if necessary to avoid glare or reflections.
- Verify the camera is receiving adequate power.
6.4 Motion Detection Not Working or Too Many False Alarms
- Ensure motion detection is enabled for the specific camera in the NVR or app settings.
- Adjust the motion detection sensitivity. Lower sensitivity for fewer false alarms, higher for more sensitive detection.
- Configure detection zones to exclude areas with constant movement (e.g., trees swaying).
7. Specifications
| Feature | Specification |
|---|---|
| Camera Image Resolution | 2560*1920 (5MP) |
| Camera Lens | 3.6mm |
| Monitor Size | 13-inch |
| HDD Size Supported | 2.5-inch, up to 4TB |
| NVR Channels | Supports up to 10 camera connections (K8508 model) |
| Wireless Connectivity | 2.4GHz Wi-Fi |
| Night Vision | Infrared Night Vision, Full Color Night Vision |
| Audio Features | Two-Way Talk |
| Motion Detection | Supported |
| Auto Tracking | Supported |
| Pan/Tilt Range | Pan 355° / Tilt 90° |
| Recording | 7*24 hours recording, automatic overwrite |
| Weatherproof Level | IP66 |
| Camera Power Input | DC 12V/1A |
| NVR Power Input | DC 12V/2A |
| Power Output | 100V-240V |
| Item Model Number | w0u5903wei |
| ASIN | B0DMKT1QHN |
| Item Weight | 1.76 ounces |
| Package Dimensions | 1.18 x 0.79 x 0.39 inches |
8. Warranty and Support
8.1 Warranty Information
For specific warranty details, please refer to the warranty card included with your product or contact the retailer from whom you purchased the system. Warranty terms may vary by region and retailer.
8.2 Technical Support
If you encounter any issues that cannot be resolved using this manual's troubleshooting section, please contact your retailer or the manufacturer's customer support for assistance. Have your product model number (w0u5903wei) and ASIN (B0DMKT1QHN) ready when contacting support.