1. Introduction
This manual provides essential instructions for the installation, operation, maintenance, and troubleshooting of the LCWLYOBM PH-8851 Industrial pH Controller. The PH-8851 is designed for precise and continuous monitoring and control of pH levels in various industrial applications. To ensure safe and efficient operation, please read this manual thoroughly before using the device and retain it for future reference.
2. Product Overview and Components
The LCWLYOBM PH-8851 system consists of a main controller unit and a compatible electrode. The controller features a digital display for pH and temperature readings, along with control buttons for navigation and parameter adjustment. Various electrode types are available to suit specific application requirements.

Image 2.1: The PH-8851 Industrial pH Controller shown with a connected electrode. The controller features a digital display and control buttons.
2.1 Available Electrode Types (PH-8851 Series)
- Composite Electrode (5m/10m): Standard electrode for general pH measurement.
- Composite Electrode with Temperature Compensation (5m): Includes integrated temperature sensor for automatic temperature correction.
- Glass Electrode (5m/10m): Offers high precision for specific applications.
- High-Temperature Electrode (10m): Designed for use in elevated temperature environments.
- Desulfurization Electrode (10m): Specialized for desulfurization processes.
- ORP Electrode (10m): For Oxidation-Reduction Potential measurement (requires ORP controller variant).
- Teflon Sheath: Protective sheath for glass electrodes.
3. Safety Information
Observe the following safety precautions to prevent injury and damage to the device:
- Ensure the power supply matches the device's requirements.
- Do not operate the device in explosive or corrosive atmospheres unless specifically rated for such environments.
- Handle electrodes with care; glass electrodes are fragile.
- Avoid direct contact with buffer solutions or samples, as they may contain hazardous chemicals.
- Only qualified personnel should perform installation and maintenance.
- Disconnect power before performing any maintenance or connection changes.
4. Setup
4.1 Unpacking and Inspection
Carefully unpack the PH-8851 controller and electrode. Inspect all components for any signs of damage during transit. Report any damage to your supplier immediately.
4.2 Mounting the Controller
The controller is designed for panel mounting. Cut an opening in the panel according to the dimensions provided in the specifications. Insert the controller into the opening and secure it using the provided mounting brackets.
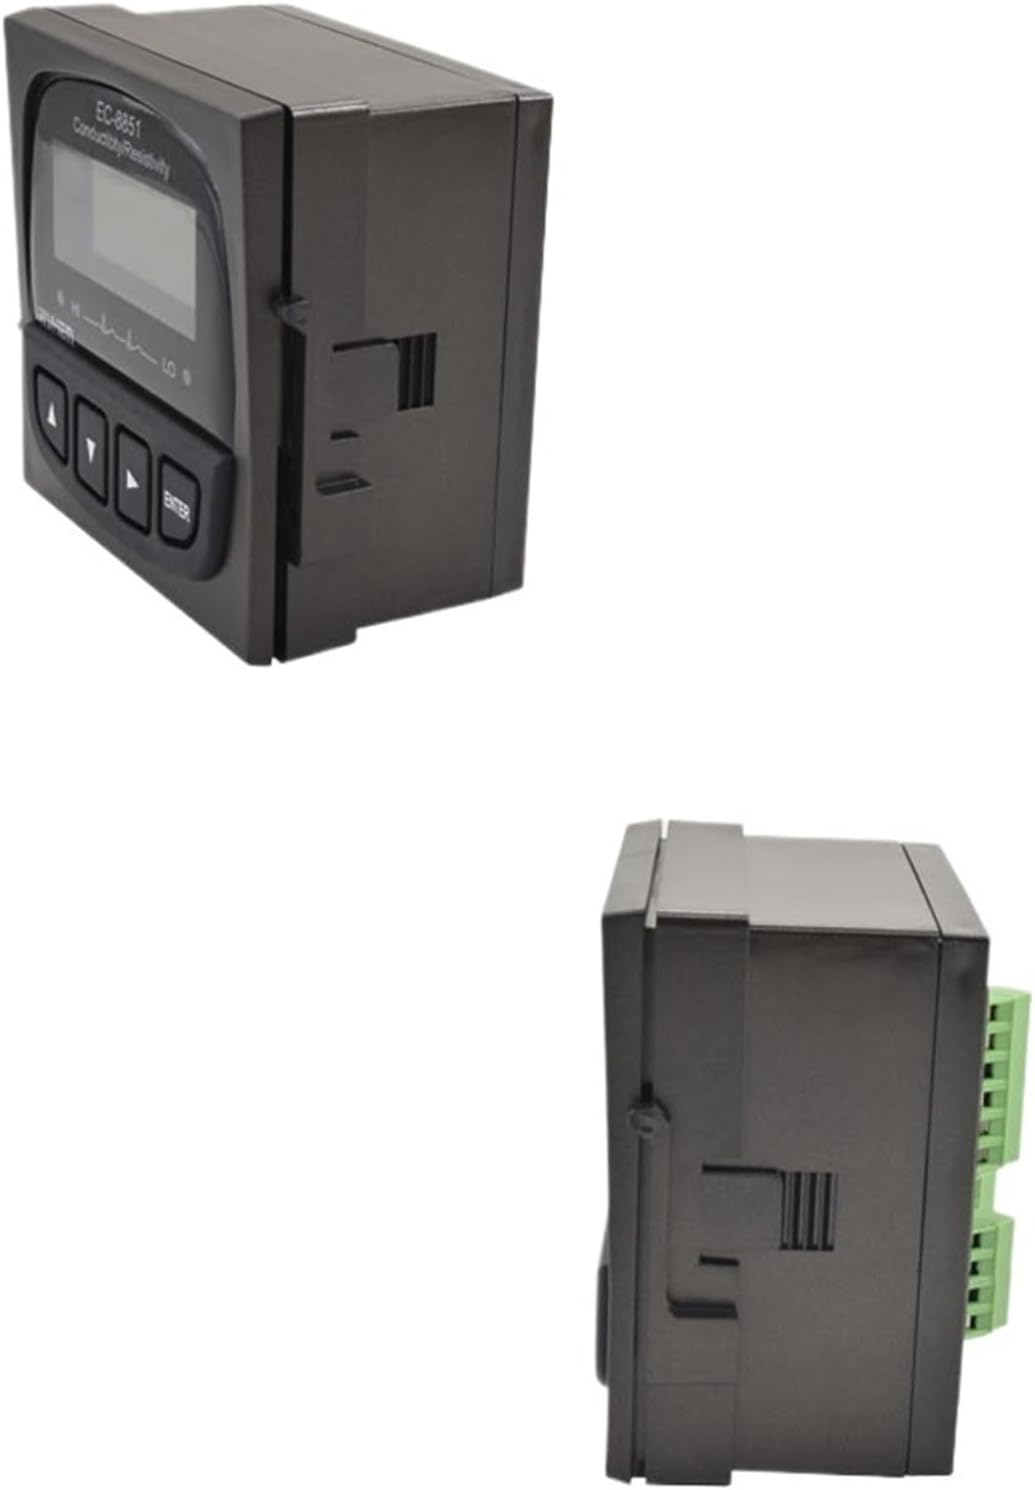
Image 4.1: Front and side view of the PH-8851 controller, illustrating its compact design for panel integration.
4.3 Electrode Connection
Connect the pH electrode to the designated input terminal on the rear of the controller. Ensure the connection is secure and free from moisture. If using a temperature compensation electrode, connect its temperature sensor lead to the appropriate terminal.
4.4 Power Connection
Connect the power cable to the power input terminal on the controller. Ensure the power source matches the voltage and frequency requirements specified on the device label. Do not apply power until all connections are complete and verified.
5. Operating Instructions
5.1 Initial Power On
After connecting power, the controller will perform a self-test and then display the current pH and temperature readings. Allow a few minutes for the readings to stabilize.
5.2 Button Functions
- Up/Down Arrows: Navigate menu options, adjust values.
- Left/Right Arrows: Select menu items, move cursor.
- ENTER Button: Confirm selections, enter menu.
5.3 Calibration
Regular calibration is crucial for accurate pH measurements. Perform a 2-point or 3-point calibration using fresh, certified buffer solutions (e.g., pH 4.00, 7.00, 10.00).
- Access the calibration menu using the control buttons.
- Rinse the electrode thoroughly with distilled water and blot dry.
- Immerse the electrode in the first buffer solution (e.g., pH 7.00). Wait for the reading to stabilize, then confirm.
- Rinse the electrode again.
- Immerse the electrode in the second buffer solution (e.g., pH 4.00 or 10.00). Wait for stabilization, then confirm.
- For 3-point calibration, repeat with the third buffer solution.
- Exit the calibration menu.
5.4 Measurement
After successful calibration, immerse the electrode into the sample solution. The display will show the real-time pH and temperature readings. Allow sufficient time for the readings to stabilize before recording.
5.5 Setting Control Parameters
The PH-8851 allows setting of control parameters such as alarm points, hysteresis, and output control. Refer to the on-screen menu for detailed instructions on adjusting these settings to suit your application.
6. Maintenance
6.1 Electrode Cleaning
Regular cleaning of the electrode is essential for accurate readings. Rinse the electrode with distilled water after each use. For stubborn deposits, use a mild cleaning solution recommended for pH electrodes. Avoid abrasive materials.
6.2 Electrode Storage
When not in use, store the pH electrode in a suitable storage solution (e.g., 3M KCl solution or electrode storage solution). Do not store in distilled water, as this can dehydrate the sensing membrane.
6.3 Controller Care
Keep the controller clean and dry. Wipe the exterior with a soft, damp cloth. Do not use harsh chemicals or solvents. Ensure the operating environment is within the specified temperature and humidity ranges.
6.4 Electrode Replacement
Electrodes have a limited lifespan. Replace the electrode when it can no longer be calibrated accurately or when readings become unstable despite proper cleaning and storage. The lifespan varies depending on usage and sample conditions.
7. Troubleshooting
| Problem | Possible Cause | Solution |
|---|---|---|
| No power/display | Power cable disconnected; no power supply; blown fuse. | Check power connections; verify power outlet; inspect and replace fuse if necessary. |
| Inaccurate pH readings | Electrode dirty or fouled; electrode not calibrated; expired buffer solutions; damaged electrode. | Clean electrode; perform calibration with fresh buffer solutions; replace electrode if damaged. |
| Unstable readings | Electrode not conditioned; air bubbles on electrode; electrical interference; sample not homogeneous. | Condition electrode in storage solution; gently tap electrode to remove bubbles; ensure proper grounding; stir sample. |
| Error message on display | Specific system fault. | Refer to the controller's on-screen error code guide or contact customer support. |
8. Specifications
| Feature | Detail |
|---|---|
| Model Number | PH-8851 |
| Brand | LCWLYOBM |
| Package Dimensions | 1.18 x 0.79 x 0.39 inches |
| Item Weight | 1.76 ounces |
| Number of Pieces | 1 (Controller unit) |
| Assembly Required | No (for controller unit) |
| Color | Type9 (Specific variant color/configuration) |
| Unit Count | 1.0 Count |
9. Warranty Information
For detailed warranty terms and conditions, please refer to the warranty card included with your product, your purchase documentation, or the official LCWLYOBM website. Warranty coverage typically includes defects in materials and workmanship under normal use.
10. Customer Support
If you require technical assistance, service, or have any questions regarding the LCWLYOBM PH-8851 Industrial pH Controller, please contact LCWLYOBM customer support or your authorized dealer. Please have your model number and purchase date available when contacting support.