Important Safety Information
Please read and understand all instructions before assembly and use of the bassinet. Keep this manual for future reference. Failure to follow these warnings and instructions could result in serious injury or death.
- Suffocation Hazard: Infants can suffocate in gaps between an extra mattress and the side of the bassinet, or on soft bedding. Use ONLY the mattress provided by the manufacturer. NEVER add a pillow, comforter, or another mattress for padding.
- Fall Hazard: To prevent falls, do not use this product when the infant begins to push up on hands and knees, or has reached the weight limit of 20 lbs (9 kg), whichever comes first.
- Always place the bassinet on a firm, horizontal level floor.
- Keep the bassinet away from cords, blinds, drapes, or any objects that could pose a strangulation hazard.
- Ensure all assembly fasteners are securely tightened before use. Periodically check for loose fasteners.
- Do not use the bassinet if any parts are missing, damaged, or broken. Contact customer service for replacement parts.
Package Contents
Verify that all components are present before beginning assembly:
- Bassinet Frame (Legs, Support Bars)
- Bassinet Main Body (Fabric and Mesh Enclosure)
- Mattress
- Mattress Covers (x2)
- Mosquito Net
- Storage Basket
- Wheels (x4)
- Bed Attachment Straps
- Assembly Tool (Screwdriver, if included)
Assembly Instructions
Follow these steps to assemble your JOYMOR Baby Bassinet. Assembly is designed to be straightforward and quick.
- Unfold the Frame: Carefully unfold the main bassinet frame until it locks into an upright position. Ensure all locking mechanisms are engaged.
- Attach the Legs: Connect the bassinet legs to the main frame according to the indicators. Ensure they click securely into place.
- Install the Wheels: Insert the four swivel wheels into the designated slots at the bottom of the bassinet legs. Press firmly until they click. Ensure the brakes are disengaged during installation.
- Attach the Bassinet Body: Secure the fabric bassinet body to the frame. Ensure all zippers and clips are fastened correctly to create a secure sleeping enclosure.
- Insert the Mattress: Place the provided mattress inside the bassinet body. Ensure it fits snugly without gaps.
- Attach the Storage Basket: Secure the storage basket to the lower support bars of the bassinet frame.
- Optional: Attach Mosquito Net: If desired, attach the mosquito net to the designated points on the bassinet frame.

Figure 1: Fully assembled JOYMOR Baby Bassinet with mosquito net.
Operating Instructions
The JOYMOR Baby Bassinet offers multiple modes and features for versatile use.
4-in-1 Functionality

Figure 2: The bassinet's versatile 4-in-1 functionality.
- Standalone Bassinet: Use as a traditional bassinet in any room. Ensure wheels are locked for stability.
- Bedside Sleeper: Position the bassinet next to your bed. Lower one side panel by disengaging the safety locks and sliding it down. Use the provided attachment straps to secure the bassinet to your bed frame, ensuring there are no gaps between the bassinet and your mattress.
- Rocking Bassinet: To engage the rocking function, adjust the leg base as per the instructions to allow for a gentle rocking motion. To stop rocking, return the leg base to the stationary position.
- Baby Bed with Mosquito Net: Attach the mosquito net to protect your baby from insects. The net is detachable for easy cleaning or when not needed.

Figure 3: Bassinet in stationary and rocking configurations.
Height Adjustment
The bassinet offers 7 height adjustable settings to align with various bed heights, ranging from 32" to 38" (bassinet top edge height). This allows for optimal alignment with parent beds from 16" to 24" in height.
- Locate the height adjustment buttons on each side of the bassinet frame.
- Press the buttons simultaneously and slide the bassinet up or down to the desired height setting.
- Ensure both sides are locked into the same height setting before placing your baby in the bassinet.
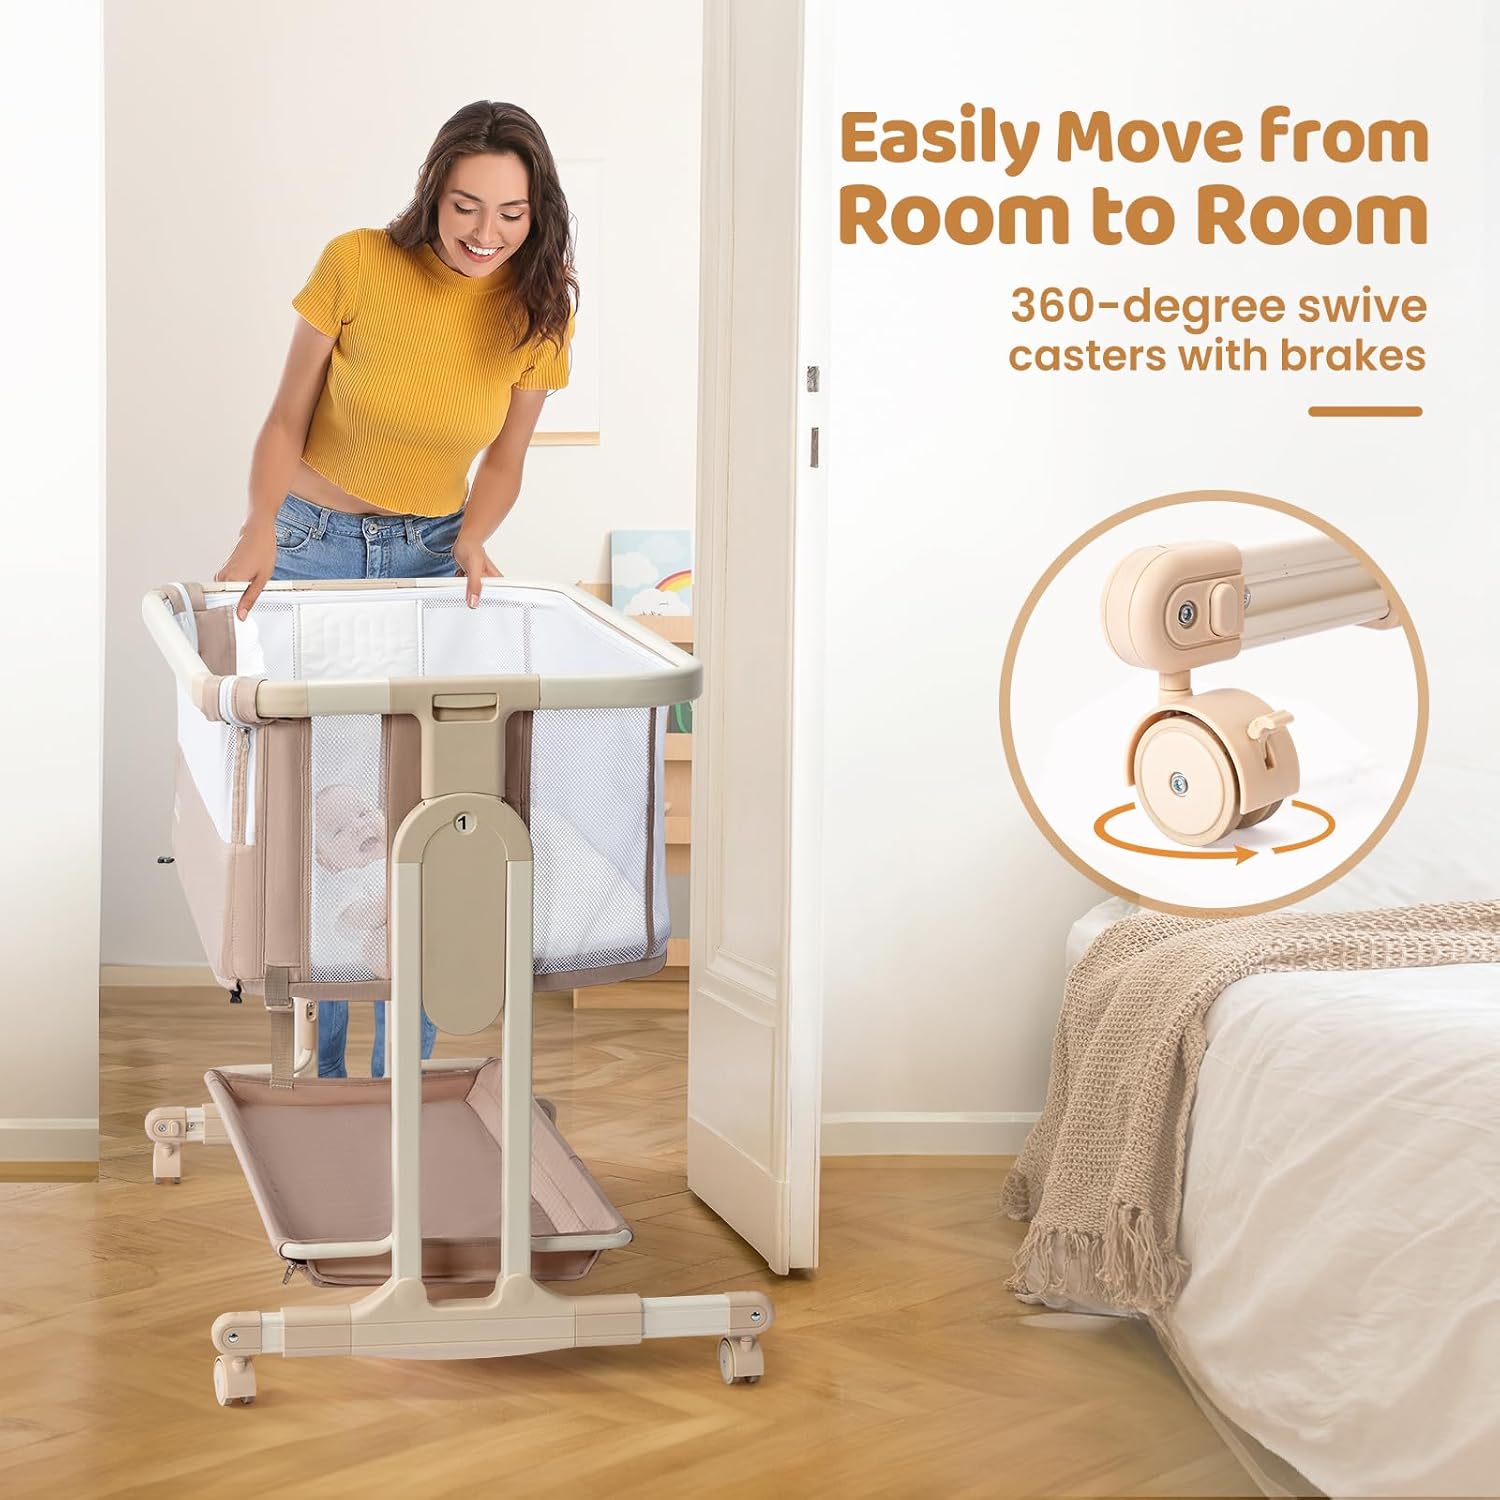
Figure 4: Height adjustment mechanism and corresponding bed heights.

Figure 5: Visual comparison of bassinet height alignment with a parent bed.
Mobility and Brakes
The bassinet is equipped with 4 swivel wheels for easy movement between rooms. Each wheel has a brake for secure positioning.
- To move the bassinet, ensure all wheel brakes are disengaged.
- To secure the bassinet in place, press down on the brake levers on each wheel until they lock. Ensure all four wheels are locked before leaving the baby unattended.

Figure 6: Bassinet mobility with swivel wheels.

Figure 7: Detail of the wheel with brake.
Incline Mode
The bassinet can be adjusted to a slight incline (approximately 3-8 degrees) to help prevent reflux in infants. Consult with a pediatrician before using the incline feature for medical conditions.
- To activate the incline, adjust one side of the bassinet to a higher setting than the other.
- Ensure the incline is gentle and stable.

Figure 8: Bassinet in incline mode for reflux prevention.
Storage Basket
An extra-large storage basket is located beneath the bassinet, providing convenient space for baby essentials such as diapers, wipes, and clothing.
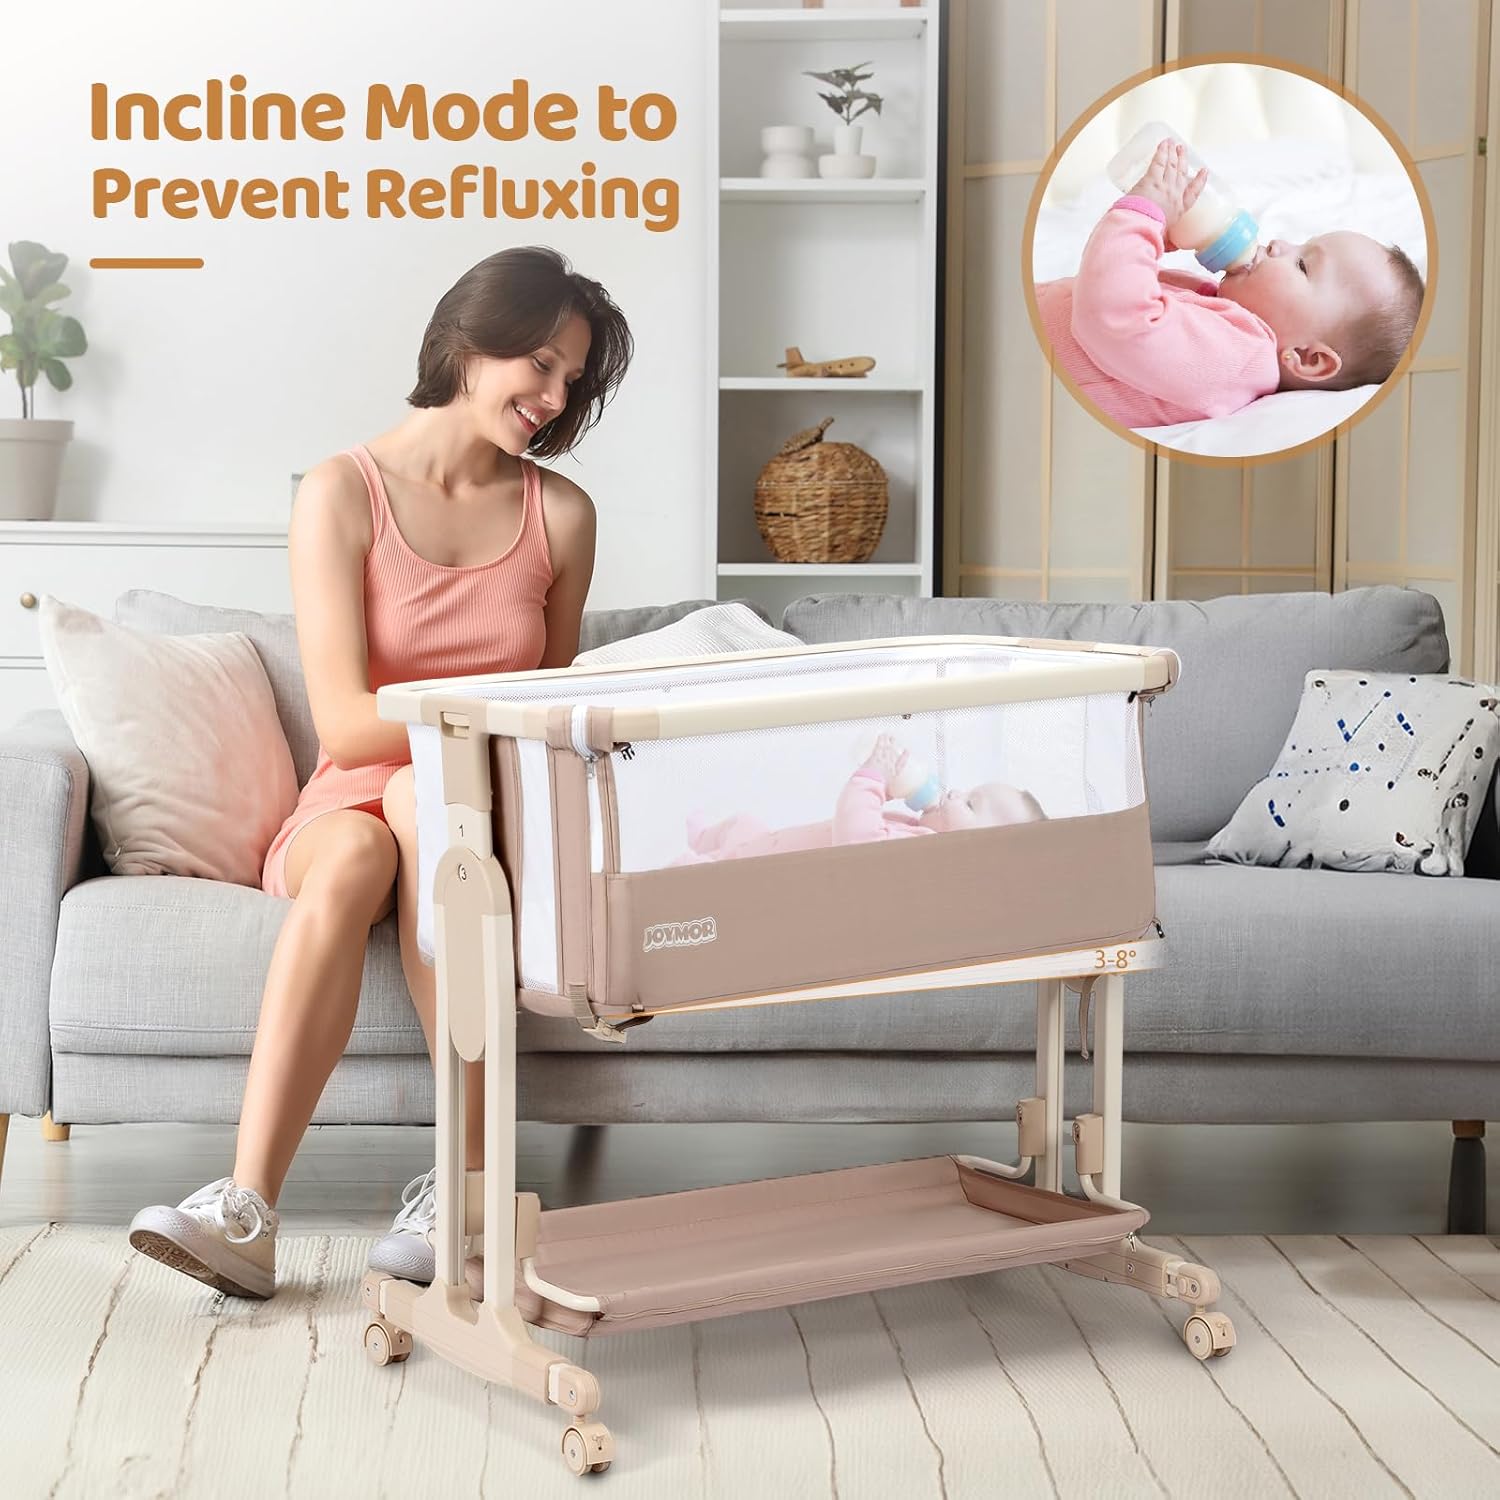
Figure 9: The spacious storage basket.
Maintenance and Care
Proper maintenance ensures the longevity and hygiene of your bassinet.
- Fabric Components: The bedding fabric and mattress covers are removable and washable. Machine wash on a gentle cycle with cold water. Do not bleach. Tumble dry low or air dry.
- Frame Cleaning: Wipe the aluminum frame and plastic components with a damp cloth and mild soap. Rinse thoroughly and dry completely before use.
- Regular Checks: Periodically inspect the bassinet for any signs of wear, damage, or loose fasteners. Tighten any loose screws or connections immediately.
Troubleshooting
If you encounter issues with your bassinet, refer to the following common solutions:
| Problem | Possible Cause | Solution |
|---|---|---|
| Bassinet feels unstable or wobbly. | Legs not fully extended or locked; fasteners are loose. | Ensure all legs are fully extended and locked. Check and tighten all assembly fasteners. |
| Difficulty adjusting height. | Adjustment buttons not pressed simultaneously or mechanism is stiff. | Ensure both height adjustment buttons are pressed firmly and simultaneously. Apply gentle pressure while adjusting. |
| Wheels not rolling smoothly or locking. | Brakes engaged; debris in wheels; wheels not fully inserted. | Disengage brakes. Clean any debris from wheels. Ensure wheels are fully inserted into their slots. |
| Rocking function is not smooth. | Leg base not correctly configured for rocking mode. | Refer to the operating instructions for proper configuration of the leg base for rocking mode. |
Specifications
- Model Number: BST1BE
- Color: Beige
- Product Dimensions (L x W x H): 36.61" x 22.24" x 38"
- Frame Material: Aluminum
- Item Weight: 28.66 Pounds
- Assembly Required: Yes
- Product Care Instructions: Machine Wash (fabric components)
- UPC: 810158426986

Figure 10: Bassinet dimensions.
Warranty and Support
For warranty information, replacement parts, or any product-related inquiries, please contact JOYMOR customer service. Details can typically be found on the product packaging or the official JOYMOR website.
We are committed to providing high-quality products and support to our customers.


