1. Introduction
This manual provides essential information for the installation, operation, and maintenance of your Western Digital WD Green SN3000 NVMe Internal Solid State Drive. Please read these instructions carefully before proceeding with installation or use to ensure optimal performance and longevity of your device.
2. Product Overview
The WD Green SN3000 NVMe SSD is designed to enhance your computer's storage performance, offering fast data access and application loading times. It utilizes PCIe Gen4 technology in a compact M.2 2280 form factor, suitable for various desktop and laptop systems.
2.1 Key Features
- PCIe Gen4 Performance: Achieves read speeds up to 5,000 MB/s, improving boot times and application launch speeds.
- High Capacity: Available in capacities up to 2TB for storing photos, videos, and other important files.
- Slim M.2 2280 Form Factor: Compatible with thin laptops and small form factor PCs.
- Enhanced Responsiveness: Utilizes NVMe and Western Digital nCache 4.0 Technologies for efficient multitasking and faster file transfers.
- Data Migration Software: Includes free downloadable Acronis True Image for Western Digital software for easy data transfer.
2.2 What's in the Box
- WD Green SN3000 NVMe SSD
3. Setup and Installation
Proper installation is crucial for the functionality and performance of your SSD. If you are unsure about any steps, consult a qualified technician or your system's documentation.
3.1 Physical Installation
- Preparation: Power off your computer and disconnect all cables. Open your computer case or laptop chassis. It is recommended to wear an anti-static wrist strap to prevent electrostatic discharge (ESD) damage.
- Locate M.2 Slot: Identify an available M.2 slot on your motherboard. The WD Green SN3000 is an M.2 2280 form factor, meaning it is 22mm wide and 80mm long.
- Insert SSD: Gently insert the WD Green SN3000 NVMe SSD into the M.2 slot at a slight angle. The gold contacts should align with the slot. Push the SSD in until it is fully seated.
- Secure SSD: Once seated, push the SSD down towards the motherboard. Secure it with the screw provided by your motherboard or laptop manufacturer.

Image: The WD Green SN3000 NVMe SSD installed in an M.2 slot within a laptop, showing its green label and secure fit.
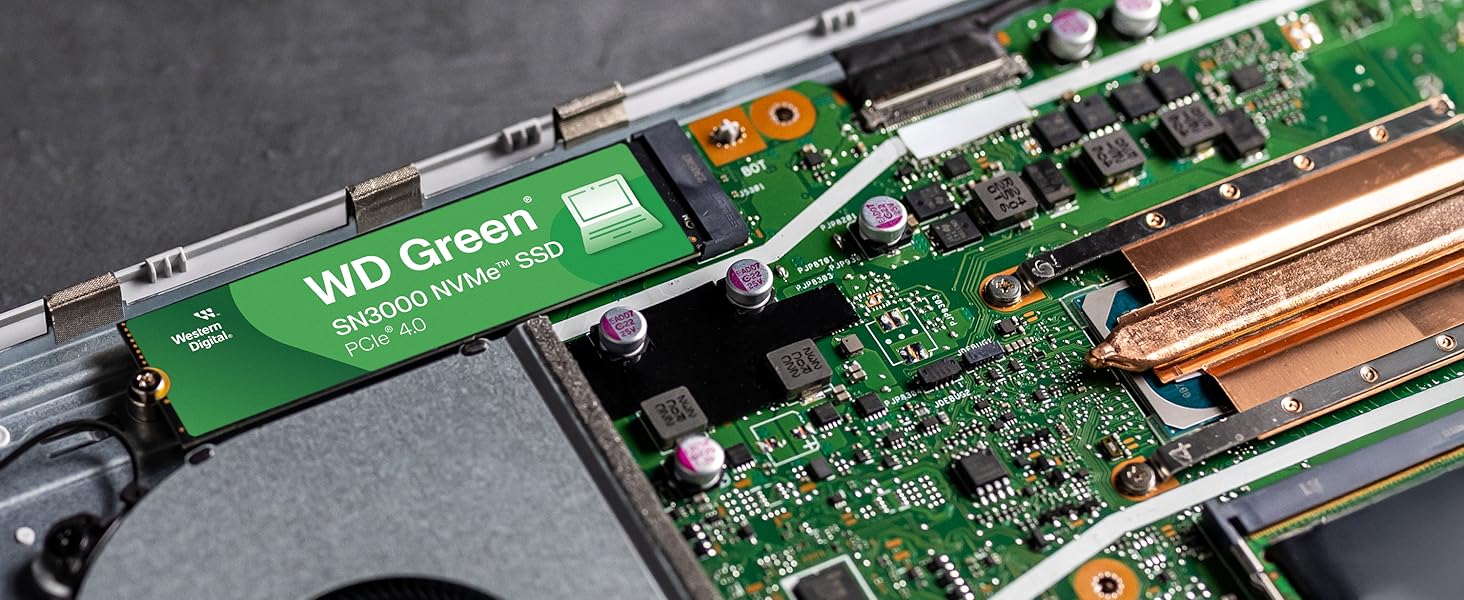
Image: The WD Green SN3000 NVMe SSD securely installed in an M.2 slot on a desktop computer motherboard, surrounded by other components.
3.2 Software Installation and Initialization
- Boot System: Reassemble your computer and power it on.
- BIOS/UEFI Check: Enter your system's BIOS/UEFI settings to confirm that the new SSD is detected. Ensure the M.2 slot is enabled and configured correctly (e.g., NVMe mode).
- Initialize and Format: For a new SSD, you will need to initialize and format it before use.
- Windows: Open Disk Management (right-click Start, select Disk Management). Locate the new SSD, right-click it, and select "Initialize Disk." Choose GPT (GUID Partition Table) for modern systems. Then, right-click the unallocated space, select "New Simple Volume," and follow the wizard to format it (NTFS recommended).
- macOS: Open Disk Utility. Select the new SSD, click "Erase," choose a name, format (APFS recommended), and scheme (GUID Partition Map).
- Data Migration (Optional): If you are migrating your operating system or existing data, download and use the free Acronis True Image for Western Digital software from the Western Digital support website. Follow the software's instructions for cloning your old drive to the new WD Green SN3000 NVMe SSD.
4. Operating the SSD
Once installed and initialized, your WD Green SN3000 NVMe SSD operates like any other storage drive in your system, but with significantly faster performance. It is ideal for your operating system, frequently used applications, and large files that benefit from quick access.
- Application Loading: Experience faster loading times for software and games.
- File Transfers: Benefit from high-speed data transfer rates when moving large files.
- System Responsiveness: Overall system responsiveness will be improved due to the SSD's low latency and high throughput.
5. Maintenance
Solid State Drives require different maintenance practices than traditional Hard Disk Drives (HDDs) to ensure optimal performance and longevity.
- TRIM Command: Ensure your operating system has TRIM enabled. TRIM helps the SSD manage its storage space efficiently, preventing performance degradation over time. Modern operating systems typically enable TRIM by default for SSDs.
- Firmware Updates: Periodically check the Western Digital support website for firmware updates for your WD Green SN3000 NVMe SSD. Firmware updates can improve performance, stability, and compatibility.
- Avoid Defragmentation: Do not defragment an SSD. Defragmentation is unnecessary for SSDs and can reduce their lifespan by causing excessive write cycles.
- Maintain Free Space: While not strictly necessary, maintaining some free space (e.g., 10-15%) on your SSD can help sustain performance.
- Data Backup: Regularly back up your important data to another storage device. While SSDs are reliable, no storage device is immune to failure.
6. Troubleshooting
If you encounter issues with your WD Green SN3000 NVMe SSD, consider the following troubleshooting steps:
- SSD Not Detected:
- Verify physical installation: Ensure the SSD is fully seated in the M.2 slot and secured.
- Check BIOS/UEFI settings: Confirm the M.2 slot is enabled and configured for NVMe. Some motherboards may disable SATA ports when an M.2 NVMe drive is used.
- Update motherboard BIOS/UEFI: An outdated BIOS/UEFI might not fully support newer NVMe drives.
- Check Disk Management (Windows) or Disk Utility (macOS): Ensure the drive is initialized and formatted.
- Slow Performance:
- Verify PCIe Gen4 compatibility: Ensure your motherboard and CPU support PCIe Gen4 for maximum speeds. If your system only supports PCIe Gen3, the SSD will operate at Gen3 speeds.
- Check drivers: Ensure you have the latest NVMe drivers installed (often provided by your operating system or motherboard manufacturer).
- Monitor temperature: Excessive heat can cause thermal throttling, reducing performance. Ensure adequate airflow in your system.
- Check for background processes: Other applications or system processes might be consuming resources.
- Operating System Issues: If you cloned your OS and are experiencing issues, ensure the cloning process was successful and that your BIOS/UEFI boot order is set correctly to boot from the new SSD.
7. Specifications
The following table details the technical specifications for the Western Digital WD Green SN3000 NVMe Internal SSD (Model WDS200T4G0E).
| Feature | Specification |
|---|---|
| Digital Storage Capacity | 2 TB |
| Hard Disk Interface | PCIE x 4 |
| Connectivity Technology | PCIe Gen4 NVMe |
| Brand | Western Digital |
| Special Feature | PCIe Gen4 NVMe |
| Hard Disk Description | Solid State Drive |
| Compatible Devices | Desktop, Laptop |
| Installation Type | Internal Hard Drive |
| Color | Green |
| Hard Disk Size | 2 TB |
| Additional Features | PCIe Gen4 NVMe |
| Specific Uses For Product | Business |
| Read Speed | 5000 Megabytes Per Second |
| Media Speed | 4.1 Gigabytes Per Second |
| Data Transfer Rate | 1 Megabytes Per Second |
| Form Factor | M.2 2280 |
| Hardware Connectivity | PCI-X |
| Item Weight | 5.4 Grams |
| Item Dimensions L x W x Thickness | 3.15"L x 0.87"W x 0.09"Th |
| Model Number | WDS200T4G0E |
| Built-In Media | WD Green SN3000 NVMe SSD |
| Model Name | WD Green SN3000 NVMe SSD |
| Manufacturer | Western Digital Technologies, Inc. |
| Global Trade Identification Number (GTIN) | 00718037904610 |
| UPC | 718037904610 |
8. Warranty Information
The Western Digital WD Green SN3000 NVMe Internal SSD (Model WDS200T4G0E) comes with a 3-Year Limited Manufacturer Warranty. For detailed terms and conditions, please refer to the official Western Digital warranty statement available on their website or contact customer support.
9. Support
For further assistance, technical support, or to download the Acronis True Image for Western Digital software, please visit the official Western Digital support website:
You can also find FAQs, troubleshooting guides, and contact information for customer service on their website.


