Introduction
This manual provides detailed instructions for the assembly, operation, and maintenance of your ROBOTIME Rubber Band Gun models LQ401 (Revolver) and M870 LQ501 (Terminator Shotgun). Please read these instructions carefully before beginning assembly or operation to ensure safe and correct use.
Important Safety Information
- Adult Supervision: This product is recommended for ages 0-10 years according to manufacturer specifications. However, due to small parts and the nature of a rubber band gun, adult supervision is strongly advised during assembly and play, especially for younger children.
- Eye Protection: Always wear appropriate eye protection when operating the rubber band gun to prevent injury.
- Target Safely: Never aim or fire at people, animals, or fragile objects. Use designated targets in a safe environment.
- Rubber Band Selection: Use only standard rubber bands designed for this product. Do not use oversized, undersized, or damaged rubber bands.
- Small Parts Warning: This kit contains small parts which may pose a choking hazard for young children. Keep all components out of reach of infants and toddlers.
- Proper Assembly: Ensure all parts are correctly assembled and secured before use. Improper assembly can lead to malfunction or injury.
Package Contents
Your ROBOTIME Rubber Band Gun kit typically includes:
- Pre-cut wooden sheets (for LQ401 and LQ501 models)
- Assembly instructions booklet
- Rubber bands
- Small accessories (e.g., springs, sandpaper, wax, tools if applicable)

Image: The ROBOTIME LQ401 Revolver and LQ501 Terminator Shotgun models, along with wooden target figures and a cowboy hat, illustrating the complete product experience.
Assembly Instructions
Follow the numbered steps in the included instruction booklet. The assembly process involves carefully detaching wooden pieces from sheets and interlocking them. Some steps may require light sanding or waxing for smoother operation.
General Assembly Tips:
- Identify all parts before starting.
- Use sandpaper (if provided) to smooth rough edges.
- Apply wax (if provided) to moving parts for smoother action.
- Do not force pieces together; if a piece doesn't fit, recheck the instructions.
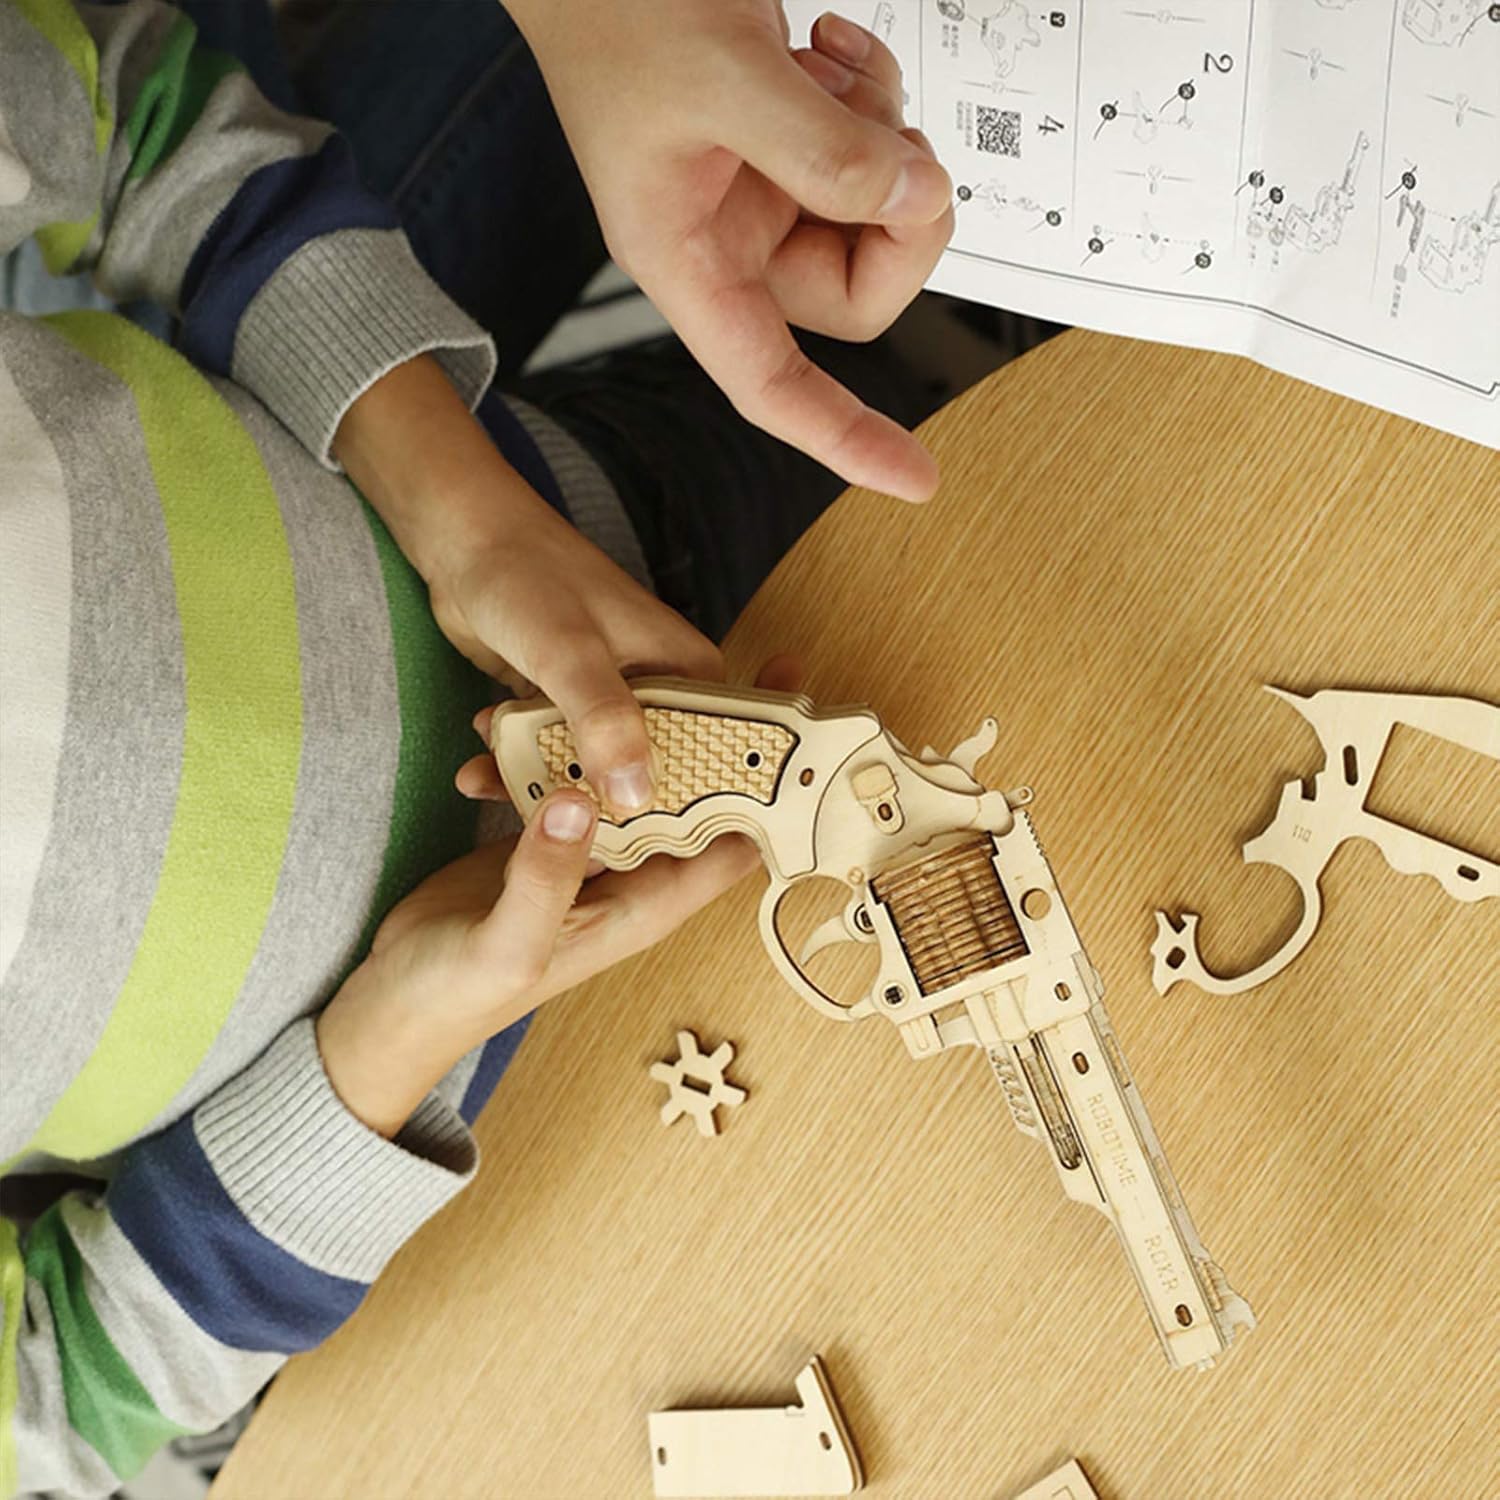
Image: A person's hands are shown carefully assembling the wooden pieces of the LQ401 Revolver, with the instruction manual visible in the background, demonstrating the assembly process.
LQ401 Revolver Specifics:
Pay close attention to the cylinder mechanism and trigger assembly. Ensure all gears and moving parts are aligned correctly for smooth rotation and firing.

Image: A detailed view of the LQ401 Revolver's wooden components, highlighting the intricate trigger mechanism, cylinder, and grip textures, crucial for proper assembly and function.
M870 LQ501 Terminator Shotgun Specifics:
The shotgun model features a pump-action mechanism. Ensure the internal spring and loading components are installed as per the diagram for proper rubber band feeding and firing.

Image: Close-up shots of the LQ501 Terminator Shotgun's wooden construction, showing the detailed loading mechanism, internal spring, and textured grip, essential for understanding its operation.
Operating Instructions
Loading Rubber Bands:
- Select appropriate rubber bands.
- For LQ401 (Revolver): Hook one end of the rubber band onto the front sight or designated loading peg. Stretch the rubber band back and secure the other end onto the rotating cylinder's firing mechanism. Load one rubber band per chamber.
- For M870 LQ501 (Shotgun): Hook one end of the rubber band onto the front barrel peg. Stretch the rubber band back along the top of the barrel and secure the other end onto the firing mechanism at the rear. Multiple rubber bands can often be loaded sequentially.

Image: A child's hands are shown carefully loading a yellow rubber band onto the front of the LQ501 Terminator Shotgun, demonstrating the initial step of preparing the toy for firing.
Firing:
- Ensure the area is clear and you are aiming at a safe target.
- Hold the gun firmly.
- Gently pull the trigger. The firing mechanism will release the rubber band.
- For LQ401, the cylinder will rotate to the next loaded chamber after each shot.
- For LQ501, pump the foregrip (if applicable) to prepare for the next shot after loading multiple bands.

Image: A child, wearing a cowboy hat and vest, is shown holding and aiming the LQ501 Terminator Shotgun, illustrating the ready-to-fire posture.
Maintenance
- Cleaning: Wipe the wooden surfaces with a dry, soft cloth to remove dust. Do not use water or chemical cleaners, as they may damage the wood.
- Lubrication: If provided, periodically apply a small amount of wax to moving parts (e.g., trigger mechanism, cylinder rotation points) to ensure smooth operation.
- Storage: Store the assembled models in a dry place away from direct sunlight and extreme temperatures to prevent warping or damage to the wood.
- Rubber Bands: Replace worn or stretched rubber bands to maintain optimal performance.
Troubleshooting
| Problem | Possible Cause | Solution |
|---|---|---|
| Rubber band does not fire or fires weakly. |
|
|
| Parts are difficult to fit during assembly. |
|
|
| Wooden parts appear warped or damaged. |
|
|
Specifications
- Product Models: LQ401 (Revolver), M870 LQ501 (Terminator Shotgun)
- Material: Wood
- Recommended Age: 0 - 10 years (Note: Adult supervision is highly recommended for assembly and play, especially for younger children, due to small parts and the nature of the product.)
- ASIN: B0DMF79ZQX
Warranty and Customer Support
ROBOTIME products are manufactured with quality in mind. For any questions regarding assembly, missing parts, or product defects, please contact ROBOTIME customer support directly. Please refer to the packaging or the official ROBOTIME website for specific warranty details and contact information.
You can often find support information by visiting the ROBOTIME Store on Amazon or their official website.