Introduction
This manual provides detailed instructions for the assembly, operation, maintenance, and troubleshooting of your VASAGLE 7-Tier Vertical Shoe Rack, Model ULBS200L01. Please read this manual thoroughly before assembly and use to ensure safe and correct operation.
Safety Guidelines
To prevent injury or damage to the product, please adhere to the following safety instructions:
- Anti-Tip Kit: Always secure the shoe rack to the wall using the provided anti-tip kit. This prevents accidental tipping, especially in households with children or pets.
- Weight Limits: Do not exceed the maximum static load of 22 lb (10 kg) per shelf. Each hook has a maximum static load of 11 lb (5 kg). Overloading can compromise stability and cause damage.
- Assembly: Ensure all components are correctly assembled and tightened according to the instructions. Do not use power tools at high torque settings, as this may damage the particleboard.
- Placement: Place the shoe rack on a flat, stable surface. Avoid placing it in areas with high humidity or direct sunlight to prevent material degradation.
- Children: Keep small parts and packaging materials away from children during assembly.
Package Contents
Verify that all components are present before beginning assembly:
- 1 x Shoe Rack (Disassembled components)
- 1 x Accessory Kit (Hardware, screws, etc.)
- 1 x Anti-Tip Kit (Wall anchors, straps)
- 1 x Instructions (This manual)
Assembly Instructions
Follow these steps to assemble your 7-Tier Vertical Shoe Rack. It is recommended to assemble the unit on a soft, clean surface to prevent scratches.
- Identify Components: Lay out all parts and hardware. Refer to the included parts list to identify each piece.
- Assemble Side Panels: Attach the horizontal shelves to the main vertical side panels using the provided screws and cam locks. Ensure the shelves are oriented correctly, with the raised back edge facing upwards.
- Secure Back Panels: Install the small back panels to prevent shoes from falling backward.
- Attach Top Panel: Secure the top shelf to the assembled structure.
- Install Hooks: The two accessory hooks can be installed on either the left or right side of the top section, as preferred. Use the designated pre-drilled holes.
- Install Anti-Tip Kit: For safety, attach the anti-tip kit to the top rear of the shoe rack and secure it to a wall stud or appropriate wall anchor point.
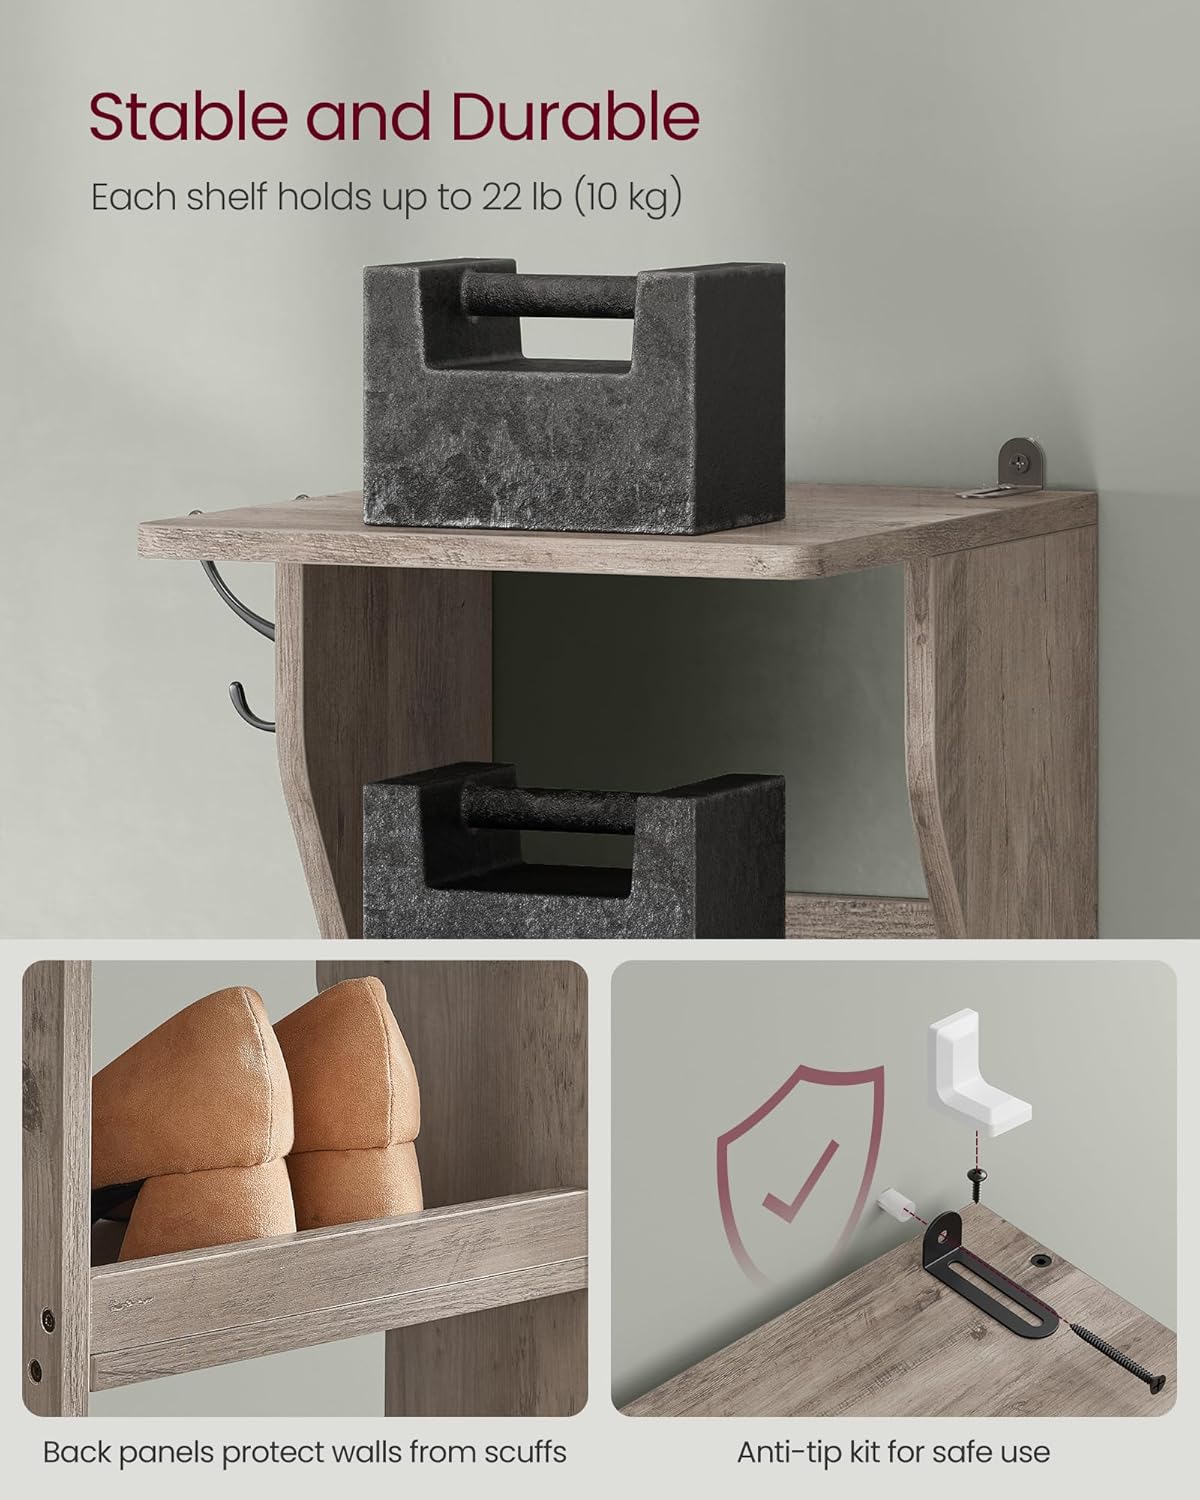
Image: Detail of the anti-tip kit and back panel design for stability.

Image: Close-up of the two extra hooks, which can be installed on either side for small accessories.
Operating Instructions
Using your VASAGLE 7-Tier Vertical Shoe Rack is straightforward:
- Shoe Placement: Place shoes on each of the seven tiers. The design allows for easy access and visibility of your footwear.
- Tall Footwear: The 6.7-inch (17 cm) distance between shelves accommodates various shoe types, including loafers, sneakers, and some boots.
- Accessory Hooks: Utilize the side hooks for hanging items such as keys, small bags, scarves, or umbrellas.
- Space Utilization: The slim, vertical design is optimized for small spaces like entryways, bedrooms, or narrow corners.

Image: The VASAGLE 7-Tier Vertical Shoe Rack in an entryway setting, showcasing its storage capacity and design.

Image: The shoe rack efficiently placed in a small corner, highlighting its space-saving feature.

Image: Detail showing the ample 6.7-inch (17 cm) shelf height, suitable for various shoe types including high-tops.
Maintenance
Proper care will extend the life of your shoe rack:
- Cleaning: Wipe the surfaces with a damp cloth. Avoid harsh chemicals or abrasive cleaners that could damage the finish.
- Spills: Clean up spills immediately to prevent staining or water damage to the particleboard.
- Inspection: Periodically check all screws and connections to ensure they remain tight. Re-tighten if necessary.
- Environmental Conditions: Avoid prolonged exposure to direct sunlight or extreme temperature changes, which can cause warping or fading.
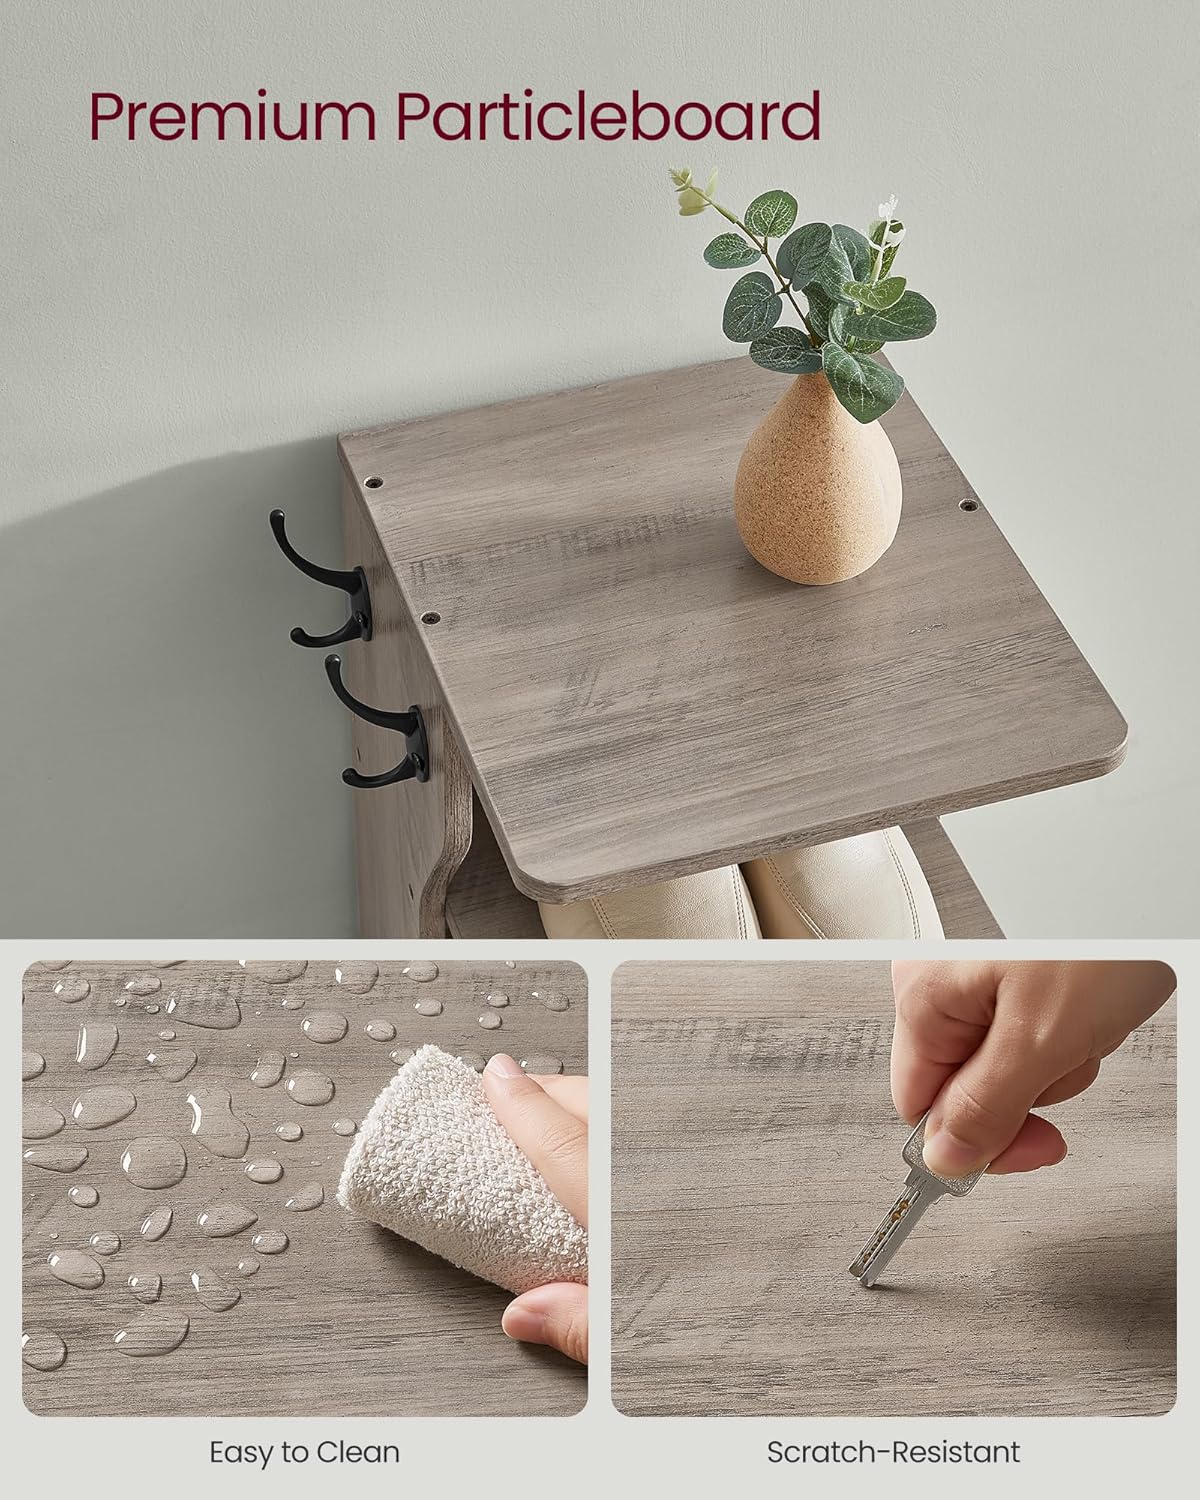
Image: Demonstrating the easy-to-clean and scratch-resistant surface of the premium particleboard.
Troubleshooting
Common issues and their solutions:
- Wobbling/Instability:
- Ensure all screws are fully tightened.
- Verify the unit is placed on a level surface.
- Confirm the anti-tip kit is correctly installed and secured to the wall.
- Shoes Sliding Off:
- Ensure the raised back edge of each shelf is facing upwards to act as a stopper.
- Missing Parts:
- Double-check the packaging. If parts are still missing, contact customer support.
Specifications
| Feature | Detail |
|---|---|
| Model Name | 7-Tier Vertical Shoe Rack |
| Model Number | ULBS200L01 |
| Brand | VASAGLE |
| Dimensions (D x W x H) | 11.8"D x 10.4"W x 43.5"H (30 cm x 26.4 cm x 110.4 cm) |
| Number of Shelves | 7 |
| Shelf Thickness (Height between shelves) | 6.7 Inches (17 cm) |
| Material | Engineered Wood (Particleboard) |
| Color | Heather Greige |
| Weight Limit per Shelf | 22 lb (10 kg) |
| Weight Limit per Hook | 11 lb (5 kg) |
| Item Weight | 17 Pounds (7.7 kg) |
| Assembly Required | Yes |
| Special Features | Durable, Easy Assembly, Space-Saving, Integrated Hooks, Anti-Tip Kit |

Image: Visual representation of the product dimensions and maximum weight capacities.
Warranty and Support
For warranty information, product support, or to purchase replacement parts, please contact VASAGLE customer service. Refer to your purchase documentation for specific warranty terms and contact details.
Customer Service: Please visit the official VASAGLE website or refer to the contact information provided with your purchase.


