1. Introduction
This manual provides essential information for the proper installation, operation, and maintenance of your FUDTYSVC Right and Left Wheel Motor Assembly. This replacement part is specifically designed for the SilverCrest SSRA1 Robotic Vacuum Cleaner. Please read these instructions carefully before proceeding with installation to ensure correct usage and to prolong the lifespan of your robotic vacuum cleaner.
1.1 Product Overview
The FUDTYSVC Wheel Motor Assembly is a critical component responsible for the mobility of your SilverCrest SSRA1 robotic vacuum cleaner. It includes both the right and left wheel units, each with an integrated motor, ensuring optimal performance and navigation.
1.2 Package Contents
- 1 x Right Wheel Motor Assembly
- 1 x Left Wheel Motor Assembly
Note: Random delivery of 1st generation or 2nd generation wheels may occur. Both generations are compatible with the SilverCrest SSRA1.
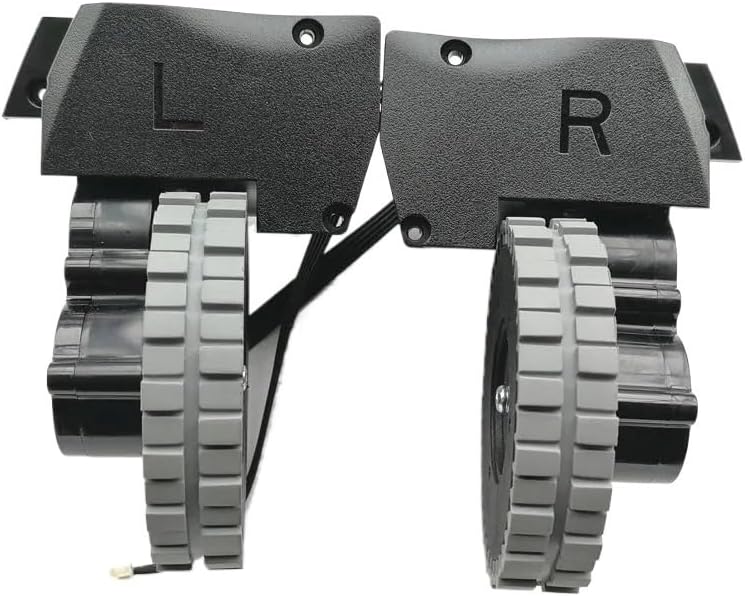
Image 1.1: FUDTYSVC Right and Left Wheel Motor Assembly (Front View)
This image displays both the right and left wheel motor assemblies. The left wheel is marked with an 'L' and the right wheel with an 'R'. Both units feature a black housing with grey rubberized wheels, connected by a small wire harness.
2. Safety Information
Please observe the following safety precautions before attempting any installation or maintenance:
- Disconnect Power: Always ensure the robotic vacuum cleaner is turned off and unplugged from its charging base before beginning any repair or replacement work. Remove the battery if accessible.
- Handle with Care: Electronic components can be delicate. Handle the wheel motor assemblies carefully to avoid damage.
- Use Appropriate Tools: Use only the recommended tools (e.g., small Phillips head screwdriver) to prevent stripping screws or damaging the vacuum cleaner's casing.
- Keep Away from Children: Small parts can be a choking hazard. Keep replacement parts and tools out of reach of children.
3. Setup and Installation
This section outlines the general steps for replacing the wheel motor assembly. Specific disassembly instructions for your SilverCrest SSRA1 may vary, so refer to your vacuum cleaner's original service manual if available.
3.1 Tools Required (Suggested)
- Small Phillips head screwdriver
- Prying tool (plastic, to avoid scratching)
3.2 Installation Steps
- Prepare the Vacuum: Turn off the SilverCrest SSRA1 and disconnect it from all power sources. Place it upside down on a clean, soft surface to prevent scratches.
- Remove Bottom Cover: Carefully unscrew and remove the bottom cover of the robotic vacuum cleaner. Set aside any brushes or side brushes that may obstruct access.
- Locate Wheel Assemblies: Identify the existing right and left wheel motor assemblies. They are typically secured by screws and connected by a small electrical connector.
- Disconnect and Remove Old Wheels:
- Gently disconnect the electrical connector from the main board or wiring harness.
- Unscrew the mounting screws holding the old wheel assembly in place.
- Carefully remove the old wheel assembly.
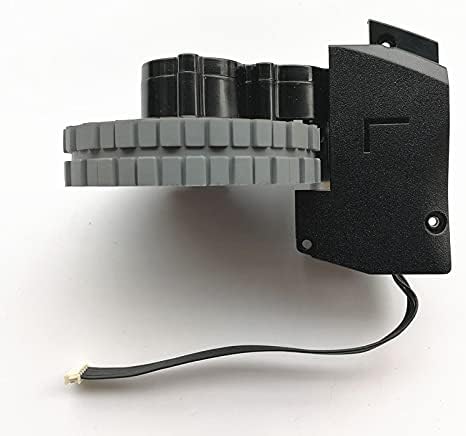
Image 3.1: Left Wheel Motor Assembly (Side View)
This image shows the side profile of the left wheel motor assembly, highlighting the motor housing and the textured grey wheel. The 'L' marking is visible on the black plastic housing.
- Install New Wheel Assemblies:
- Position the new FUDTYSVC wheel assembly (ensure you use the correct 'L' for left and 'R' for right) into its designated slot.
- Secure it with the mounting screws. Do not overtighten.
- Reconnect the electrical connector firmly. Ensure it clicks into place if applicable.
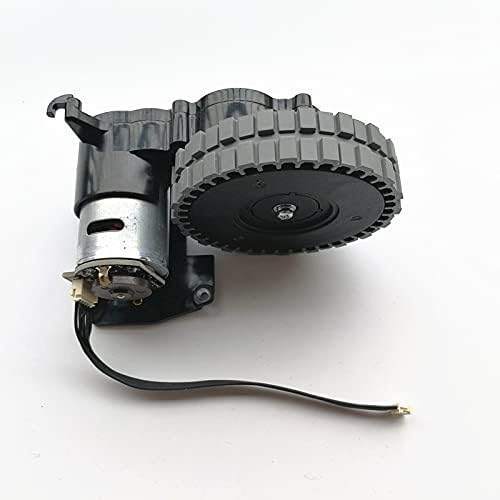
Image 3.2: Right Wheel Motor Assembly (Side View with Motor)
This image provides a side view of the right wheel motor assembly, clearly showing the integrated motor unit attached to the wheel mechanism. The 'R' marking is visible on the black plastic housing.
- Reassemble Vacuum: Replace the bottom cover and any removed brushes. Secure all screws.
- Test Functionality: Place the vacuum cleaner on the floor and power it on. Observe if both wheels move freely and the vacuum navigates correctly.
4. Operating
As a replacement part, the FUDTYSVC Wheel Motor Assembly does not have separate operating instructions. Once correctly installed, the wheels will function as part of your SilverCrest SSRA1 Robotic Vacuum Cleaner's normal operation. Ensure the vacuum cleaner's software is up-to-date for optimal performance.
5. Maintenance
Regular maintenance of the wheel motor assemblies can help ensure the longevity and efficiency of your robotic vacuum cleaner.
- Clean Wheels Regularly: Periodically inspect the wheels for tangled hair, dust, or debris. Use a small brush or cloth to clean the wheel treads and axles.
- Check for Obstructions: Ensure nothing is impeding the free rotation of the wheels. Remove any foreign objects that may have become lodged.
- Inspect for Wear: Over time, the rubber treads on the wheels may show signs of wear. While these are replacement parts, excessive wear might indicate an issue with the vacuum's usage environment or require future replacement.
6. Troubleshooting
If you encounter issues after installing the new wheel motor assemblies, consider the following:
- Wheel Not Moving:
- Check if the electrical connector is securely attached to the wheel assembly and the main board.
- Ensure no debris is blocking the wheel's movement.
- Verify that the wheel assembly is correctly seated and not obstructed by the vacuum's casing.
- Unusual Noise from Wheels:
- Inspect for any foreign objects caught in the wheel mechanism.
- Ensure all screws are tightened appropriately, but not overtightened.
- If the noise persists, the wheel motor itself might be faulty, though this is rare for new parts.
- Vacuum Navigation Issues:
- Confirm that both the right and left wheel assemblies are installed in their correct positions.
- Ensure the wheels are clean and have good traction.
- If the issue persists, it may be related to the vacuum cleaner's sensors or internal navigation system, not the wheels.
7. Specifications
| Feature | Detail |
|---|---|
| Product Type | Vacuum Cleaner Wheel Motor Assembly |
| Brand | FUDTYSVC |
| Compatibility | SilverCrest SSRA1 Robotic Vacuum Cleaner |
| Part Model Number | daishengbaihuo524gs |
| Package Contents | Right and Left Wheel Motor Assembly |
| Item Weight | 50 g |
| Origin | Mainland China |
8. Warranty and Support
For any questions regarding the FUDTYSVC Right and Left Wheel Motor Assembly, or if you require technical assistance, please contact your seller or the manufacturer directly. Please retain your proof of purchase for any warranty claims.


