1. Important Safety Information
Read and understand all safety warnings and instructions before operating this pressure washer. Failure to follow these instructions may result in electric shock, fire, and/or serious injury.
1.1 General Safety Warnings
- Electrical Safety: Always connect to a grounded outlet. Do not operate with damaged cords or plugs. Keep all connections dry and off the ground.
- Personal Safety: Wear appropriate personal protective equipment (PPE) including safety glasses, hearing protection, and protective footwear. Do not direct the spray at people, pets, or electrical devices.
- Water Supply: Ensure the water supply is clean and free of debris. Do not use hot water.
- Operation Environment: Operate on a stable, level surface. Keep children and bystanders away from the operating area.
- Chemicals: Use only pressure washer safe detergents. Follow detergent manufacturer's instructions for use and disposal.
2. Product Components
The Yeryork Electric Pressure Washer Model YE006 includes the following components:
- Pressure Washer Unit
- Spray Gun
- Stainless Steel Lance
- High-Pressure Hose (33 ft)
- Power Cord (20 ft)
- Foam Cannon (500ml)
- Quick-Connect Nozzles:
- 0° (Red): For concentrated, powerful blasting on stubborn stains.
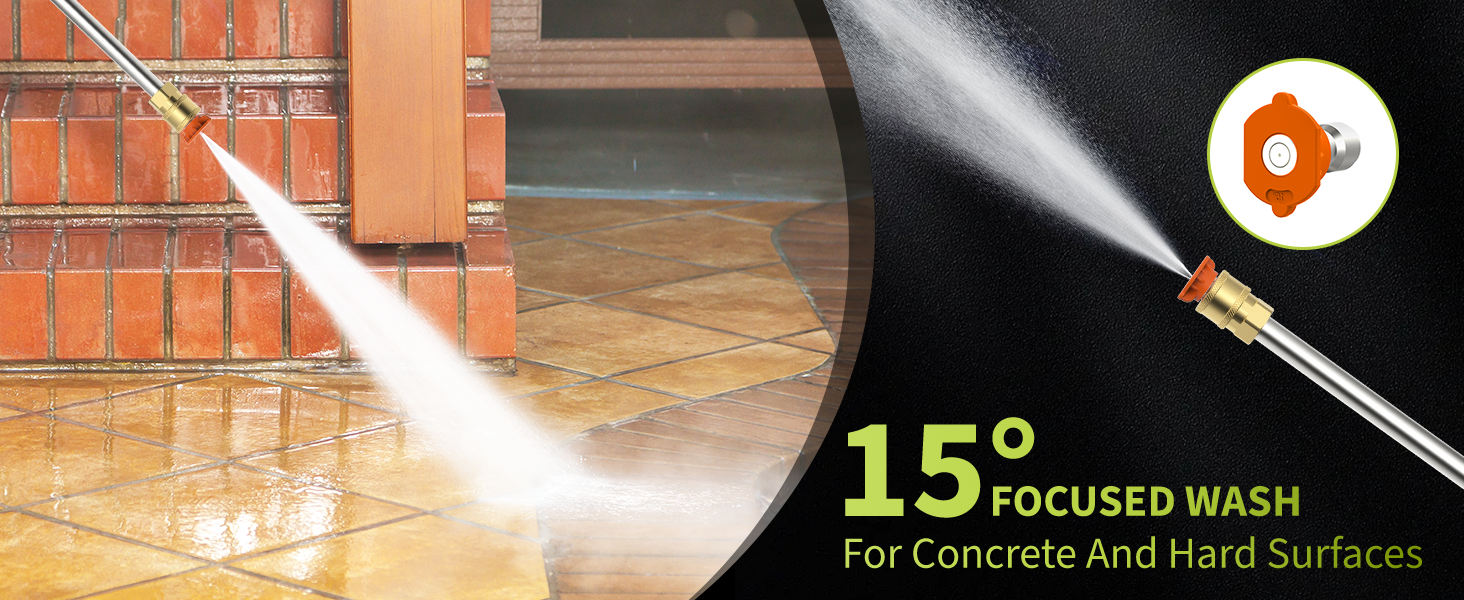
- 15° (Orange): For focused wash on concrete and hard surfaces.
- 25° (Green): For general cleaning on fences and wood decks.
- 40° (White): For uniform spraying on outdoor furniture and vehicles.

3. Setup Instructions
Follow these steps to assemble and prepare your pressure washer for use.
3.1 Assembly
- Attach Wheels: Ensure all four 360° rotating wheels are securely attached to the base of the unit. Verify that the locking casters function correctly for stability.
- Connect High-Pressure Hose: Connect one end of the high-pressure hose to the pressure washer's outlet and the other end to the spray gun. Ensure connections are tight to prevent leaks. The unit features 14mm universal threaded connectors for a secure fit.
- Assemble Lance and Nozzle: Attach the stainless steel lance to the spray gun. Select the desired quick-connect nozzle (0°, 15°, 25°, or 40°) and insert it into the end of the lance until it clicks into place.
- Attach Foam Cannon (Optional): If using the foam cannon, fill it with appropriate detergent and attach it to the spray gun in place of a nozzle, or as directed for your specific model.

3.2 Water and Power Connection
- Water Supply: Connect a standard garden hose to the water inlet of the pressure washer. Ensure the water source is turned on fully before starting the unit. The pressure washer supports water intake from faucets, buckets, or pools.
- Electrical Connection: Plug the 20 ft power cord into a grounded electrical outlet. Ensure the outlet meets the power requirements of the unit.
4. Operating Instructions
Proper operation ensures effective cleaning and extends the life of your pressure washer.
4.1 Starting the Pressure Washer
- Ensure all connections are secure and the water supply is fully open.
- Turn the pressure washer's power switch to the "ON" position.
- Squeeze the trigger on the spray gun to release air from the system and allow water to flow steadily. This primes the pump.
- Once a steady stream of water is achieved, the unit is ready for high-pressure cleaning.

4.2 Using Quick-Connect Nozzles
The pressure washer comes with four quick-connect nozzles for various cleaning tasks:
- 0° Red Nozzle: Delivers a concentrated, high-impact stream for removing extremely stubborn dirt, grime, and stains from cracks or hard-to-reach areas. Use with caution as it can damage surfaces.
- 15° Orange Nozzle: Provides a powerful, focused spray for general cleaning of concrete, brick, and other hard surfaces.
- 25° Green Nozzle: Offers a wider spray pattern suitable for cleaning fences, wood decks, and general household surfaces.
- 40° White Nozzle: Produces a broad, gentle spray ideal for washing vehicles, windows, and other delicate surfaces.

4.3 Using the Foam Cannon
The included foam cannon allows for efficient application of detergent.
- Fill the foam cannon reservoir with a pressure washer-safe detergent.
- Attach the foam cannon to the spray gun.
- Spray the detergent onto the desired surface. Allow it to soak for a few minutes (refer to detergent instructions).
- Remove the foam cannon and attach a suitable nozzle (e.g., 25° or 40°) to rinse the surface thoroughly.
4.4 Safety Lock Design
The spray gun features a safety lock to prevent accidental operation. Always engage the safety lock when the pressure washer is not in use or when changing nozzles.

4.5 Shutting Down
- Turn off the pressure washer's power switch.
- Turn off the water supply.
- Squeeze the spray gun trigger to release any remaining pressure in the system.
- Engage the safety lock on the spray gun.
- Disconnect the power cord and water hose.
5. Maintenance
Regular maintenance ensures optimal performance and longevity of your pressure washer.
5.1 Cleaning Nozzles
If a nozzle becomes clogged, use a small wire or nozzle cleaning tool to clear any debris. Rinse the nozzle with water before reattaching.
5.2 Storage
- Before storing, ensure all water is drained from the pump, hose, and spray gun to prevent freezing damage.
- Store the pressure washer in a dry, frost-free area.
- Wrap the high-pressure hose and power cord neatly. The unit is designed for easy storage with a comfortable handle and compact build.
6. Troubleshooting
Refer to this section for common issues and their solutions.
| Problem | Possible Cause | Solution |
|---|---|---|
| Motor does not start | No power supply Power switch off Thermal overload activated | Check power cord and outlet Turn power switch ON Allow motor to cool down, then restart |
| Low or no pressure | Insufficient water supply Clogged nozzle Air in pump Leak in hose/connections | Ensure water supply is fully open Clean nozzle Squeeze trigger to purge air Check and tighten all connections |
| Water leaks from connections | Loose connections Damaged O-rings | Tighten all connections Replace damaged O-rings |
| Unit pulsates | Air in pump Clogged nozzle Insufficient water supply | Squeeze trigger to purge air Clean nozzle Ensure water supply is adequate |
7. Specifications
Detailed technical specifications for the Yeryork Electric Pressure Washer Model YE006.
| Specification | Value |
|---|---|
| Brand | Yeryork |
| Model Number | YE006 |
| Power Source | Electric |
| Maximum Pressure | 4500 PSI |
| Maximum Flow Rate | 2.8 GPM (Gallons Per Minute) |
| Hose Length | 33 Feet |
| Power Cord Length | 20 Feet |
| Item Weight | 13.23 Pounds |
| Product Dimensions (L x W x H) | 10.24" x 16.14" x 12.01" |
| UPC | 198715682120 |
8. Warranty and Support
Yeryork provides a warranty for this product. Please refer to the warranty card included in your product packaging for specific terms and conditions, including coverage duration and claim procedures. For technical assistance, parts, or service inquiries, please contact Yeryork customer support through the contact information provided in your product documentation or on the official Yeryork website.