BBQration 720-0789H, XG1136207123002, XG19-101-002-02
Instruction Manual: Grill Parts Kit
Brand: BBQration
Model Compatibility: Expert Grill 4 Burner 720-0789H, XG1136207123002, XG19-101-002-02
Introduction
This instruction manual provides detailed guidance for the installation, operation, and maintenance of your BBQration Grill Parts Kit. This kit is designed to replace essential components of specific Expert Grill 4-burner models, ensuring your grill continues to perform efficiently and safely. Please read all instructions carefully before proceeding with installation or use.

Image: Overview of the BBQration Grill Parts Kit components.
Compatibility
This replacement parts kit is specifically compatible with the following Expert Grill 4-Burner models:
- Expert Grill 4 Burner 720-0789
- Expert Grill 4 Burner 720-0789C
- Expert Grill 4 Burner 720-0789H
- Expert Grill 4 Burner 720-0789MB
- Expert Grill 4 Burner 720-0789M
- Expert Grill XG19-101-002-02
- Expert Grill XG1136207123002
- Expert Grill XG1136207123003
Important: Please verify your grill model number and existing part dimensions before purchase to ensure proper fit.

Image: Visual representation of compatible Expert Grill models.
Package Contents
Your BBQration Grill Parts Kit includes the following components:
- 2 x Matte Cast Iron Cooking Grates
- 4 x Grill Burners
- 4 x Heat Plates (Flame Tamers)
- 4 x Grill Igniters
Specifications
Key dimensions for the components included in this kit:
| Component | Dimensions |
|---|---|
| Cooking Grate (Each) | 17" x 13 1/4" |
| Cooking Grate (Total) | 17" x 26 1/2" |
| Heat Plate | 14 9/16" x 3 1/4" |
| Burner | 15" x 5/8" |
Installation Guide (Setup)
Before beginning installation, ensure your grill is completely cool and the gas supply is turned off and disconnected. It is recommended to wear protective gloves.
1. Replacing Cooking Grates
- Carefully remove the old cooking grates from the grill.
- Clean any debris or residue from the grill's firebox area.
- Place the new matte cast iron cooking grates into position. Ensure they sit securely on the grill's supports.

Image: Properly installed cooking grates.
2. Replacing Burners
- Remove the cooking grates and heat plates to access the burners.
- Carefully detach the old burners from their mounting points and the gas valve orifices. Note their orientation.
- Insert the new burners, aligning the small opening at one end with the gas valve orifice.
- Secure the other end of the burner to its support bracket inside the grill.
- Ensure all burners are properly seated and aligned.

Image: New grill burner with dimensions.

Image: Burners correctly installed.
3. Replacing Heat Plates (Flame Tamers)
- After installing the burners, position the new heat plates directly over each burner.
- Ensure the heat plates rest securely on their designated supports within the grill.

Image: New heat plate design.

Image: Heat plates installed over burners.
4. Replacing Grill Igniters
- Locate the existing igniters and their wiring.
- Carefully disconnect the old igniters and remove them.
- Connect the new igniters, ensuring the wiring is securely attached to the ignition module.
- Mount the igniter electrodes near the corresponding burners, ensuring proper spark gap.
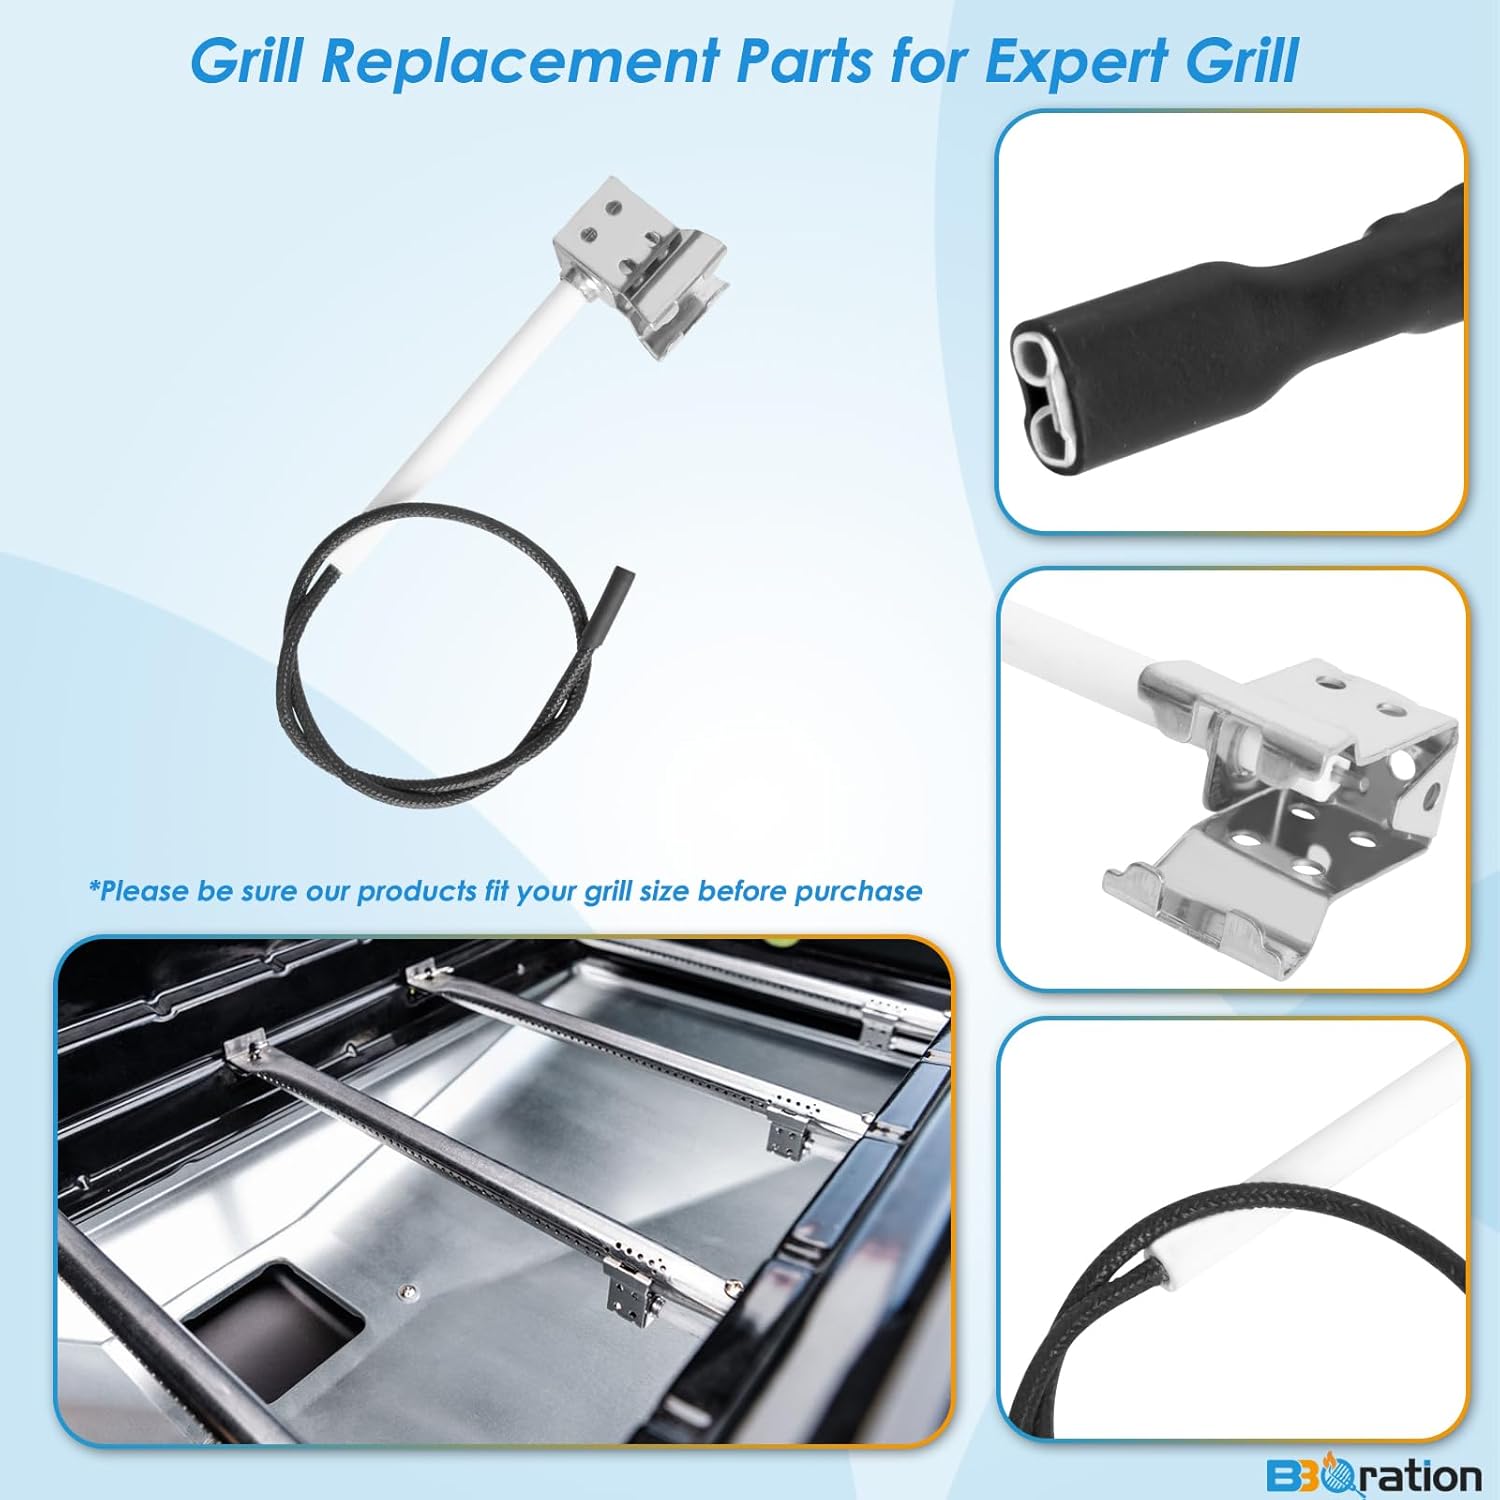
Image: New grill igniter component.
Operating Your Grill After Parts Replacement
After installing the new parts, perform a safety check before first use:
- Leak Test: Before connecting the gas supply, ensure all gas connections are tight. Once connected, apply a soapy water solution to all gas connections. Bubbles indicate a leak. If a leak is detected, tighten connections or replace faulty parts. Do not operate the grill if a gas leak is present.
- Ignition Test: With the lid open, turn on the gas supply. Turn one burner control knob to the "HIGH" position and press the igniter button. The burner should ignite within a few seconds. Repeat for all burners.
- Preheating: Close the lid and allow the grill to preheat for 10-15 minutes on high heat to burn off any manufacturing residues and season the new grates.

Image: Grill with new parts installed.
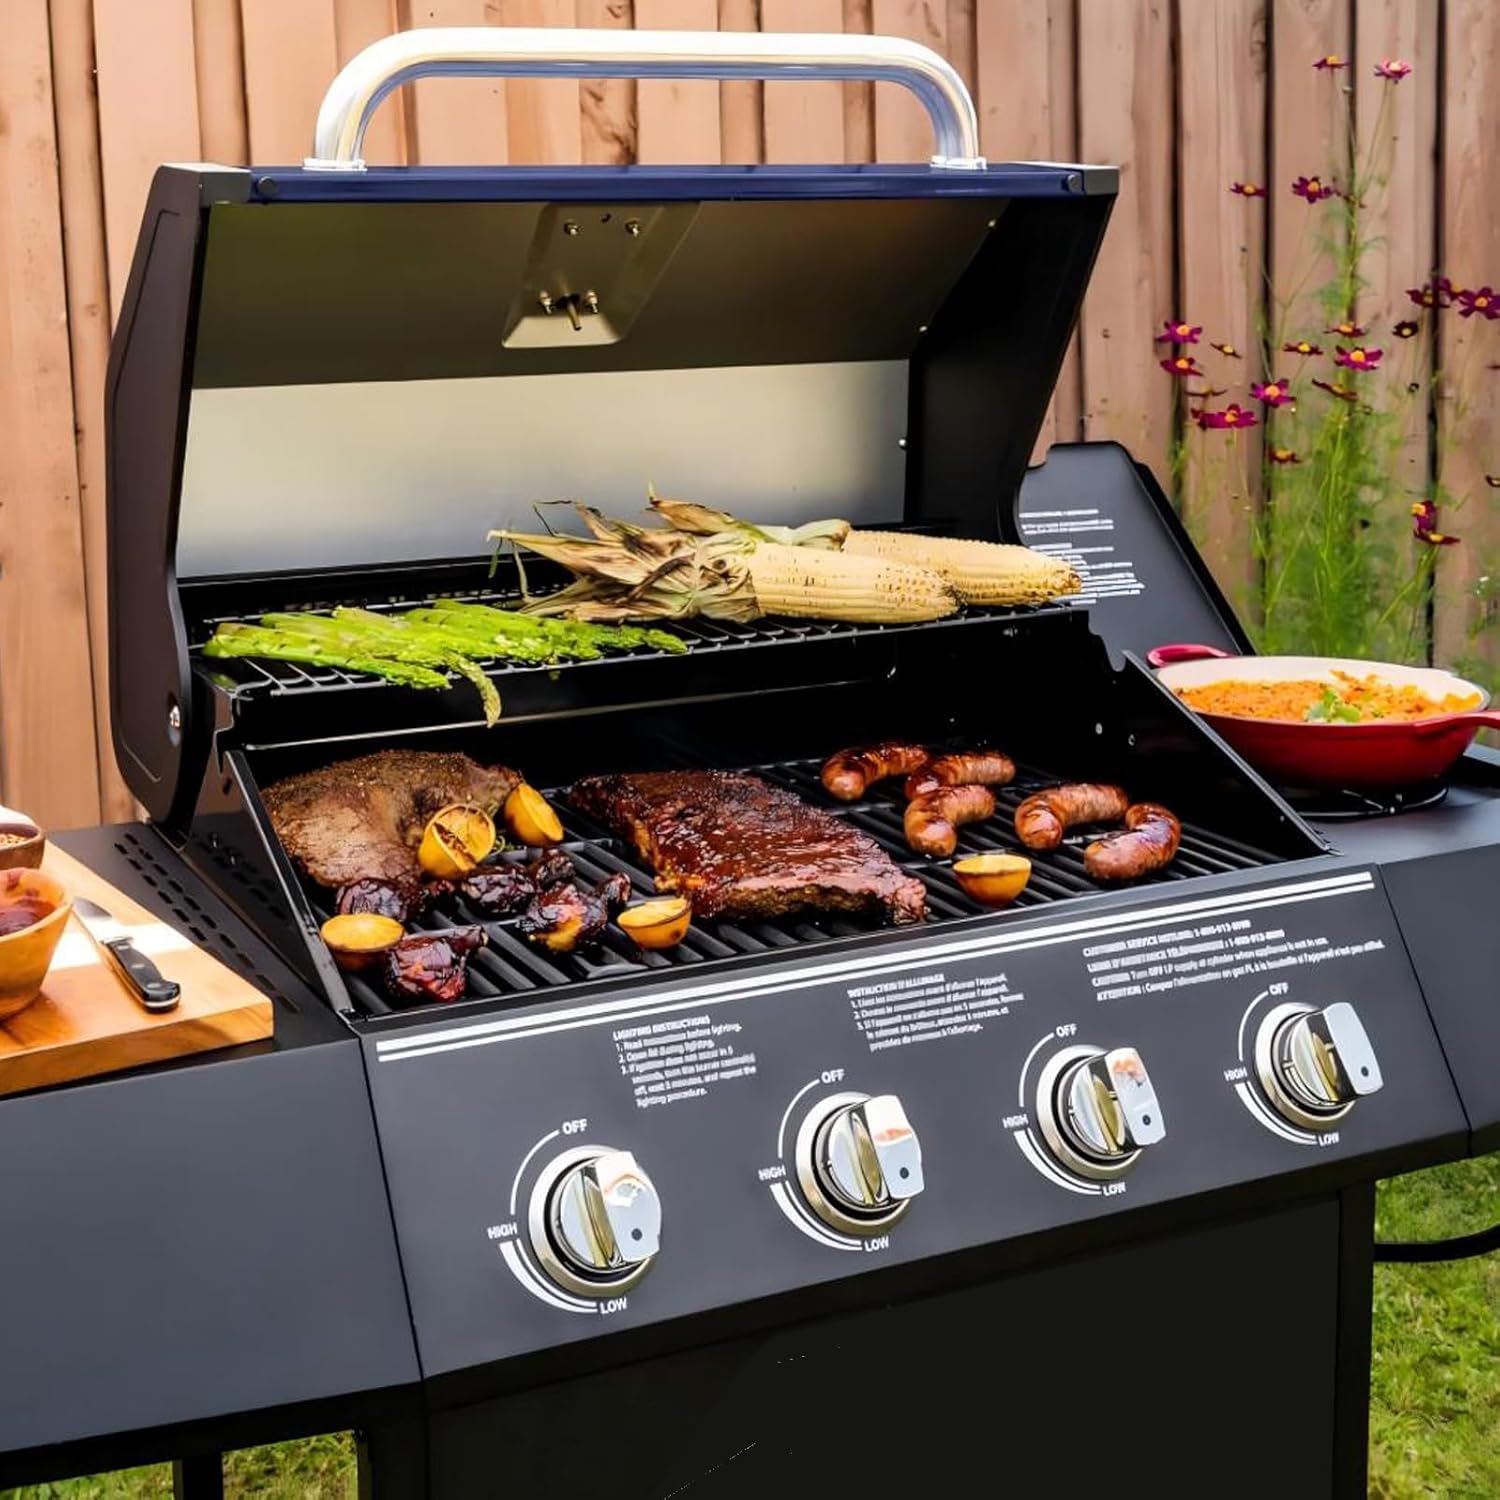
Image: Grill in operation with food.
Maintenance
Regular maintenance will extend the life of your grill parts and ensure optimal performance.
- Cooking Grates: After each use, clean the grates with a grill brush while they are still warm. For deeper cleaning, remove and wash with warm soapy water, then rinse and dry thoroughly. For cast iron grates, apply a thin layer of cooking oil after cleaning to prevent rust.
- Heat Plates: Periodically remove and scrape off any accumulated grease and food debris. Wash with warm soapy water and rinse. Ensure they are completely dry before reinstalling.
- Burners: Inspect burners regularly for blockages (e.g., spider webs, food debris) in the burner ports. Use a wire brush or a stiff wire to clean the ports. Ensure the air shutters are clear.
- Igniters: Keep the igniter electrodes clean and free of grease buildup to ensure consistent sparking.
Troubleshooting
If you encounter issues after replacing parts, consider the following common problems and solutions:
- Burner Not Lighting:
- Check gas supply: Ensure propane tank is not empty and valve is fully open.
- Igniter spark: Verify the igniter is producing a spark. If not, check igniter wire connections and electrode cleanliness.
- Burner alignment: Ensure the burner is properly seated over the gas valve orifice.
- Burner ports: Check for blockages in the burner ports.
- Uneven Heating:
- Burner ports: Clean any clogged burner ports.
- Heat plate position: Ensure heat plates are correctly positioned over the burners.
- Low Flame:
- Gas supply: Check for low gas in the tank or a partially closed valve.
- Regulator bypass: Reset the gas regulator by turning off the grill and tank, disconnecting the regulator, waiting a minute, reconnecting, and slowly opening the tank valve.
Warranty and Support
For specific warranty information or technical support regarding your BBQration Grill Parts Kit, please refer to the product packaging or contact BBQration customer service directly. Contact details can typically be found on the manufacturer's website or through your point of purchase.
For additional resources and product details, you may visit the BBQration Store on Amazon.
Ask a question about this manual
Ask about setup, troubleshooting, compatibility, parts, safety, or missing instructions. Manuals+ will review the question and use this page’s manual context to help answer it.