1. Introduction
The KYOCERA ECOSYS MA4000wifx is a versatile monochrome all-in-one wireless laser printer designed for efficient document management. This device integrates high-speed printing, copying, scanning, and faxing capabilities, making it suitable for various office environments. It features a 4.3-inch color touch screen control panel for intuitive operation and supports wireless connectivity.

Figure 1: Front view of the KYOCERA ECOSYS MA4000wifx printer.
2. Setup
2.1 Unpacking and Placement
- Carefully remove all packaging materials, including protective tapes and inserts.
- Place the printer on a stable, level surface that can support its weight (approximately 42 lbs). Ensure adequate space around the printer for ventilation and access.
2.2 Power Connection
- Connect the provided power cord to the printer's power inlet.
- Plug the other end of the power cord into a grounded electrical outlet.
- Press the power button to turn on the printer.
2.3 Initial Configuration
- Follow the on-screen prompts on the 4.3-inch color touch screen control panel to complete the initial setup, including language selection, date, and time settings.

Figure 2: The 4.3-inch color touch screen control panel for printer interaction.
2.4 Software Installation
- Insert the software CD (if provided) into your computer's CD/DVD drive, or download the latest drivers and utilities from the official KYOCERA support website.
- Follow the on-screen instructions to install the printer drivers and any desired utility software.
2.5 Network Connection
- Wireless (Wi-Fi): On the printer's control panel, navigate to Network Settings, select Wi-Fi, and follow the instructions to connect to your wireless network. The printer supports Wi-Fi Direct.
- Wired (Ethernet): Connect an Ethernet cable from the printer's LAN port to your network router or switch.
- USB: For a direct connection, connect a USB cable from the printer to your computer.
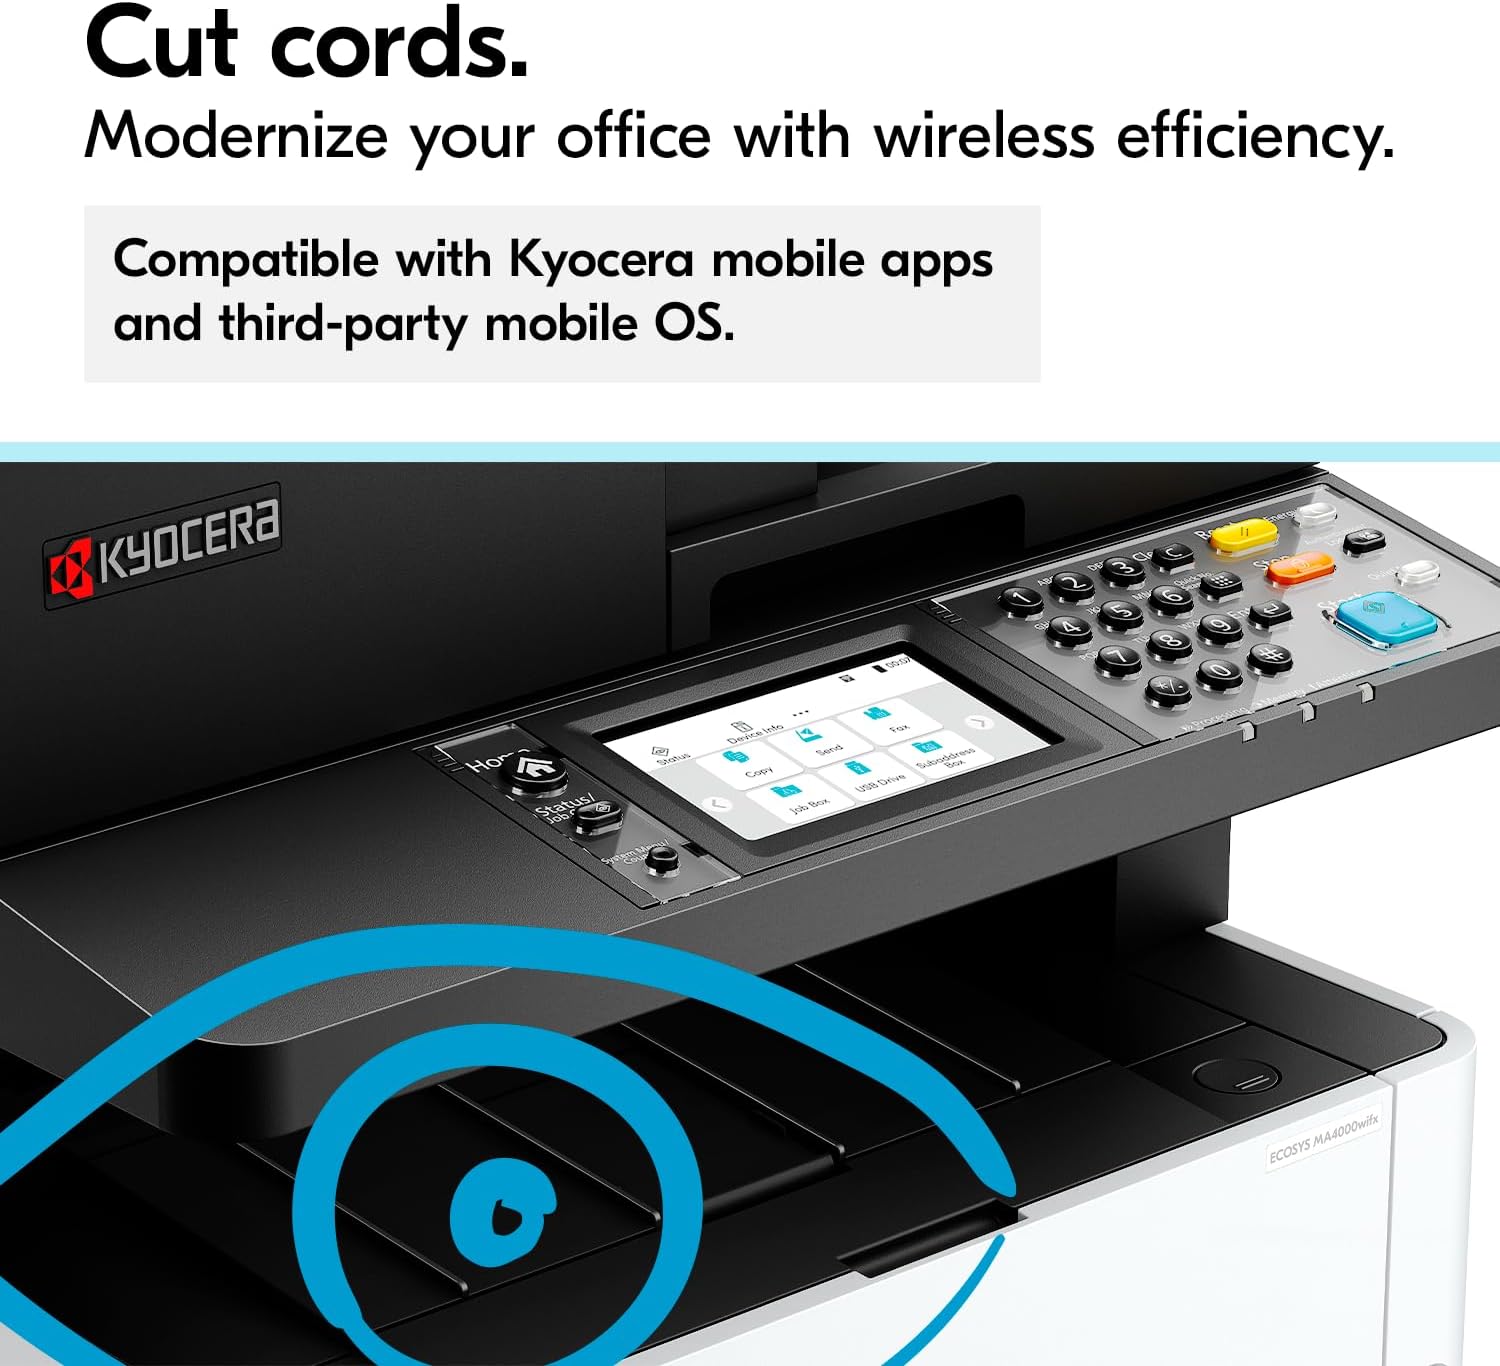
Figure 3: The printer offers wireless connectivity for flexible placement and usage.
3. Operating Instructions

Figure 4: Overview of the KYOCERA ECOSYS MA4000wifx's core functionalities.
3.1 Printing
- Load Paper: Open the paper tray and load paper. The standard tray supports paper sizes from Statement to Legal (5.5” x 8.5” – 8.5” x 14”). The multipurpose tray (MPT) supports a wider range including labels, OHP, and envelopes.
- Send Print Job: From your computer, open the document you wish to print. Select "Print" and choose "KYOCERA ECOSYS MA4000wifx" as your printer.
- Adjust Settings: In the print dialog box, configure settings such as paper size, orientation, number of copies, and duplex printing (automatic two-sided printing).
- Start Printing: Click "Print." The printer can achieve speeds of up to 42 pages per minute for simplex (single-sided) printing.
3.2 Copying
- Place Original: Place your document face down on the scanner glass or face up in the Automatic Document Feeder (ADF).
- Select Copy Function: On the printer's control panel, select the "Copy" function.
- Configure Settings: Adjust copy settings such as the number of copies (1-999), reduction/enlargement (25-400% in 1% increments), and duplex copy. Additional features include blank page skip, DP auto-cropping, and ID card copy.
- Start Copying: Press the "Start" button on the control panel.
3.3 Scanning
- Place Original: Place your document on the scanner glass or in the ADF.
- Select Scan Function: On the printer's control panel, select the "Scan" function.
- Choose Destination: Select your desired scan destination, such as Scan to Email, Scan to FTP, Scan to PC (SMB), or Scan to USB Host.
- Select File Type and Resolution: Choose the desired file type (PDF, JPEG, TIFF, XPS, etc.) and scan resolution (up to 1200 dpi).
- Start Scanning: Press the "Start" button. Simplex scan speeds are up to 40 ipm (BW) and 23 ipm (color) at 300 dpi. Duplex scan speeds are up to 80 ipm (BW) and 46 ipm (color) at 300 dpi.
3.4 Faxing
- Place Original: Place your document in the ADF.
- Select Fax Function: On the printer's control panel, select the "Fax" function.
- Enter Recipient Number: Enter the recipient's fax number using the keypad on the control panel.
- Start Faxing: Press the "Start" button. The fax supports G3 Fax / MMR, MR, MH, JBIG with a transmission speed of 3 seconds or less (JBIG) and a modem speed of 33.6Kbps.

Figure 5: The printer features an increased memory capacity of 2GB for efficient processing.
4. Maintenance
4.1 Toner Cartridge Replacement
- When the toner level is low, a notification will appear on the control panel.
- Follow the specific instructions provided in the full user manual or on the control panel to safely replace the toner cartridge.
4.2 Cleaning the Printer
- Regularly clean the exterior of the printer with a soft, dry, lint-free cloth.
- For cleaning the scanner glass, ADF rollers, and other internal components, refer to the detailed cleaning procedures in the comprehensive user manual to prevent damage.
4.3 Clearing Paper Jams
- If a paper jam occurs, the control panel will display an error message and provide instructions for clearing the jam.
- Carefully follow the on-screen steps to remove any jammed paper from the designated areas. Avoid tearing the paper to prevent small pieces from remaining inside the printer.
5. Troubleshooting
5.1 Common Issues and Solutions
- Printer Not Responding:
- Check if the printer is powered on and connected to a working electrical outlet.
- Verify network cable connections (for Ethernet) or Wi-Fi connectivity.
- Ensure the printer is online and not in an error state. Restart both the printer and your computer.
- Poor Print Quality:
- Check the toner cartridge level and replace if low.
- Ensure the correct paper type is selected in your print settings.
- Perform a print head or drum unit cleaning cycle if available (refer to the full manual).
- Scan Errors:
- Verify network connectivity to your chosen scan destination (e.g., PC, email server).
- Ensure the document is correctly placed on the scanner glass or in the ADF.
5.2 Error Messages
If an error message appears on the control panel, note the message and consult the comprehensive user manual or the KYOCERA support website for specific troubleshooting steps related to that error code.
6. Specifications
- Model Name:
- ECOSYS MA4000wifx
- Functions:
- Print, Copy, Scan, Fax
- Printer Output:
- Monochrome
- Printing Technology:
- Laser
- Max Print Speed (Monochrome):
- Up to 42 ppm (A4 simplex)
- Max Print Resolution:
- 1200 dpi
- Duplex Printing:
- Automatic
- Scanner Type:
- Automatic Document Feeder (ADF)
- Max Scan Resolution:
- 1200 dpi (with TWAIN and WIA driver)
- Scan Speed (Simplex BW/Color @300 dpi):
- 40 ipm / 23 ipm
- Scan Speed (Duplex BW/Color @300 dpi):
- 80 ipm / 46 ipm
- Copy Speed (Monochrome):
- Up to 42 cpm
- Max Copy Resolution:
- 1200 dpi
- Fax Modem Speed:
- 33.6 Kbps
- Control Panel:
- 4.3" Color Touch Screen Interface (TSI)
- Memory:
- 2 GB
- Connectivity Technology:
- Ethernet, USB, Wi-Fi, Wi-Fi Direct, HyPAS capable
- Max Input Sheet Capacity:
- 850 sheets (with optional trays)
- Standard Paper Capacity:
- 350 sheets
- Paper Output Capacity:
- 150 sheets
- Supported Media Sizes:
- Statement to Legal (5.5" x 8.5" – 8.5" x 14") for standard tray; MPT supports labels, OHP, envelopes.
- Product Dimensions (D x W x H):
- 16.2" x 18.7" x 17.2"
- Item Weight:
- 42 lbs
7. Warranty and Support
7.1 Warranty Information
The KYOCERA ECOSYS MA4000wifx comes with a limited warranty. For detailed information regarding the terms, conditions, and duration of your warranty, please refer to the warranty documentation included with your product or visit the official KYOCERA website.
7.2 Customer Support
For technical assistance, driver downloads, firmware updates, or additional support resources, please visit the official KYOCERA support website. You can also contact KYOCERA customer service for direct assistance with product issues or inquiries.