
1. Introduction
This manual provides comprehensive instructions for the installation and care of your new ENEVABAGB LED Strip replacement set. These LED strips are designed to restore the backlight functionality of compatible 55-inch televisions. Please read this manual thoroughly before beginning any installation to ensure safety and proper operation.
2. Product Overview and Package Contents
The ENEVABAGB LED Strip set is a direct replacement for original TV backlight strips. Each set includes 10 individual LED strips, each measuring 582mm in length and featuring multiple LED beads, with each LED lamp operating at 3V.
Key Features:
- Length: 582mm per strip
- LED Beads: Multiple beads per strip, designed for uniform illumination.
- Voltage: 3V per LED lamp.
- Quantity: 1 set includes 10 LED strips.

Figure 2.1: A complete set of 10 ENEVABAGB LED backlight strips, as included in the package. These strips are designed for direct replacement in compatible 55-inch televisions.
3. Safety Information
Working with electronic components, especially inside a television, requires caution. Please observe the following safety guidelines:
- Disconnect Power: Always unplug the television from the power outlet before beginning any disassembly or installation.
- Static Electricity: Discharge any static electricity from your body before handling electronic components. Use an anti-static wrist strap if available.
- Handle with Care: LED strips and TV panels are fragile. Handle them gently to prevent damage.
- Professional Assistance: If you are unsure about any step, seek assistance from a qualified technician.
4. Installation Guide
This section outlines the general steps for replacing the LED backlight strips in a compatible 55-inch television. Specific disassembly procedures may vary by TV model. Refer to your TV's service manual for detailed disassembly instructions.
Required Tools:
- Screwdriver set (Phillips, Torx)
- Plastic prying tools (spudgers)
- Anti-static wrist strap (recommended)
- Clean, soft cloth
Installation Steps:
- Prepare the Work Area: Ensure a clean, well-lit, and spacious work surface. Place a soft cloth or mat to protect the TV screen.
- Disconnect Power: Unplug the TV from the wall outlet and disconnect all external cables.
- Disassemble the TV: Carefully remove the TV's back cover, stand, and any internal components (e.g., main board, power supply board, speakers) that obstruct access to the display panel. Document screw locations and cable connections.
- Remove the Display Panel: This is the most delicate step. Carefully detach the display panel from the TV frame. It is highly recommended to have a second person assist with this to prevent damage. Place the panel face down on a clean, soft surface.
- Access the Backlight Assembly: Remove the diffuser sheets and any other layers covering the existing LED strips. Note their orientation.
- Remove Old LED Strips: Gently disconnect the connectors and peel off the old LED strips. They are often held in place by adhesive tape.
- Install New LED Strips: Align the new ENEVABAGB LED strips in the correct positions. Ensure the connectors match and the strips are securely adhered.

Figure 4.1: A close-up view of one of the ENEVABAGB LED strips, highlighting the 'XS-57S' identifier. This marking helps confirm the correct part during installation.
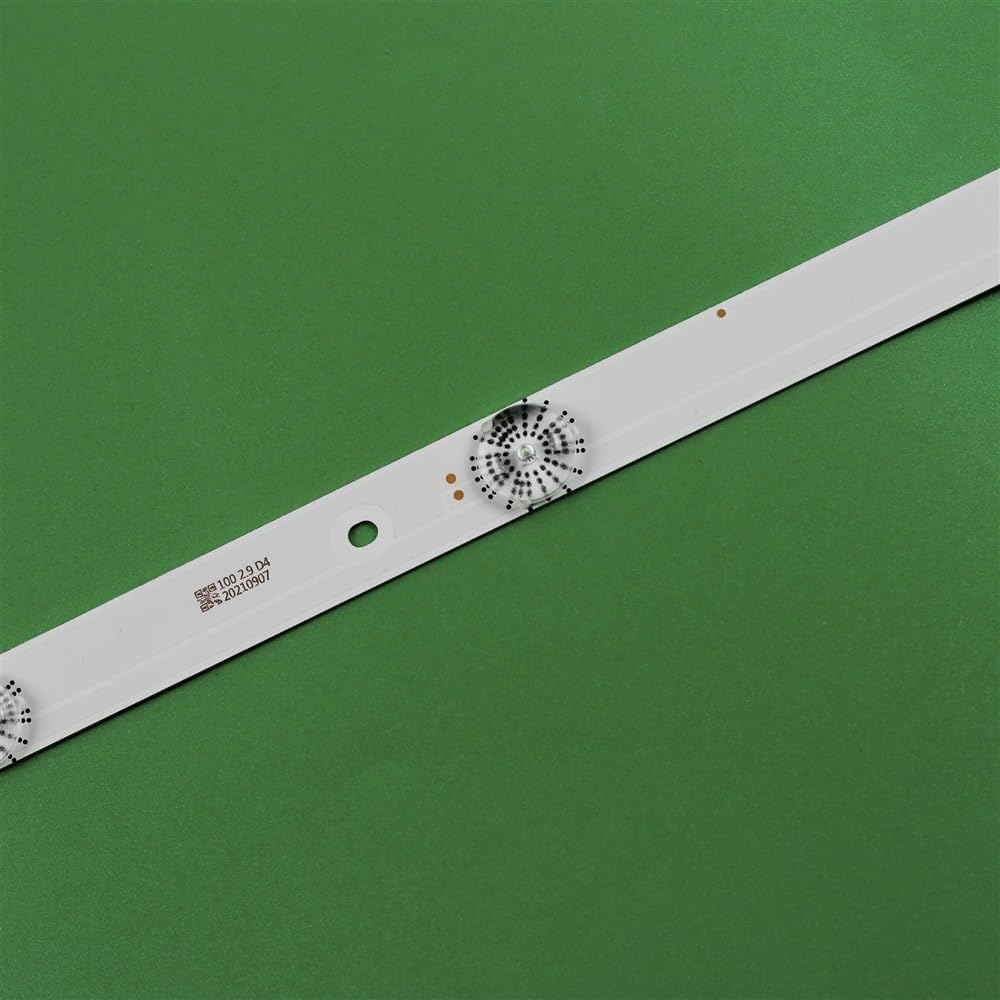
Figure 4.2: Another detailed view of an ENEVABAGB LED strip, showing the '100 2.5 D4 20210907' marking. These numbers often indicate manufacturing batch or revision details.

Figure 4.3: A close-up of the LED strip displaying the model number 'SVH550AF2_6LED_REV01_140919', which is crucial for compatibility verification.

Figure 4.4: A detailed image showing the connector end of the LED strip, including the positive (+) and negative (-) terminals. Ensure correct polarity when connecting.

Figure 4.5: A close-up of an individual LED lens on the strip, designed to diffuse light evenly across the display panel.
- Reassemble Backlight Layers: Carefully place the diffuser sheets and other layers back in their original positions.
- Reinstall Display Panel: With extreme care, place the display panel back onto the TV frame. Ensure it is seated correctly and no cables are pinched.
- Reconnect Components: Reinstall all internal components and reconnect all cables.
- Reassemble TV Casing: Secure the TV's back cover and stand.
5. Testing and Operation
After reassembling the television, perform a test to ensure the new LED strips are functioning correctly.
- Connect Power: Plug the TV back into the power outlet.
- Power On: Turn on the television.
- Verify Backlight: Check if the screen illuminates evenly. Look for any dark spots, flickering, or uneven brightness.
- Test Inputs: Connect a video source (e.g., cable box, DVD player) to ensure full functionality.
If the backlight does not illuminate or shows issues, refer to the Troubleshooting section.
6. Maintenance and Care
The ENEVABAGB LED strips are designed for long-term reliability. No specific maintenance is required after installation. To ensure the longevity of your TV's backlight:
- Avoid exposing the TV to extreme temperatures or humidity.
- Ensure adequate ventilation around the TV to prevent overheating.
- Clean the TV screen and casing with a soft, dry, lint-free cloth. Avoid harsh chemicals.
7. Troubleshooting
If you encounter issues after installing the LED strips, consider the following common problems and solutions:
| Problem | Possible Cause | Solution |
|---|---|---|
| No backlight / Screen is black | Loose or incorrect cable connection; Faulty power supply to LED strips; Damaged LED strip. | Check all internal cable connections, especially to the LED strips and power supply board. Ensure strips are correctly seated. Verify power supply board output. Replace any faulty strips if necessary. |
| Uneven brightness / Dark spots | Misaligned diffuser sheets; Damaged individual LEDs; Incorrectly installed strips. | Recheck the placement of diffuser sheets. Inspect each LED on the strips for damage. Ensure all strips are flat and properly adhered. |
| Flickering backlight | Loose connection; Power supply issue; Incompatible LED strip. | Verify all connections are secure. Check the power supply board. Ensure the LED strips are the correct model for your TV. |
| TV does not power on | Main power issue; Damage during reassembly. | Ensure the power cord is fully plugged in. Check the power outlet. Re-verify all internal connections and ensure no components were damaged during reassembly. |
If problems persist after following these steps, it is recommended to consult a professional television repair technician.
8. Specifications
Detailed technical specifications for the ENEVABAGB LED Strip replacement set:
| Attribute | Value |
|---|---|
| Model Number | SVH550AF2_6LED_REV01_140919 (as per product description) / wangqianxue (as per item model number) |
| Length (per strip) | 582mm |
| LED Beads (per strip) | Number of LED beads: Per strip (specific count not provided, varies by design) |
| LED Lamp Voltage | 3V (per individual LED lamp) |
| Package Quantity | 1 set = 10pcs LED Strip |
| Package Dimensions | 1.18 x 0.79 x 0.39 inches |
| Item Weight | 1.76 ounces |
| Manufacturer | ENEVABAGB |
| Assembly Required | No (refers to the strips themselves, not the TV installation) |
9. Warranty and Support
Information regarding product warranty and customer support for ENEVABAGB products is not provided in this manual. Please refer to the product's original packaging or the retailer's website for details on warranty coverage and how to contact customer support for further assistance.