Introduction
This manual provides comprehensive instructions for the assembly, operation, and maintenance of your YOPTO 10 x 10 FT Outdoor Storage Shed. Please read all instructions carefully before beginning assembly and retain this manual for future reference.
The YOPTO 10 x 10 FT Outdoor Storage Shed is a heavy-duty metal structure designed for multipurpose outdoor storage. It features a sloped roof for weather protection, lockable doors for security, and integrated ventilation.

Figure 1: YOPTO 10 x 10 FT Outdoor Storage Shed with closed doors.
Safety Information
- Wear protective gear: Some parts have steel edges. Always wear work gloves, eye protection, and long sleeves when handling components and during assembly to prevent scratches and injuries.
- Two-person assembly: This product is large and requires two people for safe and efficient installation.
- Weather conditions: Do not attempt assembly on days with strong winds or low temperatures.
- Level ground: Ensure the ground surface is level before starting assembly. A wooden or concrete base is recommended as a foundation.
- Check parts: Before installation, carefully check the type and quantity of all parts against the parts list.
- Review instructions: Review all instructions before you begin and continue to refer to them thoroughly during assembly.
Required Tools
The following tools are required for assembly:
- Drill
- Ladder
- Screwdriver
- Wrench
- Work Gloves
- Safety Glasses
Video 1: Patiowell 10x10 FT Large Storage Shed Installation Video. This video provides a visual guide to the assembly process, including site preparation and required tools.
Parts List
Before starting assembly, unpack all components and verify against the parts drawing. If any parts are missing or damaged, please contact customer support.

Figure 2: Exploded view of all components included with the YOPTO 10 x 10 FT Outdoor Storage Shed. Refer to this diagram to identify each part.
Included Components:
- 1 x Outdoor Storage Shed (various panels and frame components)
- 1 x Padlock
- 2 x Gloves
- Fasteners (screws, washers, nuts - quantities specified in detailed parts drawing)
Assembly Instructions
Follow these steps carefully for proper assembly. It is recommended to have a helper.
Step 1: Site Preparation and Base Assembly
Ensure the ground is level. Construct a wooden or concrete base if desired for a more stable foundation. The external dimensions of the product are approximately 118.11" (L) x 122.6" (W) x 79.21" (H).
Video 2: Metal Shed Assembly Guide. This video demonstrates the initial steps of site preparation and base frame assembly.
Step 2: Wall Panel Installation
Attach the wall panels to the base frame. Ensure all panels are correctly oriented and securely fastened. It is recommended to drive the screws at the bottom first to facilitate positioning.
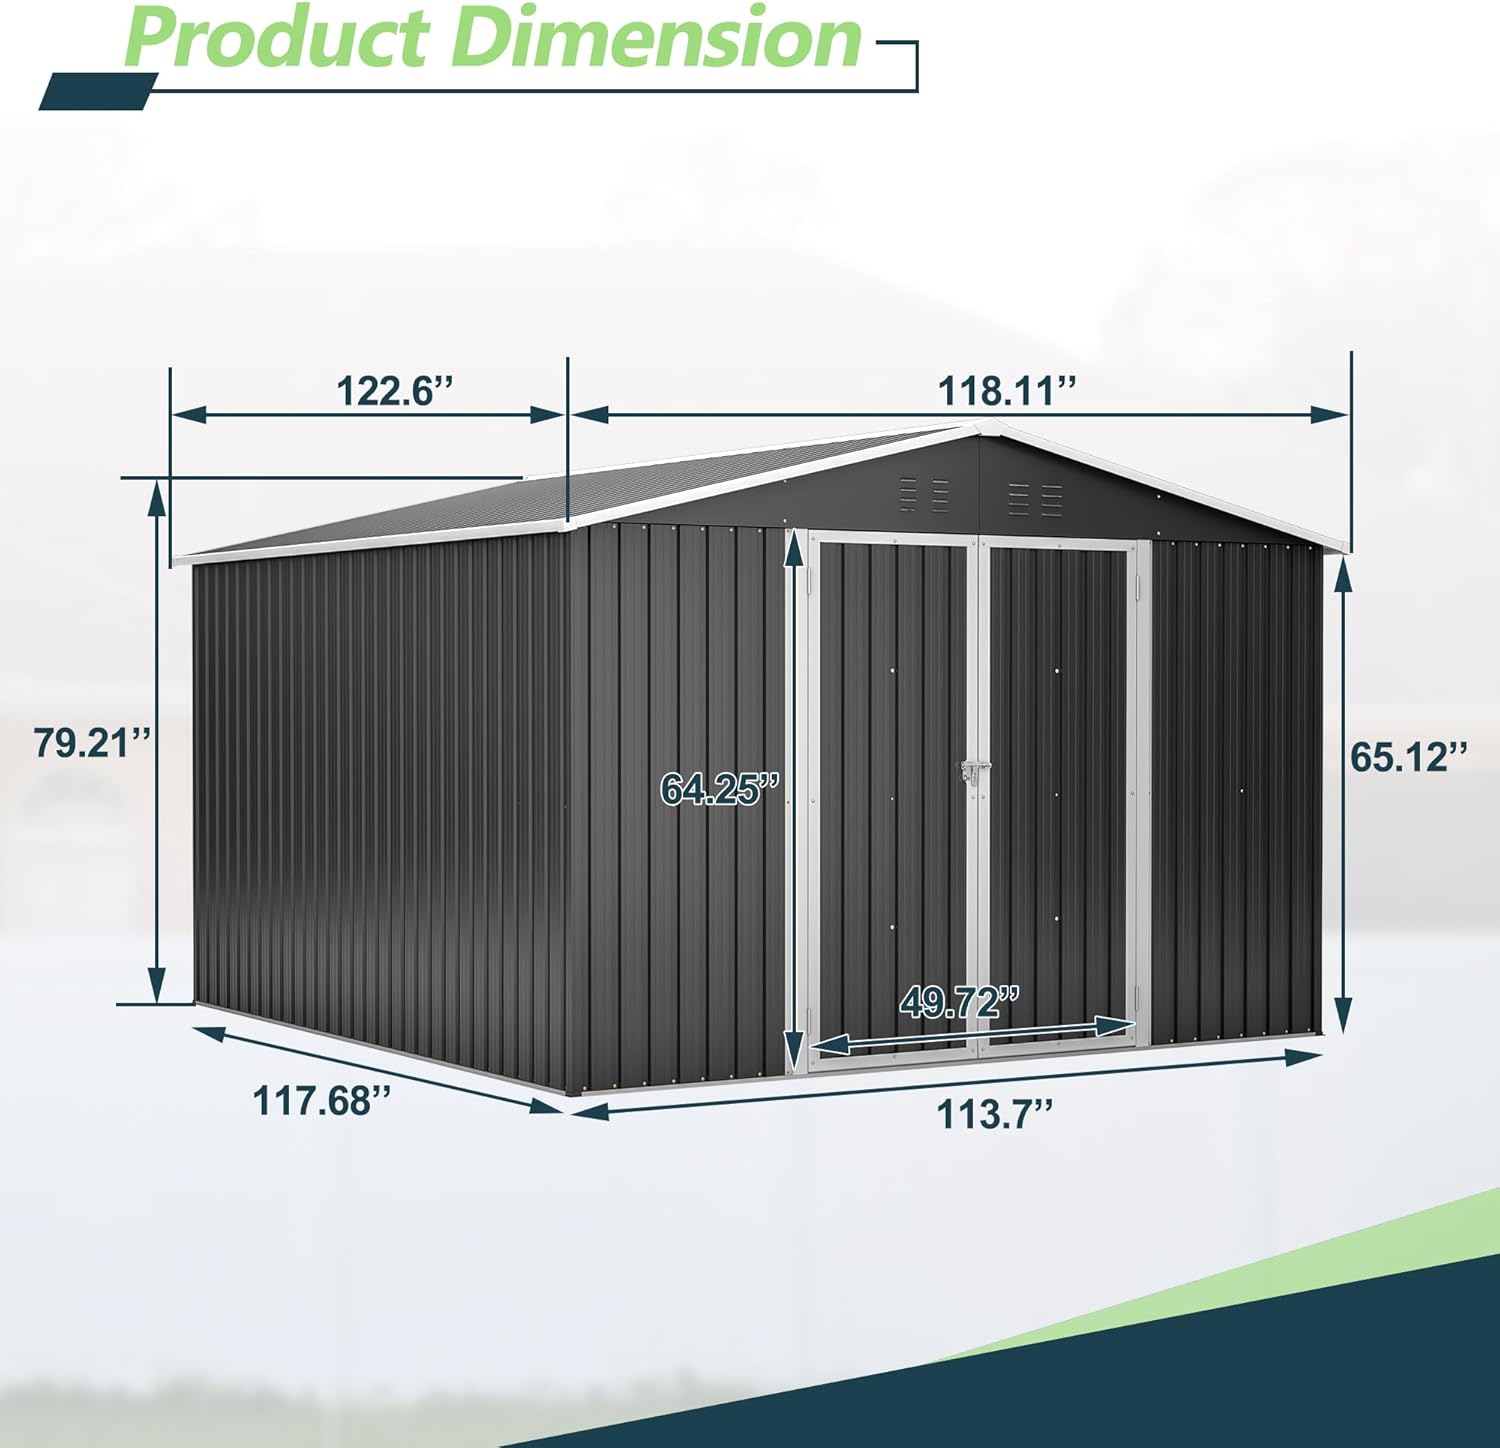
Figure 3: Interior view of the shed during assembly, showing the wall panels and roof structure.
Step 3: Roof Assembly
Install the roof support beams and then the roof panels. Make sure each roof panel overlaps exactly where it meets the adjacent panel to ensure weather resistance. Secure each panel immediately after placement to ensure screws remain accessible.

Figure 4: Interior view of the shed with roof panels partially installed, highlighting the robust roof structure.
Step 4: Door Installation
Attach the hinged doors. The shed includes two firm lockable doors. Ensure the hinges are properly aligned and secured. Install the padlock and key for added security.
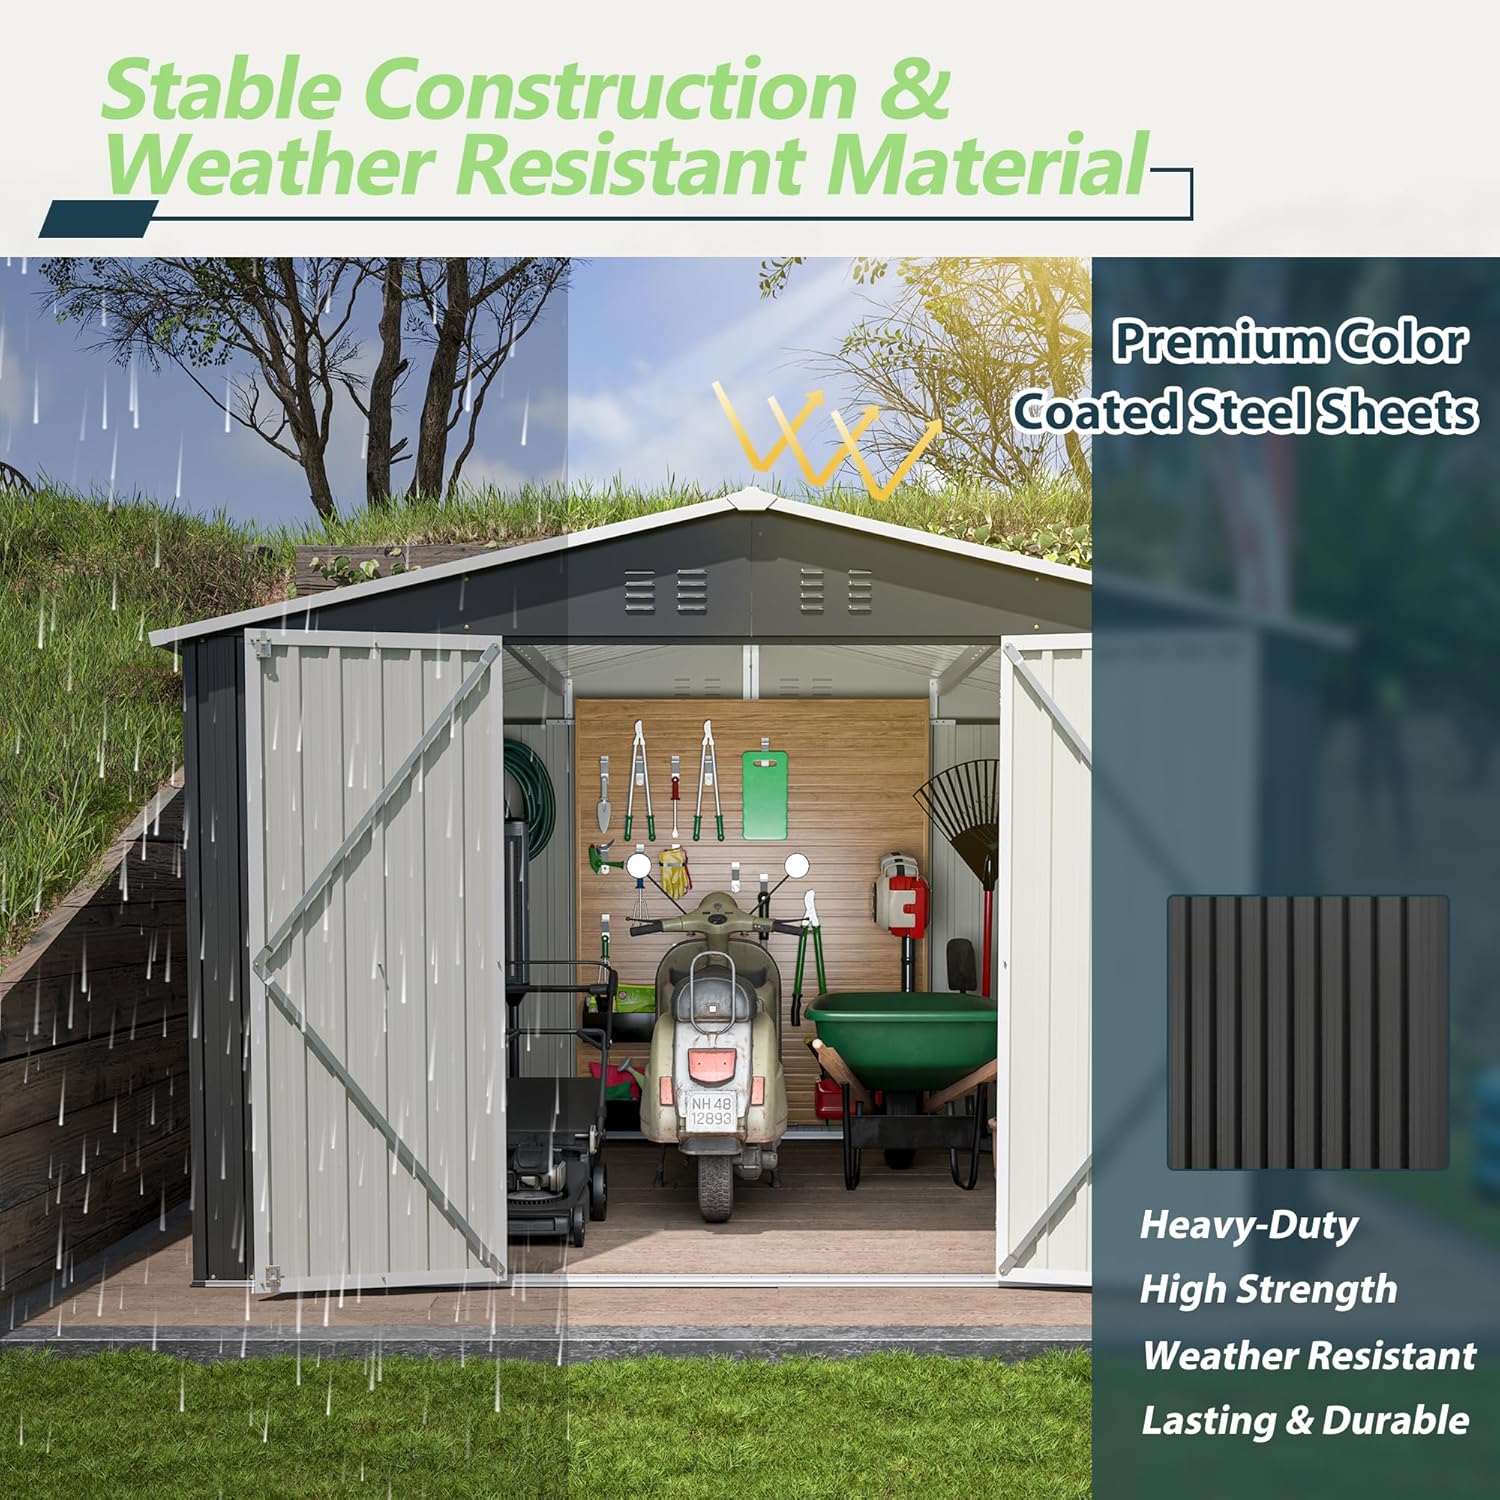
Figure 5: The shed with both doors fully open, providing wide access to the interior.
Operating Instructions
The shed features hinged doors for easy access. The doors can be secured with the included padlock. The sloped roof design helps protect contents from rain and snow, while integrated vents provide better airflow.

Figure 6: Close-up of shed details, including plastic corner caps, hinge doors, and aluminum frames, ensuring durability and functionality.
Maintenance
- Regular cleaning: Clean the shed periodically with mild soap and water to remove dirt and debris. Avoid abrasive cleaners that could damage the galvanized steel finish.
- Inspect fasteners: Periodically check all screws and bolts to ensure they are tight. Re-tighten as necessary to maintain structural integrity.
- Clear roof: In snowy regions, regularly clear heavy snow from the roof to prevent excessive load.
- Ventilation: Ensure the vents remain unobstructed to allow for proper airflow and prevent moisture buildup inside the shed.
Troubleshooting
| Problem | Possible Cause | Solution |
|---|---|---|
| Water leakage inside shed | Improperly overlapped roof panels or loose screws. | Ensure roof panels are correctly overlapped and all screws are tightened. Apply silicone sealant if necessary. |
| Doors do not close properly | Uneven base or misaligned hinges. | Check if the base is level. Adjust hinges as needed. |
| Shed feels unstable | Loose frame connections or inadequate foundation. | Tighten all frame screws. Consider anchoring the shed to the ground or reinforcing the base. |
Specifications
- Material: Galvanized Steel, Alloy Steel
- Main Color: Black
- External Dimensions: 118.11''(L) x 122.6''(W) x 79.21''(H)
- Product Dimensions: 113.7"D x 117.68"W x 79.21"H
- Door Dimensions: Total Opening 49.72"(W) x 64.25"(H)
- Wall Height: 65.12"
- Thickness: 0.6mm (T) galvanized color sheet, 0.25mm (T) galvanized color steel
- Item Weight: 30 Pounds
- Water Resistance Level: Water Resistant
- Door Style: Hinged Door
- Assembly Required: Yes
Warranty and Support
For warranty information, missing parts, or technical support, please contact YOPTO customer service directly. Refer to your purchase documentation for specific contact details. It is recommended to have your model number (10X10 FT) and purchase date available when contacting support.