1. Introduction
This manual provides detailed instructions for the installation, operation, and maintenance of your Dhiedas Smart Cabinet Lock. This biometric electronic digital lock offers multiple unlocking methods for enhanced security and convenience in various furniture types.

Figure 1: Dhiedas Smart Cabinet Lock
2. Package Contents
Verify that all components are present in your package:
- Smart Cabinet Lock Unit
- 2 x RFID Cards
- 3M Adhesive Stickers (for installation)
- Screws (optional, for installation)
- English User Manual
- Double Door Accessory (if applicable)
- Positioning Card (for drilling guidance)

Figure 2: Included components for installation
3. Features
- 5-in-1 Unlocking Methods: Fingerprint (up to 100), Passcode (up to 20), Bluetooth App, RFID (13.56 MHz), and Apple Watch compatibility.
- Invisible Mounting: Can be installed with 3M adhesive tape without drilling or damaging furniture, or with screws for a more permanent fixture.
- Long Battery Life: Powered by 2 AA batteries (not included), lasting up to a year thanks to energy-saving technology.
- Emergency Power: Features a USB-C port for emergency power supply if batteries deplete.
- Durable Construction: Made of robust zinc alloy, offering resistance against breaking and picking for high security.
- Versatile Application: Suitable for single-door cabinets, drawers, wall cabinets, liquor cabinets, pantries, desks, metal boxes, and more.
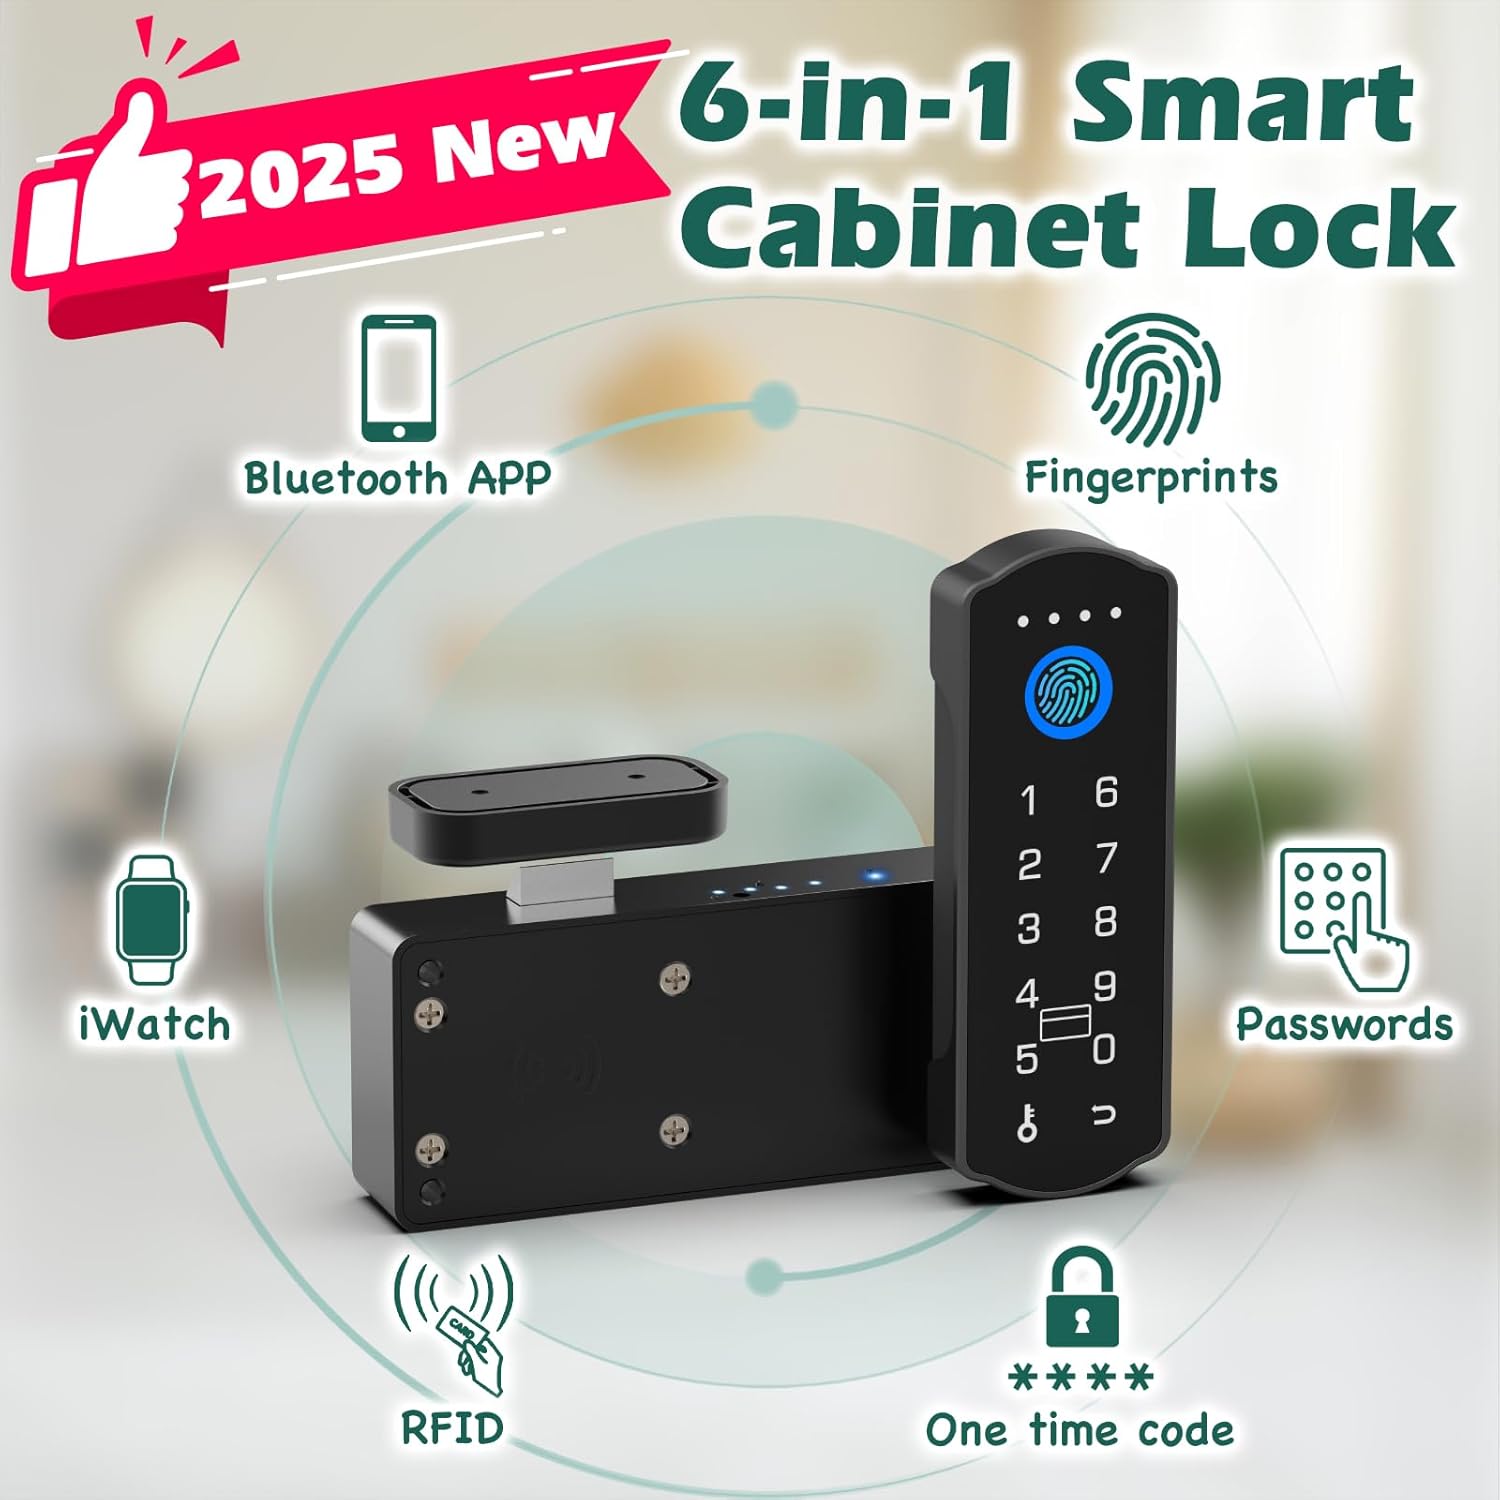
Figure 3: Overview of unlocking methods

Figure 4: Child safety application of the lock
4. Setup and Installation
The Dhiedas Smart Cabinet Lock offers two primary installation methods: adhesive mounting or screw mounting. No drilling is required for adhesive installation.
4.1. Preparing for Installation
- Ensure the cabinet or drawer surface is clean and dry.
- Insert 2 AA batteries (not included) into the main lock unit.
- Determine the optimal placement for the lock unit and the strike plate on your cabinet or drawer.
4.2. Adhesive Mounting (No Drilling)
- Peel the protective film from the 3M adhesive stickers.
- Attach the adhesive stickers to the back of the main lock unit and the strike plate.
- Carefully align and press the main lock unit onto the inside of the cabinet/drawer.
- Align and press the strike plate onto the cabinet frame or adjacent drawer, ensuring proper engagement with the lock bolt when closed.
4.3. Screw Mounting (Optional)
- Use the provided positioning card to mark the drilling points for the main lock unit and the strike plate.
- Drill pilot holes at the marked positions.
- Secure the main lock unit and the strike plate using the provided screws.

Figure 5: Installation steps for the smart cabinet lock
5. Operating Instructions
The Dhiedas Smart Cabinet Lock offers multiple ways to unlock your cabinet or drawer.
5.1. Fingerprint Unlocking
- Register your fingerprints via the Bluetooth app (refer to app instructions for details).
- Place your registered finger on the fingerprint sensor on the lock's keypad.
- The lock will unlock if the fingerprint is recognized.

Figure 6: Fingerprint unlocking in action
5.2. Passcode Unlocking
- Set up passcodes through the Bluetooth app.
- Enter your registered passcode on the keypad.
- Press the unlock button (or designated key) to confirm.
- The lock will unlock if the passcode is correct.

Figure 7: Setting up and using passcodes
5.3. Bluetooth App Unlocking
- Download the dedicated Bluetooth app on your smartphone.
- Pair your lock with the app (follow in-app instructions).
- Within Bluetooth range (5-6m), use the app interface to remotely unlock the cabinet.
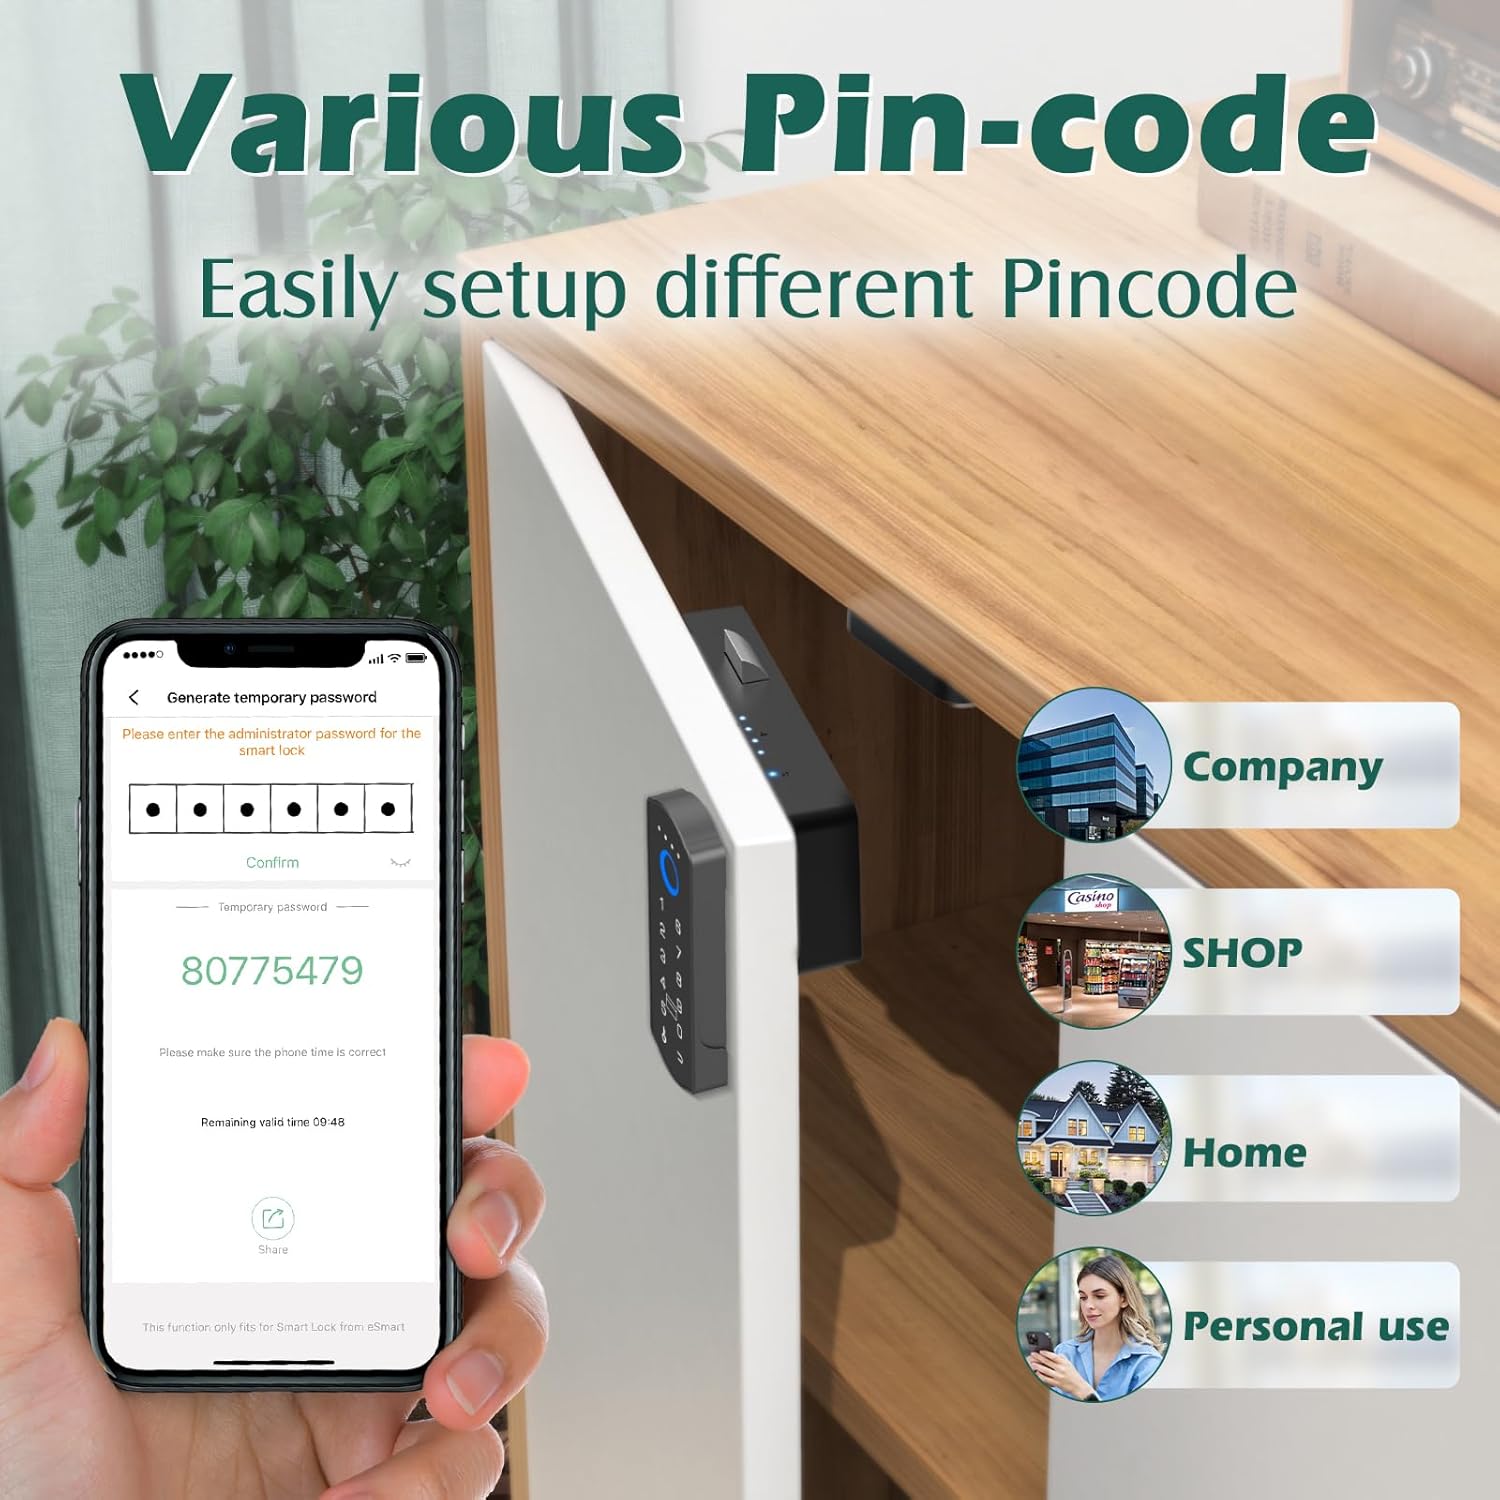
Figure 8: Remote unlocking via Bluetooth app
5.4. RFID Card Unlocking
- Register the provided RFID cards with the lock via the app.
- Tap a registered RFID card against the designated RFID reader area on the lock.
- The lock will unlock upon successful recognition.

Figure 9: Unlocking with an RFID card
5.5. Apple Watch Unlocking
- Ensure your Apple Watch is paired with your smartphone and the lock's app.
- Use the Apple Watch app interface to send an unlock command to the lock.

Figure 10: Unlocking via Apple Watch
6. Maintenance
6.1. Battery Replacement
The lock is powered by 2 AA batteries. When the battery indicator shows low power, replace both batteries promptly to ensure continuous operation.
6.2. Emergency Power
If the batteries die completely, connect a USB-C cable to the emergency power port on the keypad and a power source (e.g., power bank) to temporarily power the lock and unlock it.
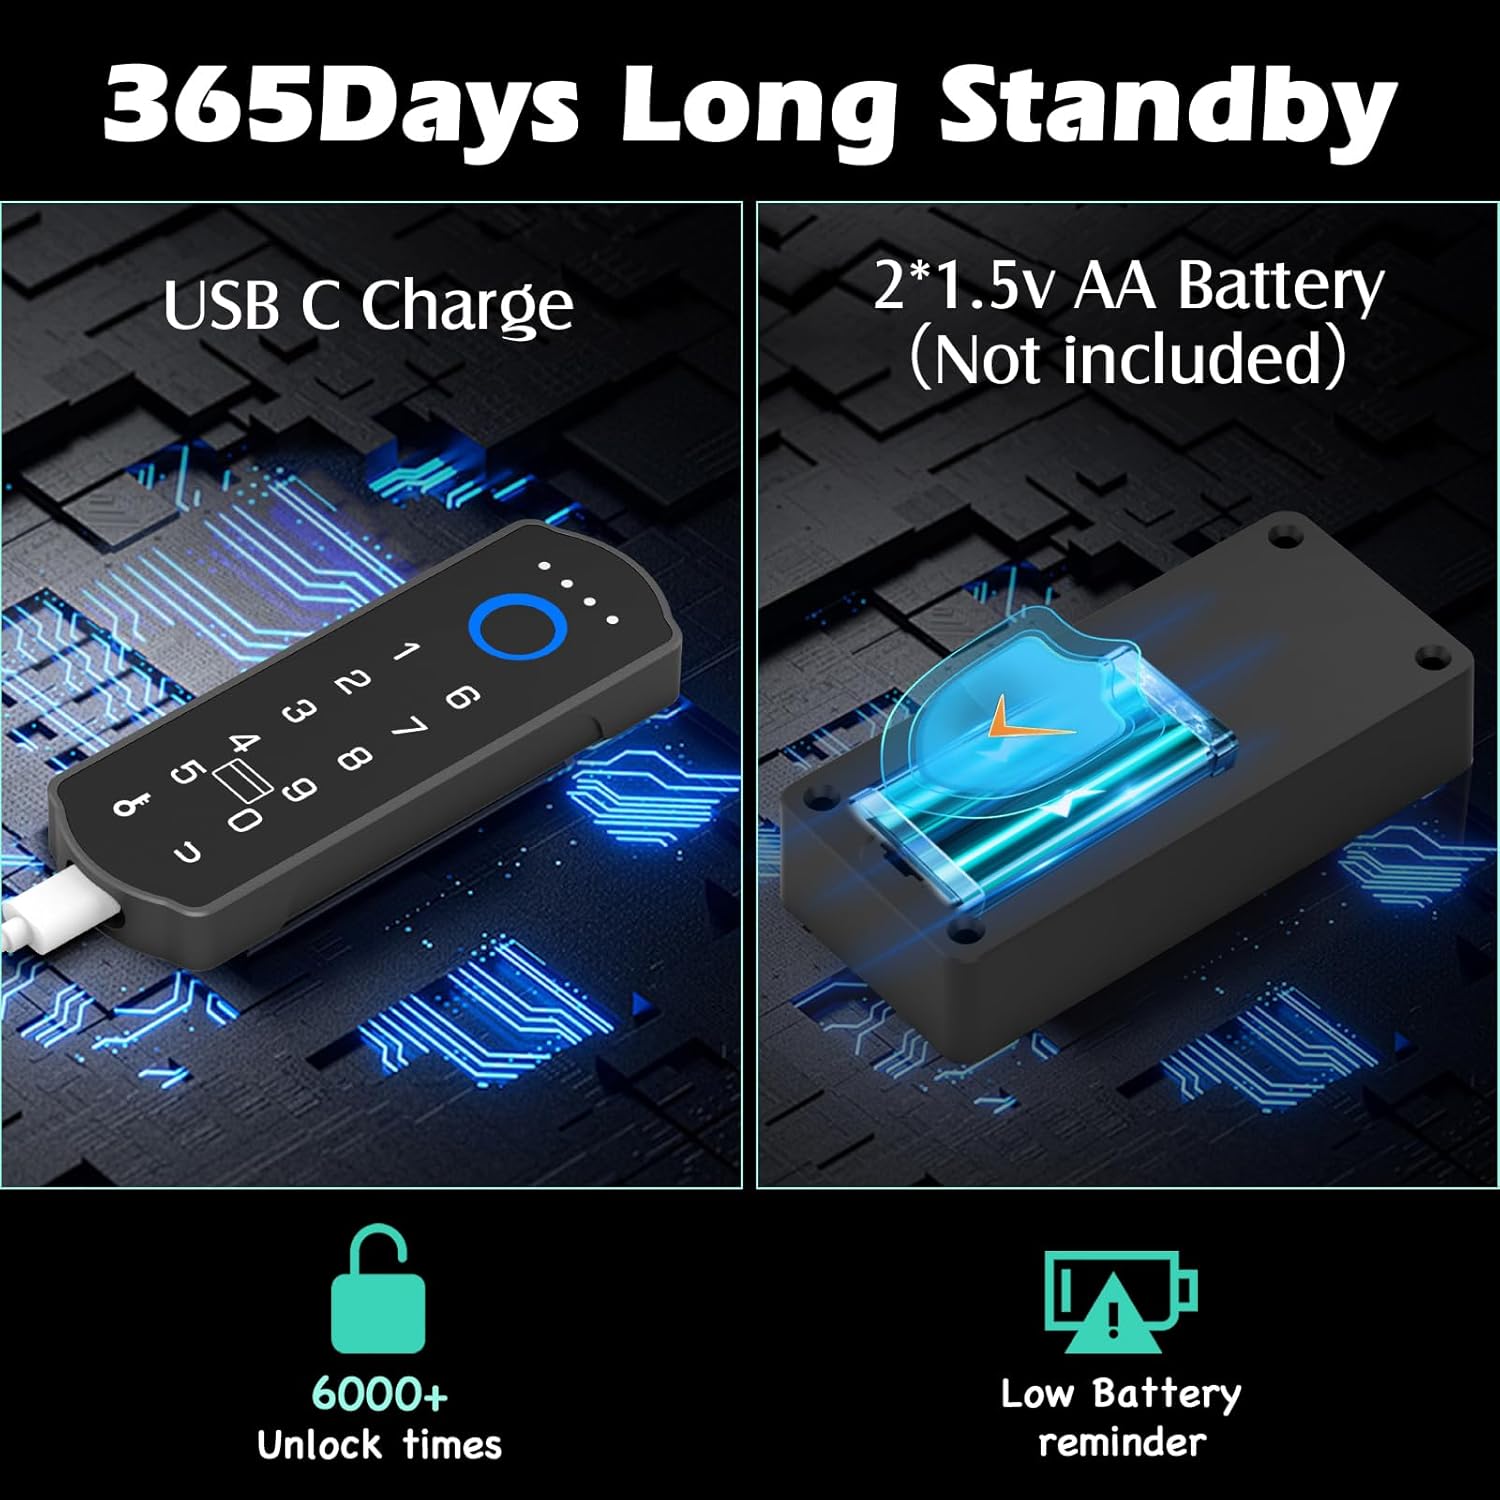
Figure 11: Battery and emergency power features
6.3. Cleaning
Wipe the lock's surface with a soft, dry cloth. Avoid using abrasive cleaners or solvents that could damage the finish or electronic components.
7. Troubleshooting
- Lock not responding: Check battery levels. Use the USB-C emergency power if needed. Ensure the lock is properly installed and not obstructed.
- Fingerprint not recognized: Ensure your finger is clean and dry. Try re-registering your fingerprint through the app.
- Passcode not working: Verify the entered passcode is correct. Ensure the lock is not in a temporary lockout state due to multiple incorrect attempts.
- App connectivity issues: Ensure Bluetooth is enabled on your device and the lock is within range. Restart the app or your device if necessary.
- RFID card not working: Ensure the card is properly registered. Try tapping the card firmly against the sensor.
8. Specifications
| Feature | Detail |
|---|---|
| Brand | Dhiedas |
| Model Number | A1BFPC-SB |
| Lock Type | Biometric, Keypad, RFID |
| Unlocking Methods | Fingerprint, Passcode, Bluetooth App, RFID, Apple Watch |
| Material | Metal, Zinc |
| Item Dimensions (L x W x H) | 1.7 x 0.5 x 4.3 inches |
| Item Weight | 0.38 Kilograms |
| Power Source | 2 x AA Batteries (not included) |
| Emergency Power | USB-C Port |
| Connectivity | Bluetooth |
| Recommended Uses | Cabinets, Drawers, Double Door Cabinets, Cupboards, Lockers, Desks, Child Safety |
9. Warranty and Support
Dhiedas offers 12 months of customer support and lifetime technical service for this product. For any questions or assistance, please contact Dhiedas customer service.