Introduction
This manual provides detailed instructions for the operation, maintenance, and troubleshooting of your GIDIGI Digital Dissolved Oxygen Meter and 4-in-1 Water Quality Tester. Please read this manual thoroughly before using the device to ensure accurate measurements and prolong its lifespan.
Product Overview
Key Features:
- Multi-Parameter Measurement: Measures pH (0.01-14.00), EC (conductivity), TDS (0-9990ppm), and Temperature (0.0-50.0°C / 32.0-122.0°F).
- Dissolved Oxygen (DO) Measurement: Two modes: mg/L (1mg/L=1ppm) and % saturation.
- Extended DO Probe Cable: Equipped with a 3-meter (9.84ft) electrode cable for deep water testing.
- Automatic Temperature Compensation (ATC): Ensures stable and accurate readings across varying temperatures.
- Bluetooth Connectivity: Connects to a smartphone app for salinity and altitude compensation, data storage, management, and sharing.
- Wide Application: Suitable for hydroponics, aquariums, fish tanks, drinking water, swimming pools, brewing, industrial systems, wastewater treatment, and environmental monitoring.
Components:

Image: GIDIGI DO Meter Kit with Complete Accessories. This image displays the main dissolved oxygen meter unit, the DO probe with its long cable, and various accessories such as protective caps and calibration solutions.
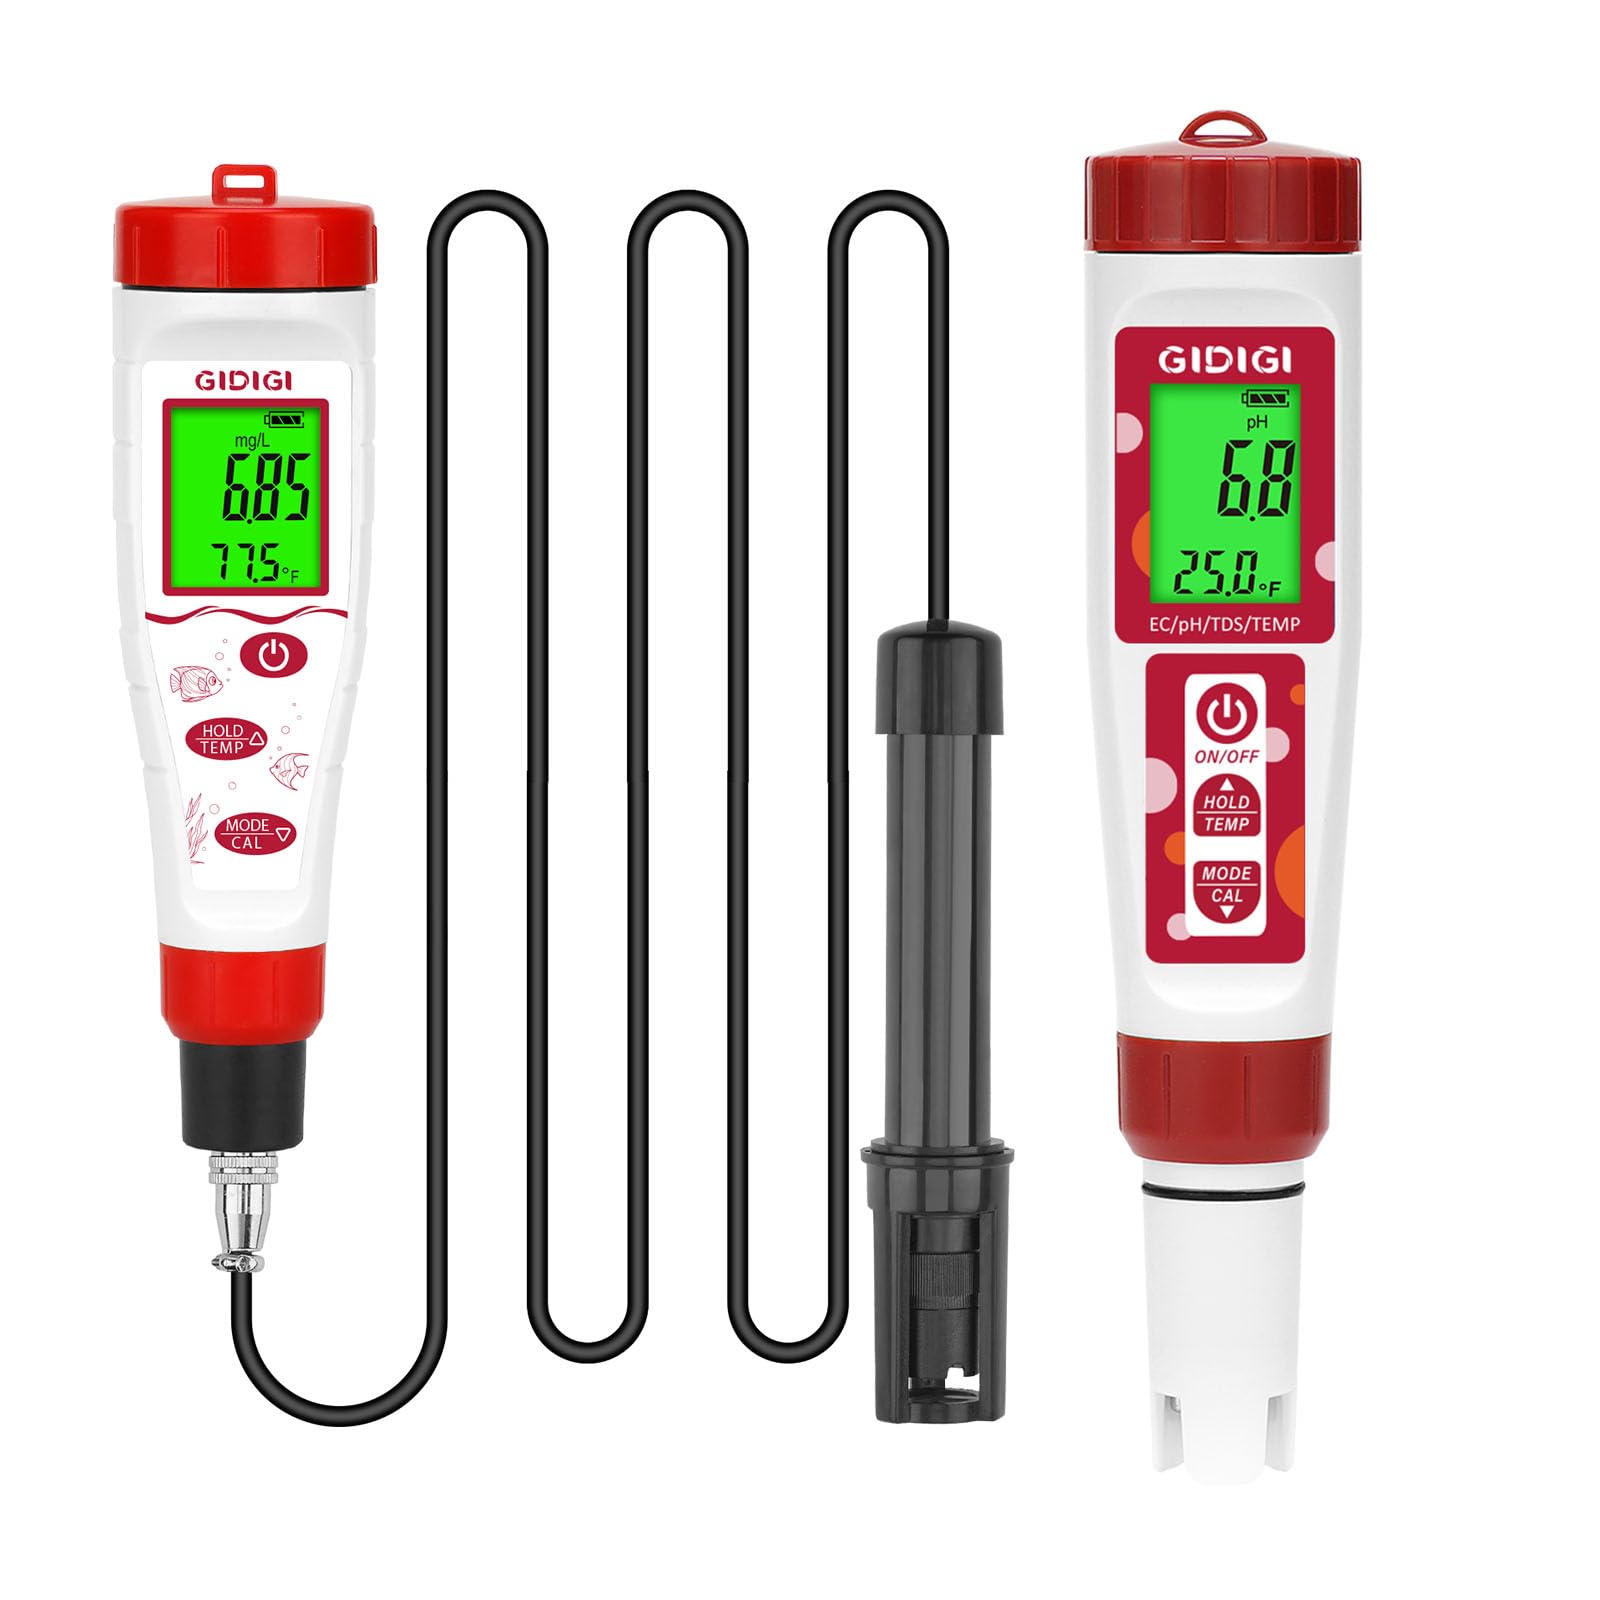
Image: Professional Dissolved Oxygen Meter in use. The image shows the DO meter displaying readings in both mg/L and percentage modes, with the probe submerged in an aquarium.
Setup
- Unpacking: Carefully remove all components from the packaging. Verify that all items listed in the product overview are present.
- Battery Installation: Open the battery compartment (if applicable, usually at the back or top of the meter) and insert the required batteries, observing polarity.
- DO Probe Preparation:
- Unscrew the protective cap from the DO probe.
- Fill the probe membrane cap with the provided electrolyte solution. Ensure no air bubbles are trapped.
- Carefully screw the membrane cap back onto the probe, ensuring a tight seal.
- Connect the DO probe cable to the main meter unit securely.
- Initial Power On: Press the ON/OFF button to power on the device. The display should illuminate.
- App Connection (Optional):
- Download the GIDIGI app from your device's app store.
- Enable Bluetooth on your smartphone.
- Open the GIDIGI app and follow the on-screen instructions to pair with your meter.

Image: Bluetooth Dissolved Oxygen Tester with App. This image illustrates the meter connected via Bluetooth to a smartphone app, showing options for salinity and altitude compensation settings.
Operating Instructions
A. Dissolved Oxygen (DO) Measurement:
- Power On: Press the ON/OFF button.
- Select Mode: Press the MODE/CAL button to cycle between mg/L and % saturation modes for DO.
- Submerge Probe: Carefully immerse the DO probe into the water sample, ensuring the membrane is fully submerged and free of air bubbles. Stir gently to ensure proper water flow around the probe.
- Read Measurement: Allow the reading to stabilize on the display. The meter will automatically compensate for temperature.
- Hold Reading: Press the HOLD/TEMP button to freeze the current reading on the display. Press again to release.
- Temperature Display: While in DO mode, press and hold the HOLD/TEMP button to switch between Celsius (°C) and Fahrenheit (°F) temperature units.
- Salinity/Altitude Compensation (via App): If measuring in saline water or at high altitudes, connect to the app and input the appropriate compensation values for more accurate results.

Image: Dissolved Oxygen Meter Modes. This image shows the meter displaying dissolved oxygen readings in both mg/L and percentage saturation modes, indicating its versatility.
B. pH, EC, TDS, and Temperature Measurement:
- Power On: Press the ON/OFF button.
- Select Mode: Press the MODE/CAL button repeatedly until the desired measurement mode (pH, EC, TDS) is displayed. Temperature is typically shown concurrently.
- Submerge Probe: Immerse the electrode tip into the water sample. Ensure the sensor is fully covered.
- Read Measurement: Wait for the reading to stabilize. The meter will automatically apply temperature compensation.
- Hold Reading: Press the HOLD/TEMP button to freeze the current reading. Press again to release.
- Temperature Display: Press and hold the HOLD/TEMP button to switch between Celsius (°C) and Fahrenheit (°F) temperature units.
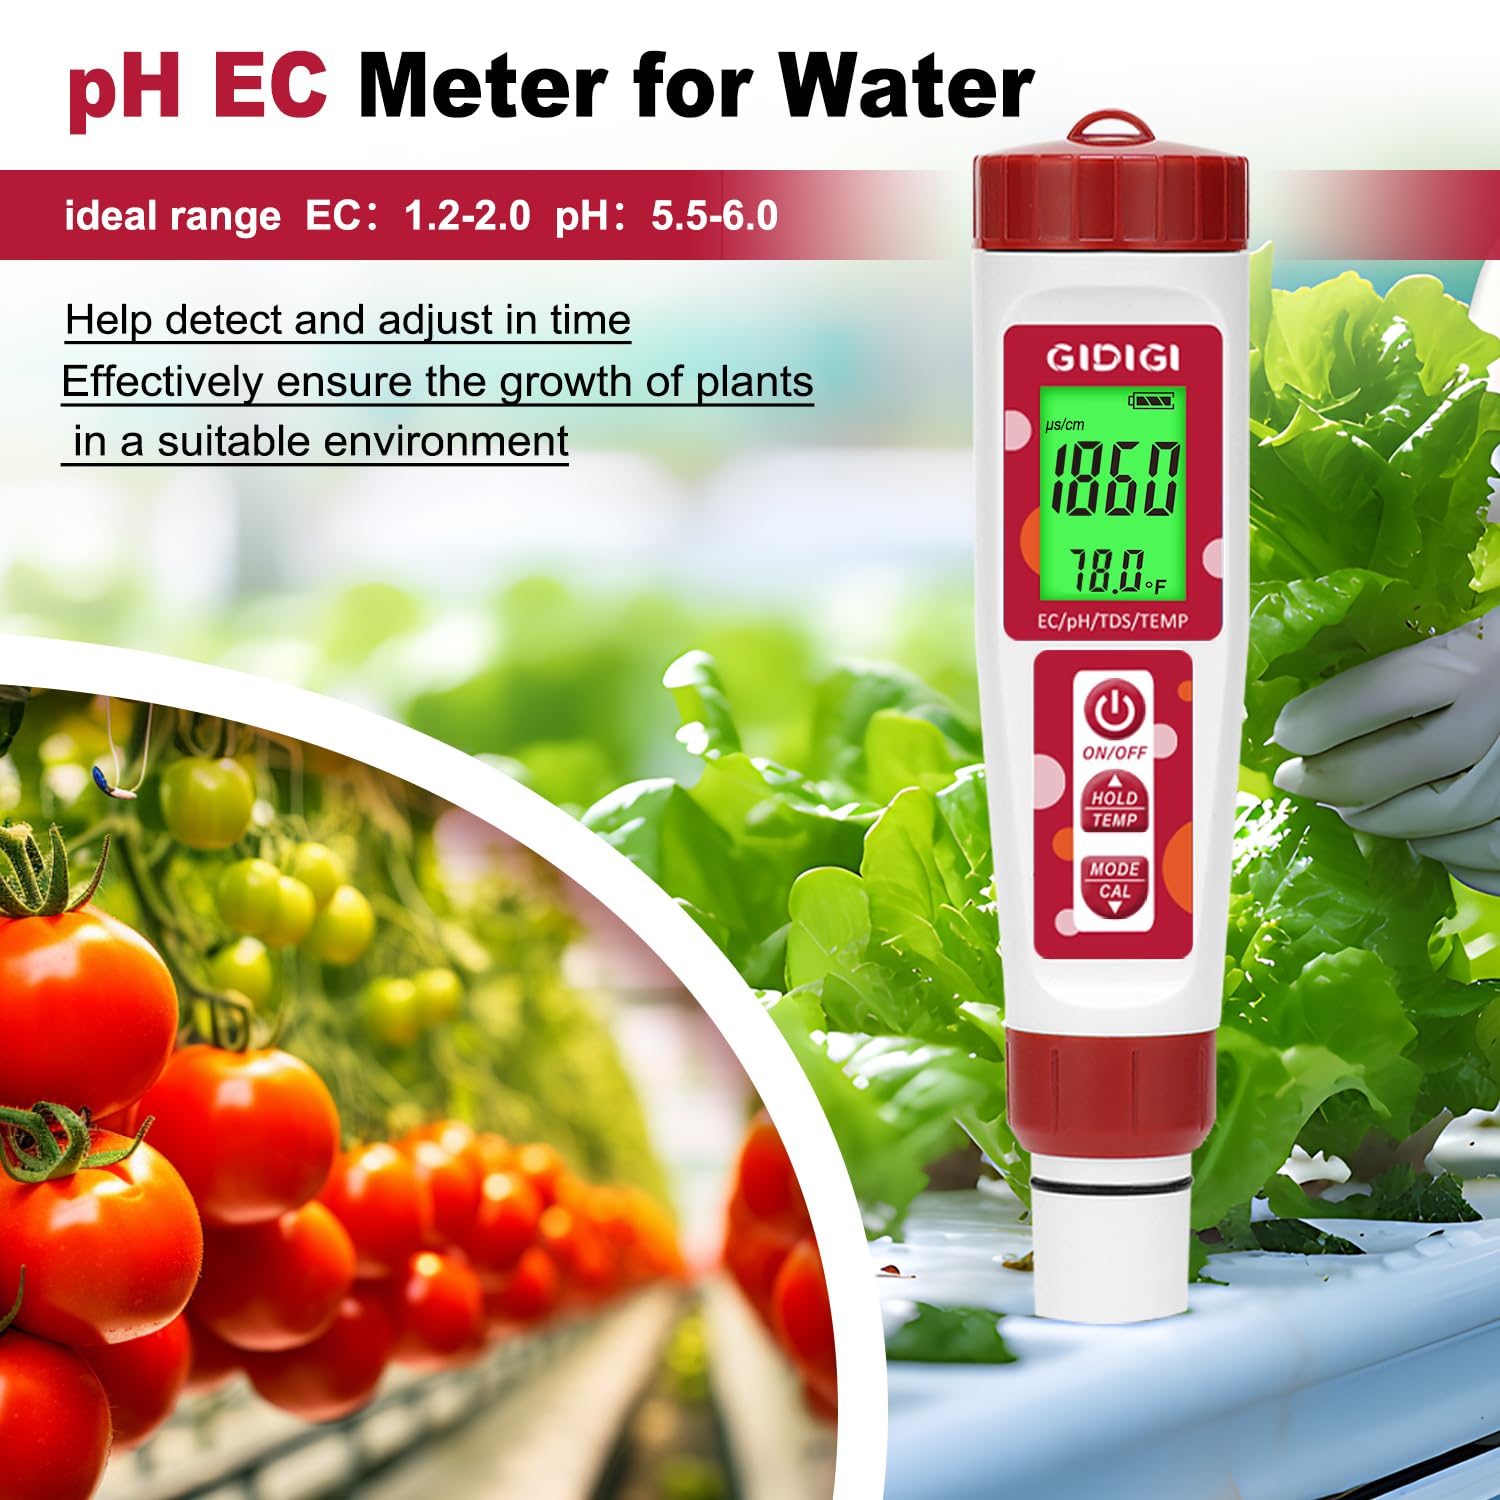
Image: pH EC Meter for Water. This image shows the 4-in-1 meter displaying EC/pH/TDS/TEMP readings, used in a hydroponic environment to monitor nutrient solution.

Image: TDS Meter for Growers. The image highlights the TDS measurement capability, showing ideal ppm levels for different plant growth stages (flowering, vegetative, cloning).

Image: ppm pH Water Meter Applications. This image demonstrates the meter's use for testing various water sources including tap water, garden water, well water, and filtered water, in addition to nutrient solutions.
Calibration
Regular calibration ensures the accuracy of your meter. Refer to the specific instructions provided with your calibration solutions for best results.
A. DO Meter Calibration:
- Air Calibration:
- Ensure the DO probe is clean and dry.
- Place the probe in a humid air environment (e.g., in the calibration bottle with a few drops of water, but not submerged).
- Power on the meter and select DO mode.
- Press and hold the MODE/CAL button until "CAL" appears on the display.
- The meter will automatically calibrate to the saturated oxygen level in the air. Wait for the calibration to complete and the display to return to measurement mode.
- Zero Oxygen Calibration (Optional): For highly precise applications, a zero oxygen solution can be used. Follow the specific instructions provided with your zero oxygen calibration solution.
B. pH Calibration:
- Prepare Solutions: Use fresh pH 6.86, pH 4.00, and pH 9.18 (or pH 10.01) buffer solutions.
- Clean Electrode: Rinse the electrode with distilled water and blot dry.
- Calibrate pH 6.86:
- Immerse the electrode into the pH 6.86 buffer solution.
- Press and hold the MODE/CAL button until "CAL" appears, then release. The meter will recognize the buffer and calibrate.
- Wait for the reading to stabilize and the meter to confirm calibration (e.g., "END" or a stable pH value).
- Calibrate pH 4.00: Rinse the electrode, then immerse it into the pH 4.00 buffer solution. Repeat the calibration steps as for pH 6.86.
- Calibrate pH 9.18/10.01 (if needed): Rinse the electrode, then immerse it into the pH 9.18 or pH 10.01 buffer solution. Repeat the calibration steps.
C. EC/TDS Calibration:
- Prepare Solution: Use a standard EC calibration solution (e.g., 1413 µS/cm or 12.88 mS/cm).
- Clean Electrode: Rinse the electrode with distilled water and blot dry.
- Calibrate:
- Immerse the electrode into the EC calibration solution.
- Press and hold the MODE/CAL button until "CAL" appears, then release. The meter will recognize the buffer and calibrate.
- Wait for the reading to stabilize and the meter to confirm calibration.
Maintenance
- Electrode Cleaning: Regularly rinse all electrodes with distilled or deionized water after each use to prevent contamination and buildup.
- DO Probe Membrane:
- Inspect the membrane for damage or fouling. Replace if necessary.
- Ensure the electrolyte solution in the membrane cap is fresh and free of bubbles. Replace the solution periodically (e.g., monthly or as needed).
- Storage:
- Store the DO probe with its protective cap filled with a small amount of electrolyte solution or distilled water to keep the membrane moist. Do not store dry.
- Store the pH/EC/TDS electrode with its protective cap, ideally with a few drops of storage solution or pH 4.00 buffer to prevent drying.
- Store the meter in a cool, dry place, away from direct sunlight and extreme temperatures.
- Battery Replacement: Replace batteries when the low battery indicator appears on the display to ensure accurate readings.
Troubleshooting
| Problem | Possible Cause | Solution |
|---|---|---|
| Meter does not power on. | Dead or incorrectly installed batteries. | Check battery polarity; replace batteries. |
| Inaccurate or unstable readings. |
|
|
| Bluetooth connection issues. |
|
|
| DO readings fluctuate excessively. |
|
|
Specifications
| Parameter | Range | Resolution | Accuracy |
|---|---|---|---|
| pH | 0.01 - 14.00 pH | 0.01 pH | ±0.05 pH |
| EC | 0 - 9990 µS/cm | 1 µS/cm | ±2% F.S. |
| TDS | 0 - 9990 ppm | 1 ppm | ±2% F.S. |
| Dissolved Oxygen (mg/L) | 0.00 - 20.00 mg/L | 0.01 mg/L | ±0.4 mg/L |
| Dissolved Oxygen (%) | 0.0 - 300.0 % | 0.1 % | ±1.5 % F.S. |
| Temperature | 0.0 - 50.0 °C (32.0 - 122.0 °F) | 0.1 °C / 0.1 °F | ±0.5 °C / ±1.0 °F |
| DO Probe Cable Length | 3 meters (9.84 feet) | ||
| Automatic Temperature Compensation (ATC) | Yes | ||
| Connectivity | Bluetooth (for app features) | ||
Note: Specifications are subject to change without prior notice.
Warranty and Support
For warranty information, technical support, or service inquiries, please refer to the contact information provided with your product packaging or visit the official GIDIGI website. Keep your purchase receipt as proof of purchase for warranty claims.
Manufacturer: GIDIGI
Model Number: B0DM85218Q
Date First Available: December 5, 2024