isekurity 32
isekurity WiFi Mini Detector Camera Model 32 User Manual
Your Guide to Setup, Operation, and Maintenance
1. Introduction
Thank you for choosing the isekurity WiFi Mini Detector Camera Model 32. This device is designed for discreet surveillance in home and office environments, offering 1080P high-definition video, motion detection, and remote viewing capabilities. Please read this manual thoroughly before operating the device to ensure proper setup and functionality.
Important Note: This device is a camera only and does not possess any real smoke detection functionality. It is designed to resemble a smoke detector for discreet placement.
2. Package Contents
Verify that all items are present in your package:
- 1 x isekurity WiFi Mini Detector Camera Model 32
- 1 x USB Charging Cable
- 1 x User Manual (this document)

Figure 2.1: Front view of the product packaging.

Figure 2.2: Side view of the product packaging, indicating key features.
3. Product Overview
The isekurity WiFi Mini Detector Camera is designed to blend seamlessly into its environment. Below is an illustration of the device and its primary components.
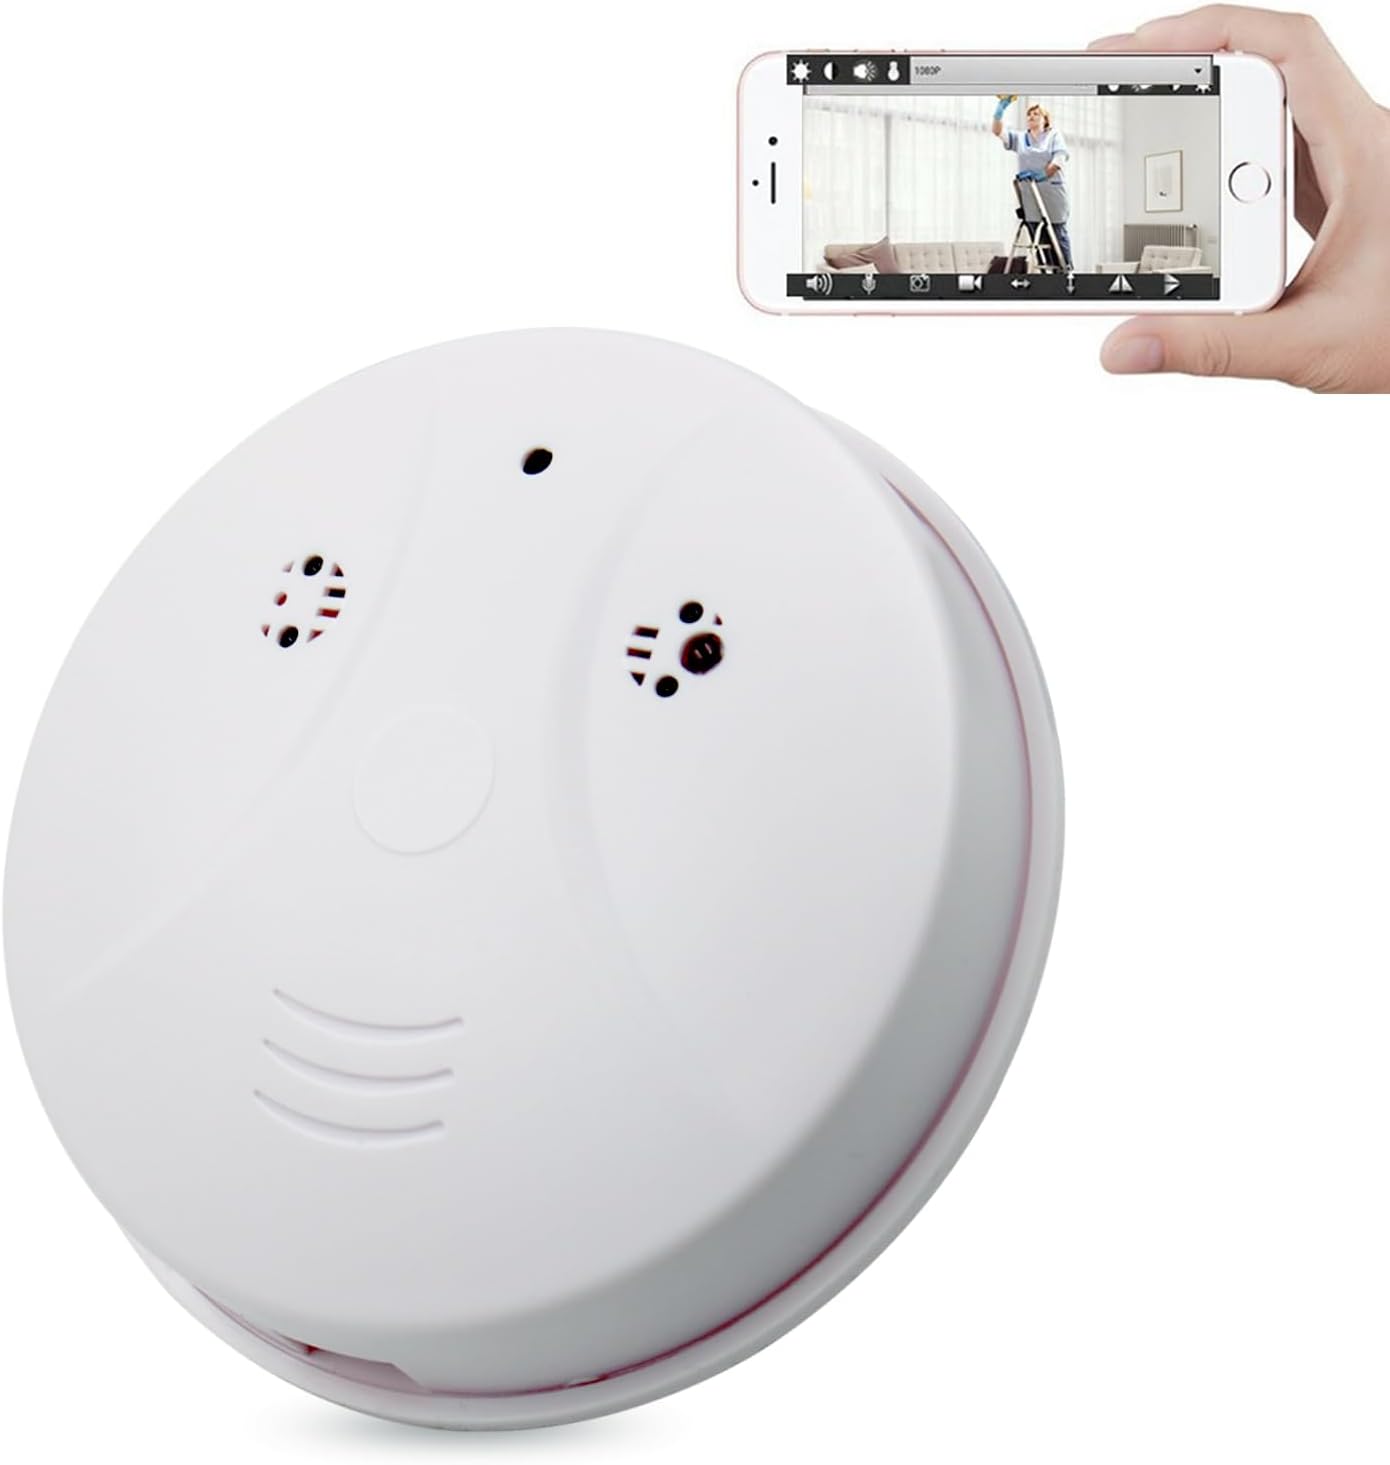
Figure 3.1: isekurity WiFi Mini Detector Camera with a smartphone displaying its live feed.
Key Components:
- Camera Lens: Discreetly integrated for video capture.
- Indicator Lights: Provide status information (e.g., power, Wi-Fi connection).
- Micro SD Card Slot: For local video storage (card not included).
- USB Charging Port: For power supply and battery charging.
- Reset Button: To restore factory settings.
4. Setup Instructions
- Charge the Device: Connect the camera to a power source using the provided USB charging cable. Ensure the device is fully charged before first use. The indicator light will change when charging is complete.
- Insert Micro SD Card: Open the cover and carefully insert a Micro SD card (up to 64GB, not included) into the designated slot. Ensure it is inserted correctly.
- Download the App: Search for the recommended camera application (refer to packaging or quick start guide for app name) on the Apple App Store (for iOS) or Google Play Store (for Android) and install it on your smartphone or tablet.
- Power On: Press and hold the power button until the indicator lights activate.
- Connect to Wi-Fi:
- Open the installed app and follow the on-screen instructions to add a new device.
- The camera supports both 2.4GHz and 5GHz Wi-Fi networks. Select your home or office Wi-Fi network and enter the password.
- Once connected, the indicator light will confirm a successful Wi-Fi connection.
- Mounting: The camera is designed for ceiling mount. Use appropriate screws or adhesive (not included) to securely install the camera in your desired location. Ensure the camera lens has an unobstructed view of the area you wish to monitor.
5. Operating Instructions
After successful setup, you can access and control your camera remotely via the smartphone application.
5.1 Remote View and Recording
Open the app on your smartphone or tablet. You will see a list of connected cameras. Select your camera to view the live feed.

Figure 5.1: App interface showing multiple camera feeds.
- Live View: Tap on the camera feed to view real-time video.
- Snapshot: Use the snapshot icon within the app to capture still images from the live feed.
- Record: Use the record icon to manually start and stop video recording. Recorded videos are saved to the Micro SD card and can be accessed via the app.
5.2 Motion Detection
The camera features motion detection to alert you to activity. When motion is detected, the camera will automatically capture 3 photos and send a push notification to your smartphone.
- Enable/Disable: You can enable or disable motion detection alerts through the camera settings in the app.
- Sensitivity: Adjust the motion detection sensitivity to minimize false alarms.
5.3 Night Vision
The camera is equipped with 4 infrared lights, providing enhanced visibility in low-light conditions. These lights are invisible to the human eye.

Figure 5.2: Comparison of day and night vision capabilities.
- Automatic Activation: Night vision typically activates automatically in low light.
- Manual Control: You can manually turn night vision on or off via the app settings.
5.4 Loop Recording
When the Micro SD card is full, the camera will automatically overwrite the oldest video files to continue recording. This ensures continuous surveillance without manual intervention.

Figure 5.3: Illustration of loop recording functionality.
5.5 Multi-User and Multi-Camera Access
The app supports connecting multiple cameras to one account and allowing multiple users to view a single camera feed. Share access with family members or colleagues as needed.

Figure 5.4: Examples of surveillance applications for the camera.
6. Maintenance
6.1 Battery Charging
The camera has a built-in rechargeable battery. A full charge provides approximately 4 hours of operation. For continuous surveillance, it is strongly recommended to keep the camera connected to a power source via the USB charging cable.
6.2 Micro SD Card Management
- Capacity: Supports Micro SD cards up to 64GB.
- Formatting: It is recommended to format the Micro SD card periodically through the app settings to maintain optimal performance and prevent data corruption.
- Removal: Always power off the device before inserting or removing the Micro SD card to prevent data loss or damage.
6.3 Cleaning
Use a soft, dry cloth to clean the camera's exterior. Do not use liquid cleaners or abrasive materials, as they may damage the device.
7. Troubleshooting
If you encounter issues with your isekurity WiFi Mini Detector Camera, refer to the following common problems and solutions:
| Problem | Possible Cause | Solution |
|---|---|---|
| Camera not connecting to Wi-Fi | Incorrect Wi-Fi password, weak signal, router issues, incorrect Wi-Fi band. | Ensure correct password. Move camera closer to router. Restart router. Confirm your router supports 2.4GHz or 5GHz and is configured correctly. Try resetting the camera. |
| Poor video quality | Weak Wi-Fi signal, dirty lens, insufficient lighting. | Improve Wi-Fi signal strength. Clean the camera lens. Ensure adequate lighting or enable night vision. |
| Motion detection not working | Feature disabled in app, incorrect sensitivity settings, camera placement. | Enable motion detection in the app. Adjust sensitivity. Ensure camera has a clear view of the detection area. |
| Battery drains quickly | Normal operation (4-hour battery life), continuous recording, frequent motion detection. | Keep the camera connected to a power source for continuous use. Reduce recording frequency or motion detection events if operating on battery only. |
| Micro SD card not recording | Card full, corrupted, or not inserted correctly. | Format the SD card via the app. Reinsert the card. Try a different SD card. Ensure the card is not full. |
8. Specifications
| Feature | Detail |
|---|---|
| Model Number | 32 |
| Video Resolution | 1080p HD |
| Connectivity | Wi-Fi (2.4G & 5G support) |
| Power Source | Battery Powered (1 Lithium Ion battery included) |
| Battery Life (on full charge) | Approximately 4 hours |
| Storage | Micro SD Card (up to 64GB, not included) |
| Special Features | Motion Detection, Night Vision, Remote View |
| Indoor/Outdoor Usage | Indoor |
| Mounting Type | Ceiling Mount |
| Color | White |
| Item Weight | 8.4 ounces |
| Package Dimensions | 5.08 x 4.84 x 2.52 inches |
9. Warranty and Support
9.1 Warranty Information
isekurity provides a 12-month refund or replacement warranty for this product from the date of purchase. This warranty covers manufacturing defects and malfunctions under normal use. It does not cover damage caused by misuse, accidents, unauthorized modifications, or external factors.
9.2 Technical Support
Lifetime technical support is available for all isekurity products. If you have any questions, require assistance with setup, or encounter any issues not covered in the troubleshooting section, please contact our support team. Refer to the product packaging or our official website for contact details.