Introduction
This manual provides essential information for the installation, operation, maintenance, and troubleshooting of your new carburetor. This component is designed for specific Toyota vehicles equipped with the 2E SOHC 1.3 LTR PETROL engine. Please read these instructions thoroughly before attempting any installation or adjustments to ensure proper function and safety.
Product Overview
The carburetor is a crucial component in your vehicle's fuel system, responsible for mixing air and fuel in the correct proportions for combustion. This replacement unit is manufactured to meet the specifications for compatible Toyota models.

Figure 1: Front view of the Carburetor for Toyota Tercel 2E Engine, showing primary components and linkages.
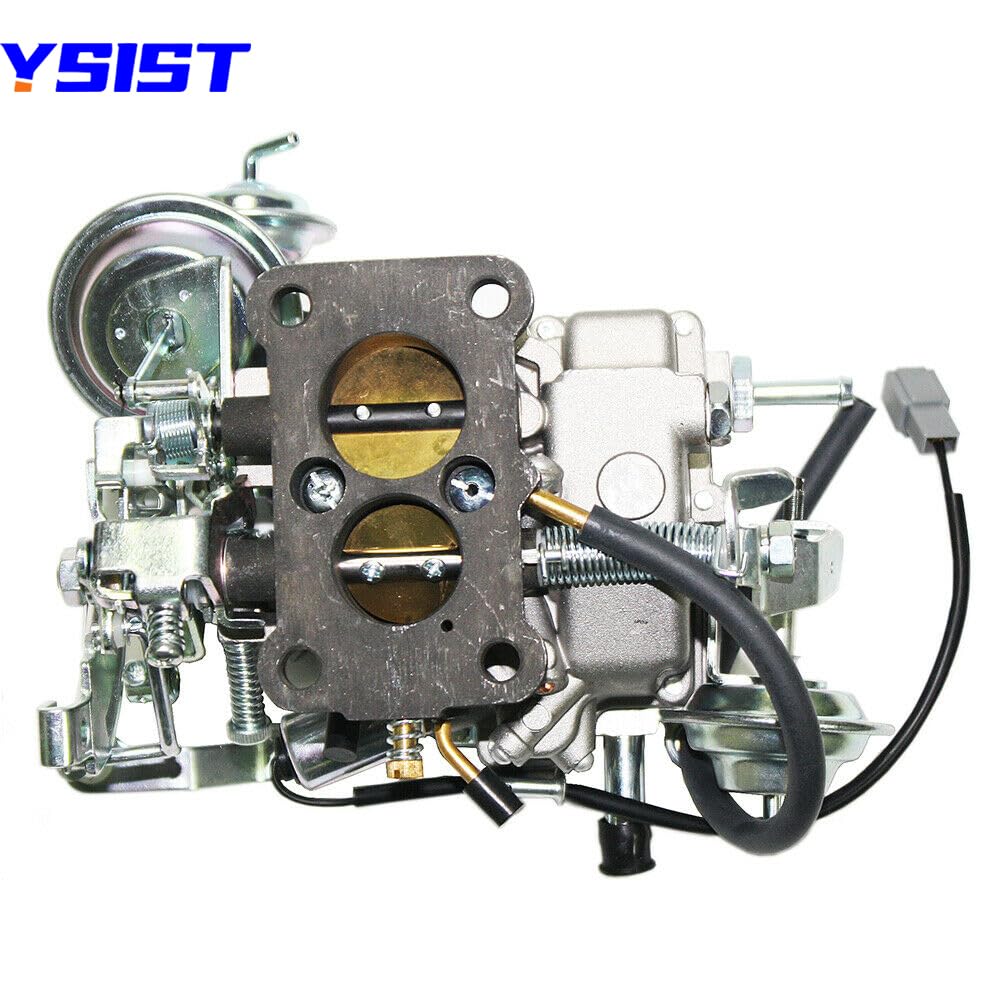
Figure 2: Top view of the carburetor, illustrating the air intake and fuel mixture components.

Figure 3: Side view of the carburetor, highlighting the throttle linkage and various vacuum ports.

Figure 4: Carburetor with the air horn cover removed, revealing the primary and secondary barrels.

Figure 5: Detailed side view of the carburetor, showing various adjustment screws and connections.

Figure 6: Rear view of the carburetor, displaying the fuel inlet and vacuum lines.

Figure 7: Bottom view of the carburetor, showing the mounting flange and base plate.
Compatibility
This carburetor is specifically designed for certain Toyota models and engine codes. It is crucial to verify your vehicle's specifications against the list below before proceeding with installation.
Applicable Engine Code:
- 2E SOHC 1.3 LTR PETROL
Compatible Vehicle Models (1985-1999):
- Toyota Corolla
- Toyota Corsa
- Toyota Tercel
- Toyota Sprinter
Specific Tercel Models (1995-1999):
- 1999 Toyota Tercel CE Sedan 2-Door 1.5L 1497CC l4 GAS DOHC Naturally Aspirated
- 1998 Toyota Tercel CE Sedan 2-Door 1.5L 1497CC l4 GAS DOHC Naturally Aspirated
- 1997 Toyota Tercel CE Sedan 2-Door 1.5L 1497CC l4 GAS DOHC Naturally Aspirated
- 1997 Toyota Tercel CE Sedan 4-Door 1.5L 1497CC l4 GAS DOHC Naturally Aspirated
- 1996 Toyota Tercel DX Sedan 2-Door 1.5L 1497CC l4 GAS DOHC Naturally Aspirated
- 1996 Toyota Tercel DX Sedan 4-Door 1.5L 1497CC l4 GAS DOHC Naturally Aspirated
- 1996 Toyota Tercel STD Sedan 2-Door 1.5L 1497CC l4 GAS DOHC Naturally Aspirated
- 1995 Toyota Tercel DX Sedan 2-Door 1.5L 1497CC l4 GAS DOHC Naturally Aspirated
- 1995 Toyota Tercel DX Sedan 4-Door 1.5L 1497CC l4 GAS DOHC Naturally Aspirated
- 1995 Toyota Tercel STD Sedan 2-Door 1.5L 1497CC l4 GAS DOHC Naturally Aspirated
Specific Tercel Models (1994):
- 1994 Toyota Tercel DLX Sedan 2-Door 1.5L 1456CC l4 GAS SOHC Naturally Aspirated
- 1994 Toyota Tercel DLX Sedan 4-Door 1.5L 1456CC l4 GAS SOHC Naturally Aspirated
- 1994 Toyota Tercel LE Sedan 4-Door 1.5L 1456CC l4 GAS SOHC Naturally Aspirated
- 1994 Toyota Tercel S Sedan 2-Door 1.5L 1456CC l4 GAS Naturally Aspirated
- 1994 Toyota Tercel STD Sedan 2-Door 1.5L 1456CC l4 GAS SOHC Naturally Aspirated
Specific Corolla Models (1992):
- 1992 Toyota Corolla Base Sedan 4-Door 1.6L 1587CC l4 GAS DOHC Naturally Aspirated
- 1992 Toyota Corolla DLX All Trac Wagon 5-Door 1.6L 1587CC l4 GAS DOHC Naturally Aspirated
- 1992 Toyota Corolla DLX Sedan 4-Door 1.6L 1587CC l4 GAS DOHC Naturally Aspirated
- 1992 Toyota Corolla DLX Wagon 5-Door 1.6L 1587CC l4 GAS DOHC Naturally Aspirated
- 1992 Toyota Corolla LE Sedan 4-Door 1.6L 1587CC l4 GAS DOHC Naturally Aspirated
Safety Information
Always prioritize safety when working with automotive components. Improper installation or handling can lead to injury or damage to the vehicle. Adhere to the following safety guidelines:
- Ensure the engine is off and completely cooled down before beginning any work.
- Disconnect the vehicle's battery (negative terminal first) to prevent electrical hazards.
- Wear appropriate personal protective equipment (PPE), including safety glasses and gloves.
- Work in a well-ventilated area to avoid inhaling fuel fumes.
- Keep a fire extinguisher nearby when working with fuel systems.
- If unsure about any step, consult a qualified mechanic or refer to your vehicle's official service manual.
Setup and Installation
This section outlines the general steps for installing the carburetor. Specific procedures may vary based on your vehicle's exact model and year. Always refer to your vehicle's service manual for detailed, model-specific instructions.
Tools Required:
- Socket set and wrenches
- Screwdrivers (Phillips and flathead)
- Pliers
- Gasket scraper
- Torque wrench
- Clean rags
- New carburetor base gasket (recommended)
Installation Steps:
- Preparation: Disconnect the negative terminal of the vehicle's battery. Allow the engine to cool completely to prevent burns and fuel evaporation.
- Remove Air Cleaner Assembly: Detach the air cleaner housing and any associated ducting from the old carburetor.
- Disconnect Lines and Linkages: Carefully label and disconnect all vacuum lines, fuel lines, and electrical connectors from the old carburetor. Disconnect the throttle cable and any other mechanical linkages. Take photos for reference if needed.
- Remove Old Carburetor: Unscrew the mounting nuts or bolts securing the carburetor to the intake manifold. Carefully lift the old carburetor off the manifold.
- Clean Mounting Surface: Use a gasket scraper to thoroughly clean the intake manifold's mounting surface, ensuring no old gasket material or debris remains. This is critical for a proper seal.
- Install New Gasket: Place a new carburetor base gasket onto the intake manifold, ensuring it is correctly oriented.
- Position New Carburetor: Carefully lower the new carburetor onto the intake manifold, aligning it with the mounting studs/holes and the new gasket.
- Secure Carburetor: Install the mounting nuts or bolts. Tighten them gradually and evenly in a crisscross pattern to the manufacturer's specified torque settings. Overtightening can warp the carburetor base and cause vacuum leaks.
- Reconnect Lines and Linkages: Reconnect all vacuum lines, fuel lines, electrical connectors, and throttle linkages to their correct positions, referring to your labels or photos. Ensure all connections are secure.
- Install Air Cleaner Assembly: Reattach the air cleaner housing and ducting.
- Reconnect Battery: Reconnect the negative terminal of the battery.
Operating and Initial Start-up
After installation, perform an initial start-up and basic adjustments to ensure proper function.
- Fuel System Prime: Before starting, turn the ignition key to the "ON" position for a few seconds (without cranking) to allow the fuel pump to prime the system and fill the carburetor float bowl. Repeat a few times if necessary.
- First Start: Start the engine. It may take a few cranks to draw fuel into the carburetor and stabilize.
- Check for Leaks: Immediately after starting, visually inspect all fuel lines and vacuum connections around the carburetor for any leaks. Address any leaks before proceeding further.
- Idle Adjustment: Allow the engine to reach its normal operating temperature. Adjust the idle speed screw to achieve the recommended idle RPM for your specific vehicle (refer to your vehicle's service manual or under-hood decal).
- Mixture Adjustment (if applicable): Some carburetors have an idle mixture screw. Adjust this screw for the smoothest idle and highest vacuum reading. This often requires specialized tools or knowledge and should ideally be done by a professional.
- Test Drive: Once basic adjustments are made and no leaks are present, perform a short test drive to ensure proper operation under various conditions, including acceleration and deceleration.
Maintenance
Regular maintenance ensures optimal performance and longevity of your carburetor and associated fuel system components.
- Air Filter: Regularly inspect and replace the air filter according to your vehicle's maintenance schedule. A clogged air filter can restrict airflow, leading to a rich fuel mixture and reduced carburetor performance.
- Fuel Filter: Replace the fuel filter at recommended intervals to prevent contaminants and debris from reaching and clogging the carburetor.
- Fuel Quality: Use high-quality, clean fuel to minimize the formation of deposits and varnish within the carburetor's delicate passages.
- Vacuum Lines: Periodically check all vacuum lines connected to the carburetor for cracks, leaks, or disconnections. Damaged vacuum lines can cause significant performance issues. Repair or replace as needed.
- Linkages: Ensure all throttle and choke linkages move freely and are not binding. Lubricate pivot points with appropriate lubricant if necessary.
- Cleaning: If performance issues persist despite other checks, a professional carburetor cleaning or rebuild may be required. Avoid using harsh chemicals directly on the carburetor without proper knowledge, as this can damage seals and components.
Troubleshooting
This section provides common issues and potential solutions. For complex or persistent problems, it is recommended to consult a qualified automotive technician.
| Problem | Possible Cause | Solution |
|---|---|---|
| Engine cranks but won't start | No fuel reaching carburetor, clogged fuel filter, incorrect choke setting, significant vacuum leak. | Check fuel level and fuel pump operation, replace fuel filter, verify choke operation, inspect all vacuum lines for integrity. |
| Rough idle or stalling | Incorrect idle speed/mixture adjustment, vacuum leak, dirty idle circuit, faulty spark plugs or ignition components. | Adjust idle speed and mixture, check vacuum lines, clean carburetor idle passages, inspect ignition system components. |
| Poor acceleration or hesitation | Accelerator pump issue, clogged main jet, vacuum leak, incorrect ignition timing. | Inspect accelerator pump for proper function, clean main jet, check vacuum connections, verify ignition timing. |
| Excessive fuel consumption | Rich fuel mixture, stuck float or needle valve, clogged air filter, high fuel pressure. | Adjust mixture, inspect float and needle valve, replace air filter, check fuel pressure regulator. |
| Fuel leaks | Loose fuel line connections, cracked fuel lines, faulty gaskets, stuck float causing overflow. | Tighten connections, replace damaged lines/gaskets, inspect float valve for proper sealing. |
Specifications
Key specifications for the carburetor are provided below:
- Manufacturer OEM Part Numbers: 21100-11190, 21100-11191, 21100-11212, H2092
- Engine Code Compatibility: 2E SOHC 1.3 LTR PETROL
- Vehicle Compatibility: Toyota Corolla, Corsa, Tercel, Sprinter (model years 1985-1999)
- Brand: Generic
- ASIN: B0DM55R4G7
Warranty and Support
For warranty information or technical support regarding this product, please contact the seller or manufacturer directly. It is advisable to retain your purchase receipt as proof of purchase for any warranty claims.
Manufacturer: Laminee
Date First Available: November 19, 2024
For further assistance or to view seller details, please refer to the seller's information page on Amazon.


