Introduction
This manual provides essential instructions for the safe and effective use, installation, and maintenance of your DCH 2400mAh XBAT200EU Lithium-Ion battery replacement. This battery is designed for specific Shark ION Rocket Cordless Ultra-Light vacuum cleaner models. Please read this manual thoroughly before using the product.
Safety Information
Your safety is paramount. Please observe the following warnings and precautions:
- Warranty Void: The warranty is void if the product label is removed.
- No Disassembly: Do not attempt to disassemble, open, or service the battery pack. Unauthorized modifications can lead to hazards and void the warranty.
- Proper Replacement: Replace only with the battery pack specifically designated for your vacuum cleaner model. Using an incompatible battery can cause damage or injury.
- Avoid Damage: Do not crush, puncture, or short-circuit the battery. Avoid external contacts with metal objects.
- Temperature Control: Do not dispose of the battery in fire or water. Do not store the battery above 60°C (140°F). High temperatures can damage the battery and pose a fire risk.
- Initial Charge: A new battery pack must be fully charged before its first use to reduce the risk of fire or burns.
- Read Instructions: Always read the operating guide of your vacuum cleaner before using this battery.
Compatibility
This DCH battery replacement is compatible with the following models and part numbers:
- Compatible Vacuum Model: Shark ION Rocket Cordless Ultra-Light
- Compatible Battery Part Numbers: XBAT200EU, XBAT200
Please verify that both your vacuum model and existing battery part number match the information above before installation.
Specifications
| Feature | Specification |
|---|---|
| Battery Part Number | XBAT200EU, XBAT200 |
| Model Number | CS-SHC200VX |
| Battery Type | Lithium-Ion (Li-ion) |
| Voltage | 25.2V |
| Capacity | 2400mAh |
| Watt-Hours (Wh) | 60.48Wh |
| Dimensions (L x W x H) | 6.79 x 3.64 x 1.81 inches (172.5 x 92.5 x 46.0 mm) |
| Weight | 1.56 pounds (706.2 g) |
| Number of Batteries | 1 (included) |
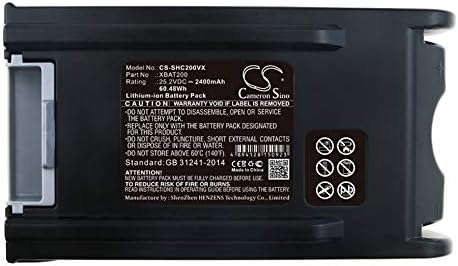
Image: Detailed view of the battery's information label, including specifications and safety warnings.
Setup: Battery Installation
Follow these steps to safely install your new DCH replacement battery:
- Power Off: Ensure your Shark ION Rocket Cordless Ultra-Light vacuum cleaner is completely powered off and unplugged from any charging source.
- Locate Battery Compartment: Refer to your vacuum cleaner's original user manual to locate the battery compartment and release mechanism. This is typically on the main body of the vacuum.
- Remove Old Battery: Press the battery release button (if present) and carefully slide out the old battery pack.
- Insert New Battery: Align the new DCH battery with the battery slot. Slide the battery firmly into place until it clicks, indicating it is securely locked. Do not force the battery.
- Initial Charge: As per safety instructions, fully charge the new battery before its first use. Connect your vacuum to its charger and allow it to charge until the charging indicator shows a full charge.

Image: Angled view of the battery, highlighting the release mechanism area.
Operating Instructions
Charging the Battery
- Always use the original charger provided with your Shark vacuum cleaner.
- Connect the charger to a power outlet and then to the vacuum cleaner.
- Allow the battery to charge completely before use, especially for the first time. Refer to your vacuum's manual for typical charging times and indicator lights.
- Do not leave the battery on charge indefinitely after it is full, although modern Li-ion batteries have protection circuits.
Using the Vacuum
- Once fully charged, disconnect the vacuum from the charger.
- Operate your vacuum cleaner as described in its original user manual.
- The battery provides consistent power until it is depleted. Performance may decrease slightly as the charge level drops.
- Recharge the battery when the vacuum's power indicator shows low battery or when performance noticeably declines.
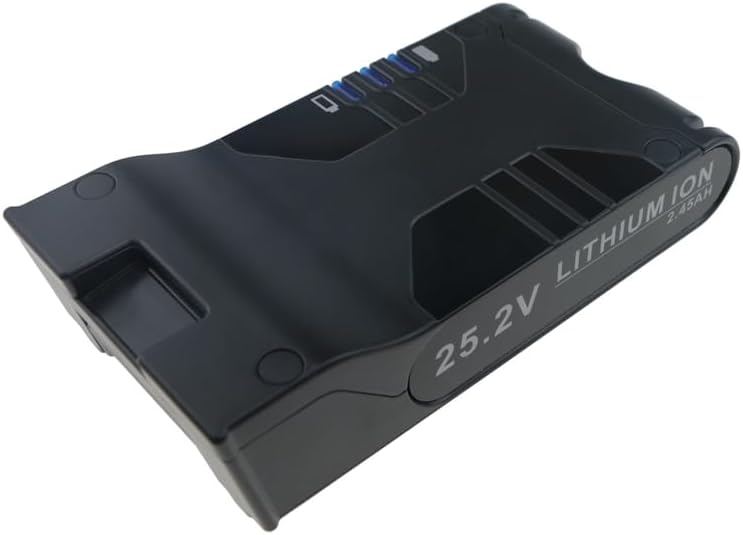
Image: Top view of the battery, illustrating its design and charge indicator.
Maintenance
Battery Storage
- If storing the battery for an extended period, charge it to approximately 50-60% capacity.
- Store the battery in a cool, dry place, away from direct sunlight, heat sources, and moisture.
- Avoid storing the battery in extreme temperatures (below 0°C / 32°F or above 40°C / 104°F).
- For long-term storage, it is recommended to periodically check the battery charge and recharge it to 50-60% every few months to prevent deep discharge.
Cleaning
- Wipe the battery's exterior with a clean, dry cloth.
- Do not use harsh chemicals or abrasive cleaners.
- Ensure the battery terminals are clean and free of dust or debris for optimal connection.

Image: Bottom view of the battery, showing the release button and regulatory markings.
Troubleshooting
If you encounter issues with your DCH replacement battery, consider the following:
- Battery Not Charging:
- Ensure the charger is properly connected to both the power outlet and the vacuum.
- Verify that the power outlet is functional.
- Check for any visible damage to the charger or battery.
- Confirm the battery is securely seated in the vacuum's compartment.
- Short Run Time:
- Ensure the battery is fully charged before each use.
- Over time, all rechargeable batteries experience a decrease in capacity. If the battery is old, it may be reaching the end of its lifespan.
- Operating the vacuum in high-power modes or with clogged filters can reduce run time.
- Vacuum Not Powering On:
- Confirm the battery is fully charged.
- Ensure the battery is correctly installed and locked into place.
- Refer to your vacuum cleaner's manual for specific troubleshooting steps related to power issues.
If these steps do not resolve the issue, please contact customer support.
Warranty and Support
For any questions regarding your DCH replacement battery, including pre-sales inquiries or after-sales support, please feel free to contact us. We are committed to providing professional assistance.
Please retain your proof of purchase for warranty claims. Specific warranty duration and terms may vary; refer to your purchase documentation or contact customer service for details.
Contact Information: Please refer to the seller's contact information on the platform where you purchased this product.


