1. Introduction
This manual provides comprehensive instructions for the installation, operation, and maintenance of your WESLNN PG-103 Tuya Smart Home Alarm System. Please read this manual thoroughly before using the device to ensure proper functionality and safety. This system integrates GSM and WiFi connectivity, motion sensors, a wireless siren, and an IP camera for comprehensive home security.
2. Package Contents
Upon unpacking, please verify that all components are present and in good condition. The standard package includes:
- WESLNN PG-103 Tuya Alarm Host (Main Panel)
- Door/Window Sensor(s)
- Wireless Siren
- Power Adapter
- Mounting Hardware
- User Manual (this document)
- Additional accessories may vary based on kit configuration.

Figure 2.1: WESLNN PG-103 Tuya Alarm Host Main Panel. This image displays the central alarm panel with its touch screen interface, numeric keypad, and function buttons for arming, disarming, and SOS.
3. Setup Instructions
3.1. Initial Power-Up
- Connect the provided power adapter to the alarm host and plug it into a standard electrical outlet.
- The system will power on automatically. Follow the on-screen prompts for initial language and time settings.
3.2. Network Configuration (WiFi & GSM)
- WiFi Connection:
- On the alarm host's screen, navigate to "Settings" > "Network" > "WiFi Settings".
- Select your home WiFi network from the list and enter the password.
- Ensure the host is within range of your WiFi router for a stable connection.
- GSM Connection (Optional):
- Insert a valid GSM SIM card (not included) into the designated SIM card slot on the alarm host.
- The system will automatically detect the SIM card. Verify network signal strength on the display.
3.3. App Installation and Pairing
- Download the "Tuya Smart" or "Smart Life" app from your smartphone's app store (iOS or Android).
- Register or log in to your account.
- In the app, tap "+" to add a new device. Select "Security & Video Surveillance" > "Alarm (Wi-Fi)".
- Follow the in-app instructions to pair the alarm host with your smartphone. This typically involves putting the alarm host into pairing mode and confirming the WiFi network.
3.4. Sensor Installation and Pairing
The system supports various wireless sensors, such as door/window sensors and motion sensors. Refer to the individual sensor manuals for specific installation details.
- On the alarm host, navigate to "Settings" > "Accessories" > "Add Sensor".
- Trigger the sensor (e.g., open a door for a door sensor, wave hand for a motion sensor). The host will detect and display the sensor.
- Assign a name and zone to the sensor for easy identification.

Figure 3.1: WESLNN Alarm System installed on a wall. This image shows the alarm panel mounted on a wall in a modern home environment, demonstrating its discreet integration.
4. Operating Instructions
4.1. Arming and Disarming
- Arm (Away Mode): Press the ARM/* button on the keypad or use the mobile app to arm the system. All configured sensors will be active.
- Disarm: Enter your password and press the DISARM/# button on the keypad or use the mobile app to disarm the system.
- Home Arm (Stay Mode): This mode typically arms perimeter sensors (e.g., door/window sensors) while allowing free movement inside. Refer to app settings for configuration.
4.2. Scheduled Arming and Disarming
The system allows you to set schedules for automatic arming and disarming, enhancing convenience and security.
- On the alarm host or via the Tuya app, navigate to "Settings" > "Schedule".
- Set desired times for automatic arming (e.g., before bedtime) and disarming (e.g., in the morning).
- Confirm and save the schedule.
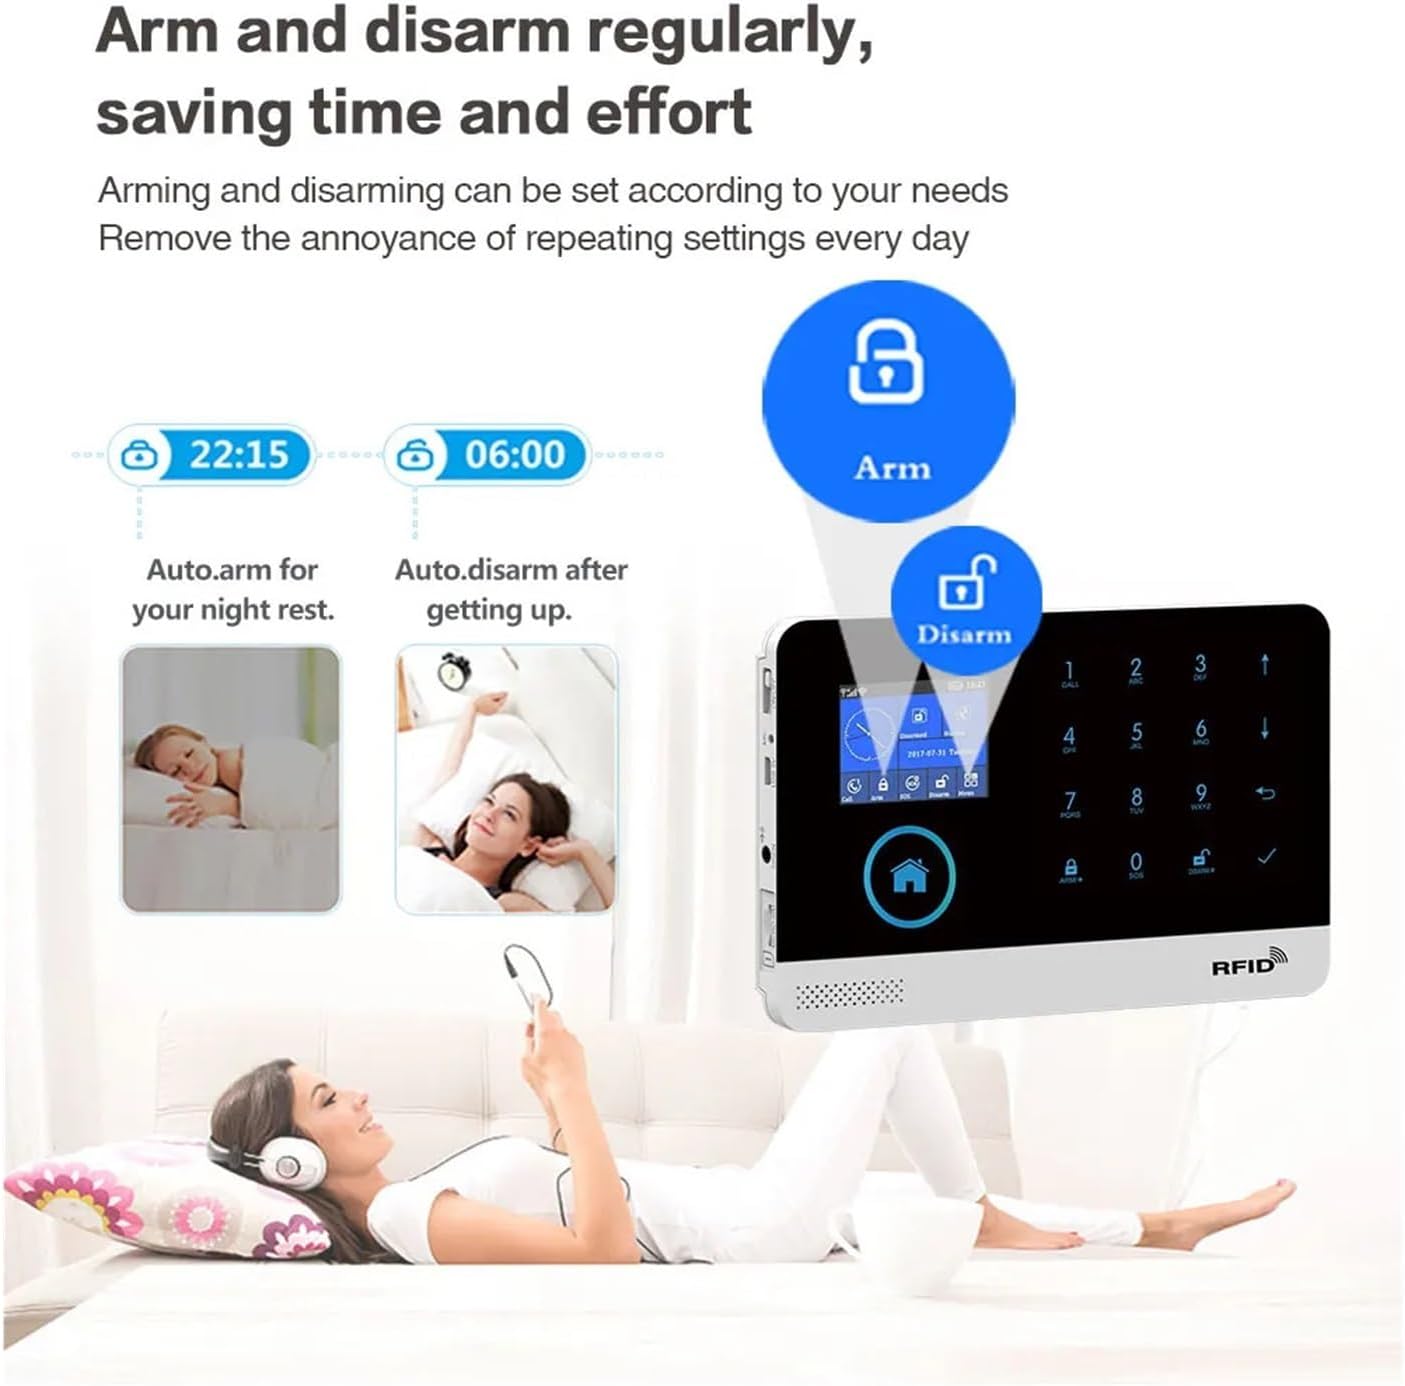
Figure 4.1: Illustration of scheduled arming and disarming. This image visually explains how to set automatic arming for night rest and disarming for waking up, saving daily effort.
4.3. Emergency (SOS) Function
In case of an emergency, press the SOS button on the alarm host. The system will immediately trigger the siren and send emergency notifications to pre-set contacts.
4.4. Alarm Call Sequence
The system supports up to 5 pre-set alarm call numbers. If an alarm is triggered, the host will dial these numbers sequentially. If a number is busy, it will proceed to the next reserved number until a connection is made or all numbers have been attempted.
4.5. Real-time Monitoring and Intercom
Through the Tuya app, you can monitor the system's status in real-time, view alarm history, and track events. The integrated intercom function allows for two-way communication through the alarm host, enabling remote deterrence if an intruder is detected.
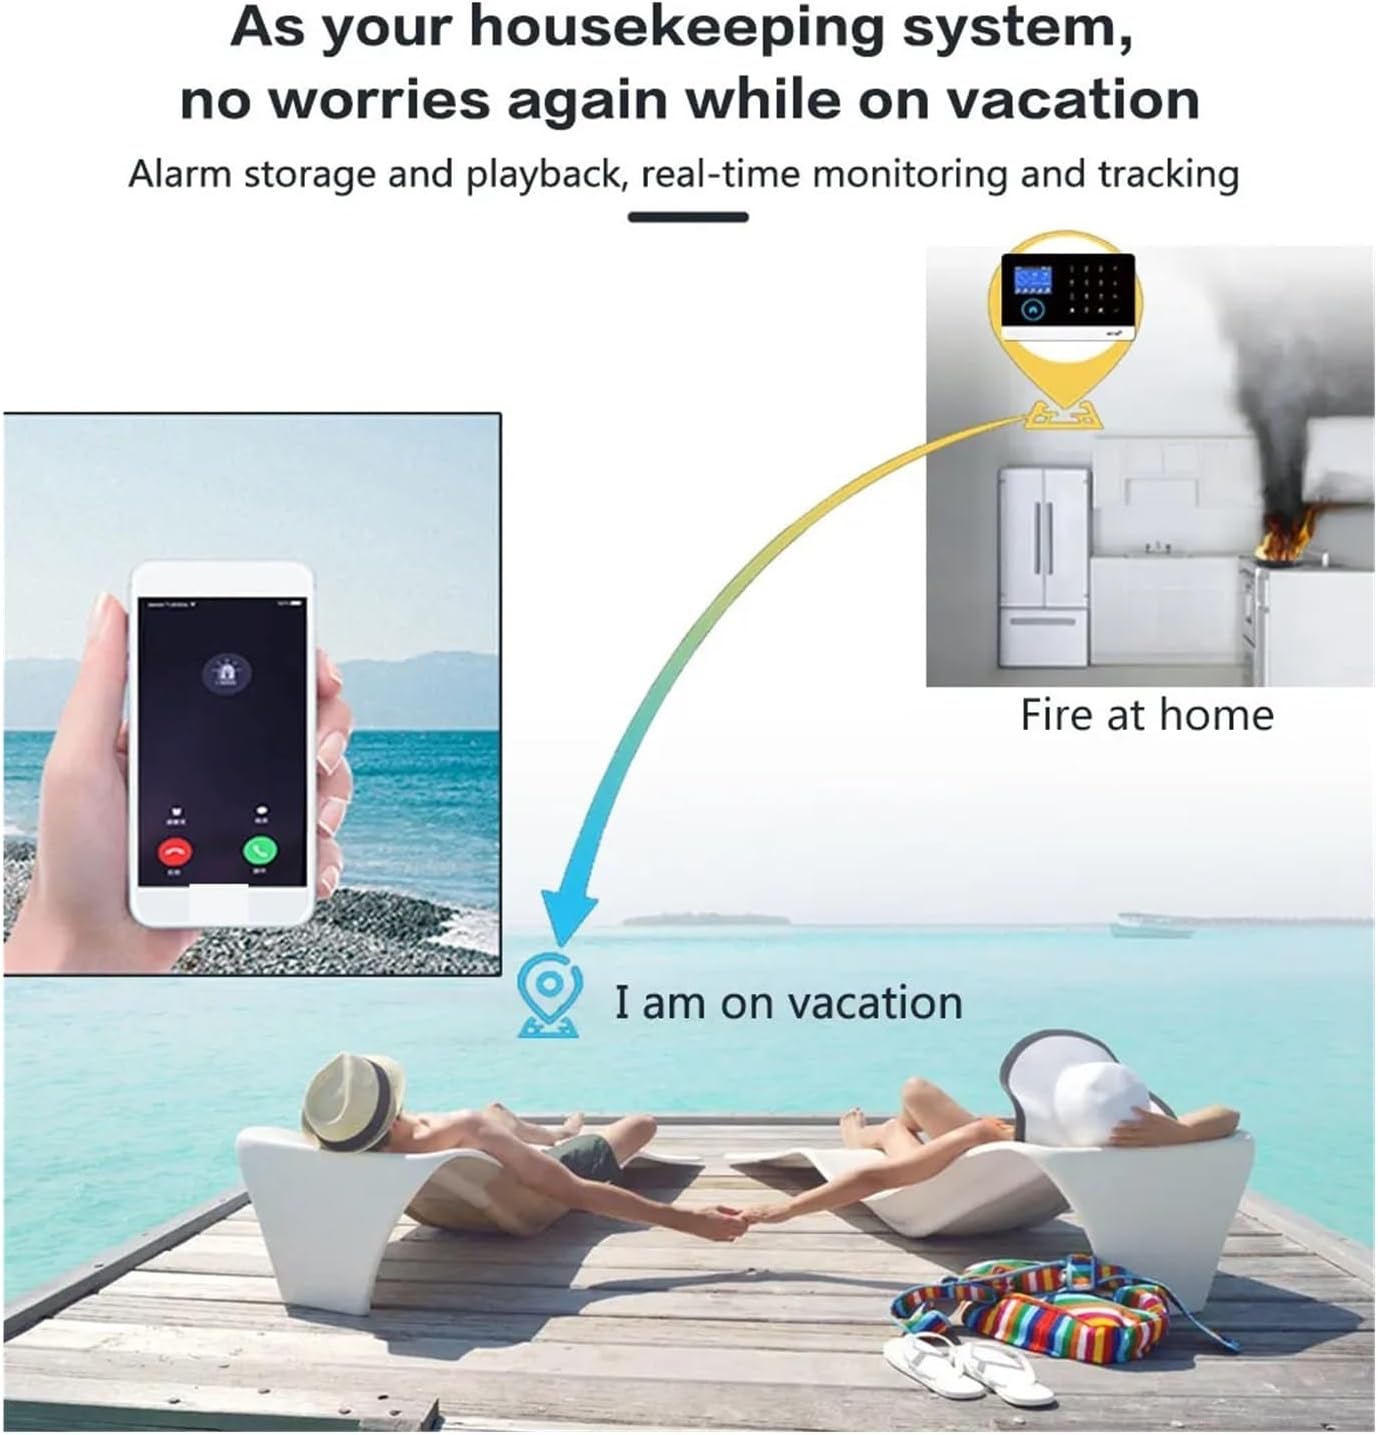
Figure 4.2: Remote monitoring and alarm playback. This image illustrates how the system acts as a housekeeping system, providing peace of mind while on vacation by allowing remote monitoring and alarm playback in case of incidents like a fire.
4.6. Doorbell Functionality
The alarm host can be configured to function as a visible doorbell when paired with a compatible wireless doorbell button. When the doorbell is pressed, the host will alert you, and you can receive notifications via the app.

Figure 4.3: Alarm system functioning as a visible doorbell. This image shows the alarm host displaying a doorbell notification, indicating its capability to integrate with a wireless doorbell button.
5. Maintenance
- Cleaning: Use a soft, dry cloth to clean the alarm host and sensors. Avoid using abrasive cleaners or solvents.
- Battery Check: Regularly check the battery status of wireless sensors via the app or host display. Replace batteries as needed to ensure continuous protection.
- Firmware Updates: Periodically check for firmware updates through the Tuya app to ensure your system has the latest features and security enhancements.
- Signal Strength: Ensure the alarm host and all sensors maintain good signal strength for reliable communication. Relocate devices if signal is weak.
6. Troubleshooting
| Problem | Possible Cause | Solution |
|---|---|---|
| System not powering on | Power adapter disconnected or faulty. | Check power connection. Ensure outlet is functional. |
| Cannot connect to WiFi | Incorrect password, weak signal, or router issue. | Verify WiFi password. Move host closer to router. Restart router. |
| Sensor not triggering alarm | Sensor battery low, not paired, or faulty. | Check sensor battery. Re-pair sensor. Test sensor functionality. |
| No alarm calls/SMS | No GSM SIM card, no signal, or incorrect emergency numbers. | Insert/check SIM card. Verify GSM signal. Confirm emergency contact numbers in settings. |
| App not receiving notifications | App permissions, network issues, or notification settings. | Check app notification permissions on your phone. Ensure phone has internet access. Verify notification settings within the Tuya app. |
7. Specifications
| Feature | Detail |
|---|---|
| Brand | WESLNN |
| Model Number | PG-103 Tuya (A-103) |
| Alarm Type | Alarm, SMS, PSTN, GPRS, App Control |
| Kit Configuration | Door/Window Sensor (standard, other sensors optional) |
| Dimensions (Host) | 185 x 125 x 14.7 mm |
| Power Supply | DC 5V |
| Connection Type | Wireless (WiFi, GSM) |
| Arming Type | APP, Keypad |
| Video Interface | Yes (for compatible IP cameras) |
| Display Screen | Yes |
| Password Keypad | Yes |
| Working Temperature | 0℃ to 55℃ (32°F to 131°F) |
| Relative Humidity | Less than 82% RH (non-condensing) |
| Product Weight | 50 grams (main unit) |
8. Warranty and Support
For warranty information and technical support, please refer to the documentation provided with your purchase or contact WESLNN customer service. Keep your purchase receipt as proof of purchase for warranty claims.
For further assistance, please visit the official WESLNN website or contact their support team directly. Contact details are typically found on the product packaging or the manufacturer's website.