1. Introduction
This manual provides detailed instructions for the assembly, operation, and maintenance of your JOYMOR Wooden Play Kitchen. Please read all instructions carefully before assembly and use to ensure safe and correct operation. This play kitchen is designed to provide an engaging and imaginative play experience for children aged 3 years and up.

Image 1.1: Overview of the JOYMOR Wooden Play Kitchen.
2. Safety Information
Your child's safety is paramount. Please observe the following guidelines:
- Adult Assembly Required: This product contains small parts and requires adult assembly. Keep small parts away from children before and during assembly.
- Supervision: Always supervise children during play.
- Stable Placement: Ensure the play kitchen is placed on a flat, stable surface to prevent tipping.
- Regular Inspection: Periodically check all screws and fasteners to ensure they are tight. Loose parts can pose a hazard.
- No Real Heat/Water: This is a toy. The stovetop, oven, and coffee machine do not produce real heat. The sink is not designed for real water.
- Material Safety: The play kitchen is constructed from high-quality, safe materials with smooth edges to minimize injury risk.
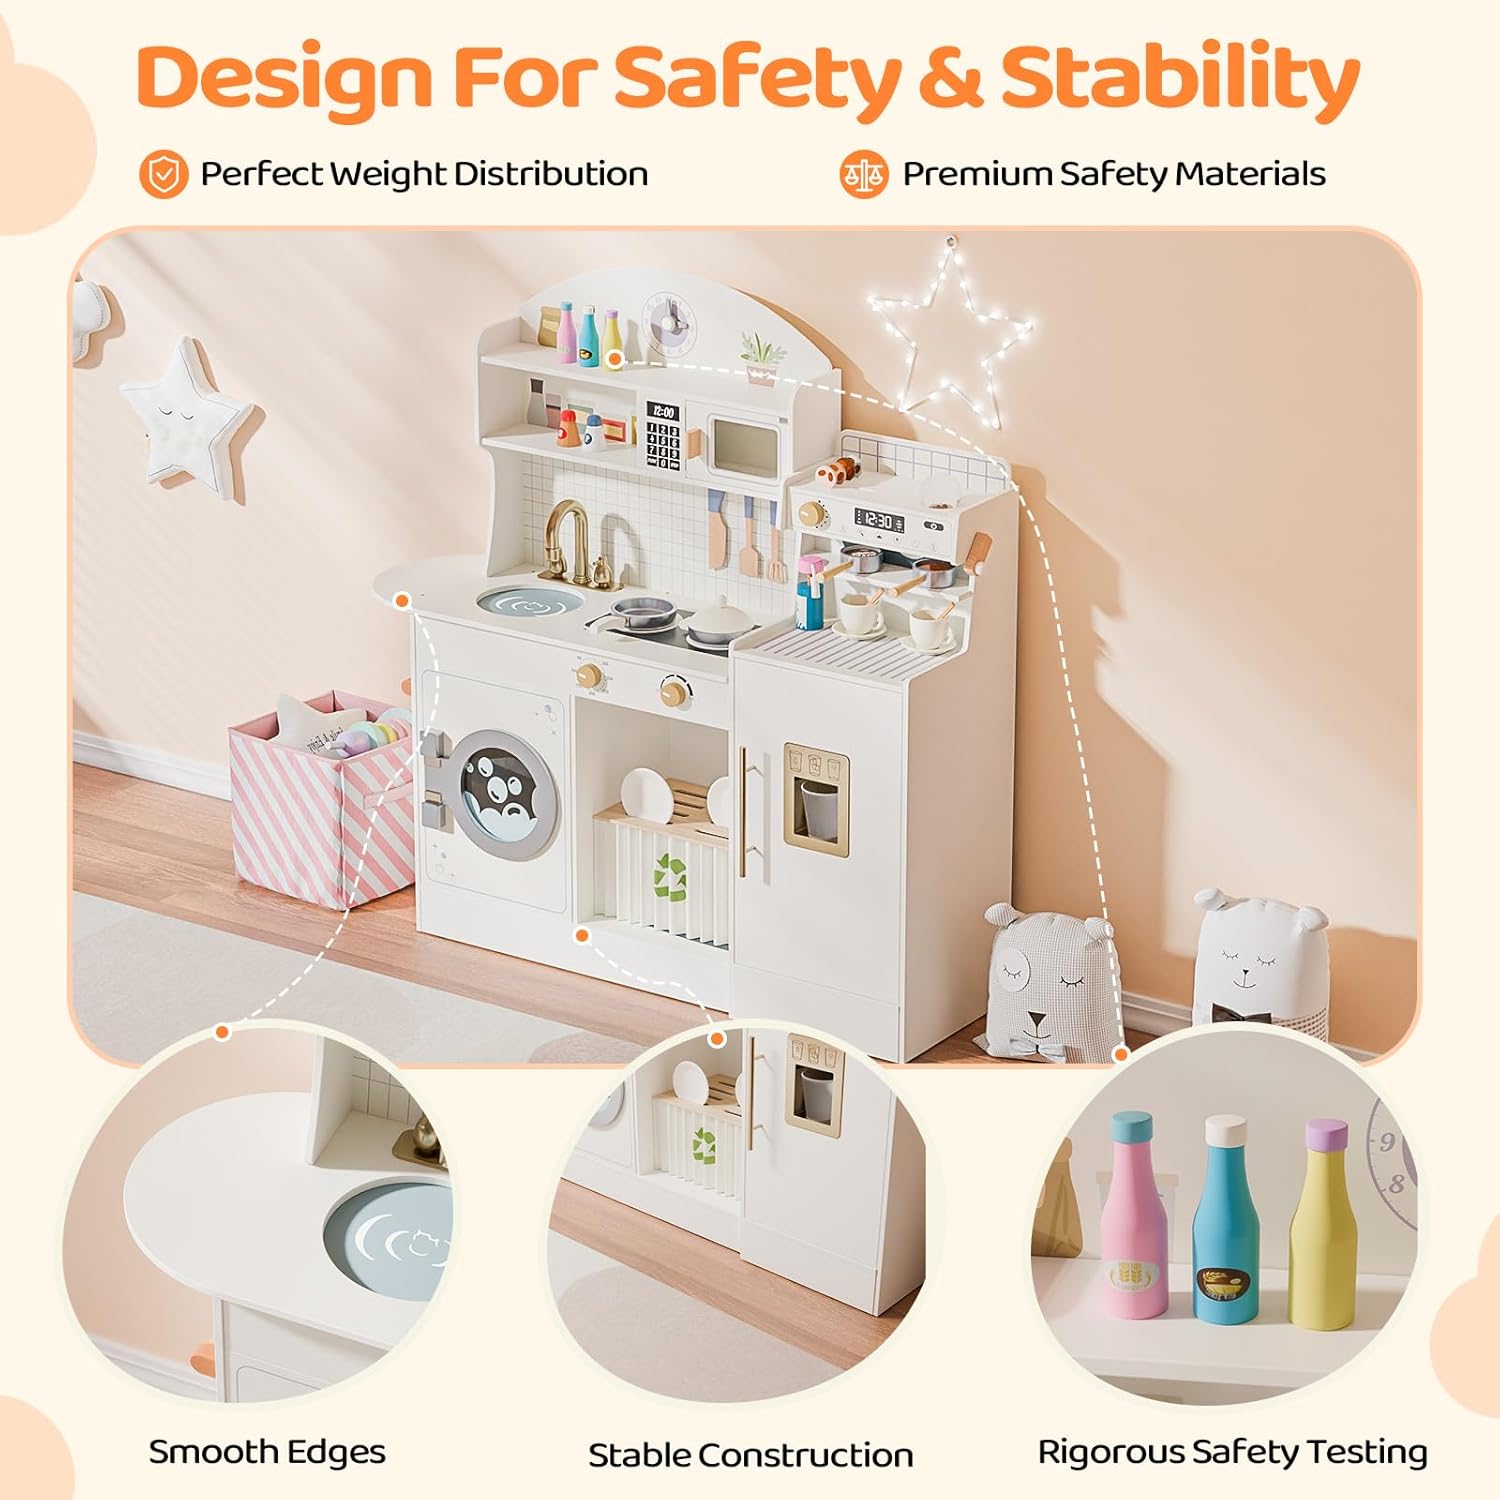
Image 2.1: The play kitchen features smooth edges and stable construction for safety.
3. What's in the Box
Carefully unpack all components and verify against the list below. If any parts are missing or damaged, please contact customer support.
- 1 x Kids Kitchen Playset (main wooden components)
- 1 x Tool Kits (assembly hardware)
- 1 x Instruction Manual (this document)
- Assorted Play Accessories (e.g., coffee machine accessories, cookware, utensils, cups, dishes)

Image 3.1: The play kitchen includes various accessories and has dimensions of approximately 35.55" (width) x 11.61" (depth) x 41.18" (height).
4. Assembly Instructions
Assembly requires adult supervision and may take approximately 2-3 hours. A power drill with appropriate bits is recommended for faster and more secure assembly, though a manual screwdriver can also be used. Follow the step-by-step diagrams provided in the separate assembly guide included in your package.
4.1. Preparation
- Clear a spacious, clean area for assembly.
- Unpack all components and lay them out, comparing them with the parts list to ensure everything is present.
- Gather necessary tools: Phillips head screwdriver (manual or power drill), and possibly a hammer for wooden dowels.
4.2. General Assembly Steps (Refer to separate diagrammatic guide for specifics)
- Begin by assembling the base structure of the kitchen, connecting side panels to the bottom panel using screws and wooden dowels.
- Attach the back panel, ensuring it aligns correctly with the grooves.
- Install internal shelves and dividers for the oven, refrigerator, and storage areas.
- Mount the sink basin and faucet assembly onto the countertop.
- Attach the stovetop and coffee machine units to their designated positions.
- Install doors for the oven, refrigerator, and washing machine, ensuring hinges are securely fastened and doors open and close smoothly.
- Attach all knobs, handles, and decorative elements.
- Once fully assembled, gently lift and place the kitchen in its desired location.
Important: Do not overtighten screws, as this can damage the wood. If you encounter difficulty, refer to the detailed assembly diagrams or contact customer support.
5. Operating Instructions
The JOYMOR Wooden Play Kitchen offers various interactive elements for imaginative play.
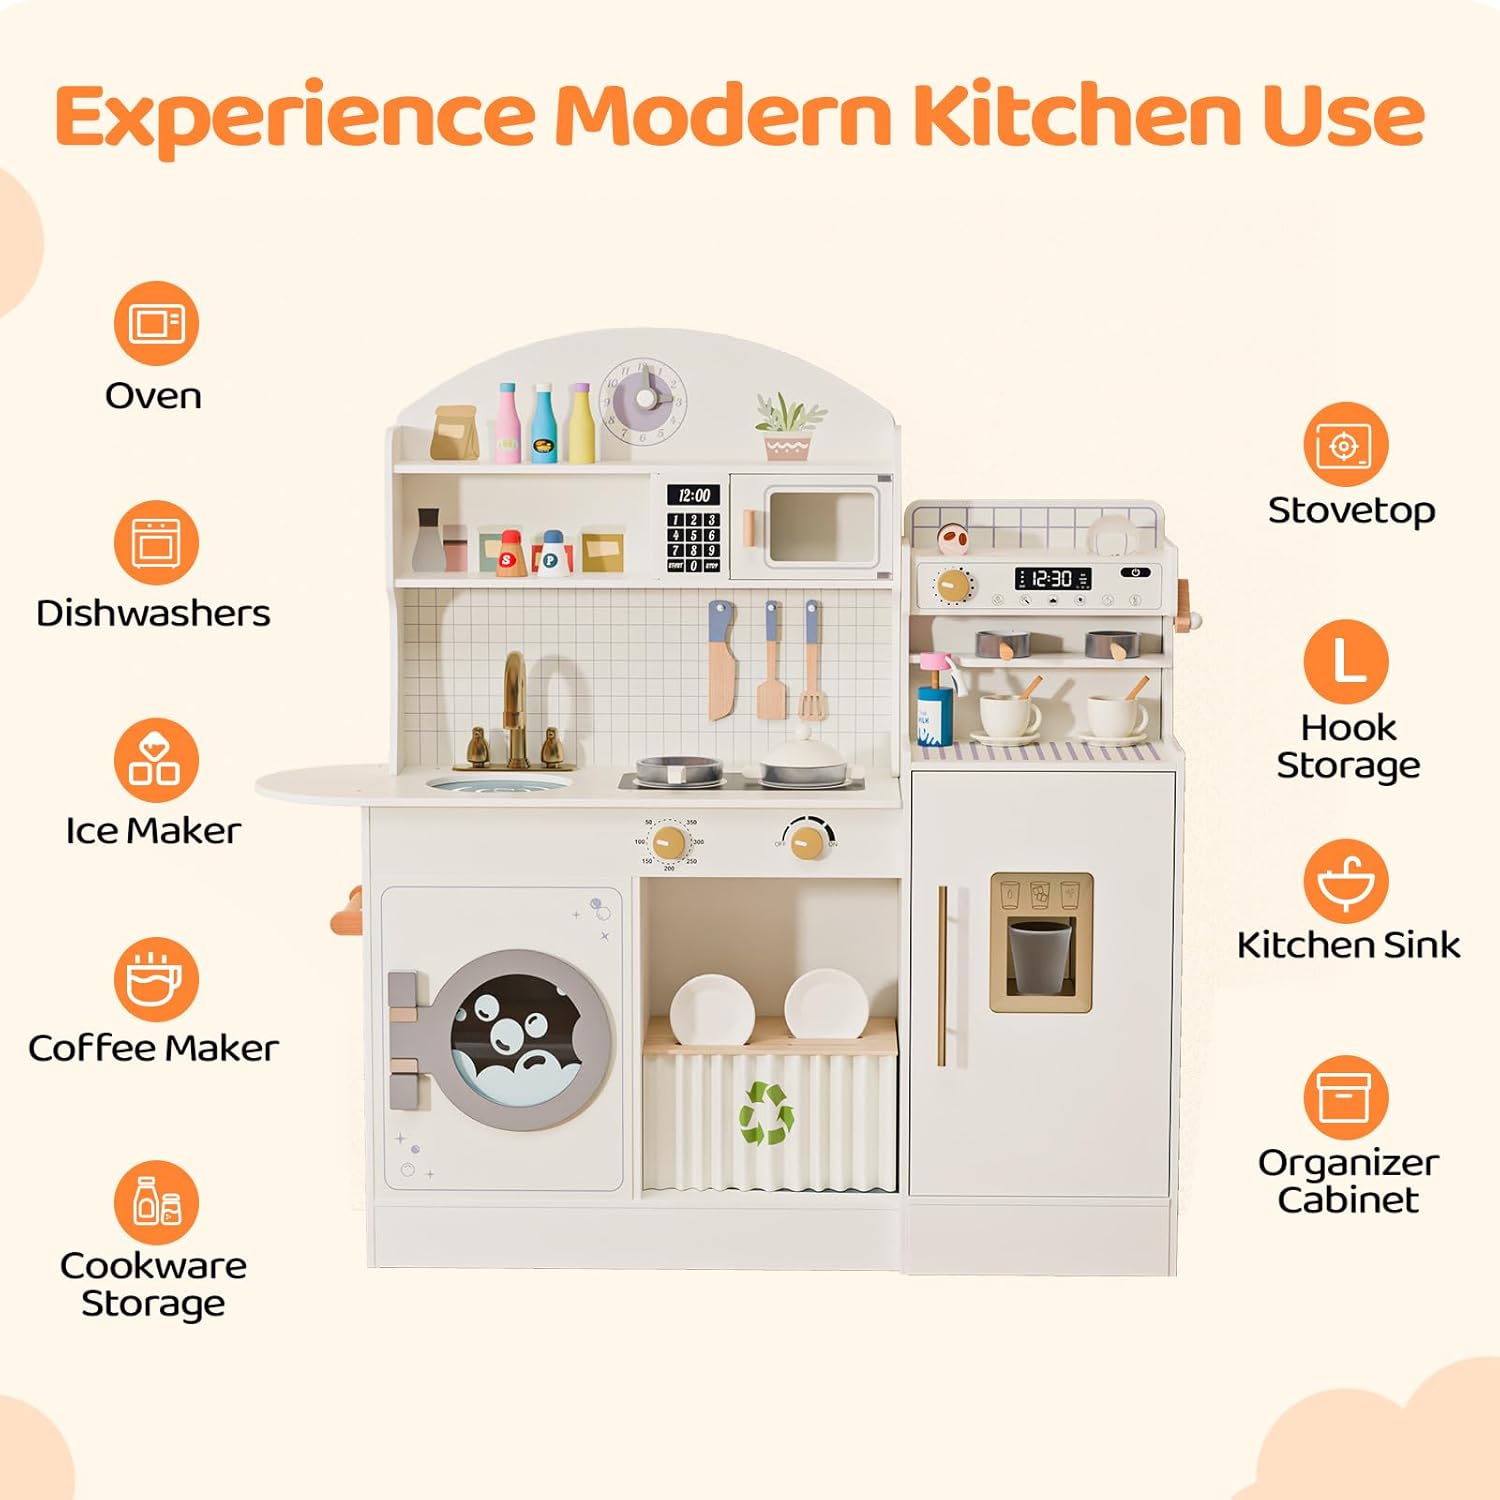
Image 5.1: Key features of the play kitchen.
5.1. Coffee Machine Operation
The integrated coffee machine allows for a realistic brewing experience:
- Grinding Beans: Turn the handle on the right side of the coffee machine to simulate grinding coffee beans.
- Inserting Coffee Coin: Align the coffee coin with the designated hole and insert it.
- Brewing: Pull the handle down to simulate the brewing process.
- Serving: Place a cup beneath the dispenser to 'collect' the coffee.

Image 5.2: Detailed steps for brewing coffee with the play coffee machine.
5.2. Stovetop and Oven
- Stovetop Knobs: Turn the knobs on the stovetop to simulate adjusting heat. These knobs produce a clicking sound for added realism.
- Oven Door: Open and close the oven door to place or remove play food and cookware.

Image 5.3: The stovetop features turning knobs for interactive play.
5.3. Sink and Faucet
- Faucet: The faucet handles can be turned. The sink basin is removable for easy cleaning.

Image 5.4: The sink area with a golden faucet.
5.4. Washing Machine and Refrigerator
- Washing Machine: The washing machine door opens and closes, and the drum can be manually turned for realistic play.
- Refrigerator: The refrigerator door opens to reveal storage space. The ice dispenser allows for dispensing play ice cubes.

Image 5.5: Interactive elements like the washing machine, ice maker, and storage.
5.5. Storage
- Shelves and Hooks: Utilize the various shelves and hooks to store play food, dishes, and utensils, promoting organization.
- Recycling Bin: A designated bin encourages learning about recycling.

Image 5.6: The play kitchen includes a recycling bin for storage.
6. Maintenance
Proper care will extend the life of your JOYMOR Wooden Play Kitchen.
- Cleaning: Wipe surfaces with a soft, damp cloth. Avoid abrasive cleaners or harsh chemicals that could damage the wood finish.
- Drying: Ensure all parts are thoroughly dry after cleaning to prevent warping or damage to the wood.
- Fasteners: Periodically check all screws, bolts, and other fasteners to ensure they remain tight. Tighten as needed.
- Storage: Store the play kitchen in a dry environment, away from direct sunlight or extreme temperature changes, which can affect wood integrity.
7. Troubleshooting
- Missing Parts: If you find any parts missing upon unboxing, carefully re-check all packaging materials. If still missing, contact JOYMOR customer support with your purchase details and a description of the missing part(s).
- Assembly Difficulties: If you encounter challenges during assembly, review the included diagrammatic assembly guide carefully. Ensure all pieces are oriented correctly. Do not force parts together. If issues persist, contact customer support.
- Loose Components: If any part becomes loose during play, immediately remove the kitchen from use and tighten all fasteners.
- No Sound/Light Effects: This wooden play kitchen is designed for imaginative play and does not include electronic sound or light features.
8. Specifications
| Feature | Detail |
|---|---|
| Product Dimensions | 90.3 x 29.5 x 104.6 inches (approx. 35.55" W x 11.61" D x 41.18" H) |
| Item Weight | 45.2 pounds |
| Model Number | WPK1WHM |
| Recommended Age | 3 years and up |
| Manufacturer | JOYMOR |
9. Warranty and Support
For warranty information, product support, or to report missing/damaged parts, please contact JOYMOR customer service through your original point of purchase or visit the official JOYMOR website. Please have your model number (WPK1WHM) and purchase date available when contacting support.