1. Introduction
This manual provides detailed instructions for the installation, operation, and maintenance of your UBORSY FAN-53T Universal Ceiling Fan Remote Control Kit. This kit is designed to replace various existing ceiling fan remote controls and receivers, offering convenient control over your ceiling fan's speed and light functions. Please read this manual thoroughly before installation and use to ensure proper function and safety.
2. Package Contents
Verify that all items listed below are included in your package:
- 1 x Remote Control
- 1 x Receiver
- 1 x Wall Mount Holder
- 6 x Wire Nuts
- 2 x Screws
- 1 x User Manual (this document)

This image displays all items included in the package: Remote Control, Receiver, Wall Mount Holder, Wire Nuts, and User Manual.
3. Specifications
| Model Number | RC-53T1&RC-37R |
| Package Dimensions | 5.75 x 4.84 x 1.77 inches |
| Item Weight | 6.1 ounces |
| Compatible Devices | 3-Speed AC Ceiling Fans |
| Max Number of Supported Devices | 1 |
| Special Feature | Basic On/Off, Learn key, Universal |

This diagram provides the physical dimensions of both the remote control (12.7cm / 5 inches tall, 5.5cm / 2.2 inches wide) and the receiver (12cm / 4.7 inches tall, 5.4cm / 2.1 inches wide), along with the wall mount holder dimensions.
4. Compatibility
This universal ceiling fan remote control kit is compatible with approximately 95% of regular 3-speed AC ceiling fans and lights from brands such as Harbor Breeze, Hunter, Hampton Bay, allen+roth, Litex, Kichler, Westinghouse, and Honeywell. It is designed for use with most downrod style fans and is not recommended for hugger style fans.
Bulb Compatibility:
- Does not support smart bulbs.
- Only compatible with dimmable non-smart lights.
Bulb Load Limits:
- Maximum load for LED/CFL bulbs: 150W
- Maximum load for incandescent bulbs: 300W
Note: Most LED/CFL lights are non-dimmable. The remote control will only provide ON/OFF functionality for these, and attempting to dim them may cause flickering.
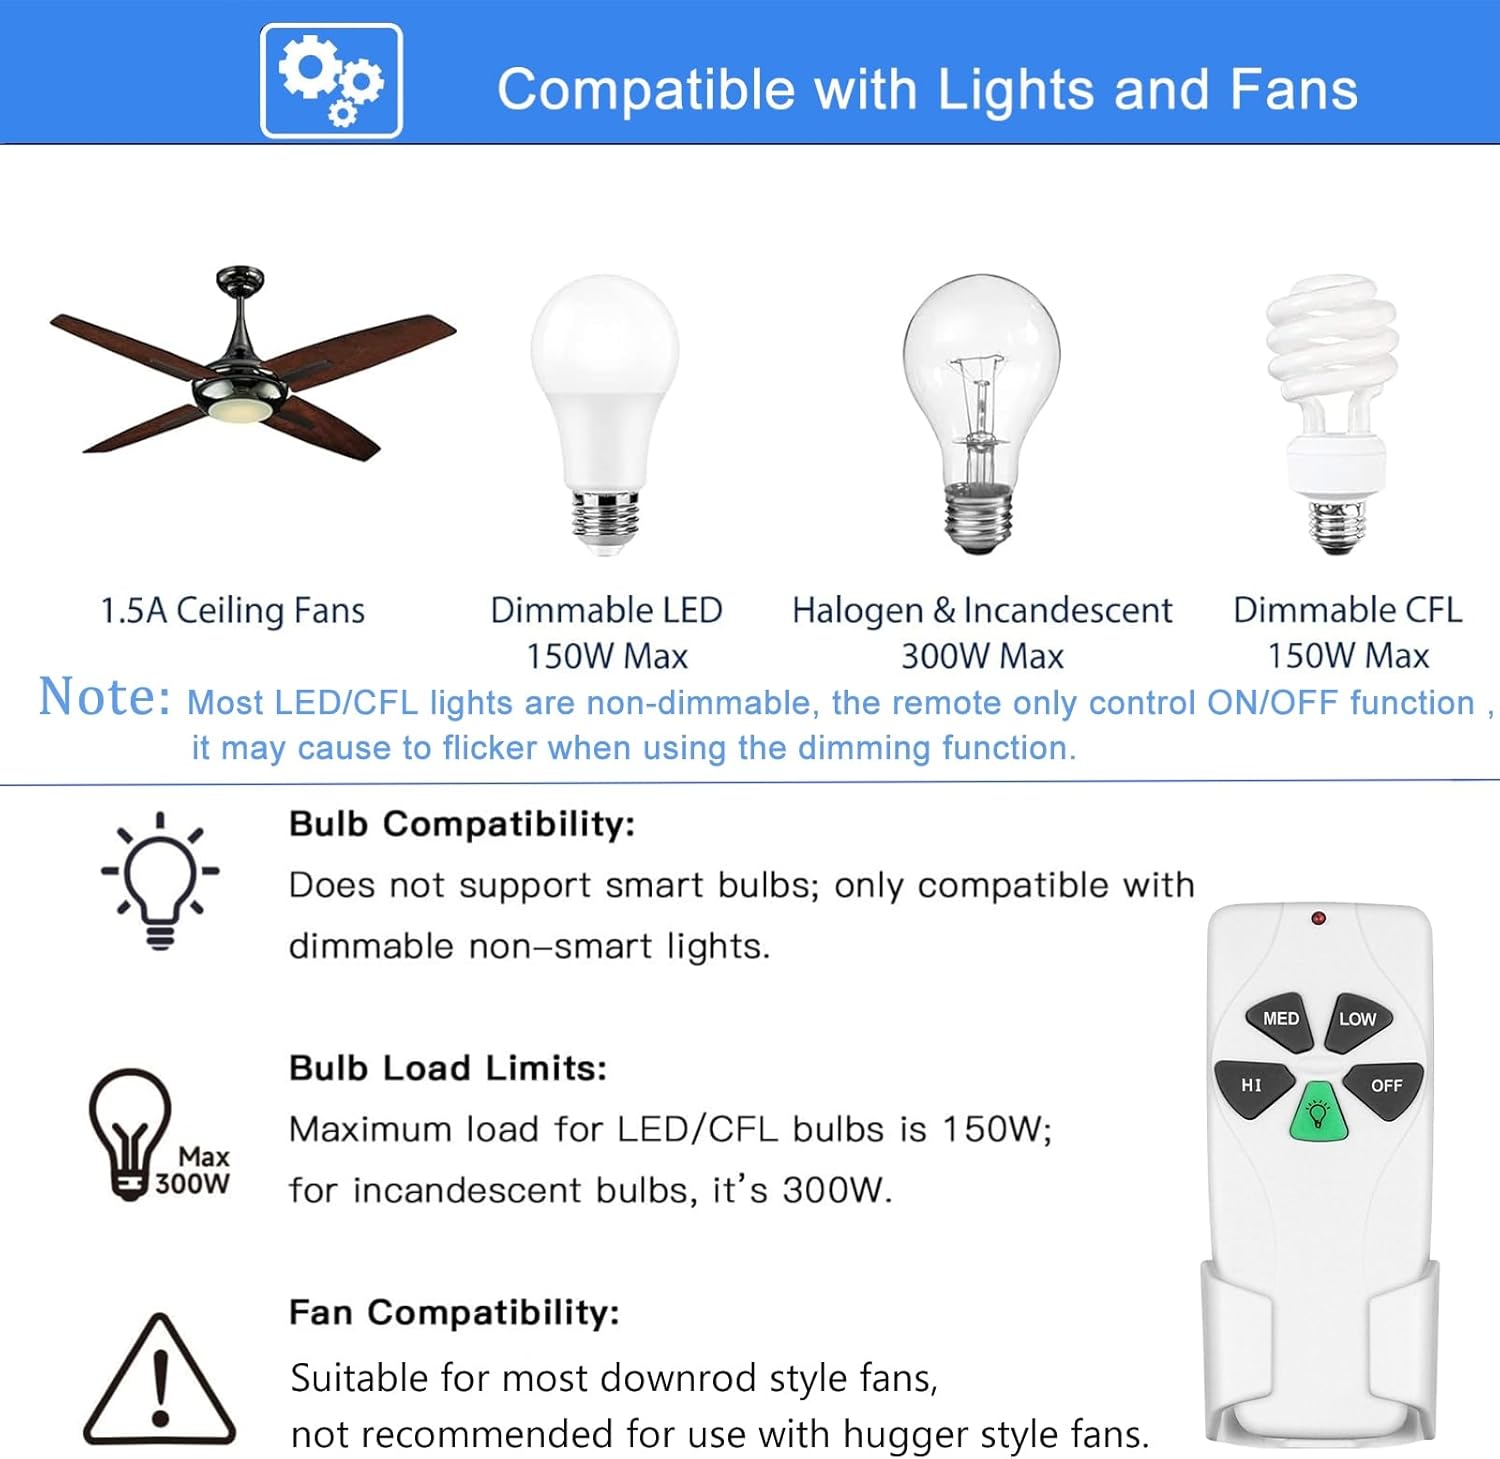
An illustration showing compatibility details: 1.5A ceiling fans, dimmable LED (150W Max), Halogen & Incandescent (300W Max), and Dimmable CFL (150W Max). It also notes that the remote is suitable for most downrod style fans and not recommended for hugger style fans.
5. Setup and Installation
Important Safety Information: Before beginning installation, ensure the power supply to the ceiling fan is turned OFF at the circuit breaker to prevent electrical shock.
5.1 Receiver Installation and Wiring
- Turn off power to the ceiling fan at the circuit breaker.
- Remove the canopy of your ceiling fan to access the wiring.
- Disconnect the existing wiring from the ceiling fan to the house wiring.
- Connect the receiver wires according to the diagram below. Use the provided wire nuts to secure connections.
- White wire from receiver: Connect to the zero wire of the ceiling fan and the zero wire of the ceiling fabric.
- Black wire from receiver: Connect to the fan wire.
- Blue wire from receiver: Connect to the light wire.
- Red wire from receiver: Connect to the fire wire of the ceiling cloth.
- Carefully tuck the receiver into the fan's canopy. Ensure there is sufficient space and no wires are pinched. Note: This remote does not have a reverse button.
- Reattach the fan canopy.

A detailed wiring diagram showing how to connect the receiver to a ceiling fan. It illustrates connections for zero wire, fan wire, and light wire, with corresponding wire colors.
5.2 Remote Control Programming
- Install a 9V battery (not included) into the remote control.
- Restore power to the ceiling fan at the circuit breaker.
- Within 30 seconds of restoring power, press and hold the 'Learn' button (located inside the remote's battery compartment or on the remote itself, often a small recessed button) for approximately 5 seconds.
- The fan light should blink or the fan should turn on, indicating successful pairing.
6. Operating Instructions
Once installed and programmed, use the remote control to operate your ceiling fan and light.
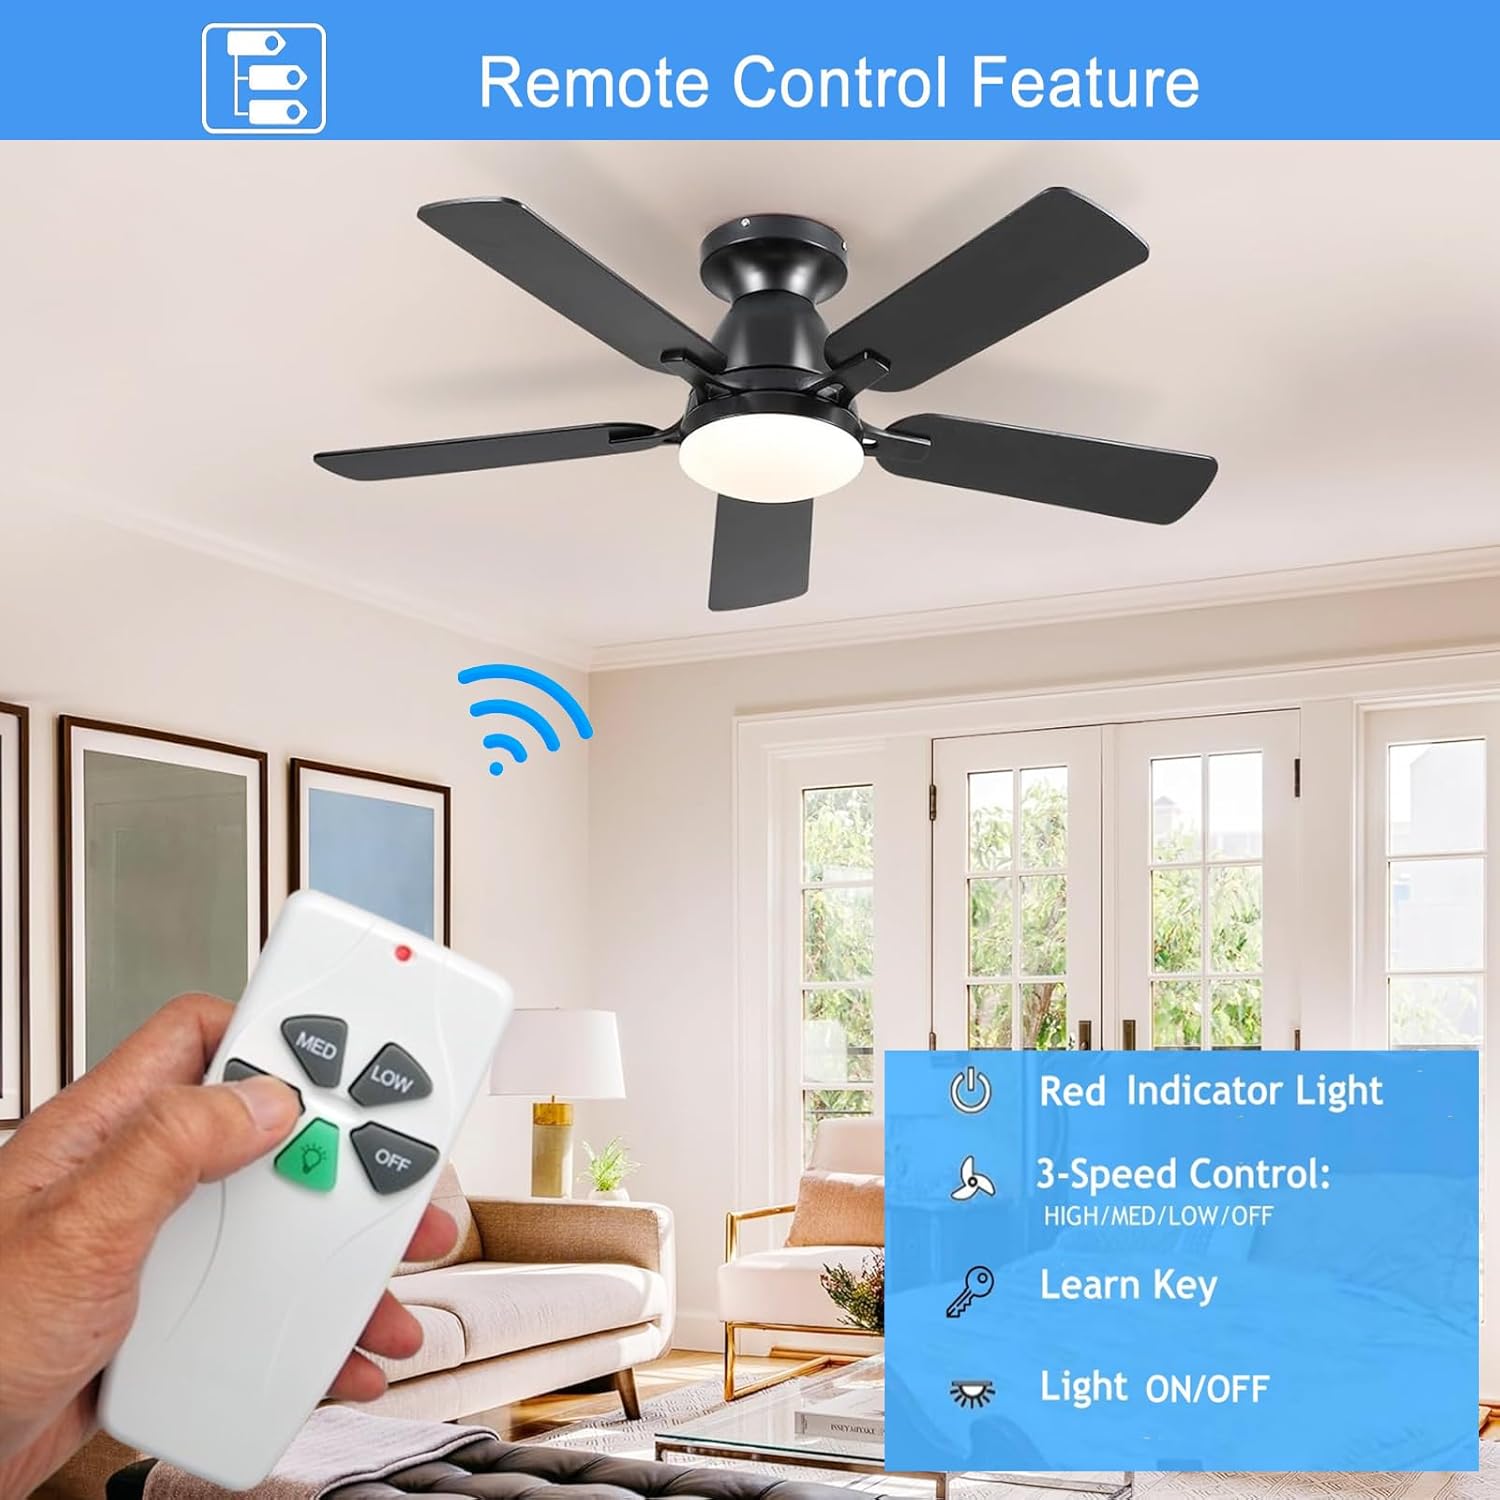
A close-up of the remote control highlighting its buttons: HI, MED, LOW for fan speed, OFF for fan, and a green light bulb button for light control. A red indicator light is visible at the top.
- HI: Sets fan speed to High.
- MED: Sets fan speed to Medium.
- LOW: Sets fan speed to Low.
- OFF: Turns the fan off.
- Light Button (Green Bulb Icon): Toggles the light ON/OFF. If compatible dimmable bulbs are installed, press and hold this button to dim or brighten the light.
- Red Indicator Light: Illuminates when a button is pressed, confirming signal transmission.
- Luminous Button: The green light button glows in the dark, aiding in finding the remote in low-light conditions.
7. Troubleshooting
If you encounter issues with your remote control kit, refer to the following common solutions:
- Remote not responding:
- Check the 9V battery in the remote control and replace if necessary.
- Ensure the remote is paired correctly by repeating the programming steps (Section 5.2).
- Verify that the power to the fan is on at the circuit breaker.
- Fan or light not working after installation:
- Double-check all wiring connections as per the diagram in Section 5.1. Ensure wire nuts are secure.
- Confirm the receiver is properly seated in the canopy and no wires are pinched.
- Ensure the fan's pull chains (if any) are set to the 'ON' position for the fan and light.
- Light does not dim:
- Verify that the installed bulbs are explicitly labeled as 'dimmable'. Many LED/CFL bulbs are not dimmable and will only function as ON/OFF.
- Check the bulb load limits (Section 4) to ensure you are not exceeding the maximum wattage for dimmable bulbs.
- Receiver does not fit in fan canopy:
- Measure the available space in your fan's canopy against the receiver dimensions (Section 3) before purchase and installation. This kit is generally compatible with most downrod style fans, but some fan designs may have limited space.
- Fan does not reverse:
- This remote control kit does not include a reverse function. Fan direction must be changed manually via a switch on the fan motor housing, if available.
8. Maintenance
To ensure the longevity and optimal performance of your UBORSY remote control kit, follow these simple maintenance guidelines:
- Battery Replacement: Replace the 9V battery in the remote control when the red indicator light becomes dim or the remote's range decreases. Always dispose of old batteries responsibly.
- Cleaning: Wipe the remote control and receiver with a soft, dry cloth. Do not use abrasive cleaners or allow moisture to enter the units.
- Storage: If storing the remote for an extended period, remove the battery to prevent leakage.
9. Warranty and Support
For any questions, technical assistance, or warranty inquiries regarding your UBORSY FAN-53T Universal Ceiling Fan Remote Control Kit, please contact UBORSY customer support. Refer to the product packaging or the retailer's website for contact information.